Cosmo JrTrack 2 User manual

User Guide


(877)-215-4741 9am-6pm EST
Hello! And welcome to the COSMO family! We’re
so excited that you’re here with your COSMO
JrTrack 2 Smartwatch – we hope you love it! This
user guide will give you step-by-step instructions to
help you get your watch set up and customized in
no time. If you have additional questions or run
into any problems, please give us a call. Our
friendly support team will gladly help.
Welcome!
Customer Support
3
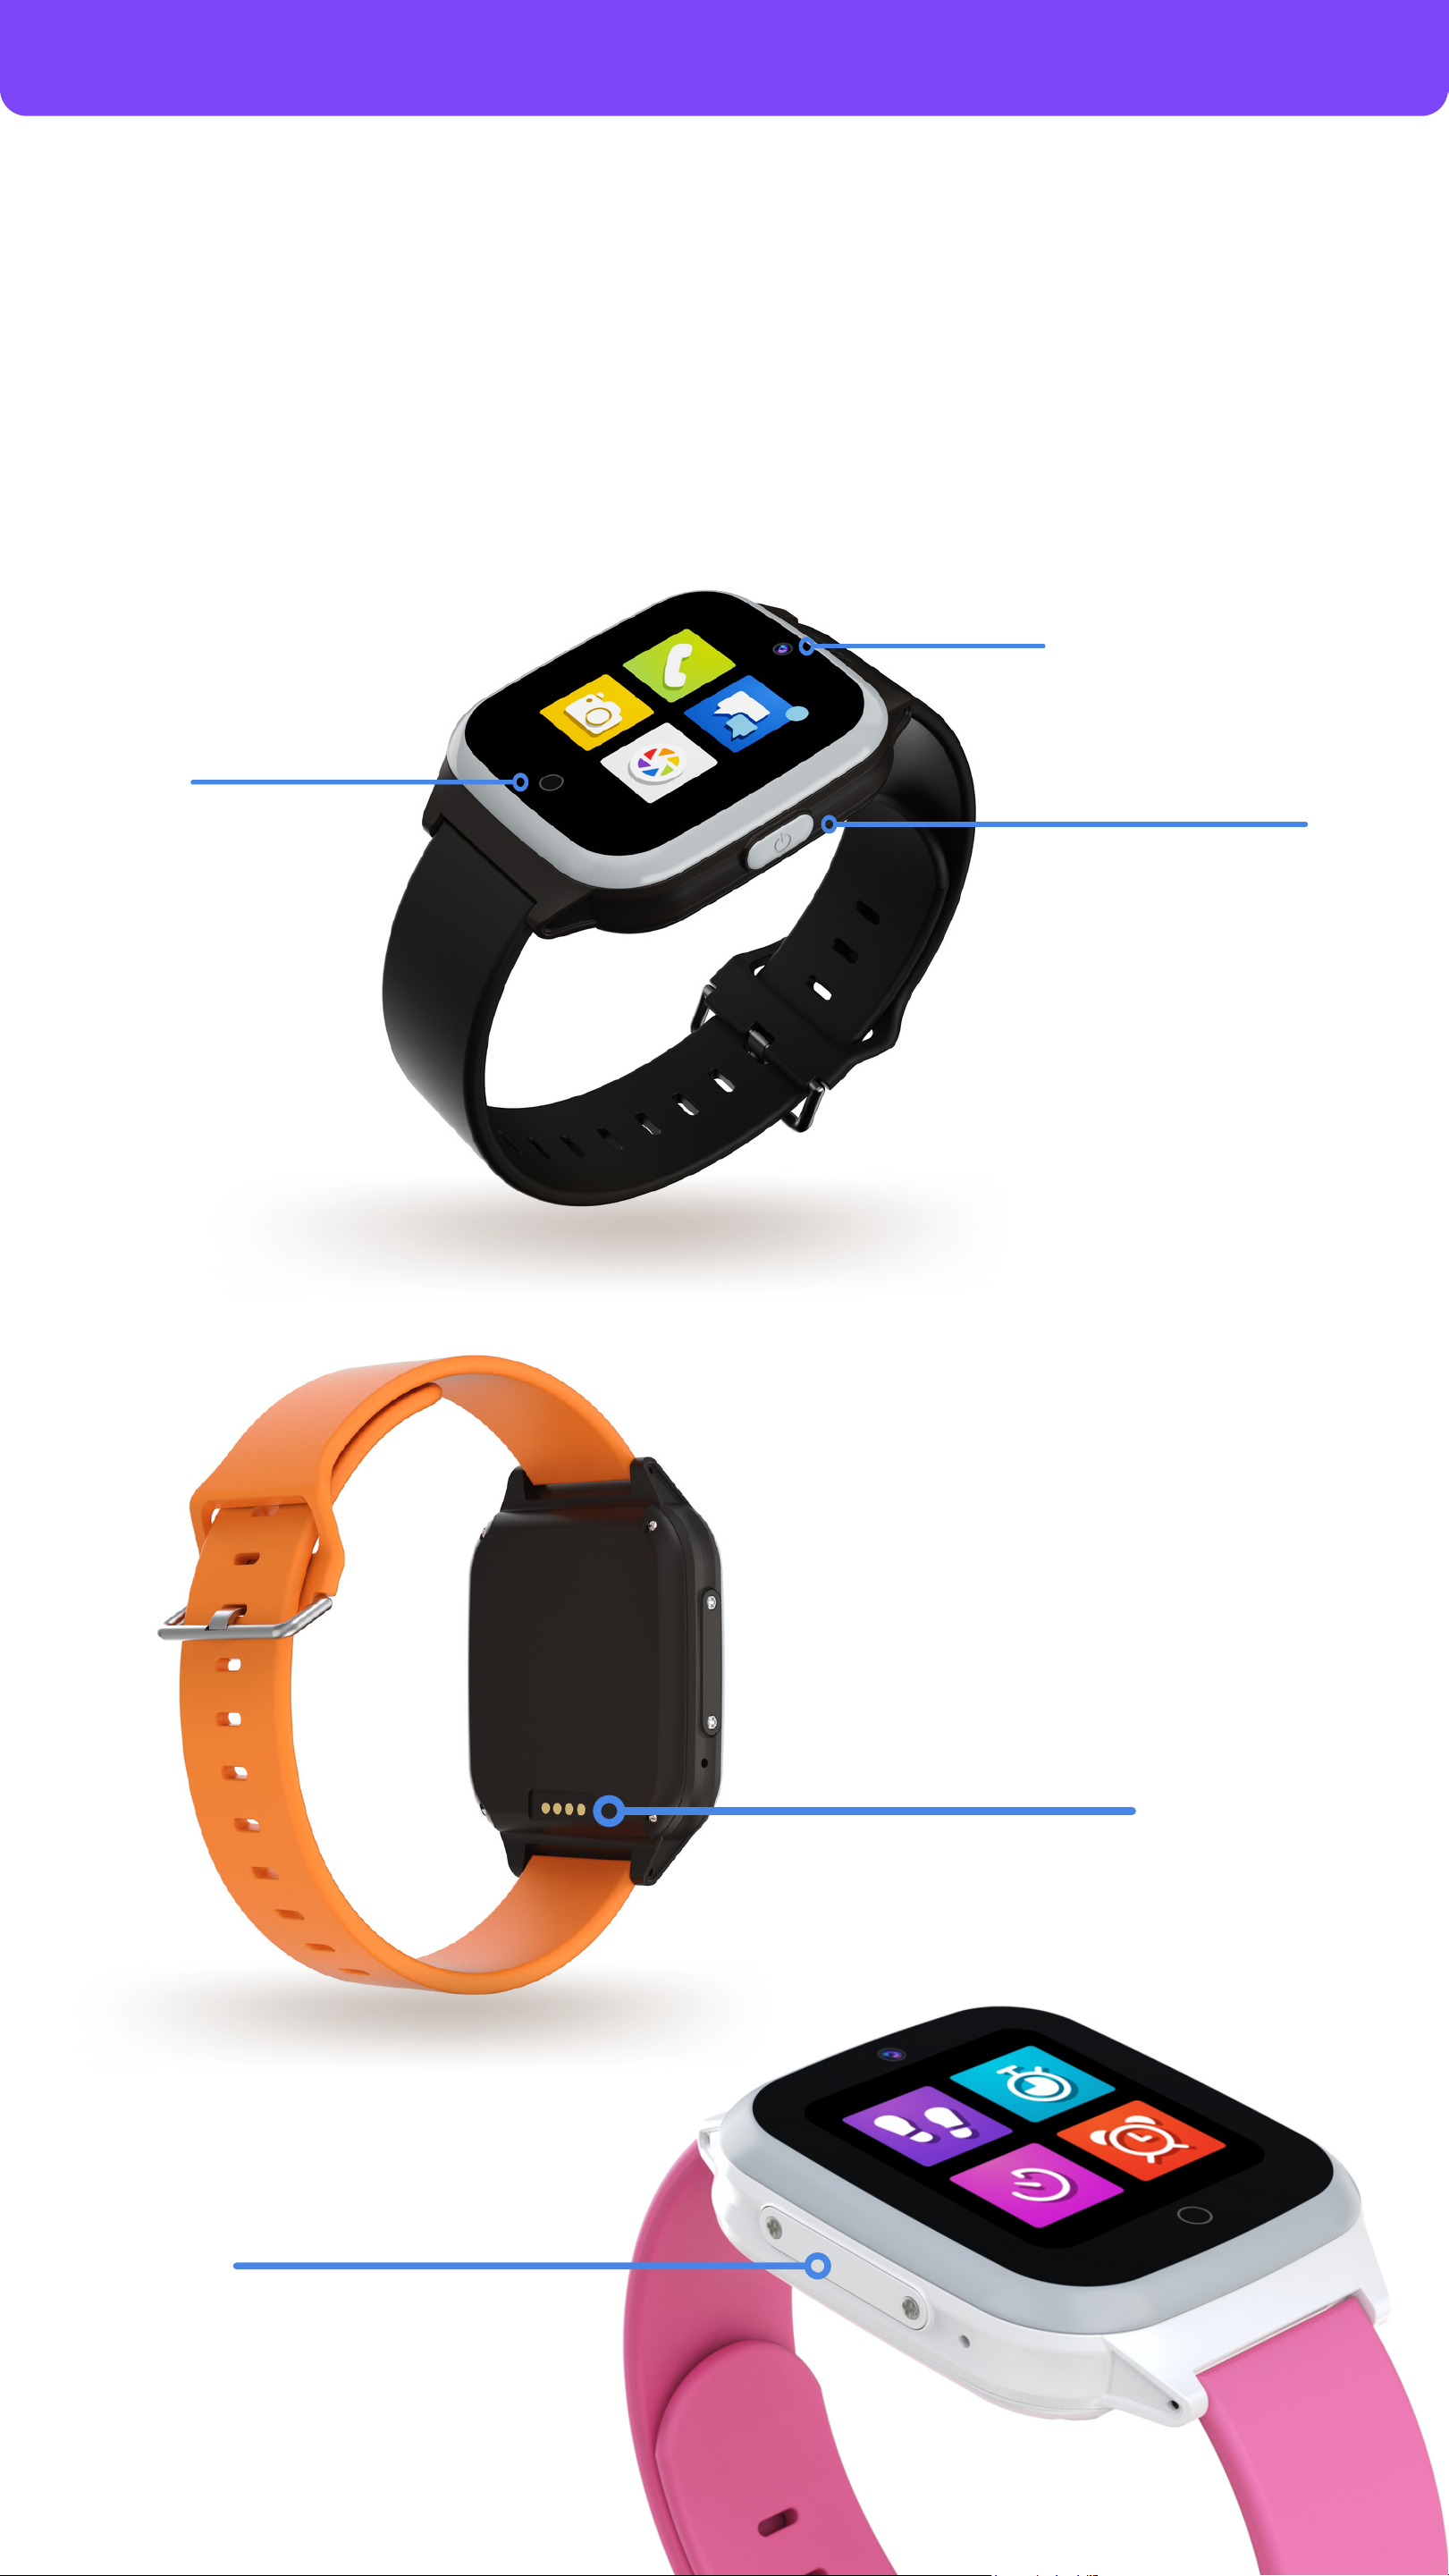
Get to know
your JrTrack 2
On/Off Button
SIM Card Tray
SIM is Pre-Installed
Home/Back
Button
Camera
Charging Port
4
Getting started
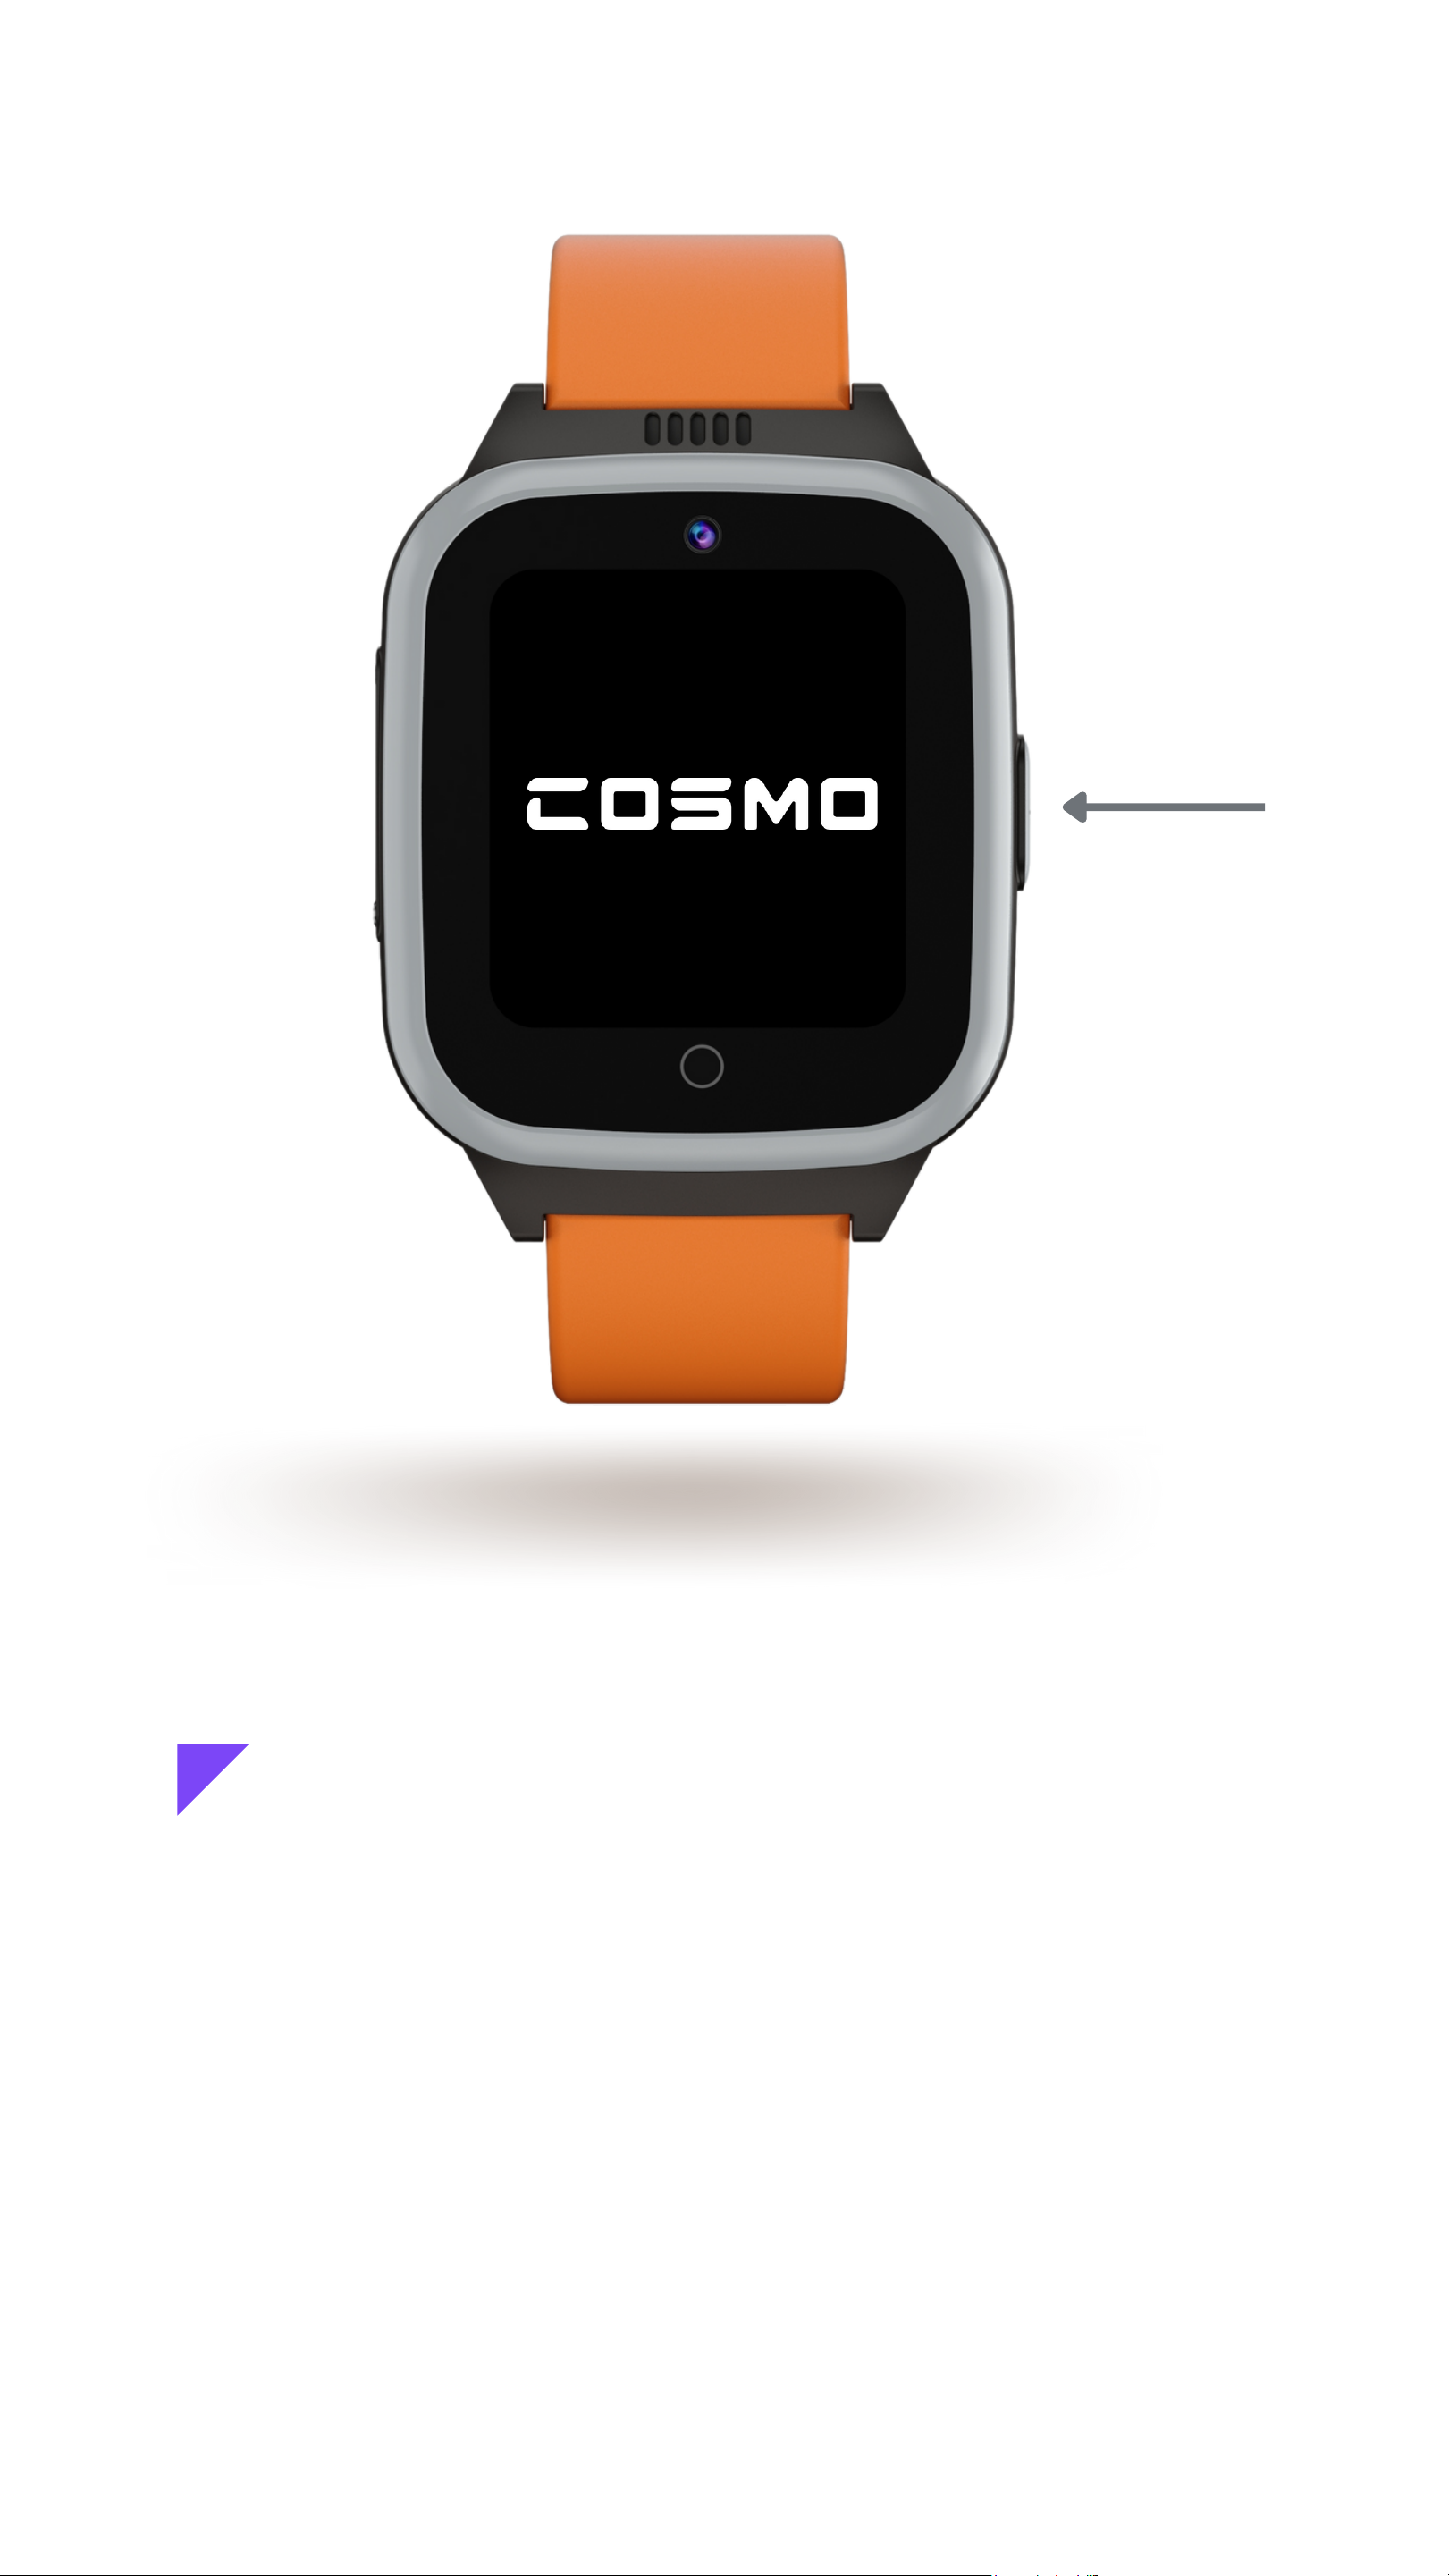
Turn on your JrTrack 2
Press and hold the On/Off button on for
two seconds to turn the watch on.
If the watch doesn't turn on, it likely needs
to be charged. Charge the watch for a few
hours and then try again.
5


In the app, create a
COSMO: Mission Control
account or sign in if you
already have one.
Confirm the email you used
to create your COSMO:
Mission Control account.
After confirmation, tap
"Add Device"
Note: This is your COSMO
Mission Control App account.
This is separate from your
COSMO Membership account.
You can use the same email,
just know that they're different.
Pair your device
Create an account
Confirm your email
8

Use the app to scan the
QR code on the watch's
screen, then paste the
phone number you
copied earlier.
If you don't see the QR
code come up on the
watch, you can manually
type in the IMEI number
found on the back of the
device.
On the watch, go to Settings > pair device to open
the QR code onscreen.
Launch pairing mode
Scan the QR code
9

Getting started
Enter the 8-digit code
displayed on your
device, then tap "Next"
You're all set! It may up
to 24 hours for data to be
fully activated.
Tip: Save the device to
your contacts for easier
and faster calling.
Enter the code
Add to contacts
10

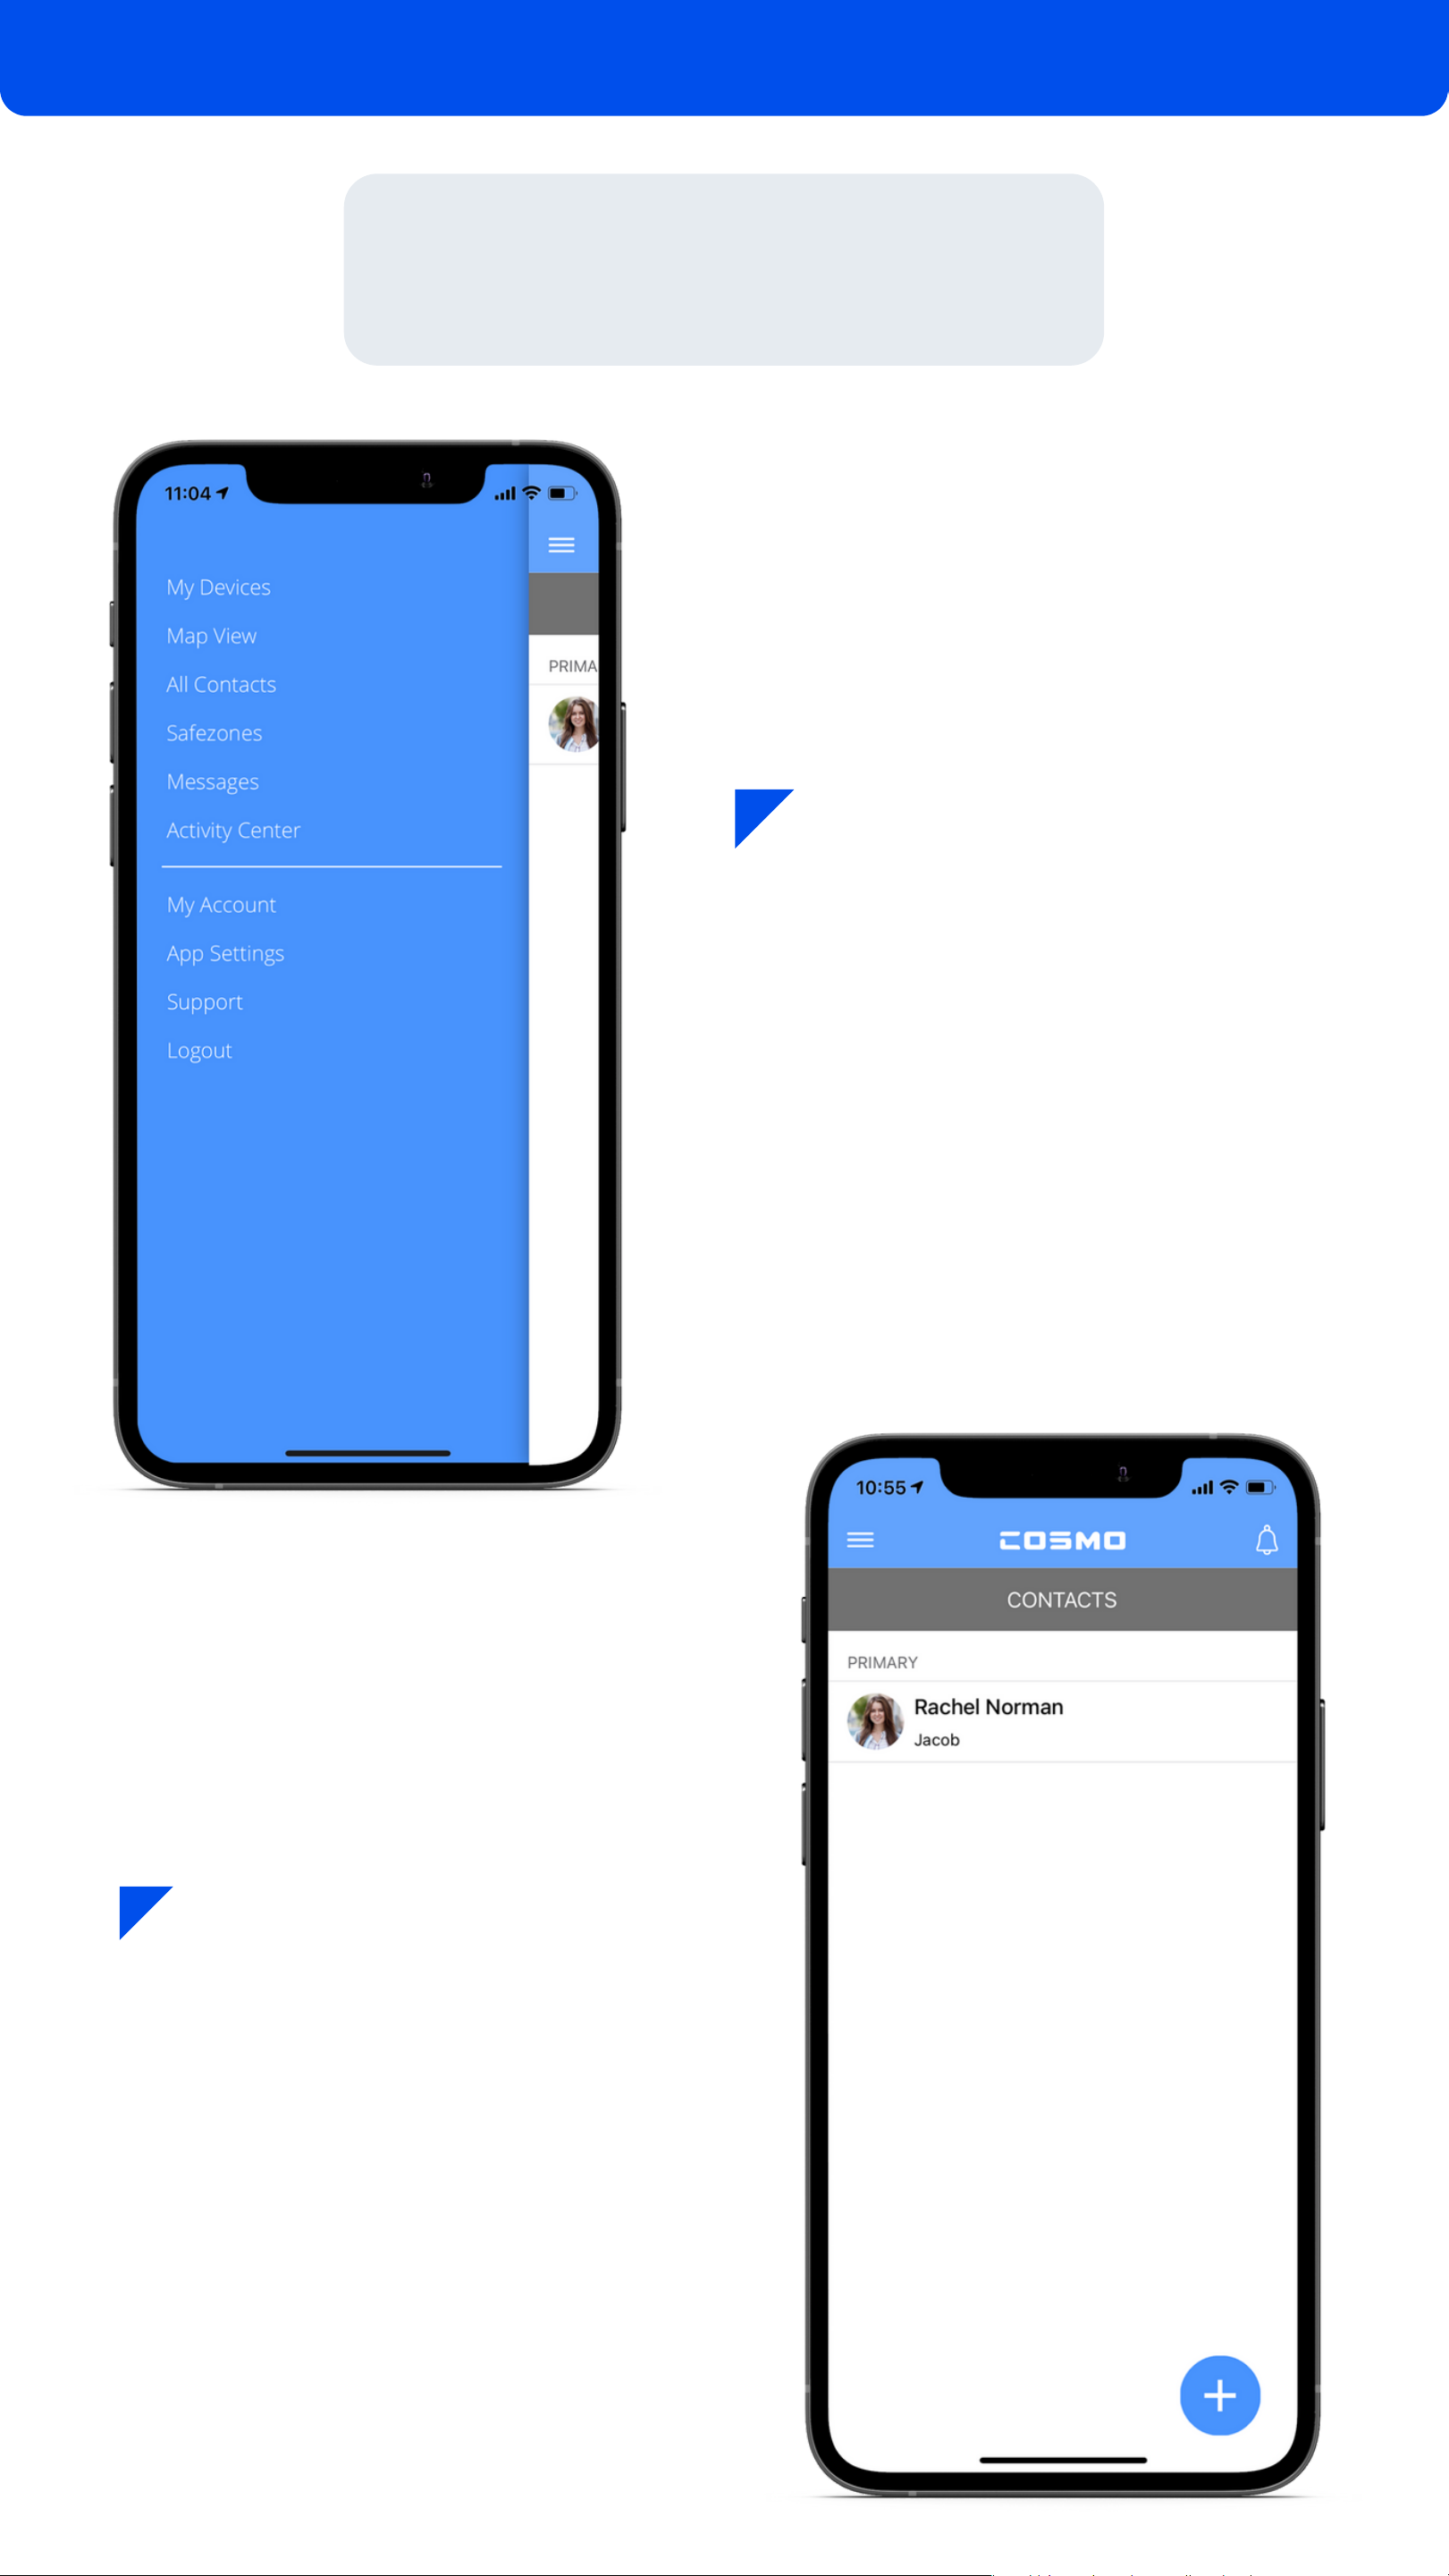
Tap the icon in the
upper left corner to
access the main menu.
The main menu is your
starting point to access
all of the main features
of the COSMO: Mission
Control app.
The main menu includes:
- My Devices (where you can
adjust device-specific settings)
- Map View
- Safe Zones
- Messages
- Activity Center (for features
like Pedometer, School Mode,
and reminders)
- Account & app settings
- Support
Menu & Navigation overview
Menu & Navigation 11

From the device home screen,
you can select from any of the
quick action tool bar options
below (Send Message, Call,
Refresh Location, etc.
To view or adjust settings for
this device, tap the icon in
the upper right.
To view & customize
settings for each JrTrack 2
device, start by tapping
on "My Devices" from the
main menu and then
choosing a device. You
can also tap on a device
from the map view.
Device data & settings
12

This is the data & settings
menu for the selected
device. Here you can access
location & call history, adjust
message presets, and
access your child's profile &
device settings.
Device Settings:
Here you can set how often
location is updated, when
the tracking period is active,
and unpair the device.
Tip: More frequent location
tracking will drain the
battery more quickly. To
maximize battery, consider
reducing tracking frequency.
UNPAIR DEVICE
13
Tap the "plus" button in
the bottom right corner.
Select "All Contacts"
from the main menu.
Add contacts
App Functions 14

There are two contact types:
Contact: Can only make and
receive calls.
Guardian: Can make and
receive calls, send and
receive messages, and track
location.
Tap the check mark in the
upper right hand corner when
finished.
To add a Guardian, you'll
need to send an invite. Under
account type, select Guardian.
Add the Guardian's name,
phone number, and email.
Tap the check mark to save
the info & send the invite.
Jacob
+1 (000) 000-0000
Guardian invite
15

In the Guardian's email inbox,
look for an email from
Follow the instructions in the
email by having the Guardian
download the COSMO:
Mission Control app, and
create an account.
Once the Guardian has
created an account, they
will need to tap 'Confirm'
to accept the invitation.
Now they're set up, and
can call, send messages,
check location, and more!
Rachel Norman Invited you to be a Guardian
Jacob
Grandpa S.
16

Tap Messages in the
main menu.
Messaging
Send texts, voice
messages, and photos!
Tip: JrTrack 2 can type out
it's own messages, but
setting preset messages of
commonly-sent phrases
makes texting quicker &
easier from the watch.
17

In the main menu, tap My
Devices and select the
device you would like to
customize.
Then, tap Preset Messages
from the Device Data &
Settings Menu.
Type any text or emojis
below that you would like
to add as presets and click
"Add". These will
automatically appear as
options for your child to
send on their JrTrack 2!
Preset messages
Tip: You can add as many
preset messages for your
kid as you like! The JrTrack
2 can also send pictures
and voice messages!
18
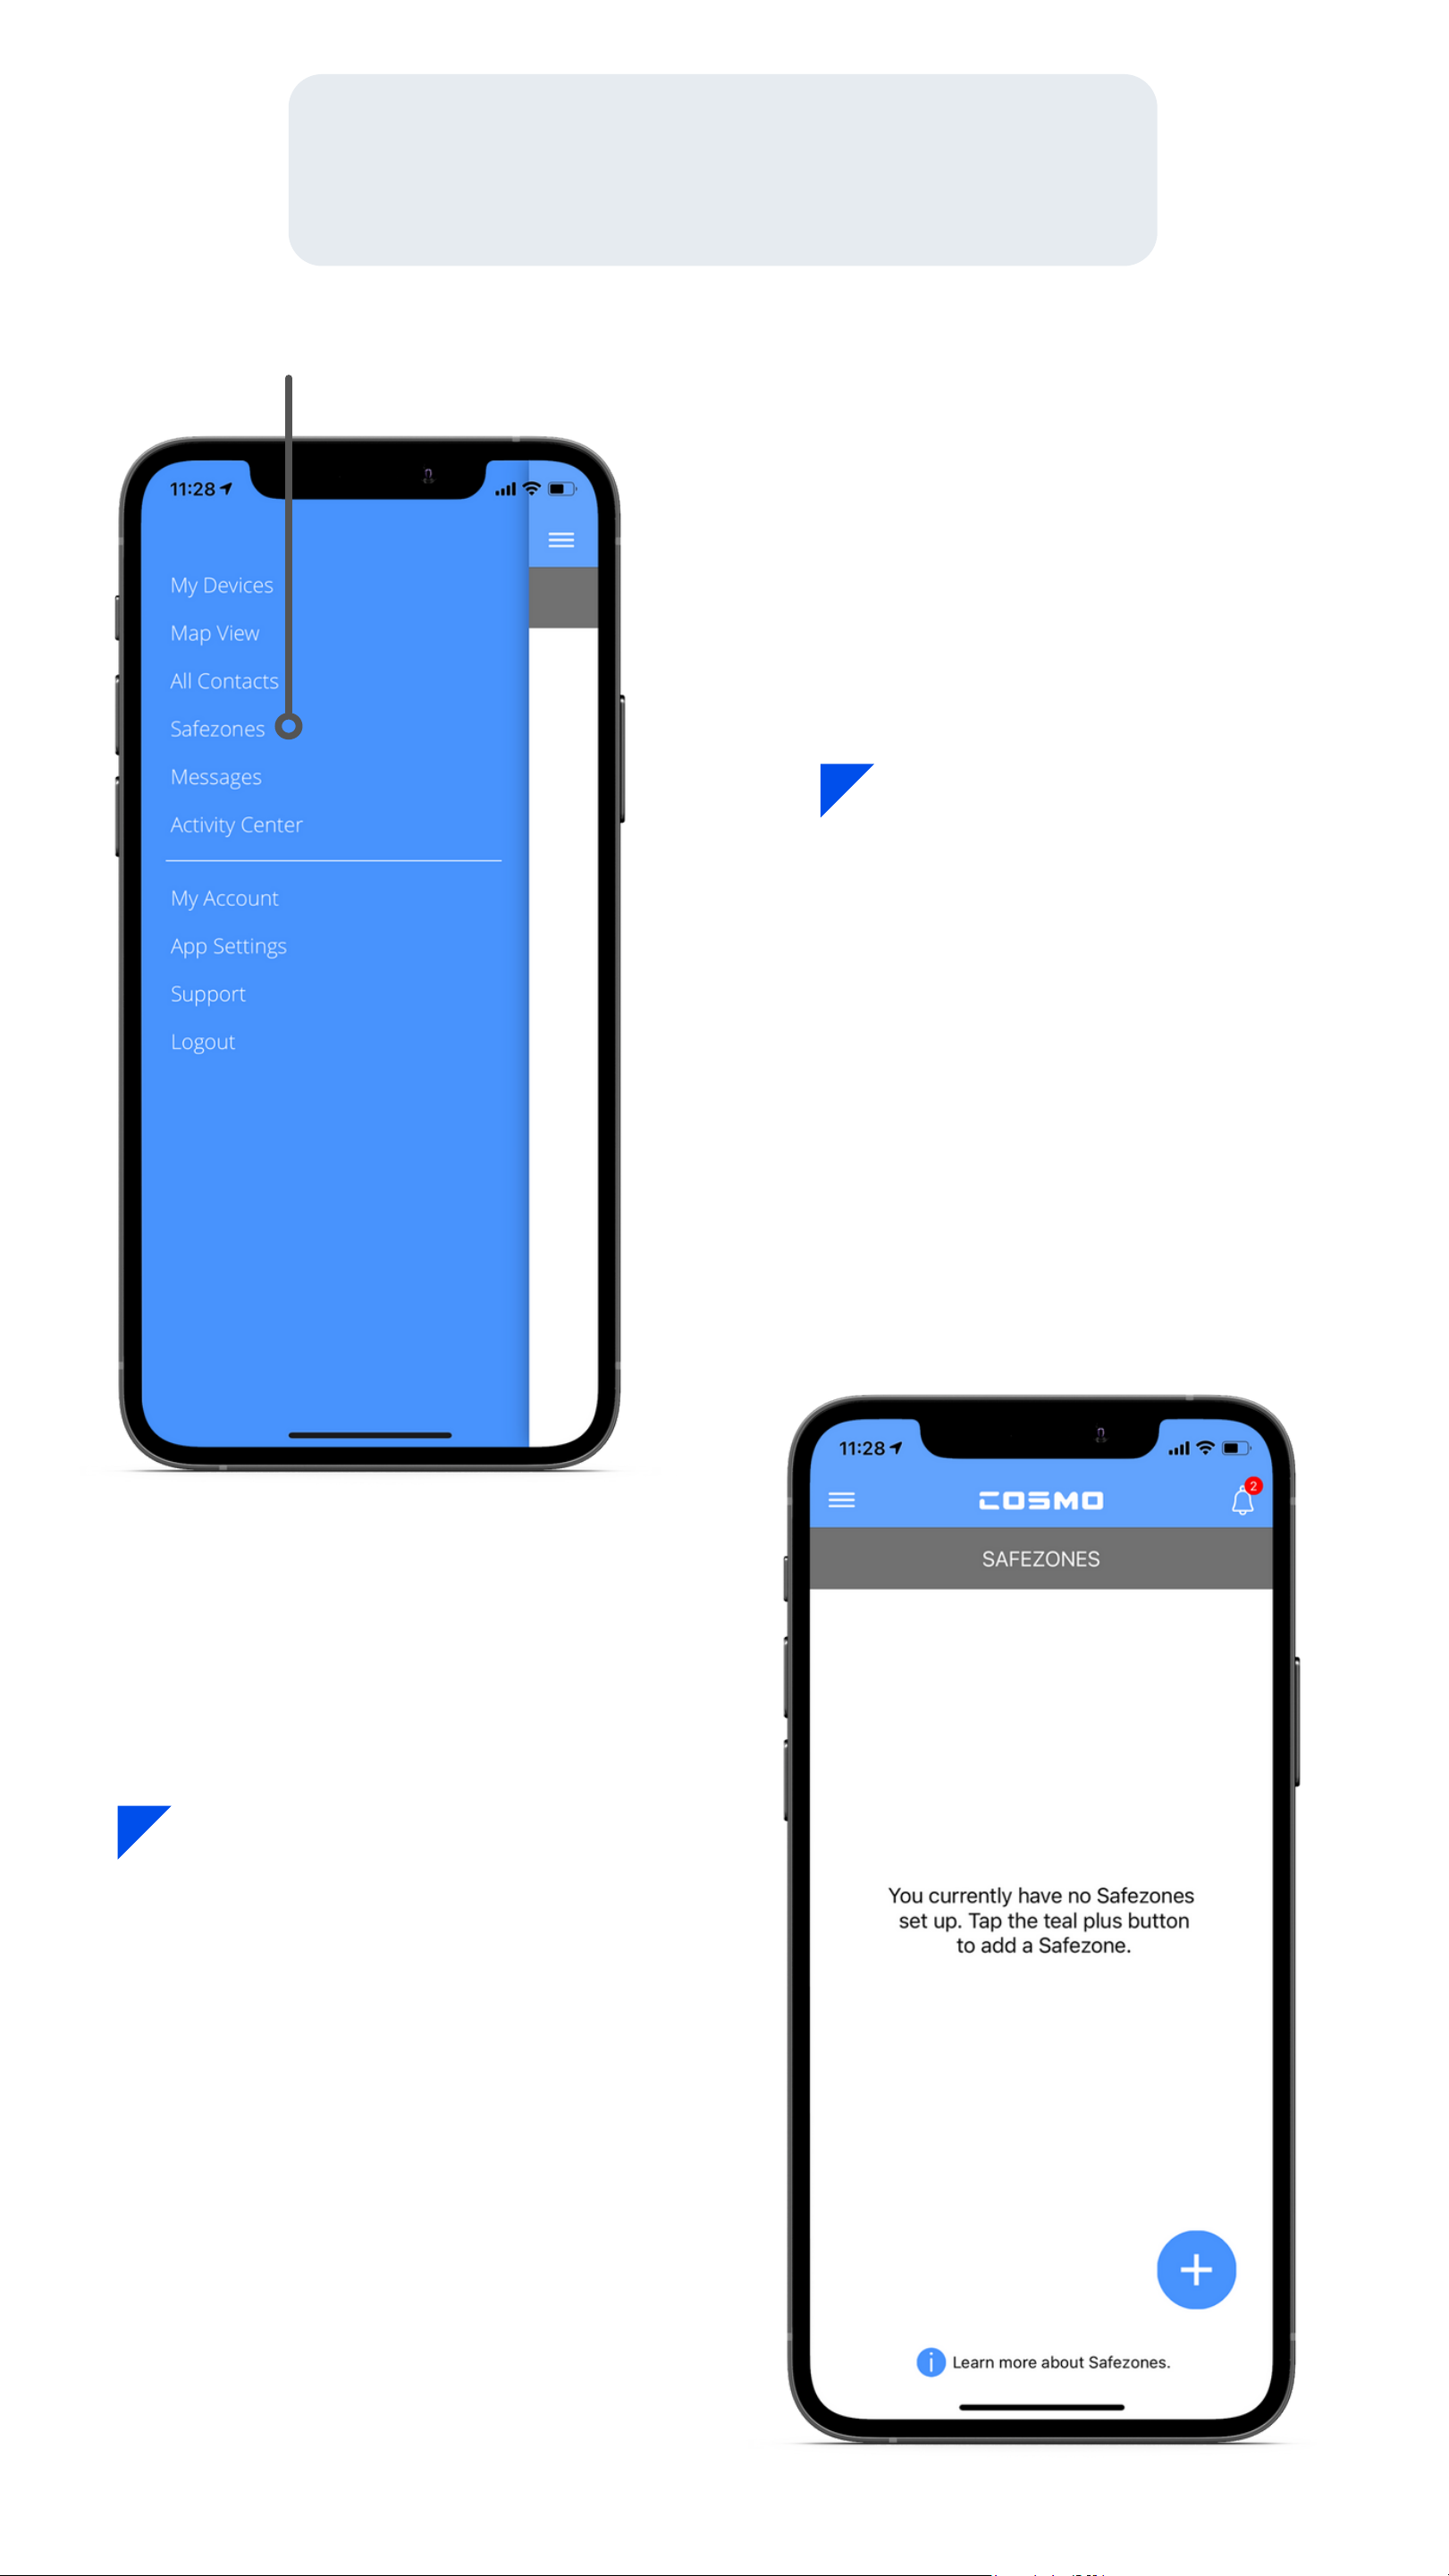
Add a safezone
In the Main Menu,
tap Safezones.
Tap the Plus button in the
bottom right-hand corner
to add a new Safezone.
Any existing Safezones will
be shown on this page.
19
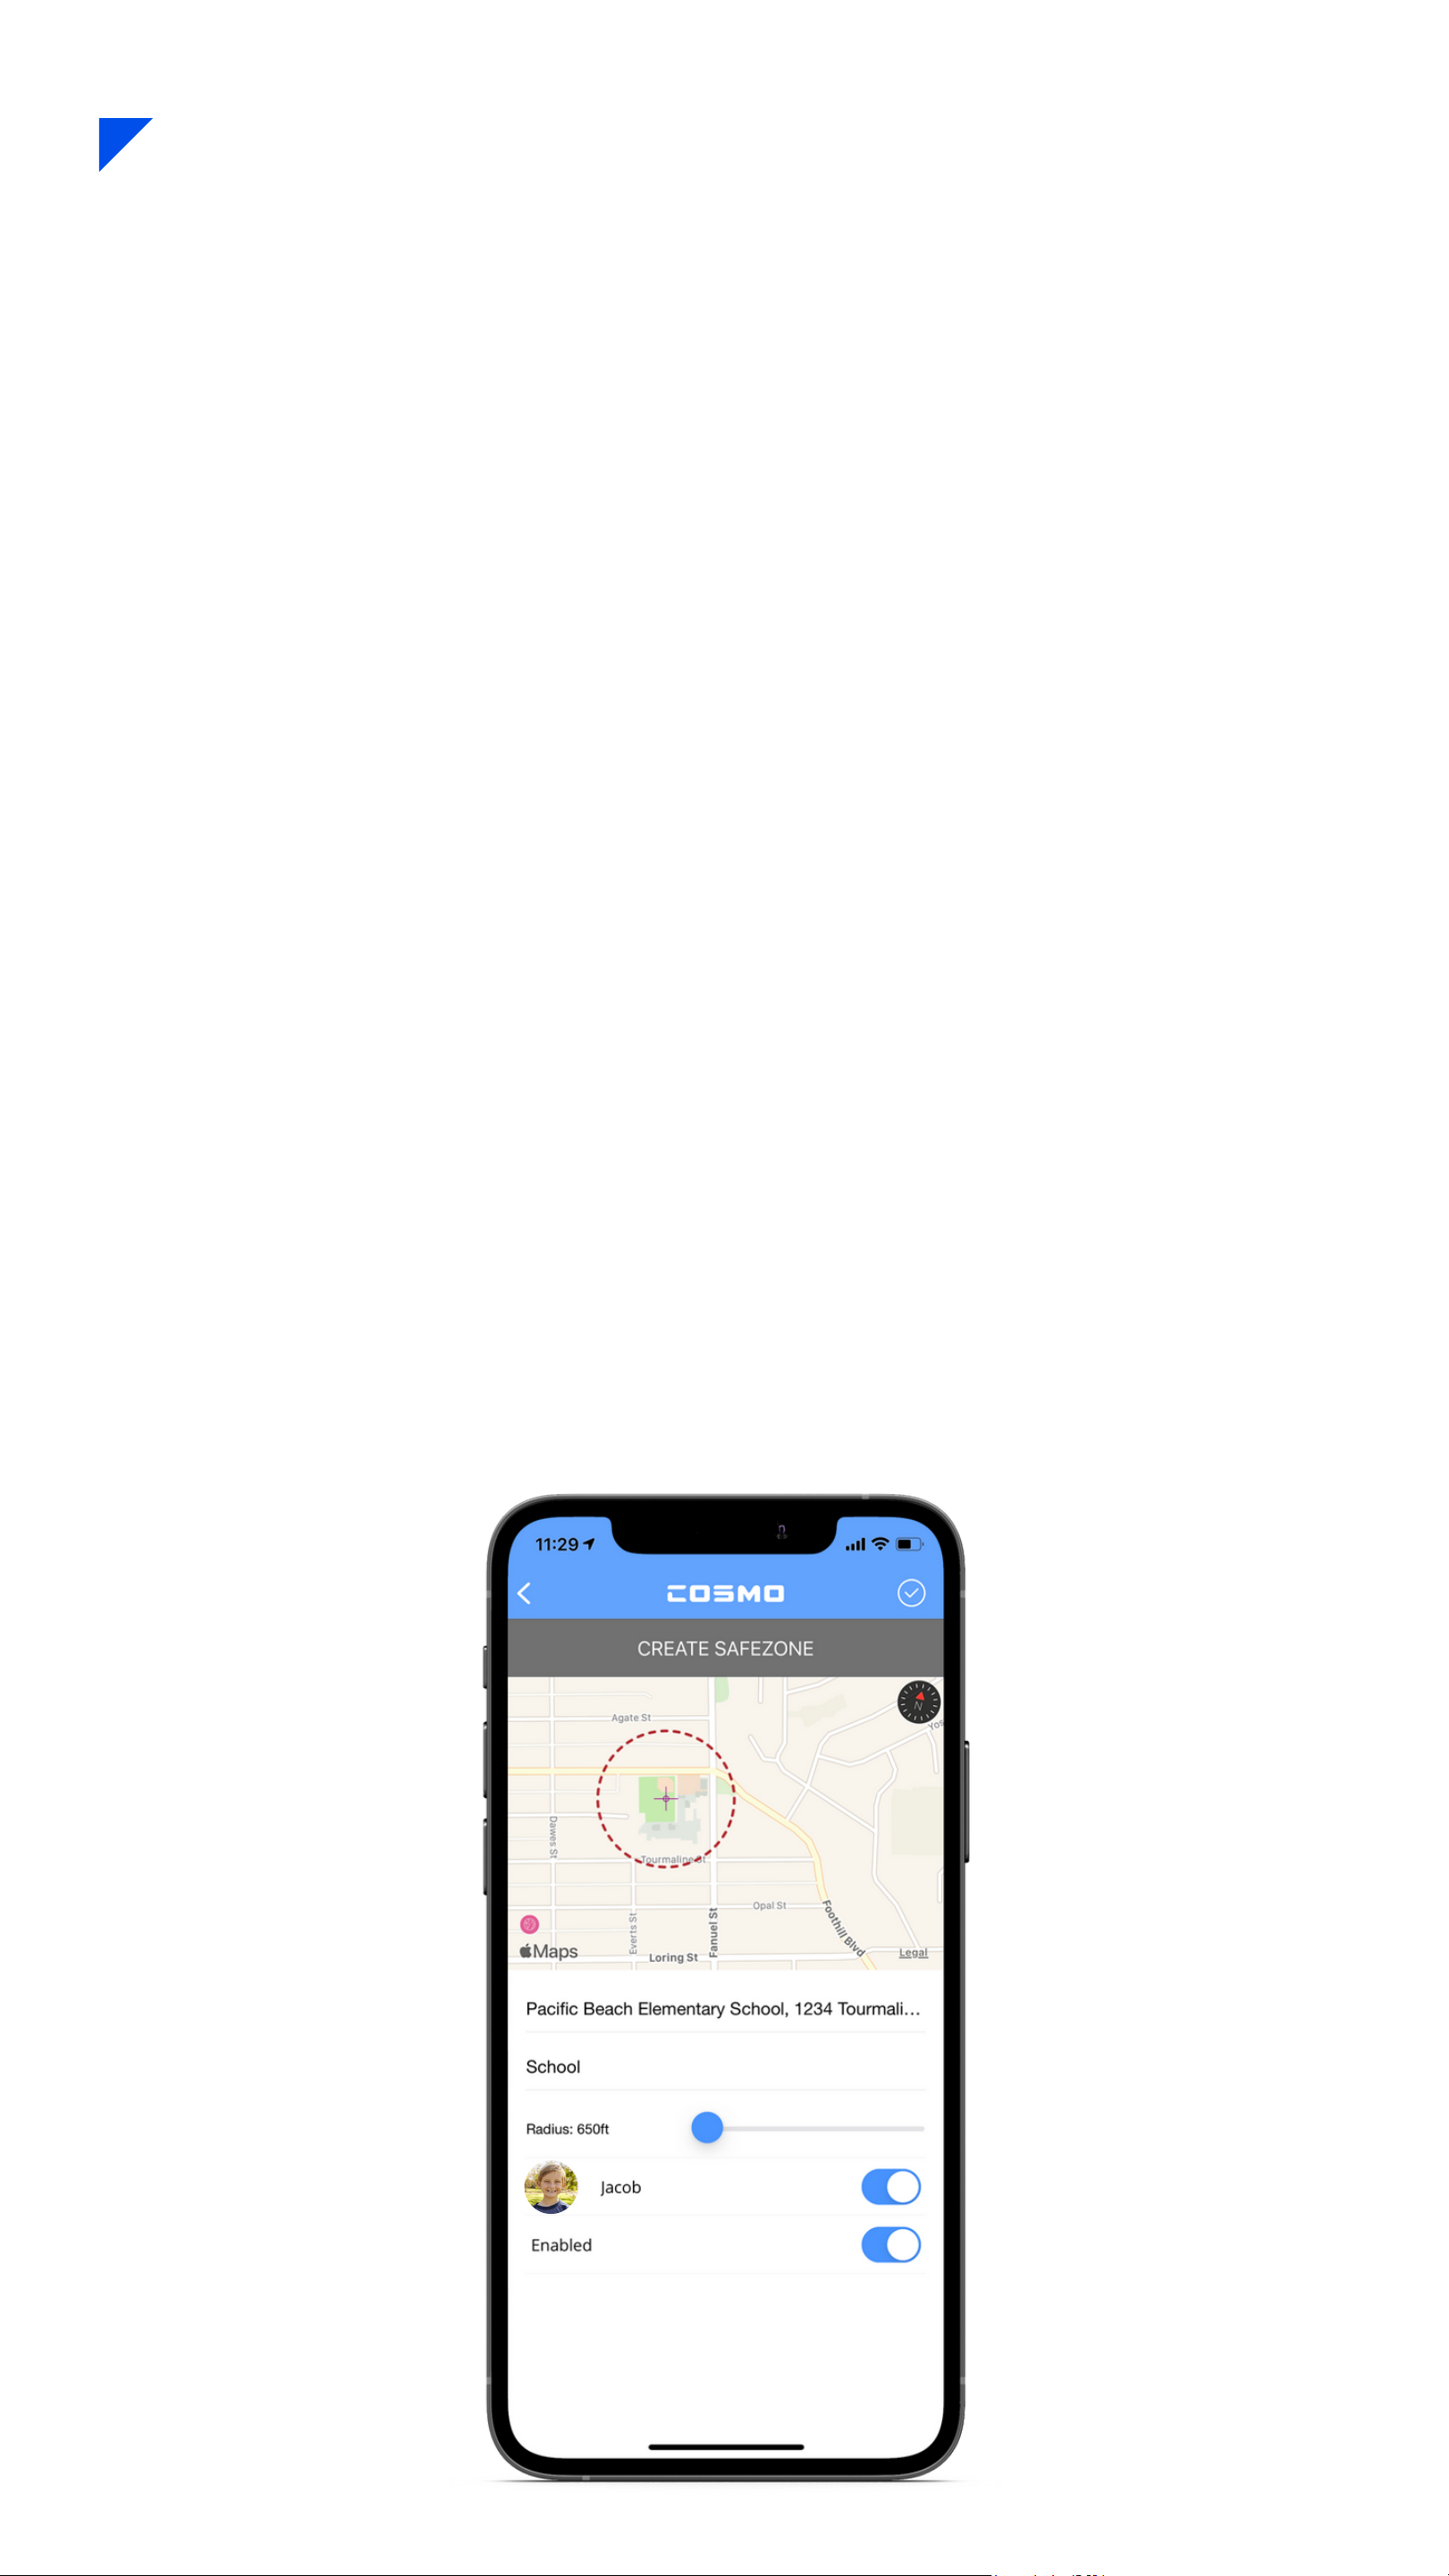
Locate area: Find where you want the Safezone to be on the
map, or search it in the search bar directly below the map.
Set the zone: Long-press in the center of exactly where you'd
like the Safezone to be on the map.
Name your safezone: Type whatever descriptive name you
like!
Set radius: Adjust the size/radius of the Safezone using the
slider.
Set time frame: Set when you'd like the Safezone to be
active. (This is when you'll receive notifications as your child
enters & leaves.)
Select device: Choose which device(s) you'd like to be
included in the Safezone, and tap the Check button in the
upper right corner to save.
20
Other manuals for JrTrack 2
2
Table of contents
Other Cosmo Watch manuals


