Cosmo JrTrack 2 User manual
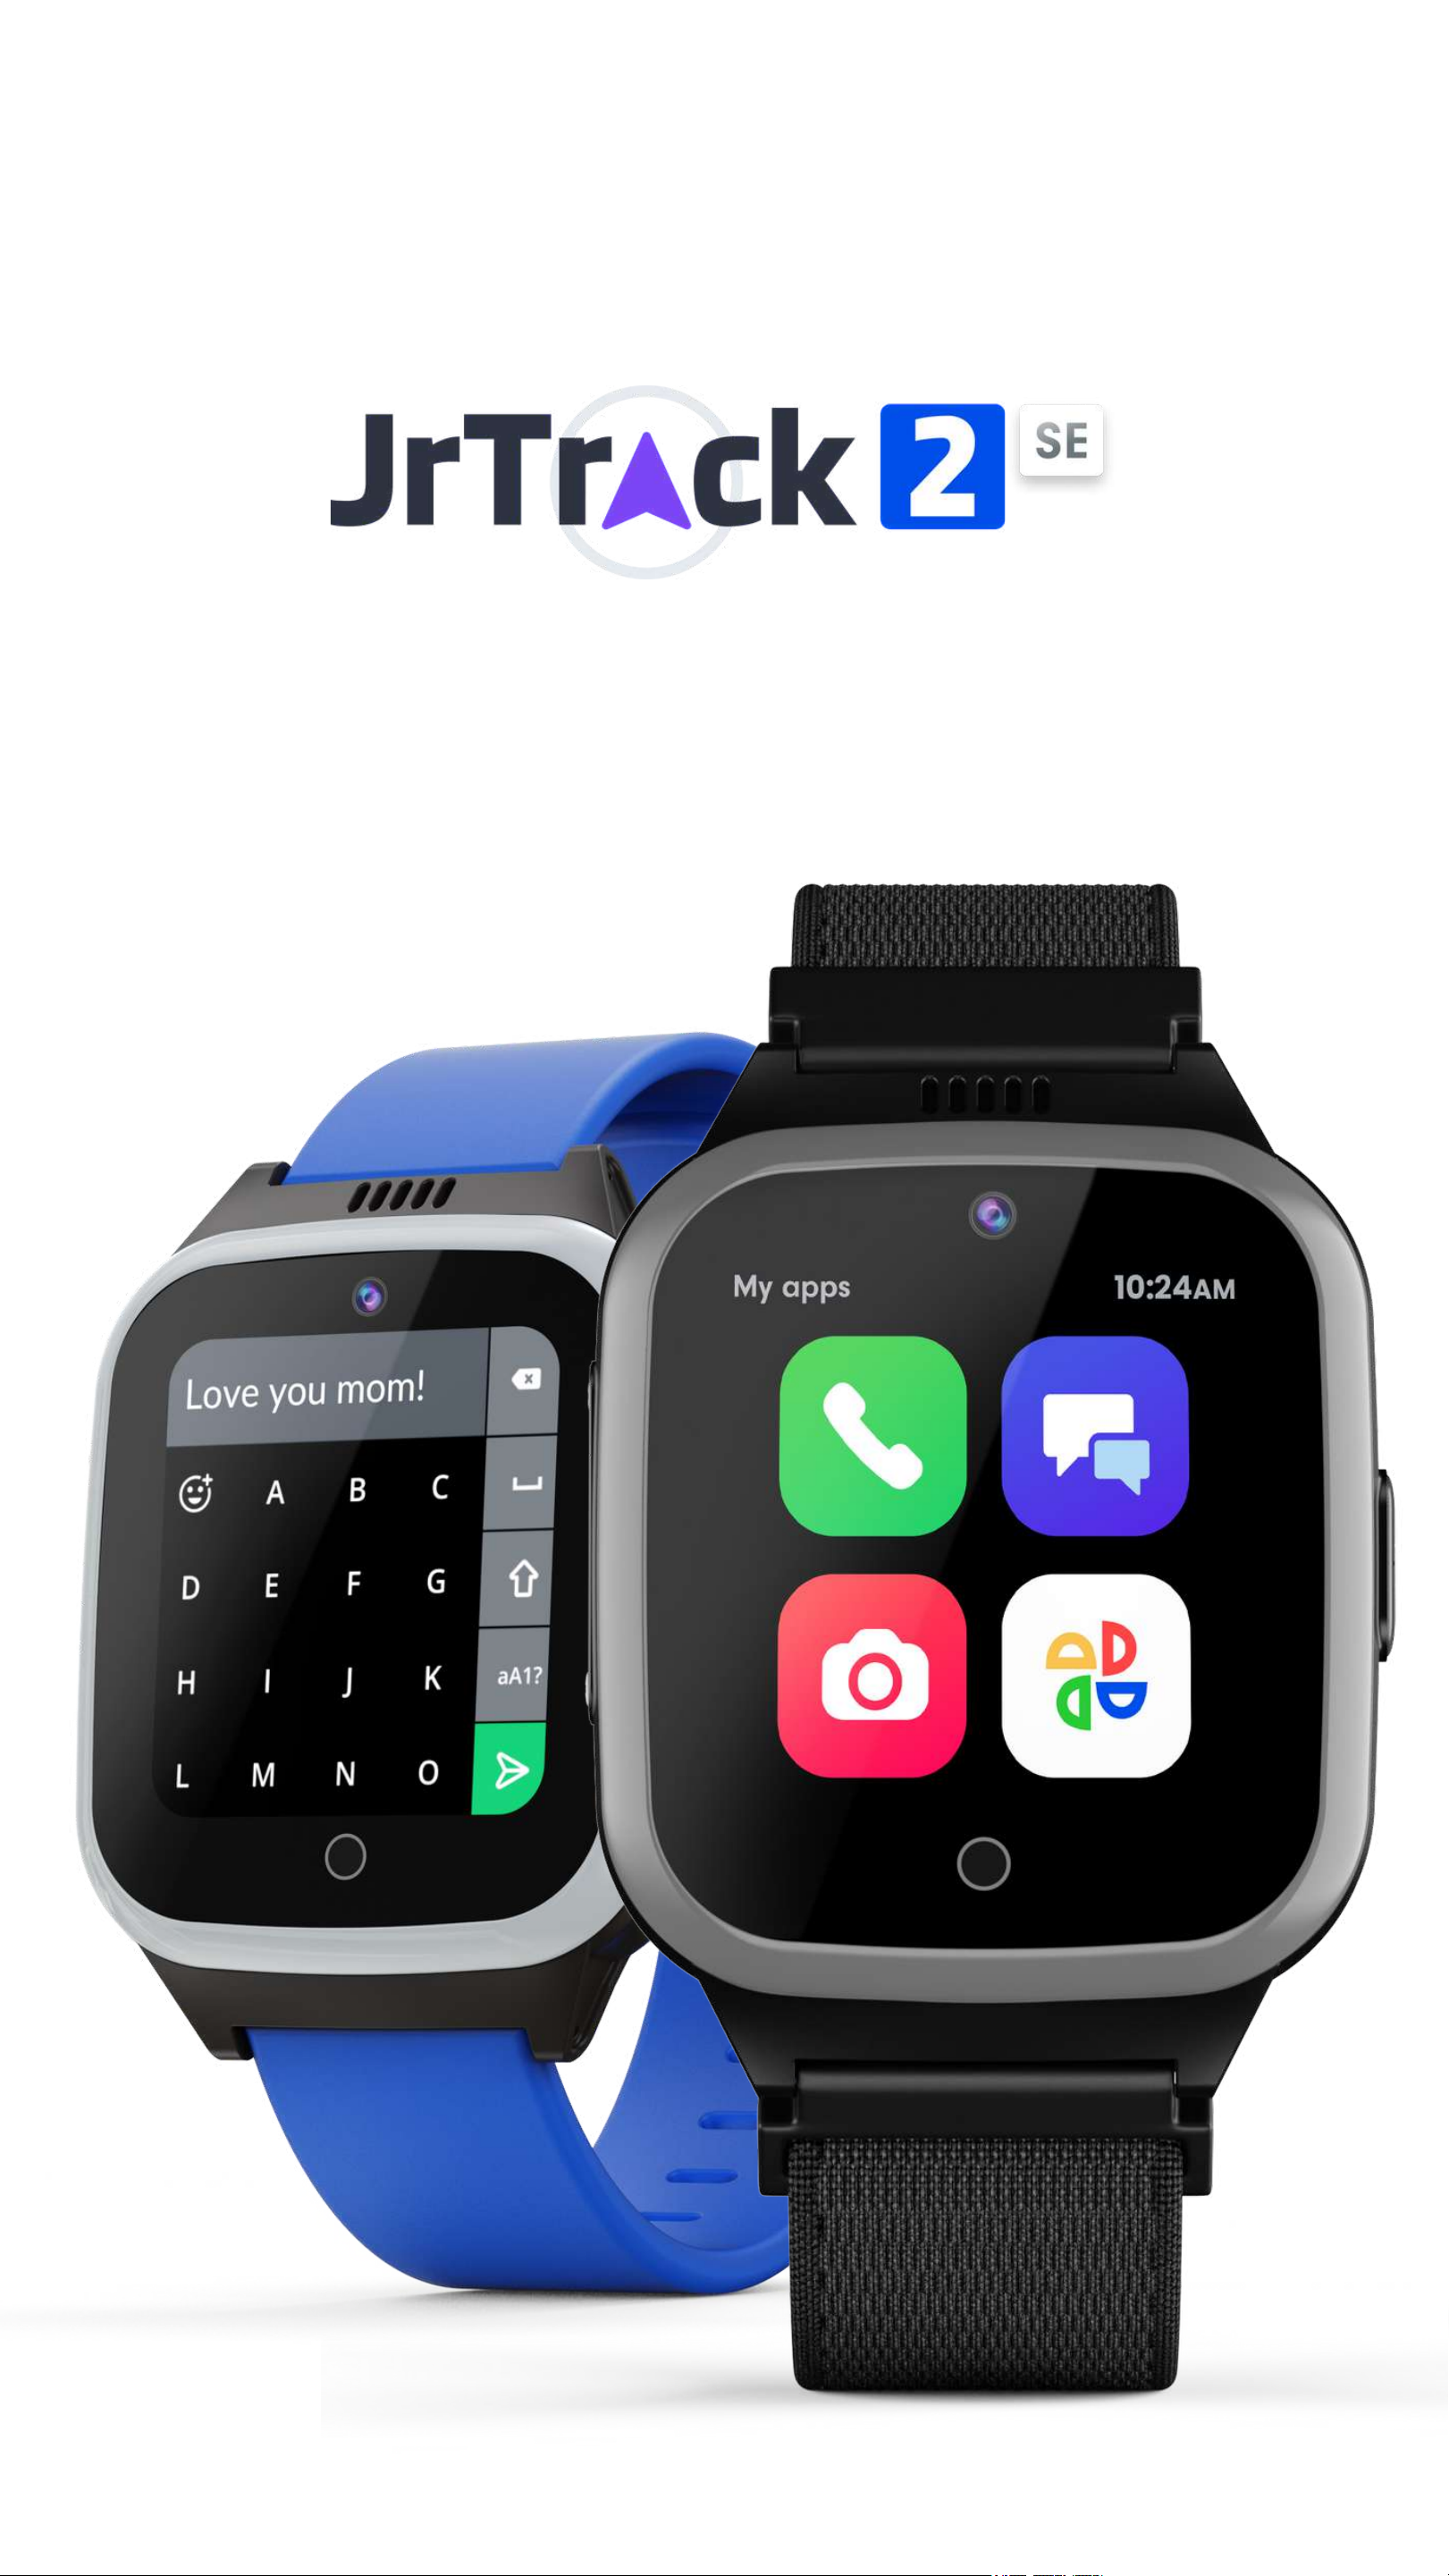
User Guide
and JrTrack 2


(877)-215-4741 9am-6pm EST
Hello! And welcome to the COSMO family! We’re
so excited that you’re here with your COSMO
JrTrack Smartwatch – we hope you love it! This
user guide will give you step-by-step instructions to
help you get your watch set up and customized in
no time. If you have additional questions or run
into any problems, please give us a call. Our
friendly support team will gladly help.
Welcome!
Customer Support
3

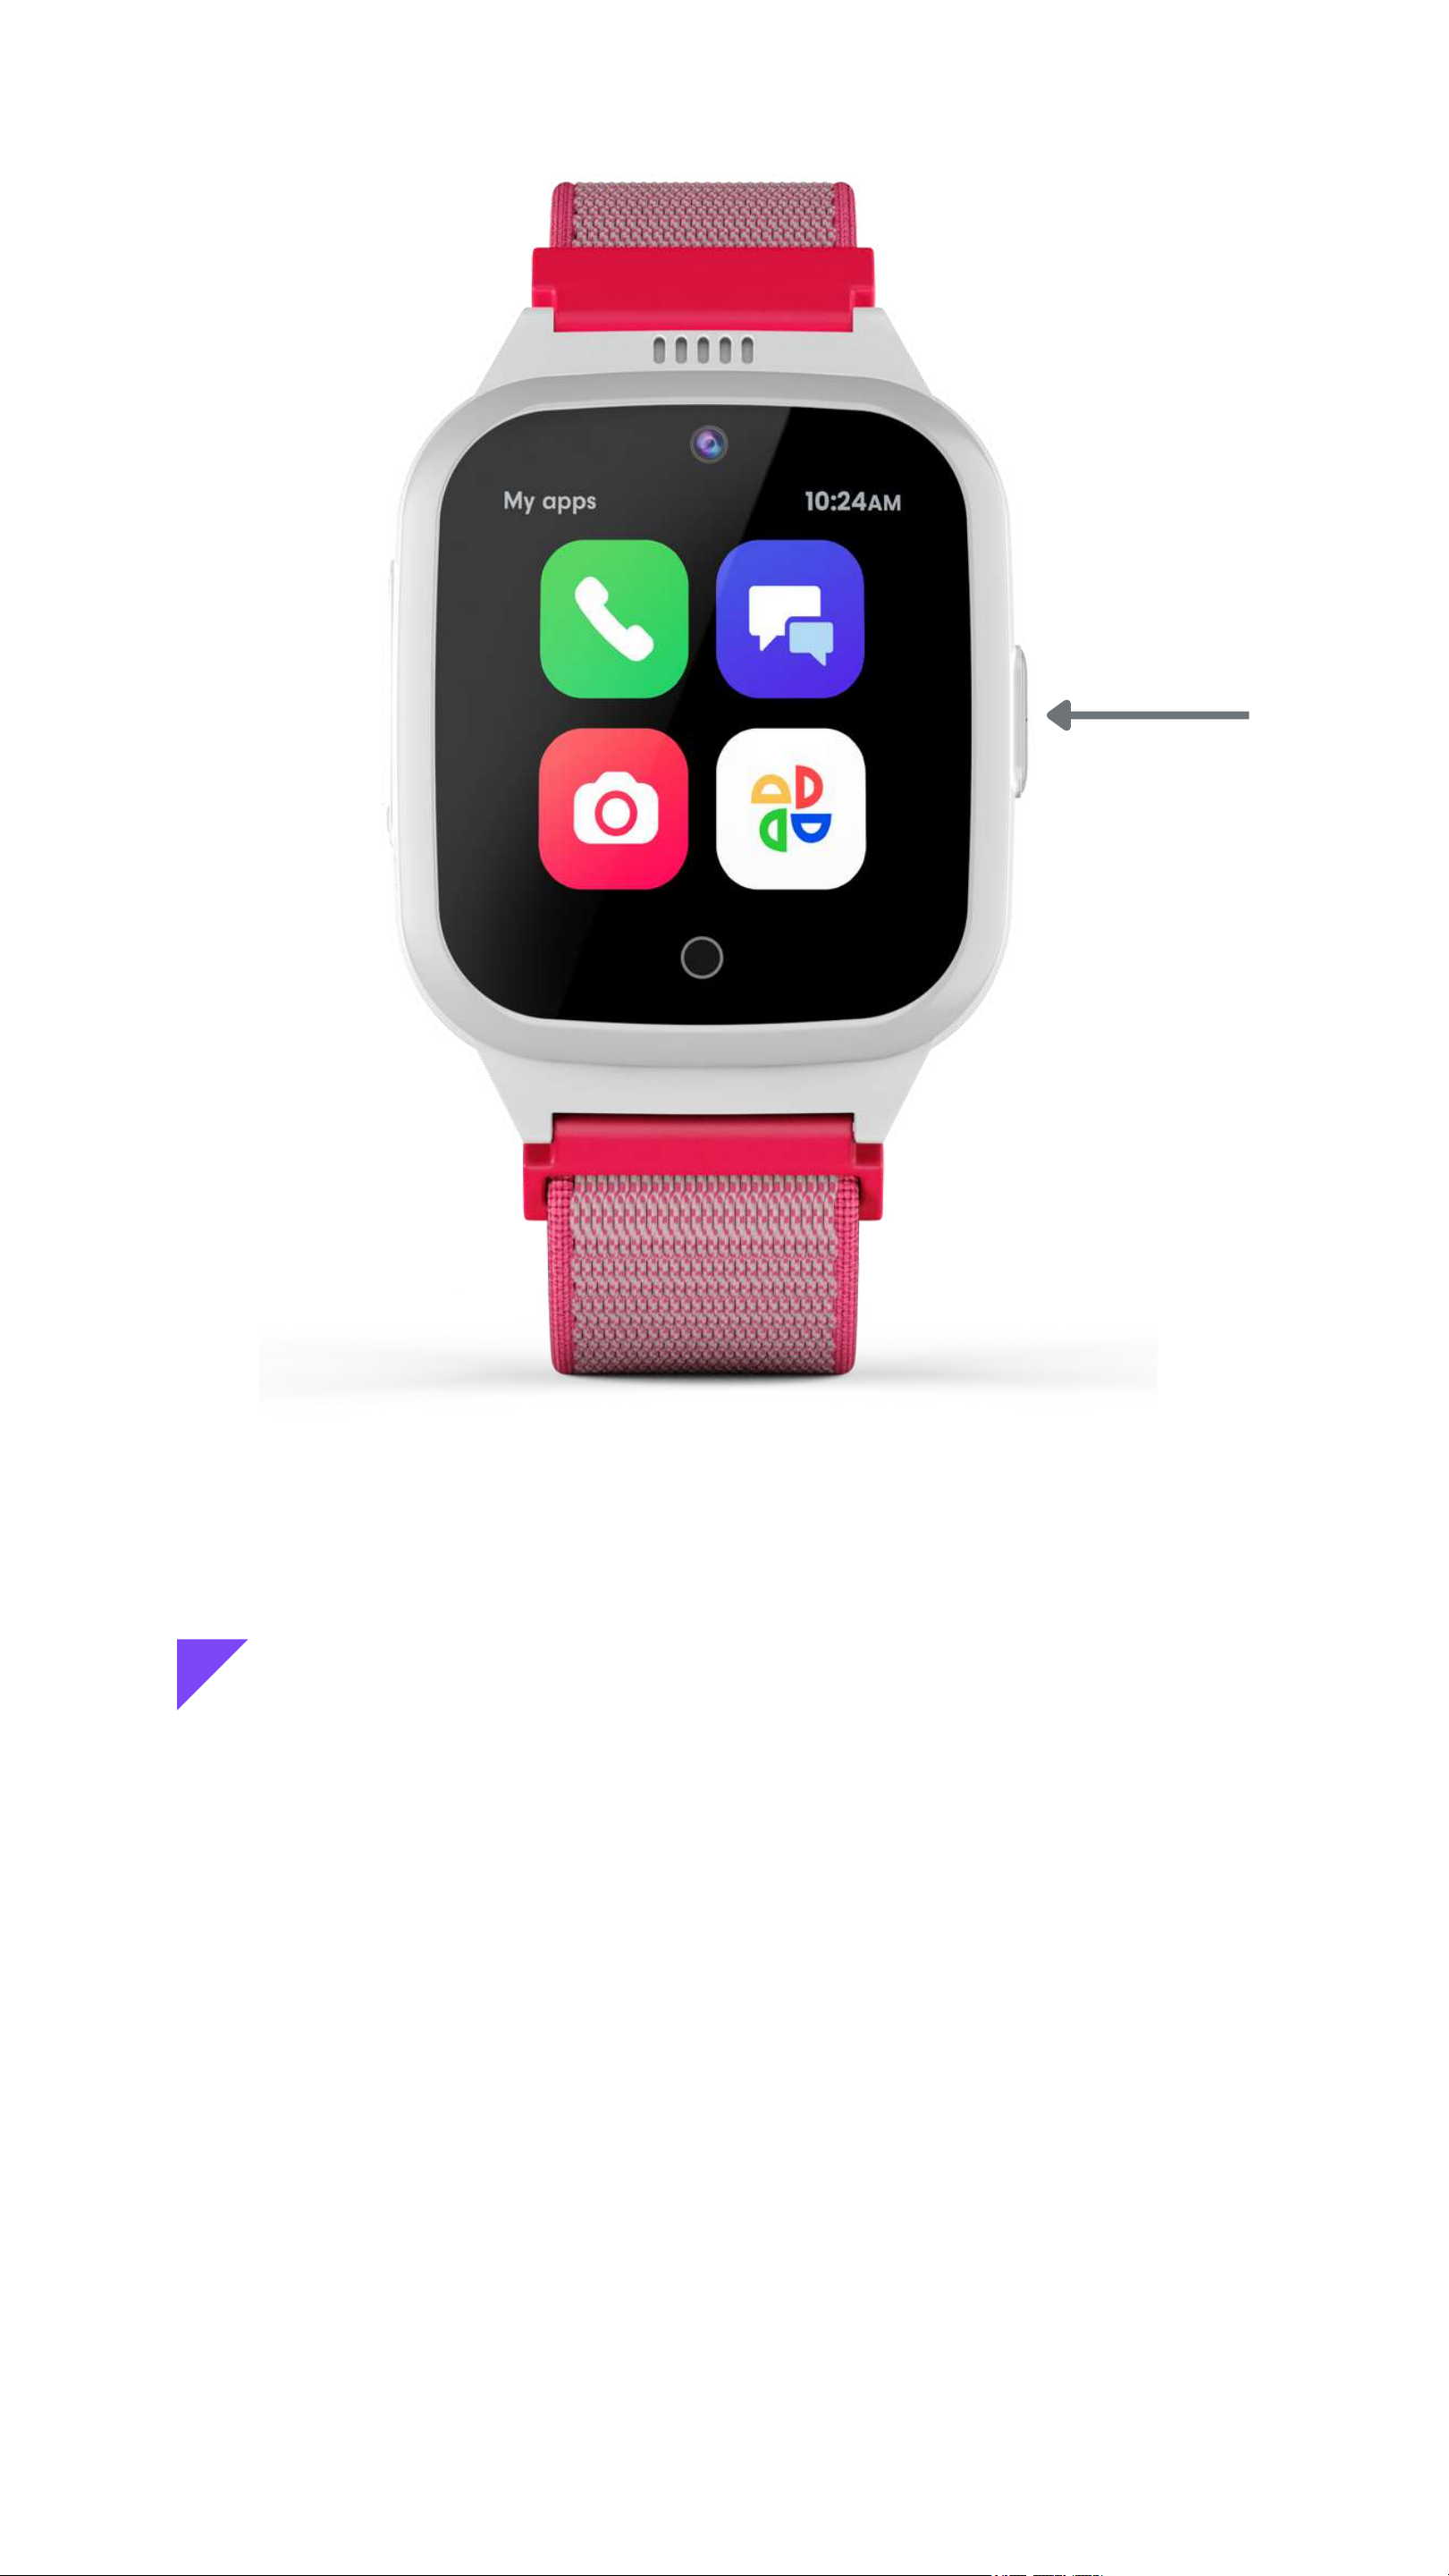
Get to know
your JrTrack
On/Off Button
SIM Card Tray
SIM is Pre-Installed
Home/Back
Button
Camera
Charging Port
4
Getting started

Turn on your JrTrack
Press and hold the On/Off button on for
two seconds to turn the watch on.
If the watch doesn't turn on, it likely
needs to be charged. Charge the watch
for a few hours and then try again. It may
need to update after turning on.
6

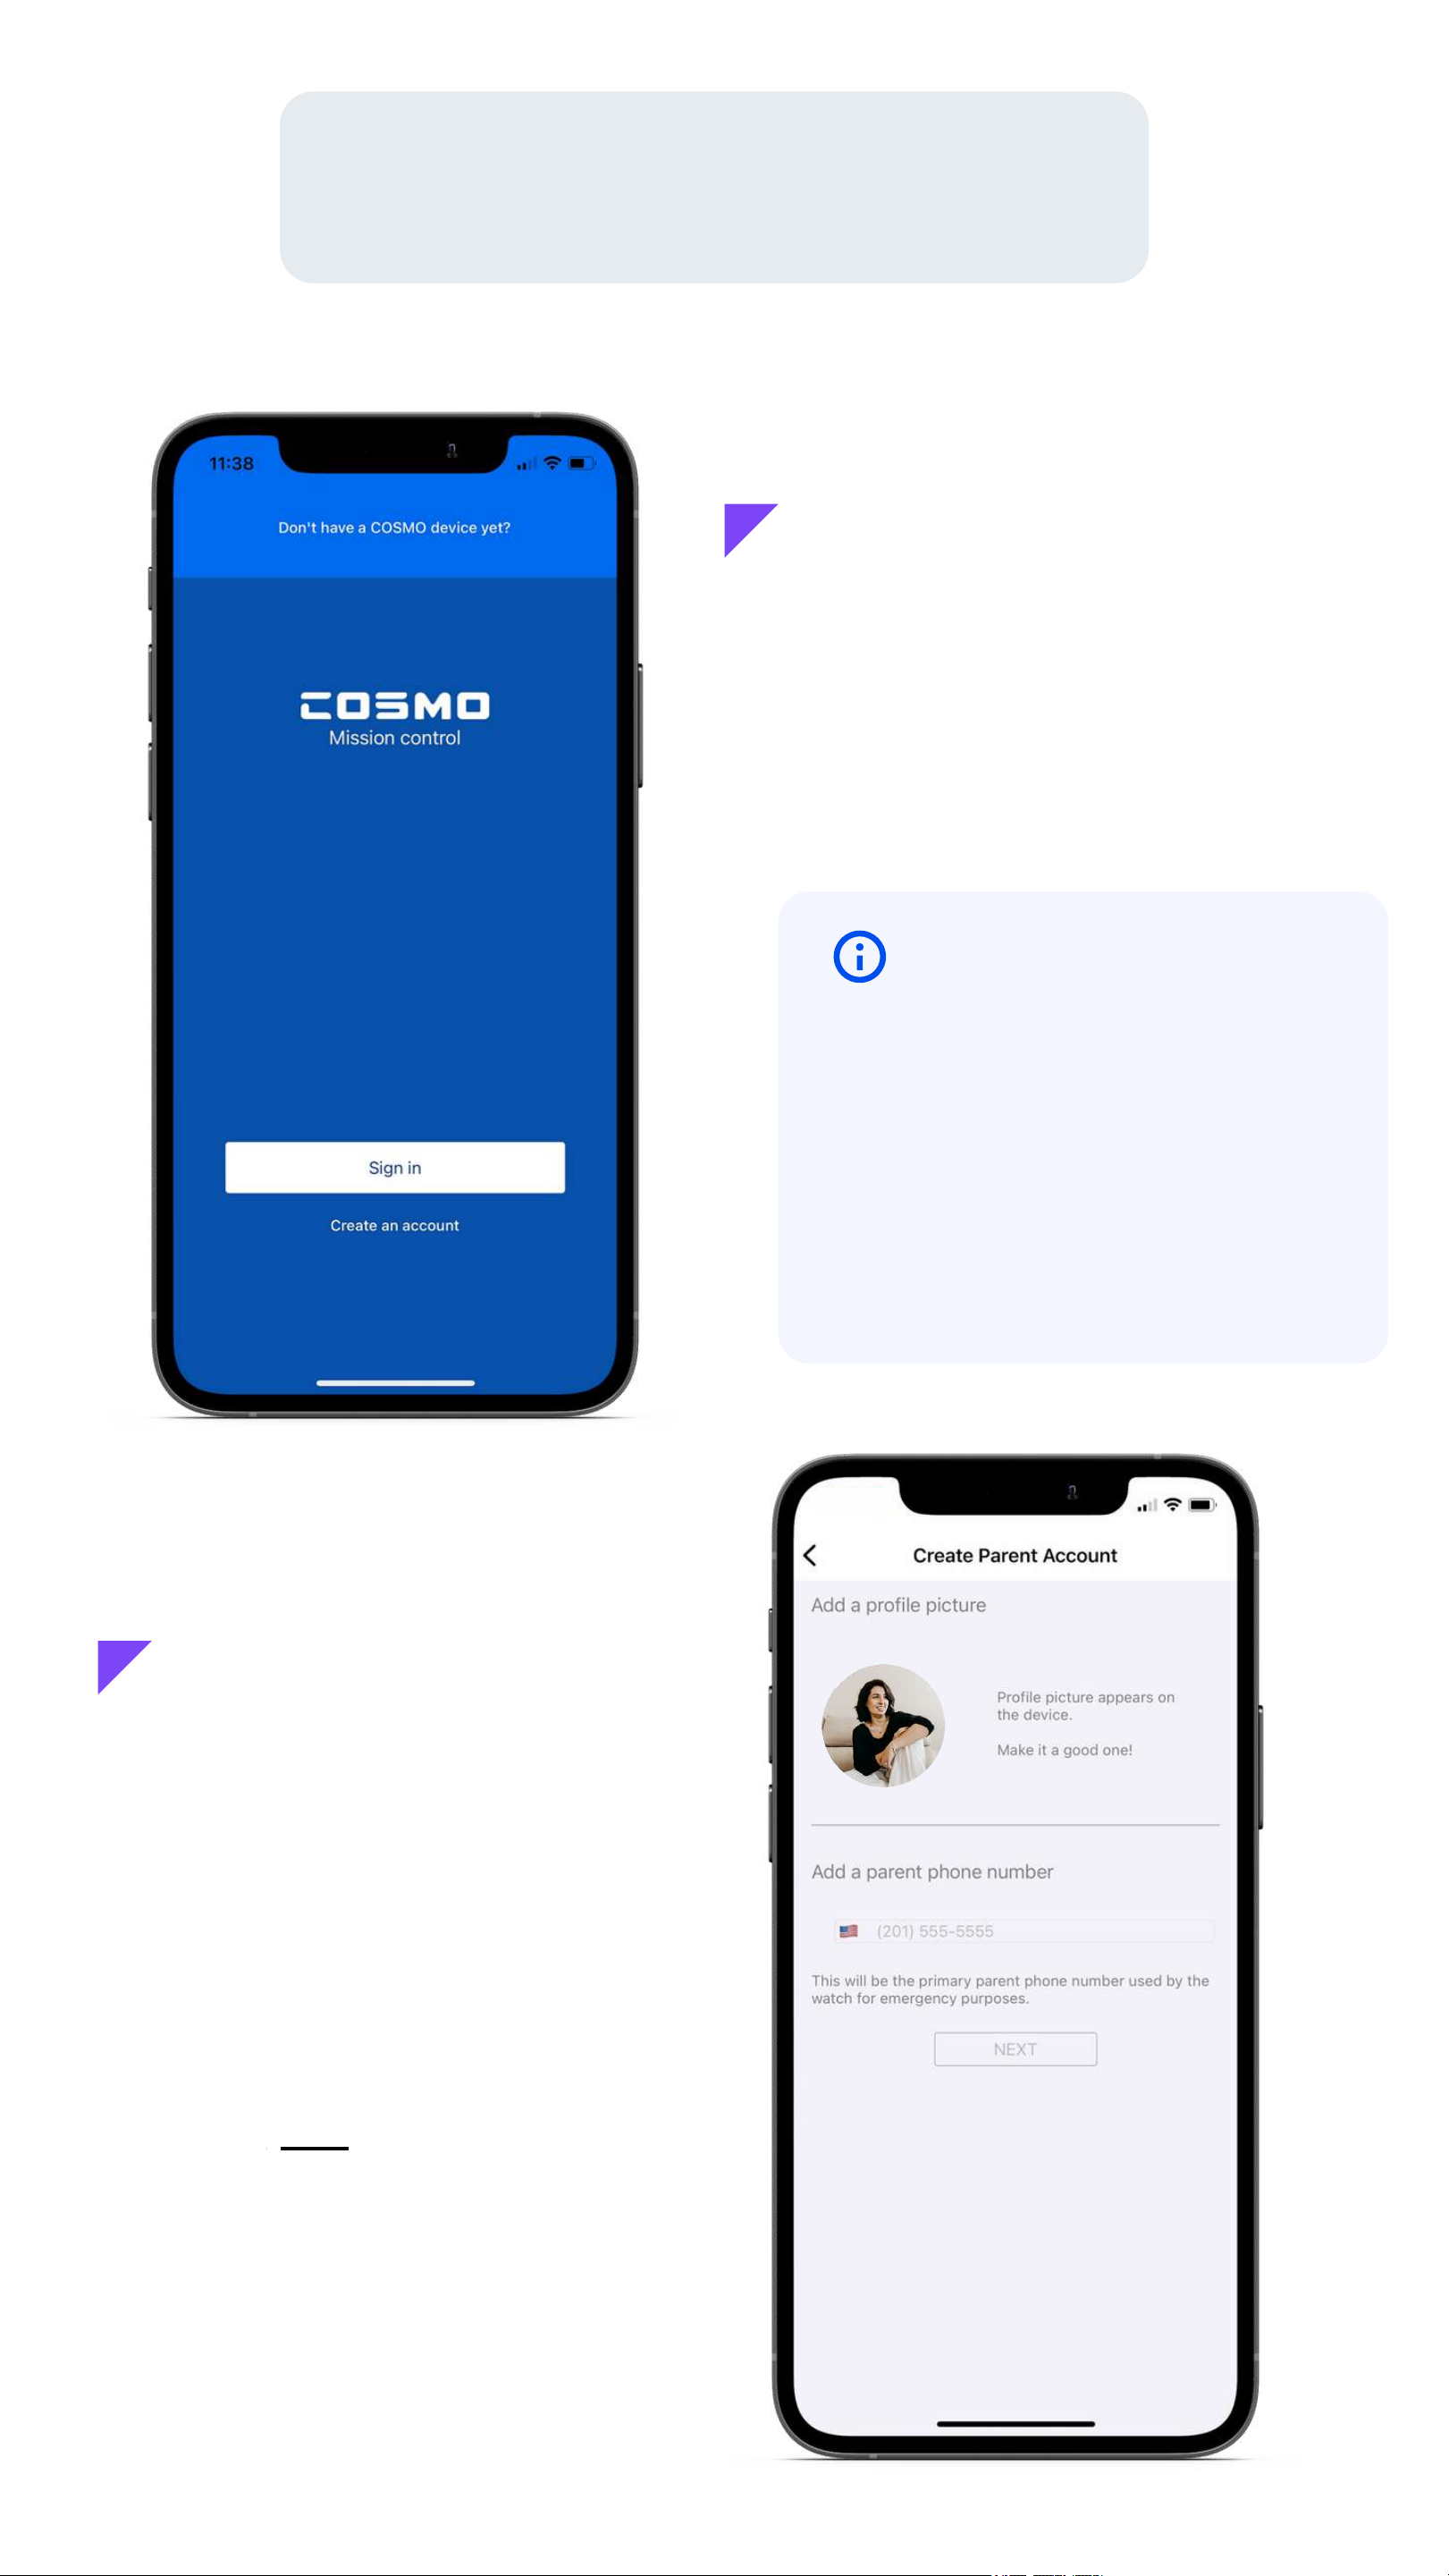
Add a profile photo for
yourself. This will appear on
your child's watch when you
call!
Enter your phone number
here, not the watch's
number.
In the app, create a
COSMO: Mission Control
account or sign in if you
already have one.
This is your COSMO Mission
Control App account. This is
separate from your COSMO
Membership account. You can
use the same email, just know
that they're different.
Pair Your Device
Create an account
Add your info
8
Note
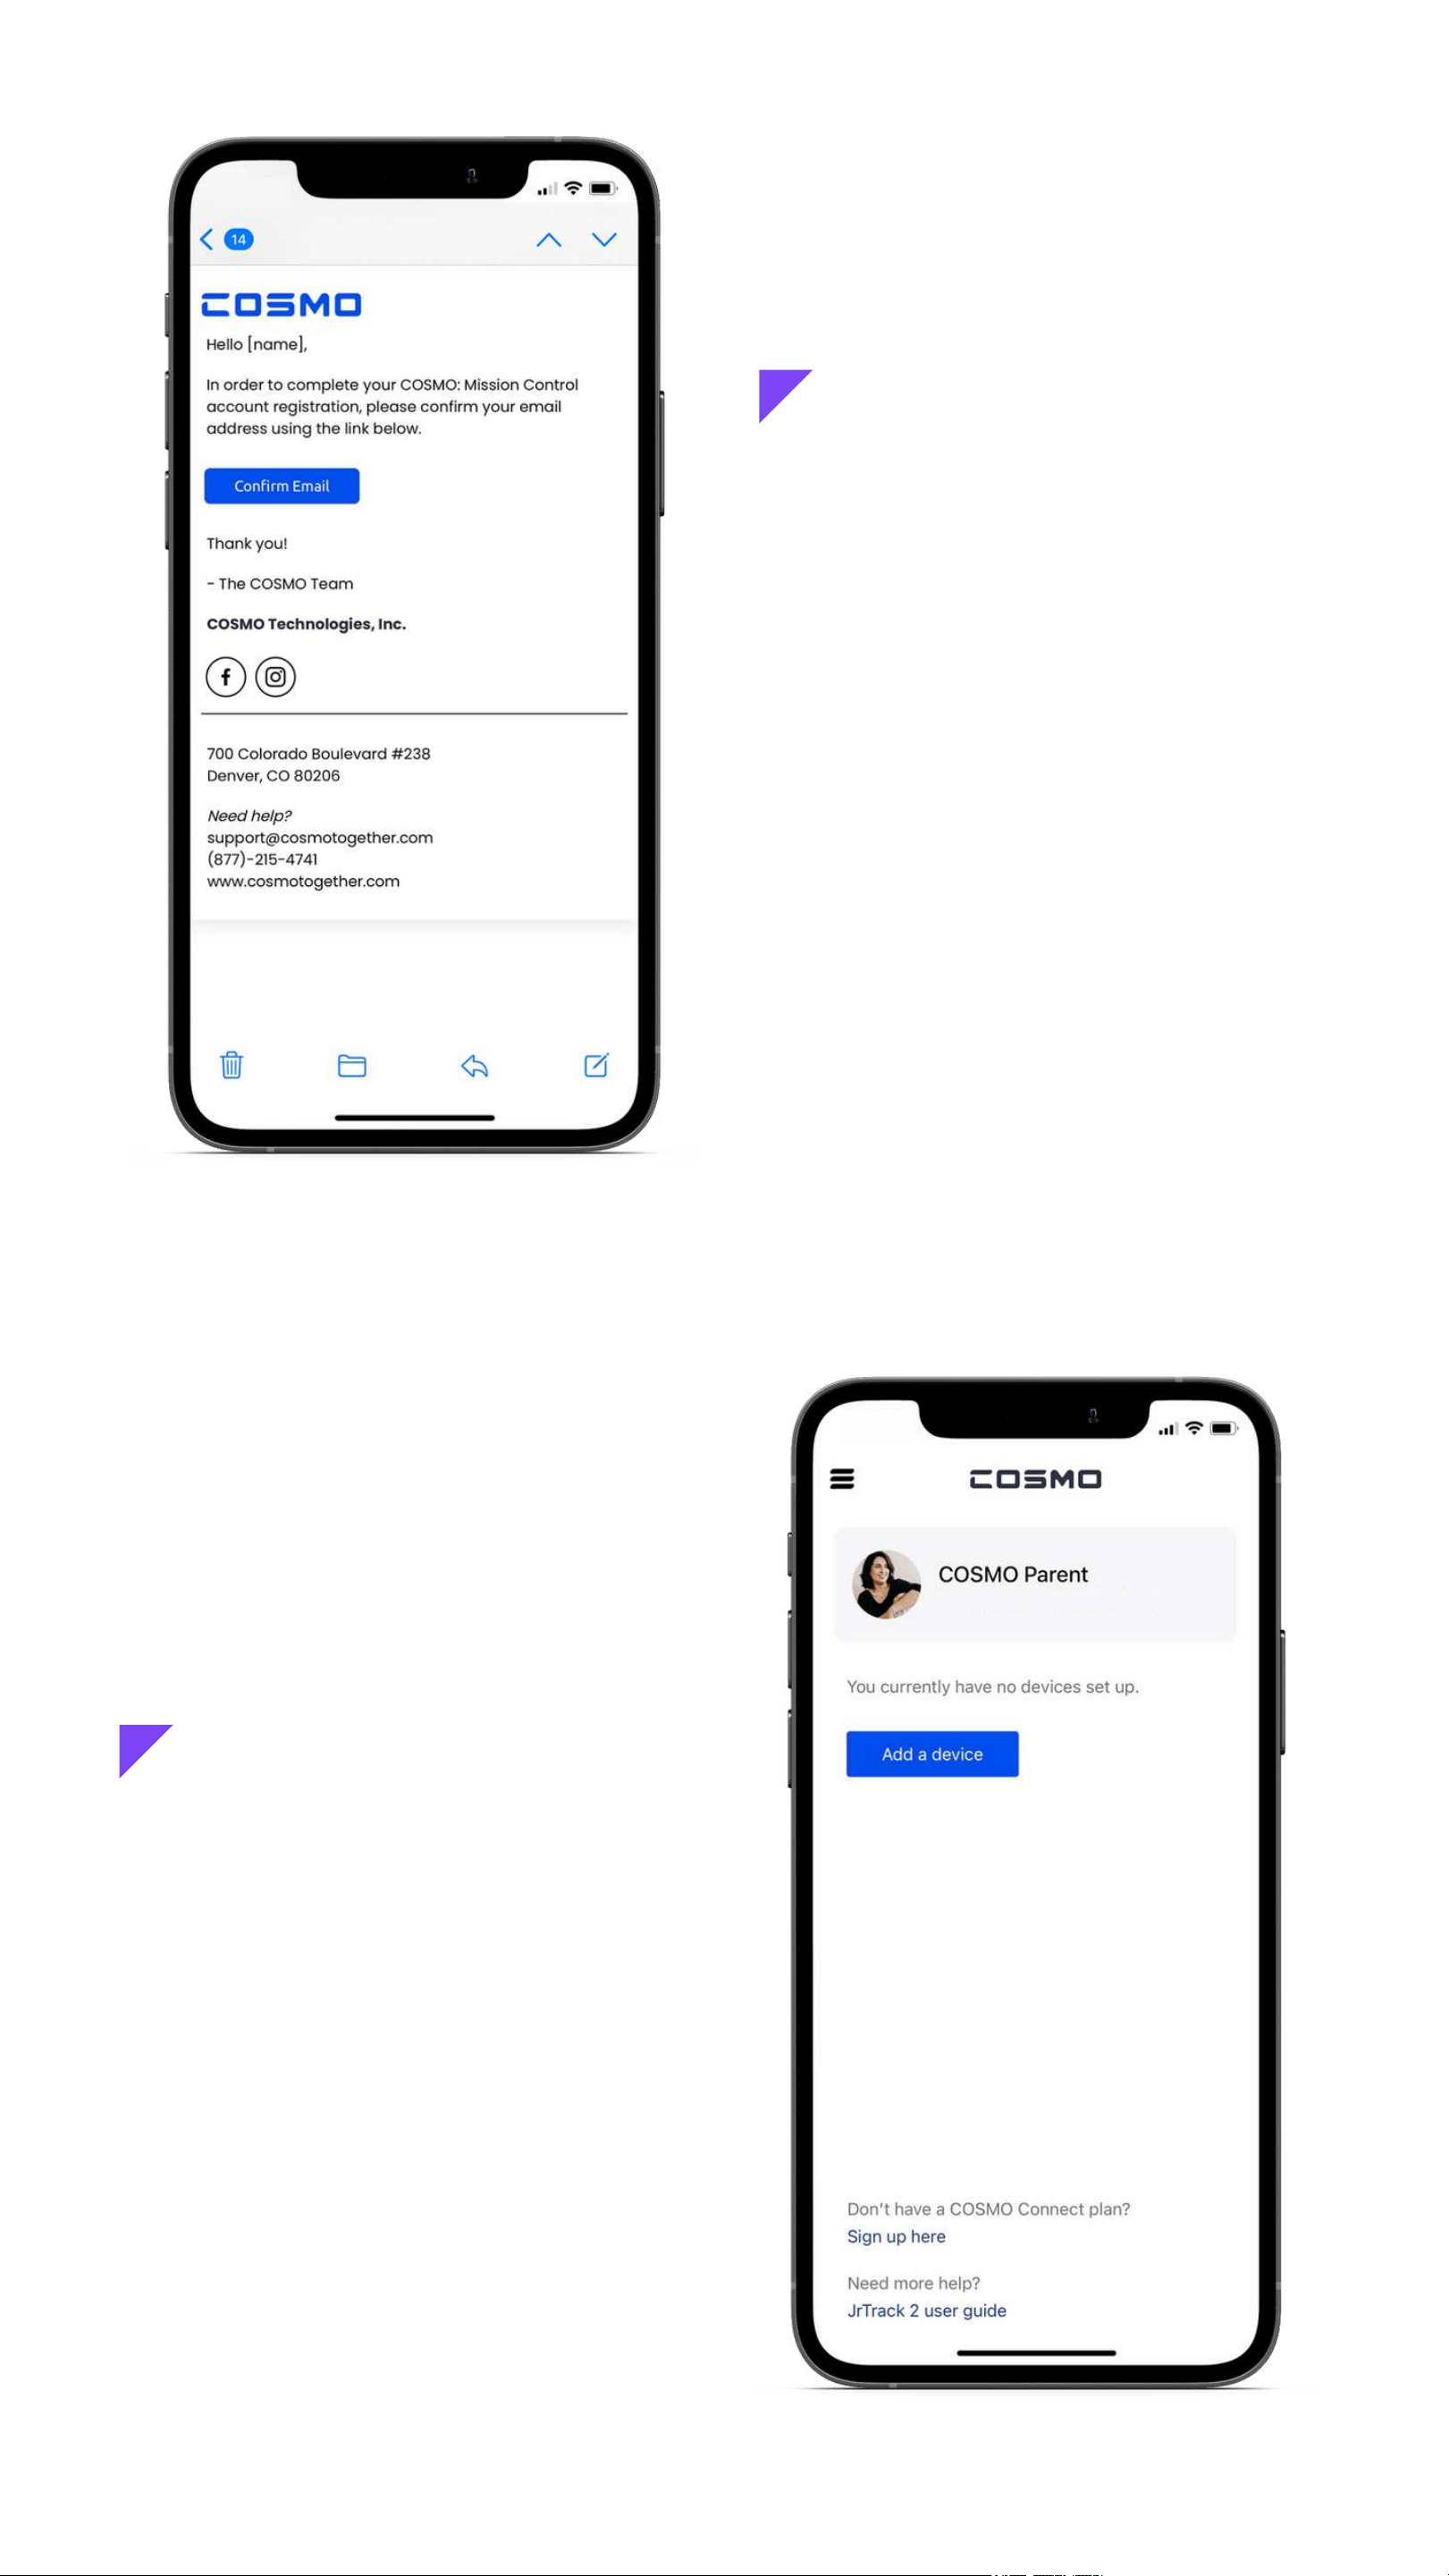
Check your inbox for a
confirmation email. Open
it and tap the "Confirm
Email" button.
Tap the "Add a device"
button.
Confirm your email
Add a device
9

Add their name, birthday,
and your favorite photo of
your child!
Your child's profile
Tara
06/14/2017
On the watch, swipe through the apps until you see
Settings. Open Settings, then tap "Pair device" to open
the QR code onscreen.
Launch pairing mode
Troubleshooting
If the QR code does not show up onscreen, tap the
home button and make sure your watch is up to date. You
may need to connect to Wi-Fi for JrTrack to see an update.
10
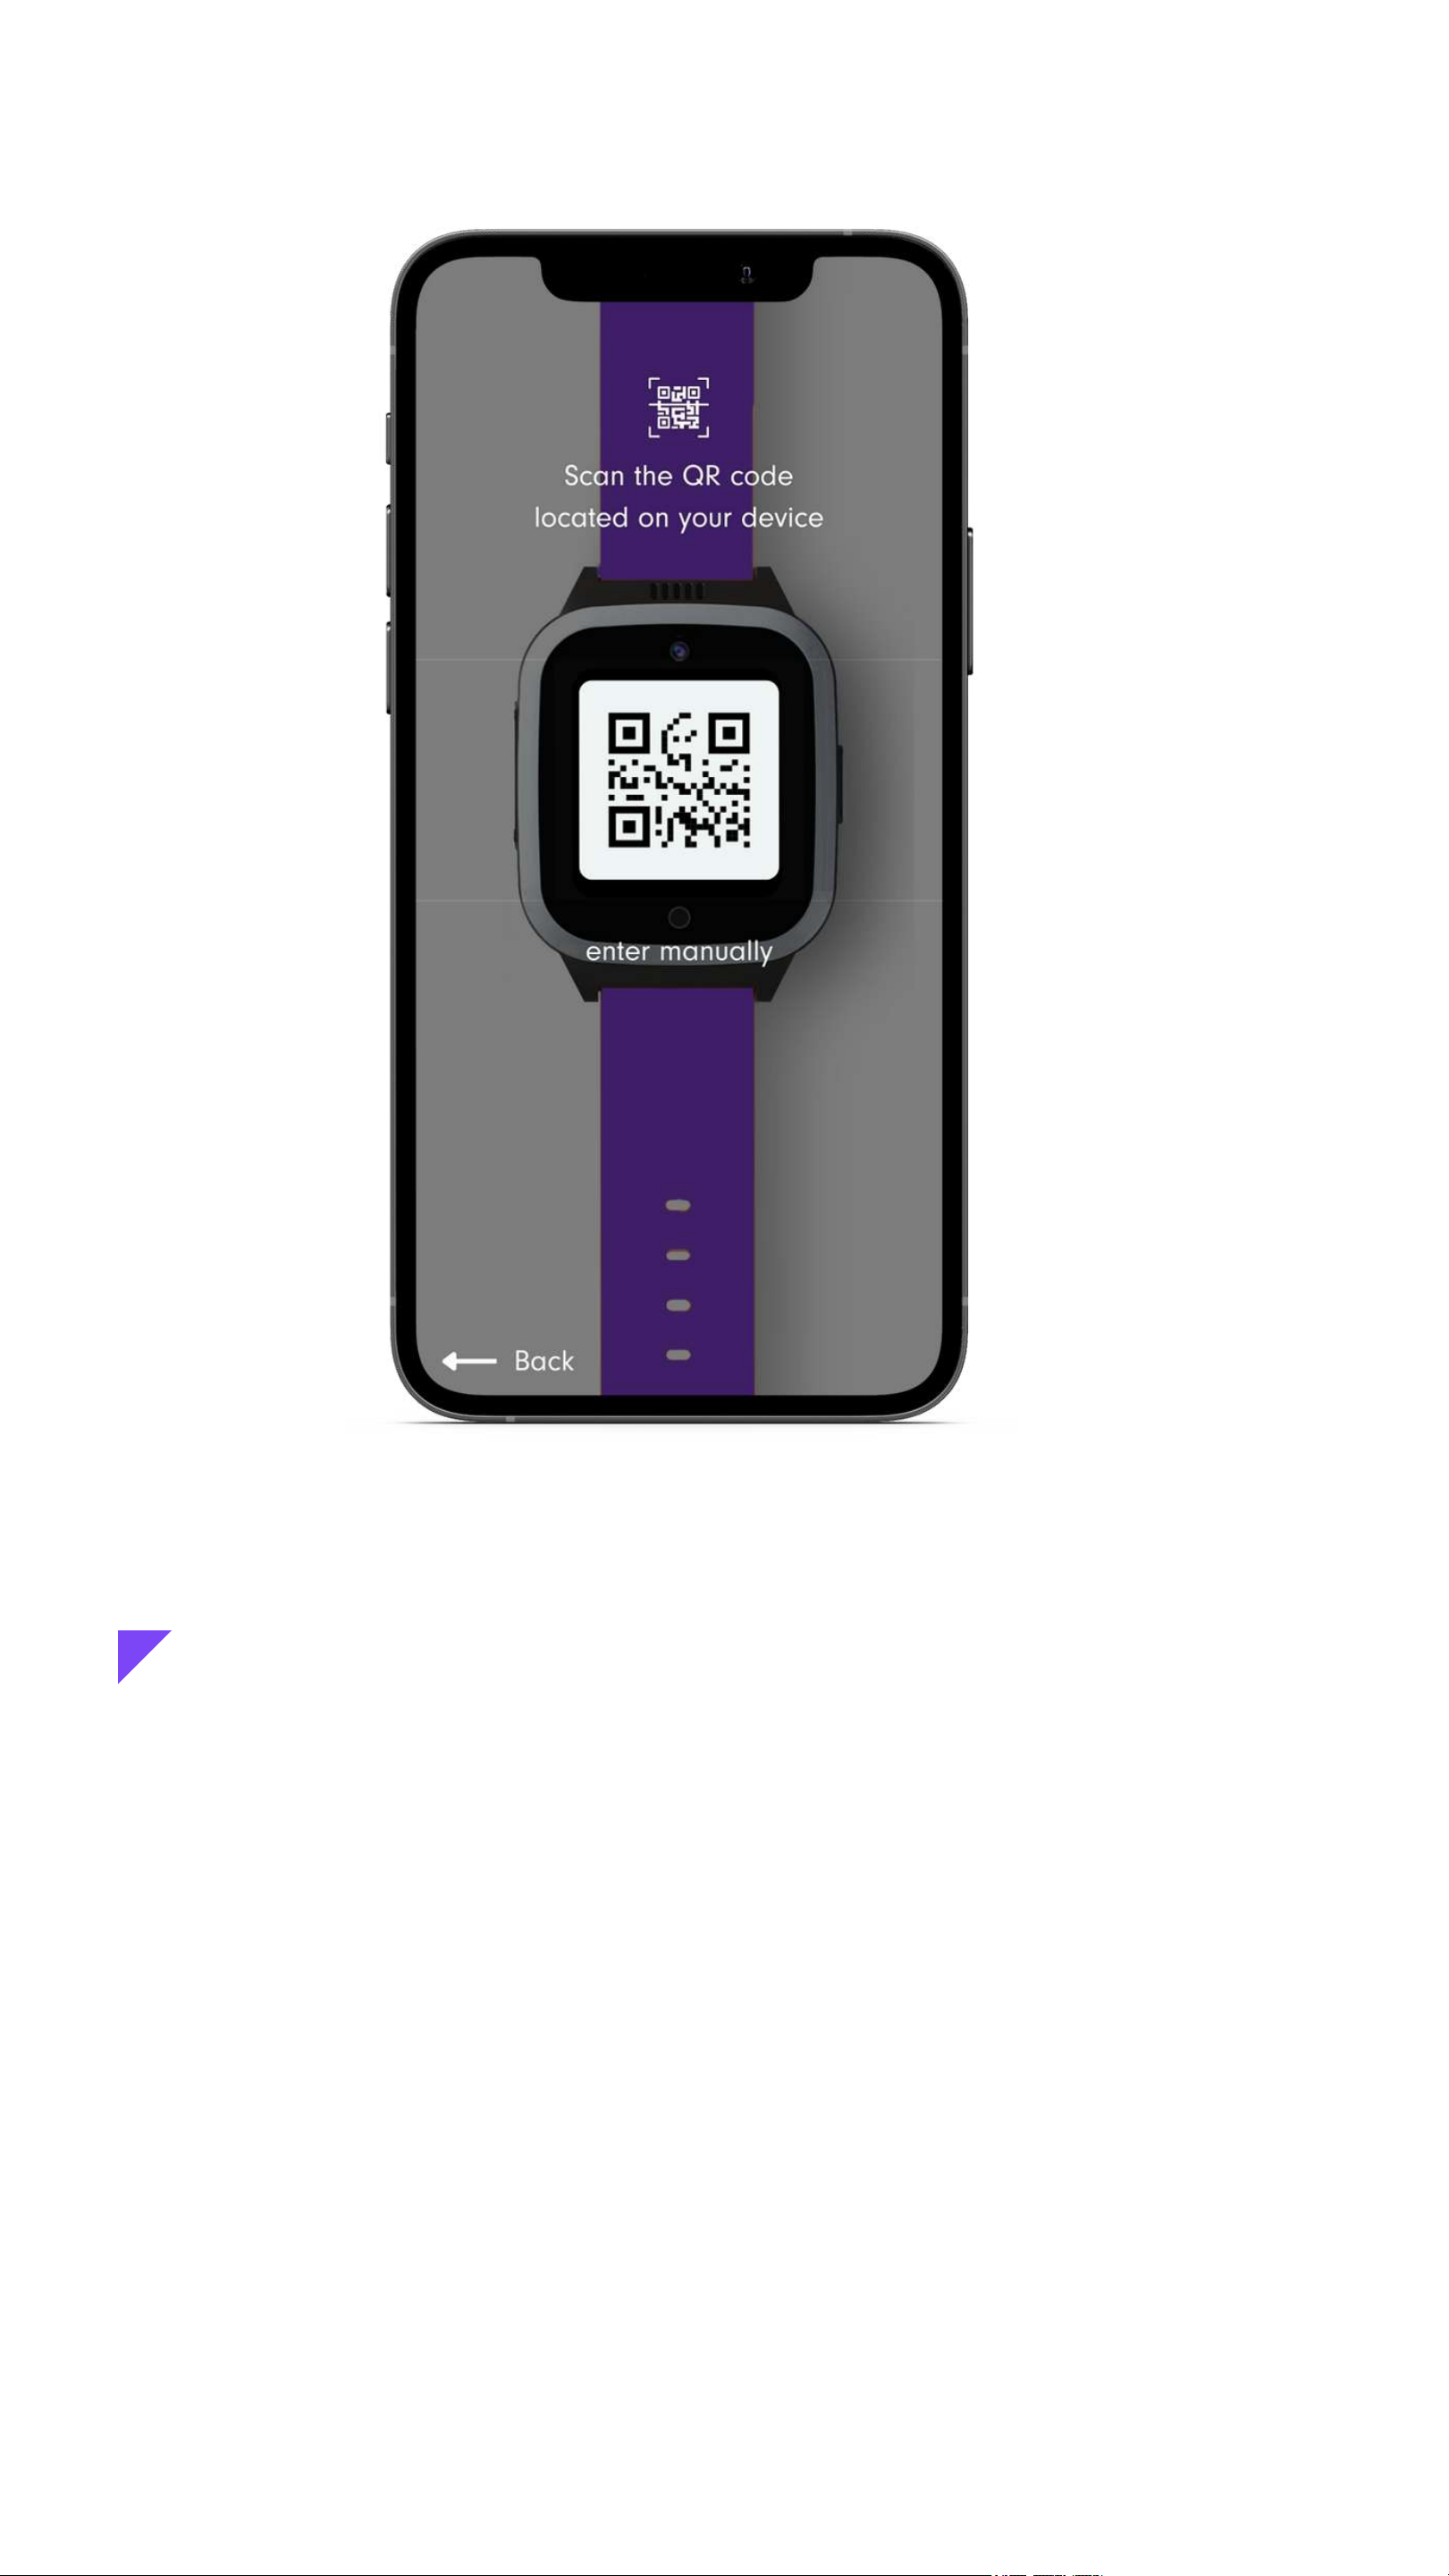
Use the app to scan the QR code on the watch's screen,
then paste the watch's phone number you copied after
activation if it doesn't autofill.
If you don't see the QR code come up on the watch, you
can manually type in the IMEI number found on the back
of the device.
Scan the QR code
11
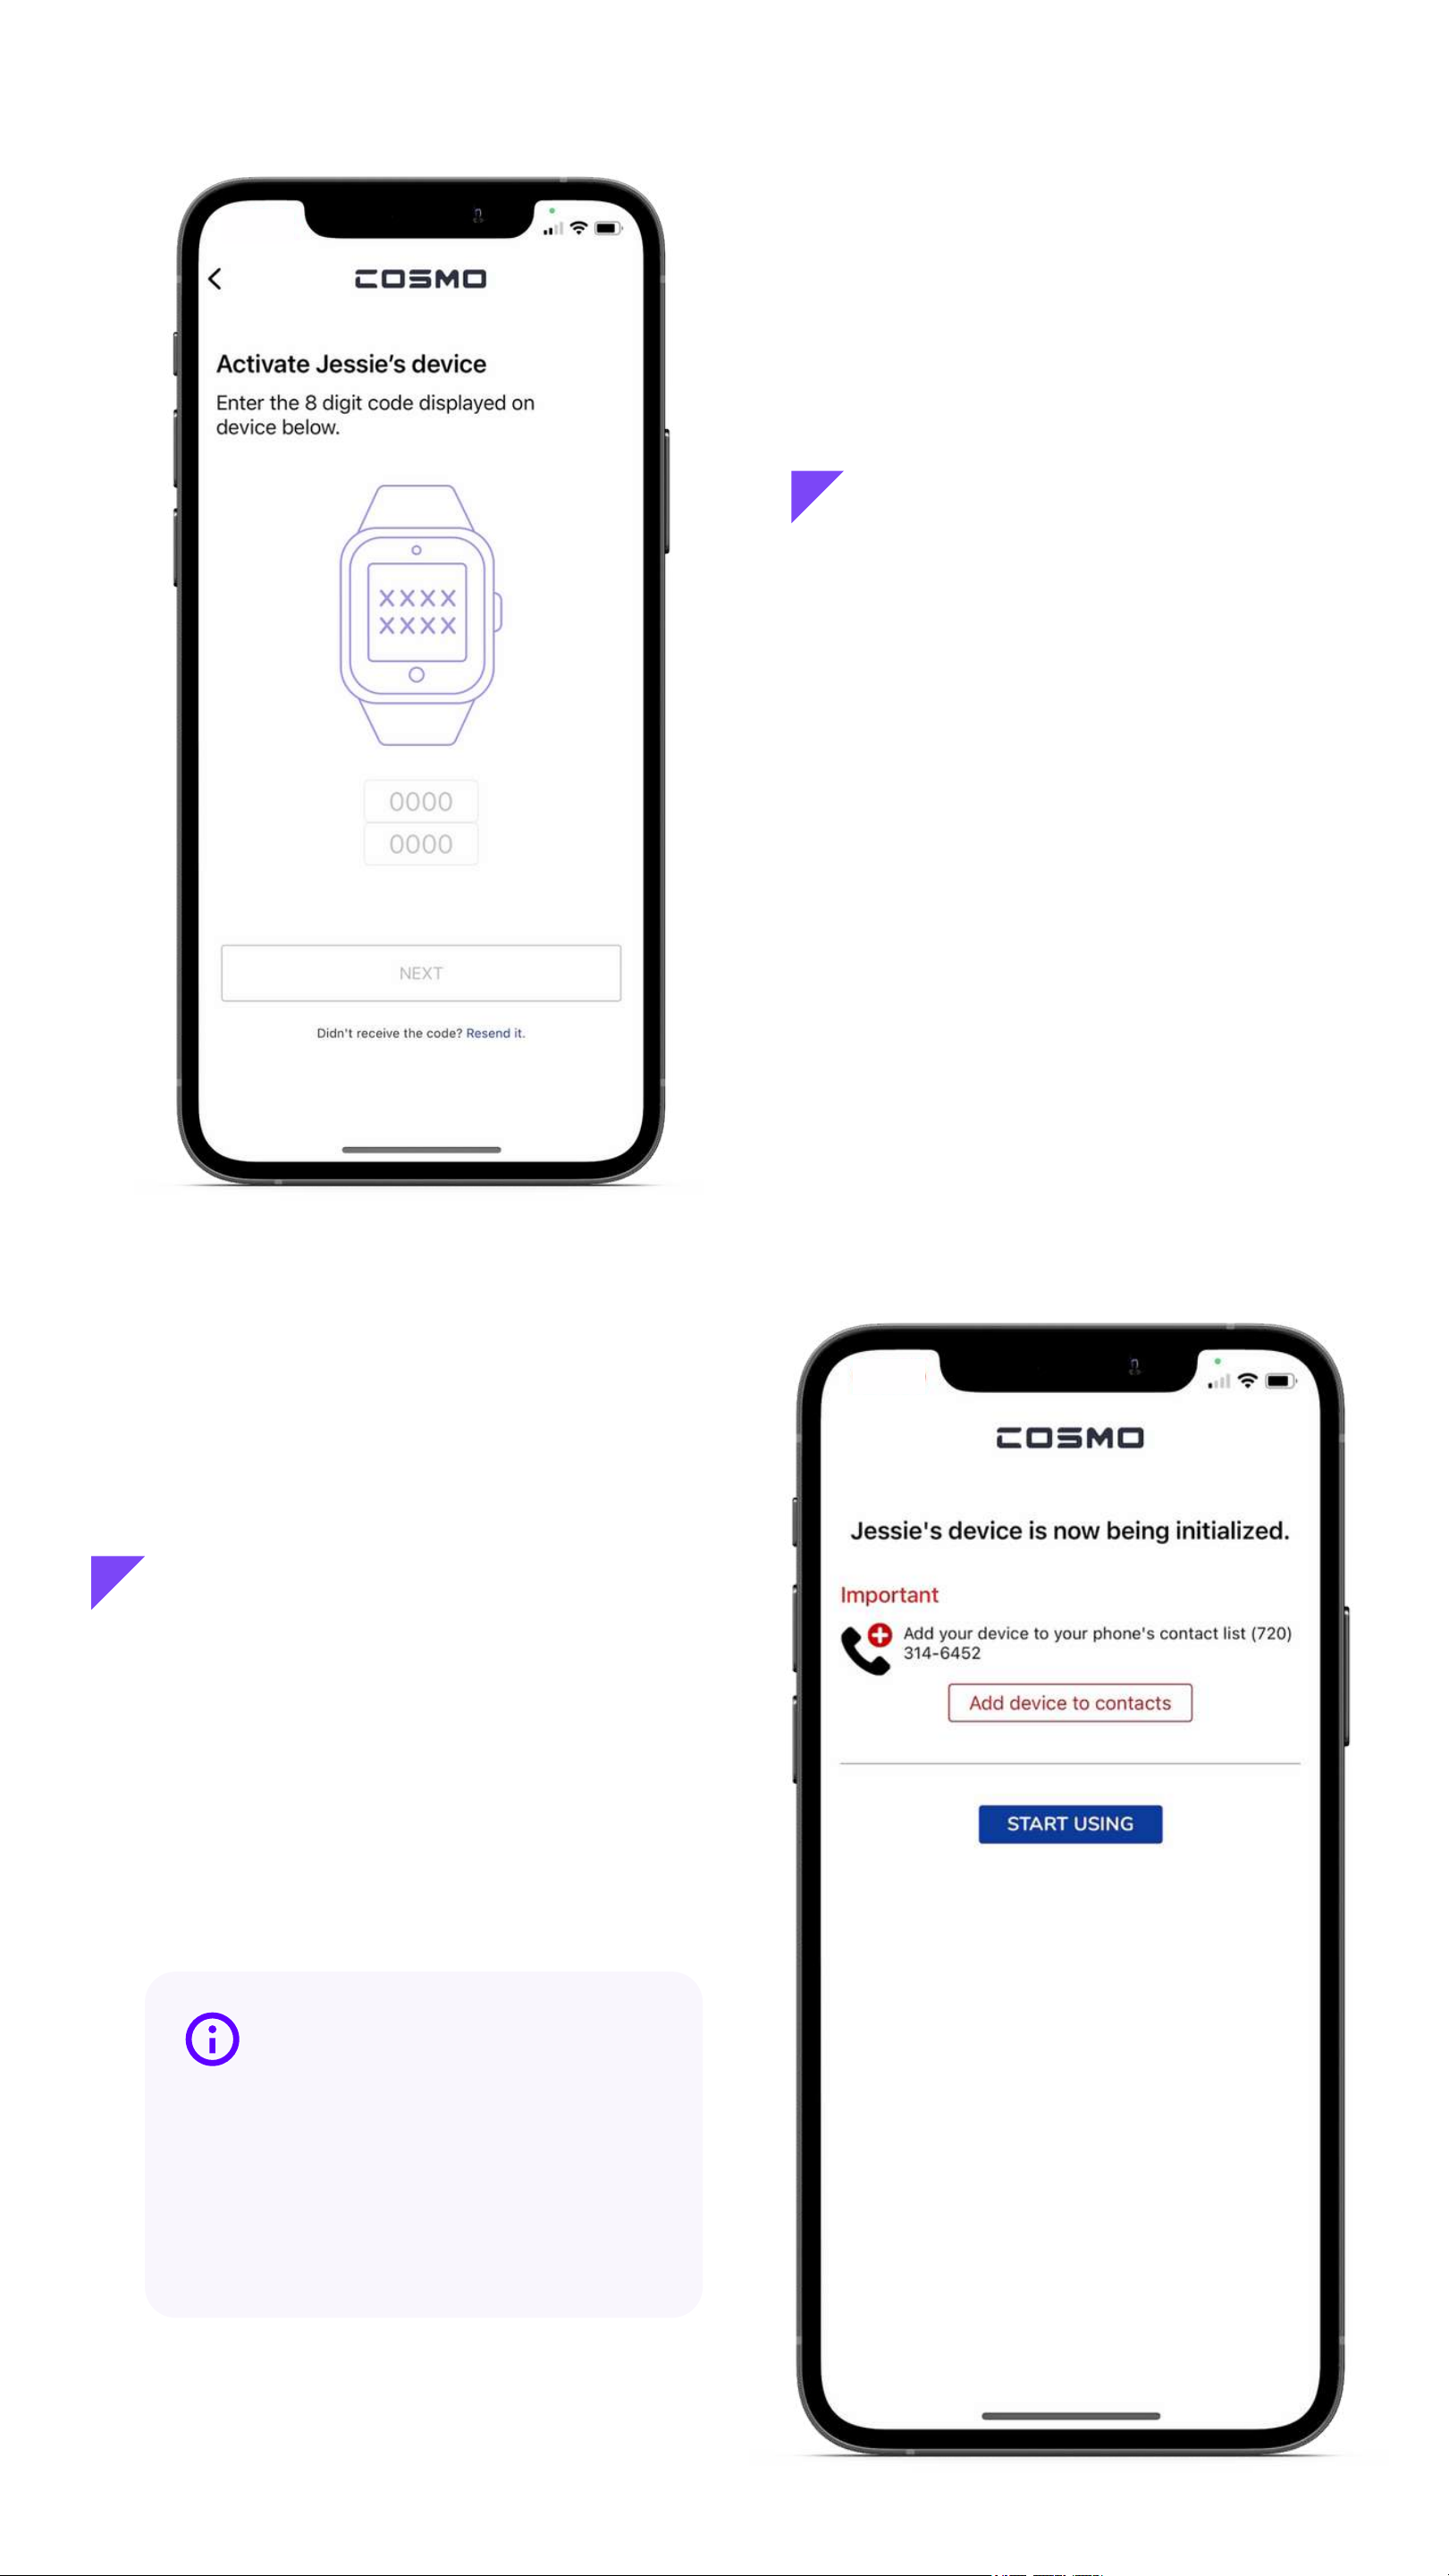
Enter the 8-digit code
displayed on your
device, then tap "Next"
You're all set! It may up to
24 hours for data to be fully
activated.
Save the device to your
contacts for easier and
faster calling.
Enter the code
Add to contacts
12
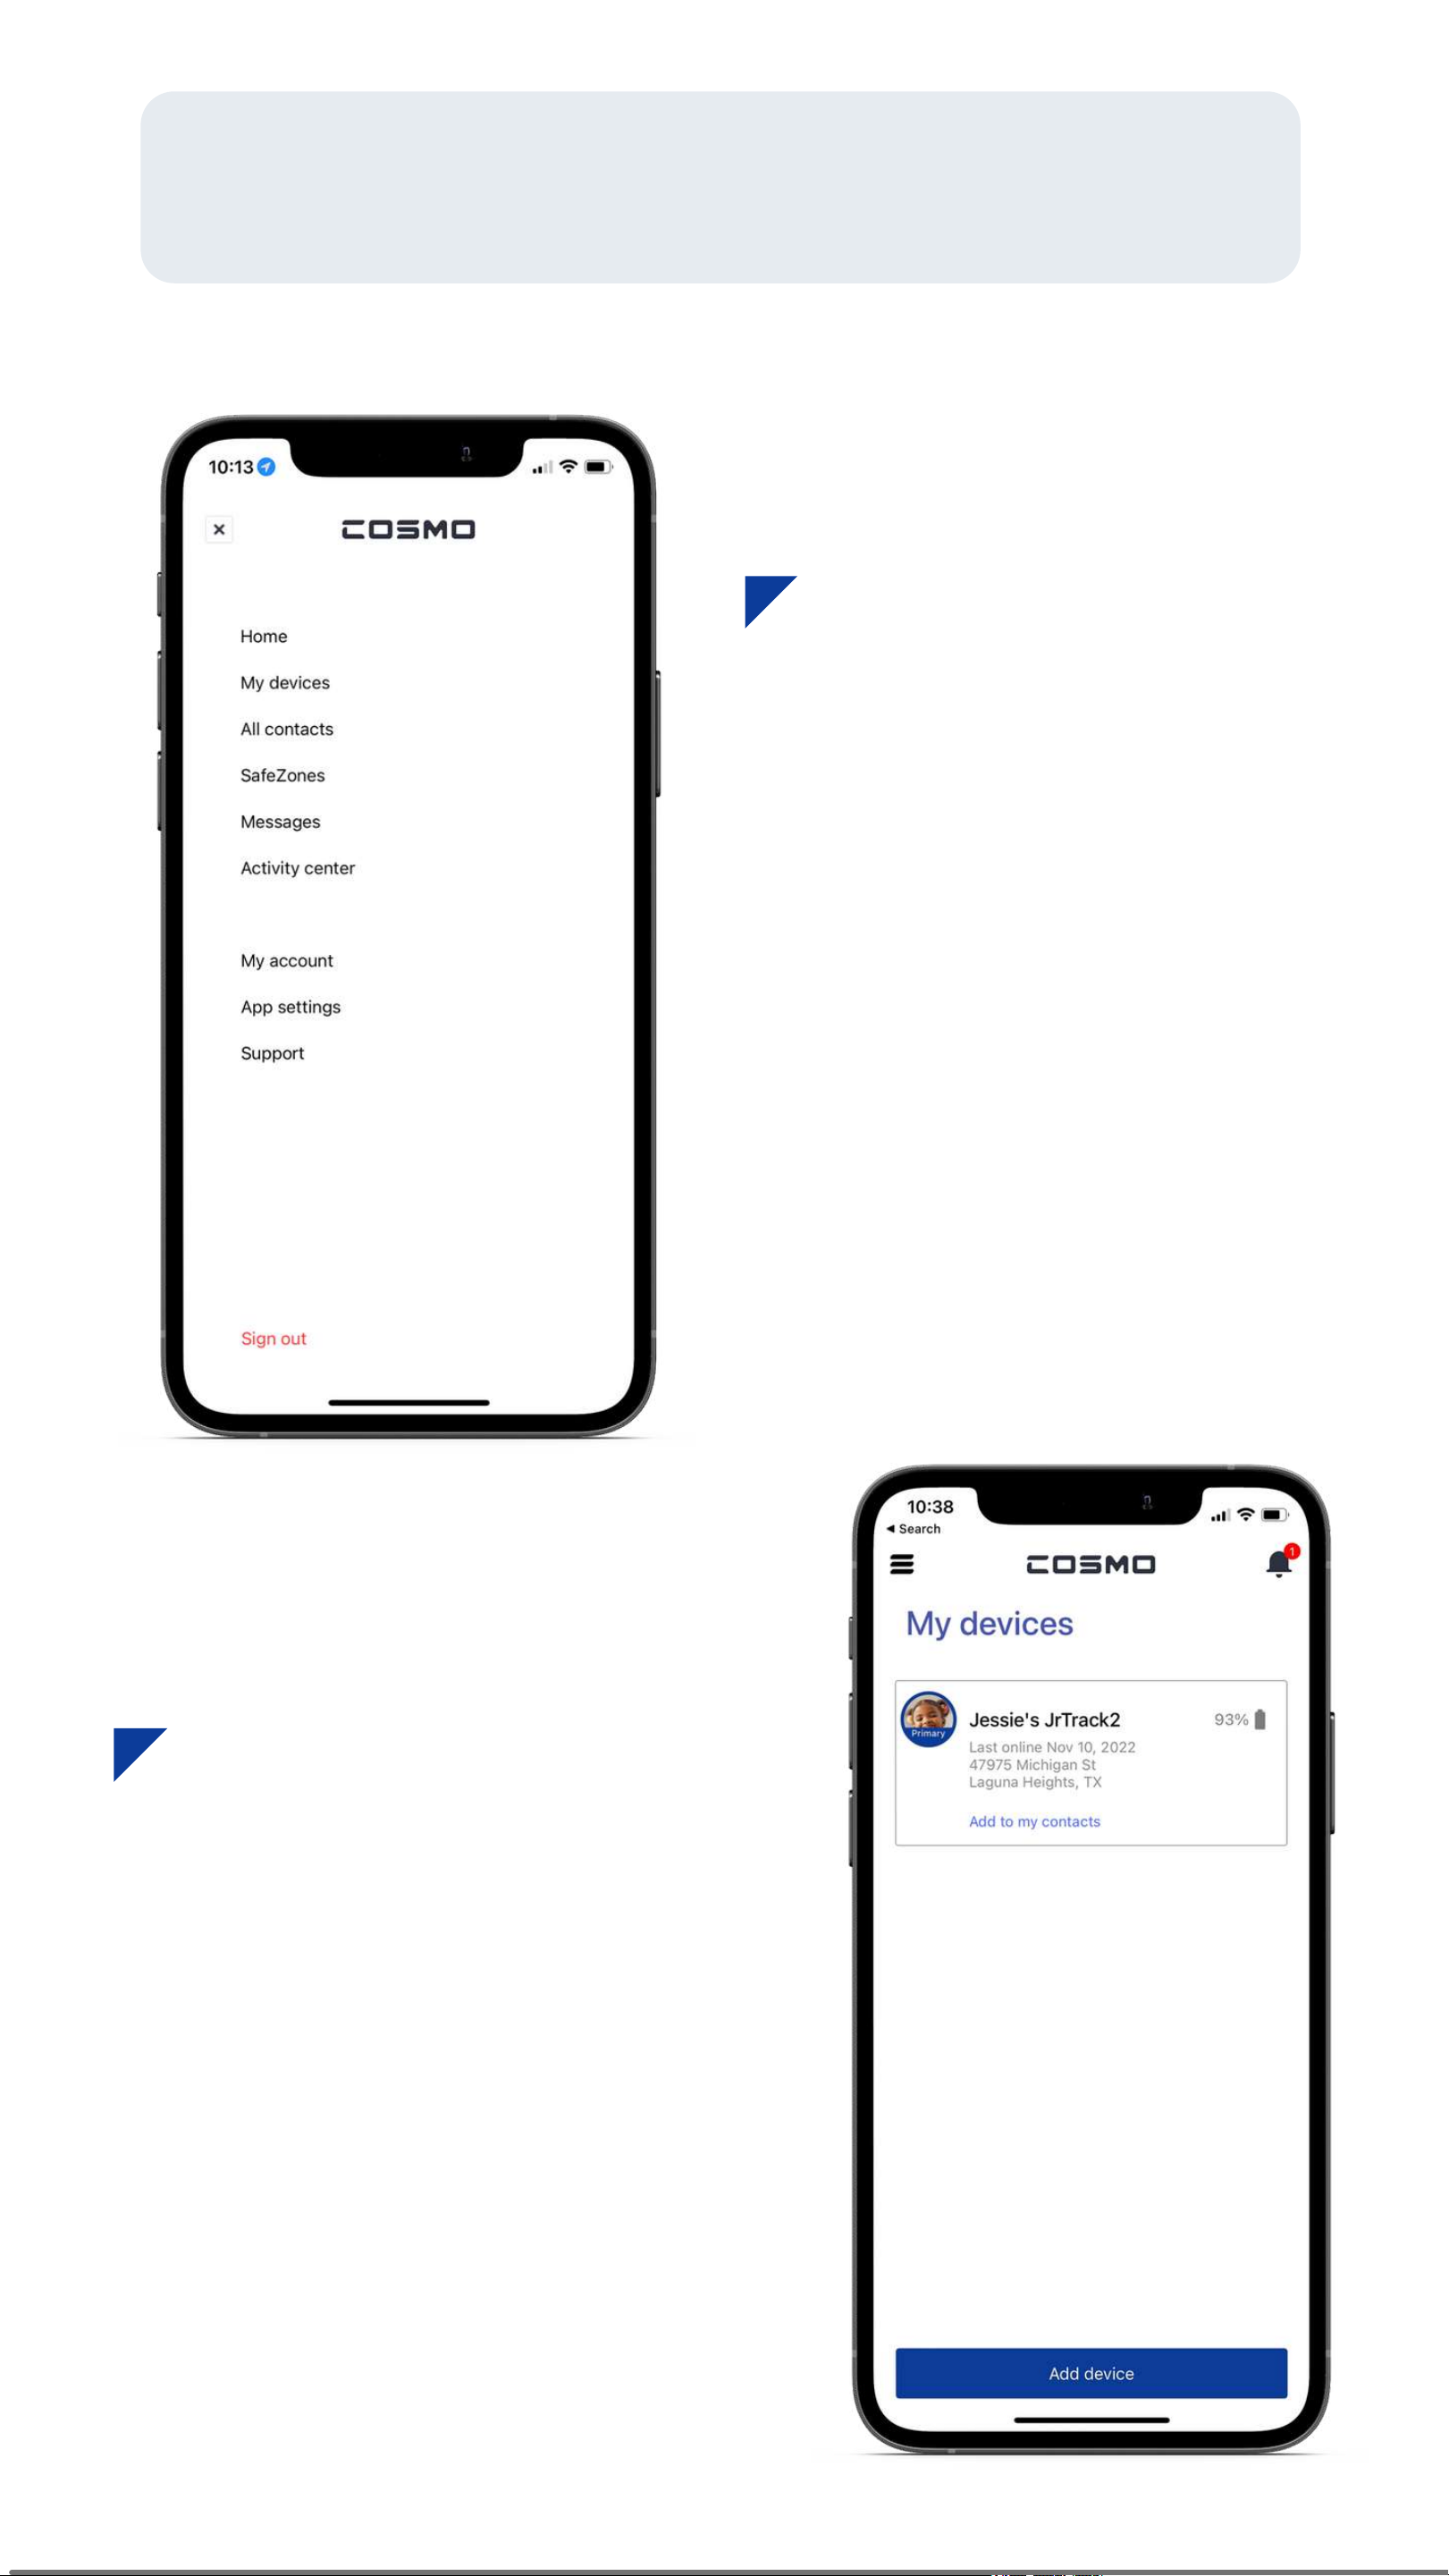
Tip

Tap the icon in the
upper left corner to
access the main menu.
The main menu is your
starting point to access
all of the main features
of the COSMO: Mission
Control app.
The main menu includes:
- My Devices
- All contacts
- Safe Zones
- Messages
- Activity Center
- Account
- App settings
- Support
Menu & Navigation Overview
Menu & Navigation 13
Main menu
(where you can check location and
adjust device-specific settings)
(for features like Pedometer,
School Mode, and Reminders)
From this screen, you can see
an overview of device info and
status.
Here you can also add a
device to your contacts, or pair
with another device.
To view & customize
settings for each JrTrack
device, start by tapping
on "My Devices" from the
main menu and then
choosing a device.
Device Data & Settings
14

To access the data and
settings menu for your watch,
tap the gear icon found
in the status bar.
This is the data & settings
menu for the selected
device. Here you can access
location & call history,
customize pre-set messages,
and access your child's
profile & device settings.
Data & settings
15
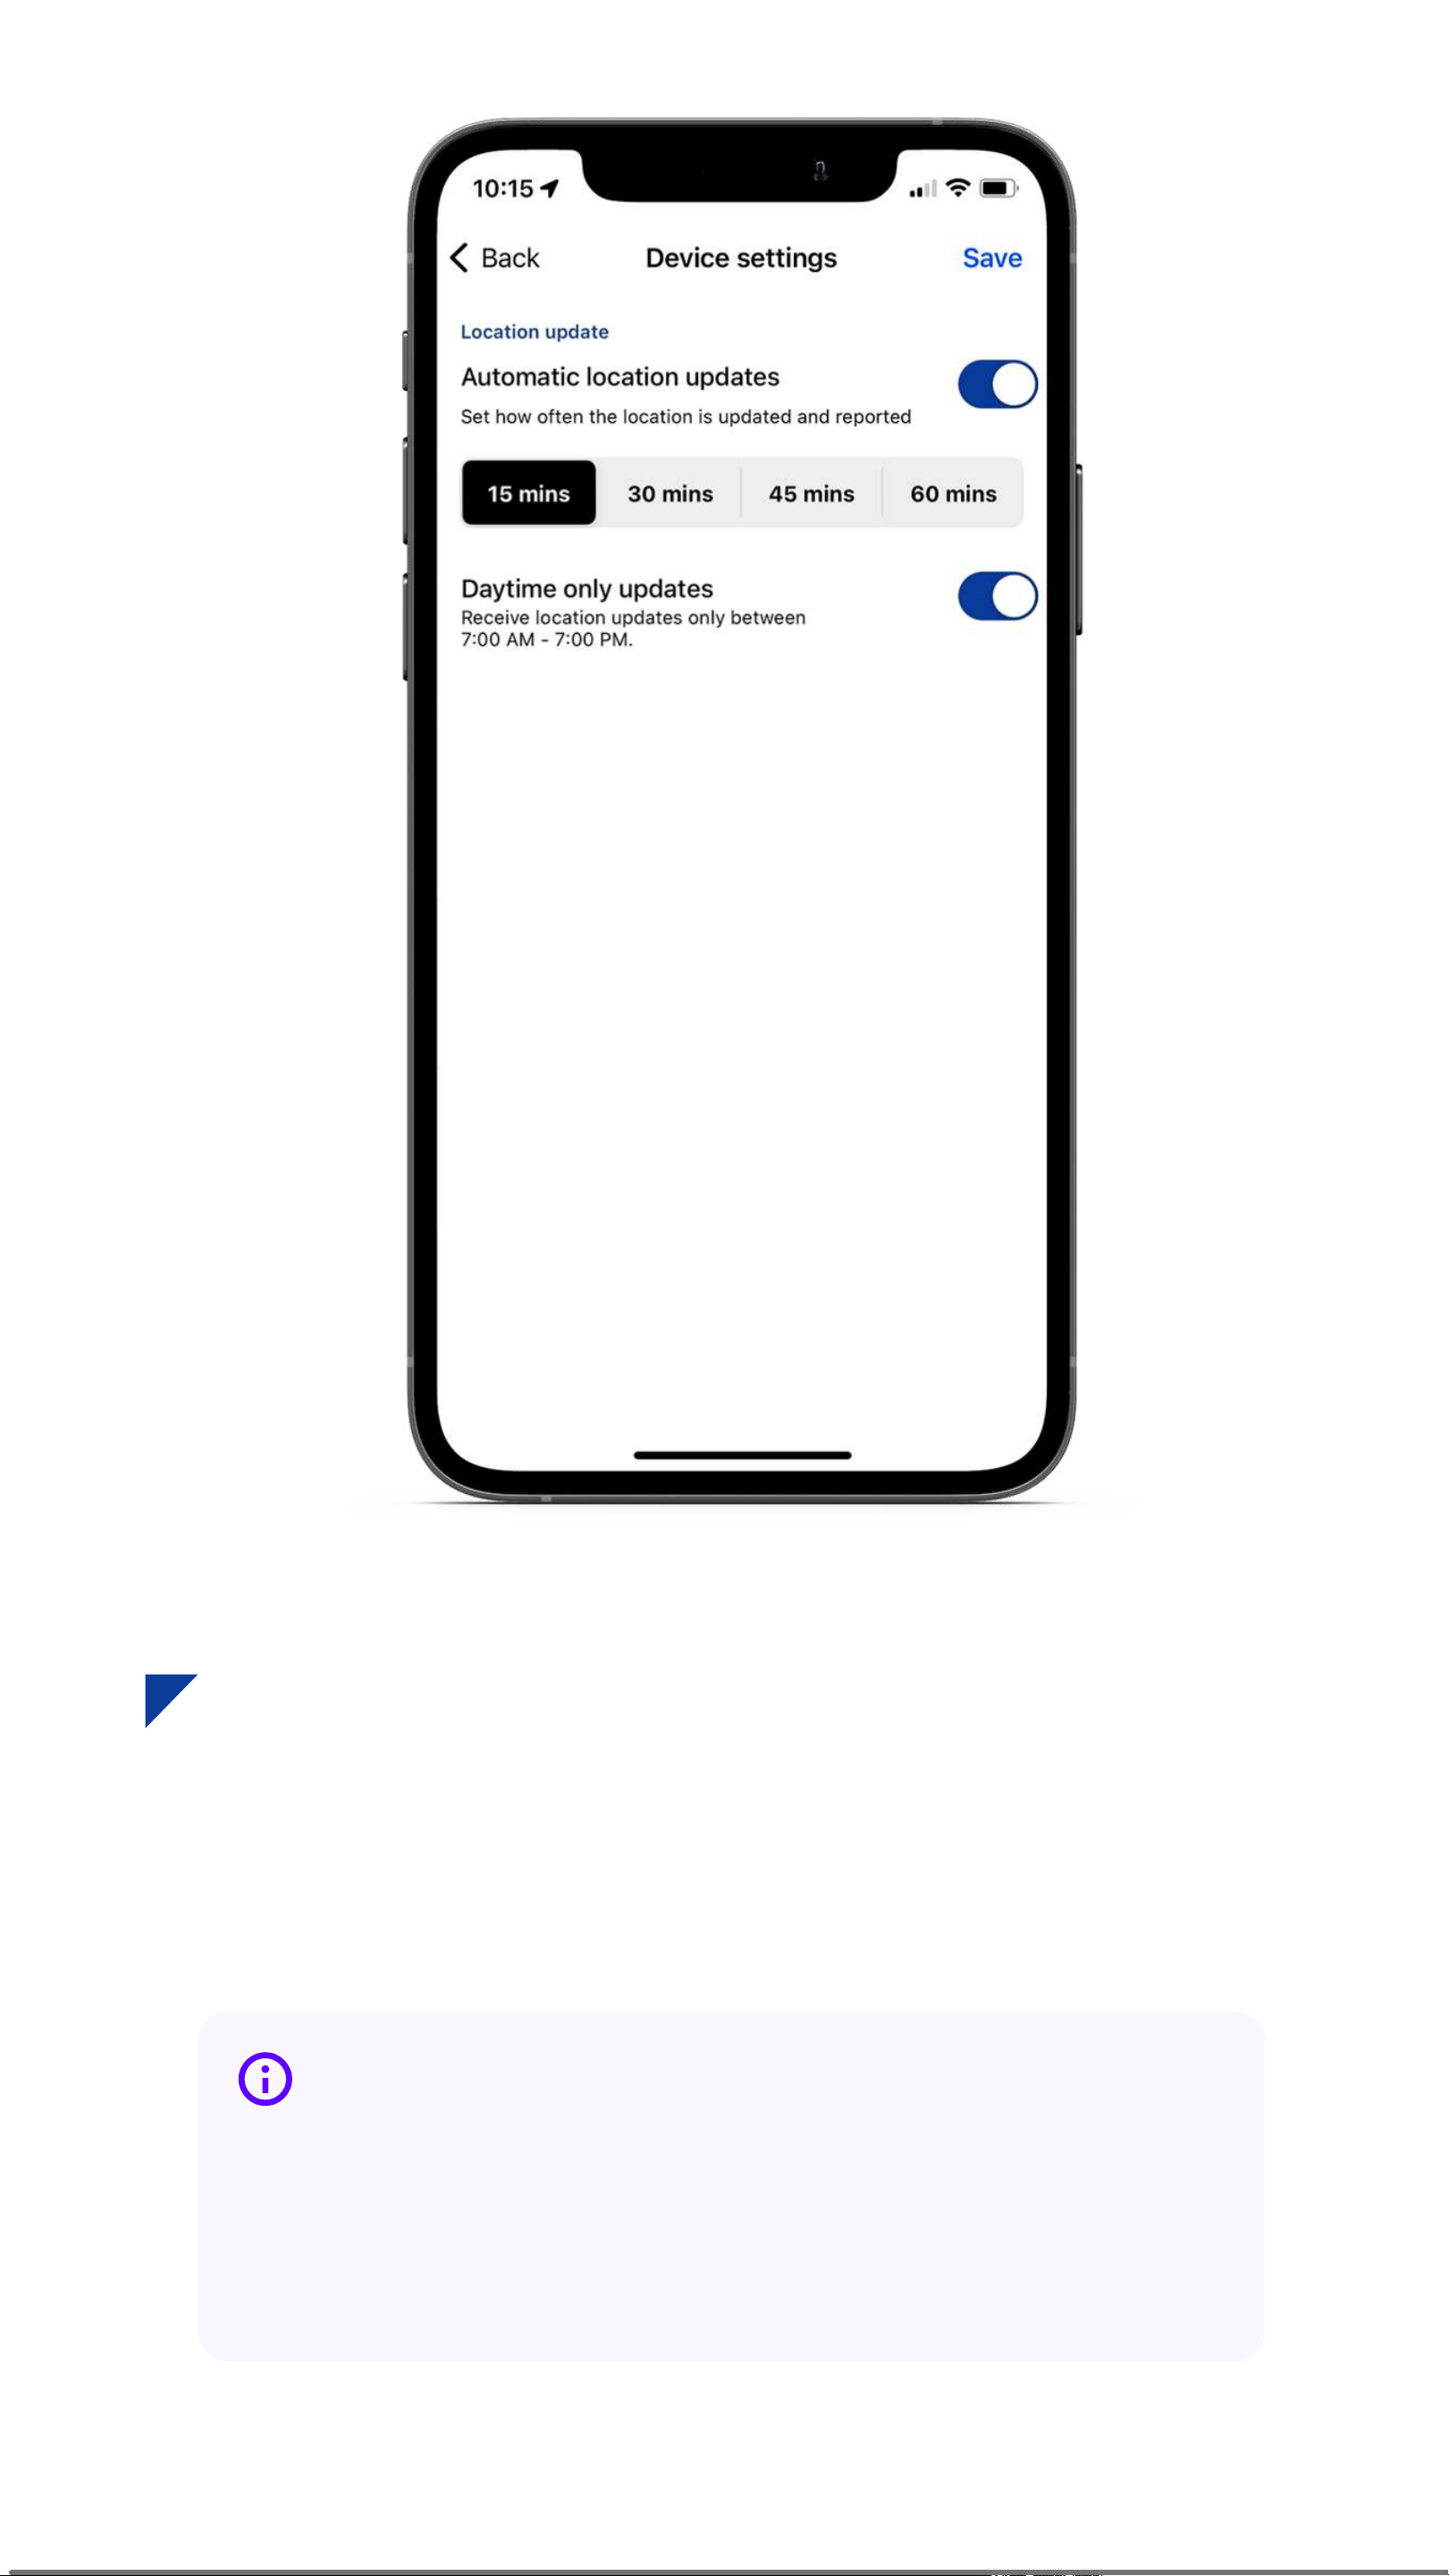
Here you can set how often location is updated, when
the tracking period is active.
UNPAIR DEVICE
16
Device settings
More frequent location tracking will drain the
battery more quickly. To maximize battery life,
consider reducing tracking frequency.
Tip
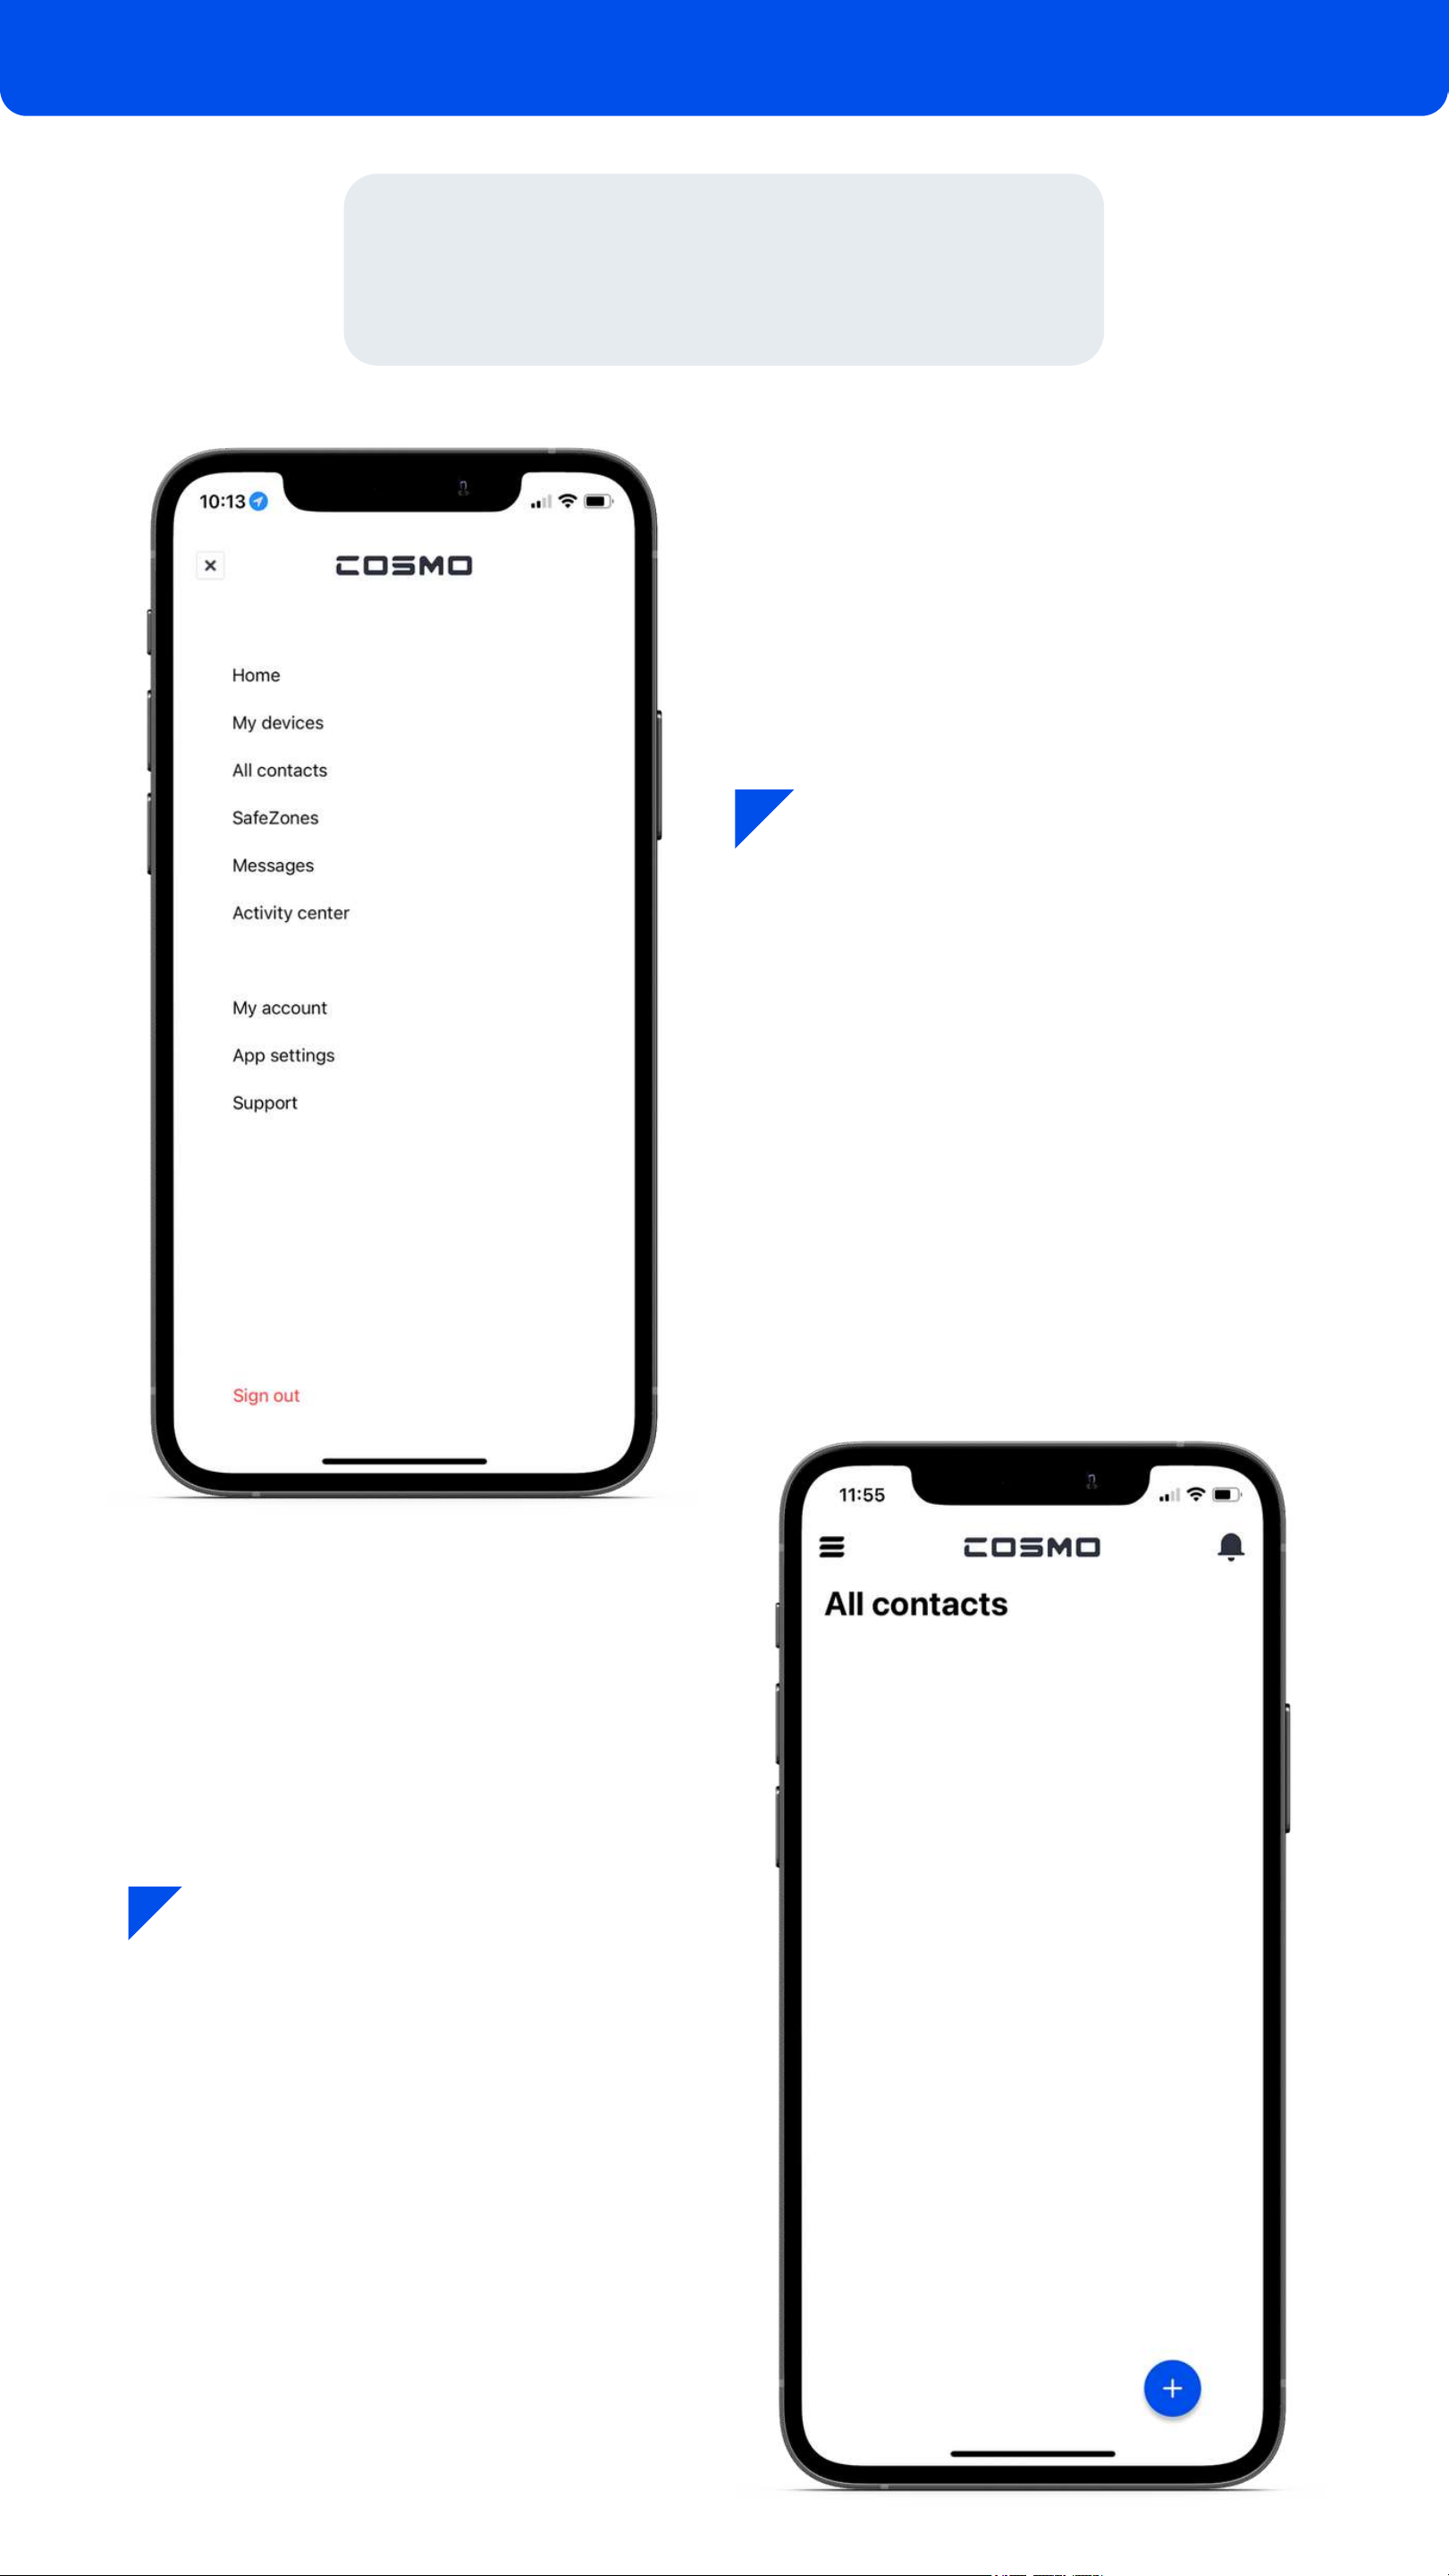
Tap the "plus" button in
the bottom right corner.
Select "All Contacts"
from the main menu.
Add Contacts
App Functions 17

There are two contact types:
Contact: Can only make and
receive calls.
Guardian: Can make and
receive calls, send and
receive messages, and track
location.
Simply add the new contact's
info and toggle whether this
will appear as a new contact
on your child's watch or not.
Tap "Save" when finished.
To add a Guardian, you'll
need to send an invite. Under
account type, select Guardian.
Add the Guardian's name,
phone number, and email.
Tap the check mark to save
the info & send the invite.
Guardian invite
18

In the Guardian's email inbox,
look for an email from
Follow the instructions in the
email by having the Guardian
download the COSMO:
Mission Control app, and
create an account.
Once the Guardian has
downloaded the app and
created an account, they will
need to go to "My Devices" an
then tap 'Confirm' to accept
the invitation.
Now they're set up, and can
call, send messages, check
location, and more!
19
You cannot grant individual
permissions to guardians. They
can access location, call, and
text. You can not turn off just one
of those items. You can always
remove a guardian's access.
Note
Grandpa invited you to be a guardian for:
Jessie

Send custom or pre-set texts,
voice messages, and photos!
Tap Messages in the
main menu.
Messaging 20
JrTrack can type out it's
own messages, but
setting preset messages
of commonly sent
phrases makes texting
quicker and easier from
the watch.
Tip
Other manuals for JrTrack 2
2
This manual suits for next models
1
Table of contents
Other Cosmo Watch manuals


