Costco W18A7211 Manual

ITM. / ART. 2322017
Model # : W18A7211
CARE AND USE INSTRUCTIONS
IMPORTANT, RETAIN FOR FUTURE REFERENCE: READ CAREFULLY
관리 및사용 설명서
중요, 추후 참고를 위해 보관하십시오: 주의 깊게 읽으십시오.
INSTRUCCIONES DE MANTENIMIENTO Y USO
IMPORTANTE: CONSERVE PARA FUTURA REFERENCIA. LEA CUIDADOSAMENTE
IMPORTANT NOTES:
Caution: Do not install this product over any planting beds with dried materials (mulch, etc).
To allow each battery to reach full capacity, pull out the plastic tab and place in full sunlight for the first 12 hours. Failure
to do so can shorten the life of the battery or operation of the light.
To protect the glass from damage, do not use force on the glass and hold only the metal parts to connect together. Keep
the glass in the packaging until you need to install it.
Customer Service 844-967-3355 (English/French language services) from 10 am to 8 pm Eastern time Monday to Friday.
You can also get support at www.GXGlobalservice.com.
중요 참고사항:
주의: 본제품을 전건재(뿌리덮개 등)가있는 간이 텃밭(planting bed)에설치하지 마십시오.
각배터리를 전면 가동하게 하려면, 플라스틱 탭을 꺼내 처음 12 시간 동안은 강한 햇볕이 내리쬐는 곳에 두십시오. 이
과정을 생략하면 배터리 수명이단축되거나 조명 사용 시간이 짧아질 수있습니다.
유리 손상을 방지하려면 유리에 힘을 가하지 말고 금속 부분만 잡고 부품들을 연결하십시오. 또한, 유리를 설치해야 할
순서가 될때까지 포장된 상태로 두십시오.
고객 서비스는 1-844-967-3355(월~금오전 10시~오후 8시, 동부표준시, 영어/프랑스어 지원)로연락하십시오.
www.GXGlobalservice.com에서도 고객 지원을 받으실 수있습니다.
NOTAS IMPORTANTES:
Precaución: No instale este artículo en plantaciones de productos secos (mantillo, etc.).
Para permitir que cada pila alcance su capacidad total, tire de la lengüeta de plástico y coloque la lámpara bajo la luz
solar directa durante las primeras 12 horas. De no hacerlo así, la duración de la pila o el funcionamiento de la lámpara
acortarse.
Para proteger el cristal de cualquier daño, no utilice fuerza y sujete solamente las partes de metal para ensamblarlas.
Mantenga el cristal en el hasta que necesite instalarlo.
Servicio al cliente: 844-967-3355 (servicio en inglés y francés), de 10 am a 8 pm (hora del Este, E.U.A.). También puede
obtener ayuda en www.GXGlobalservice.com.
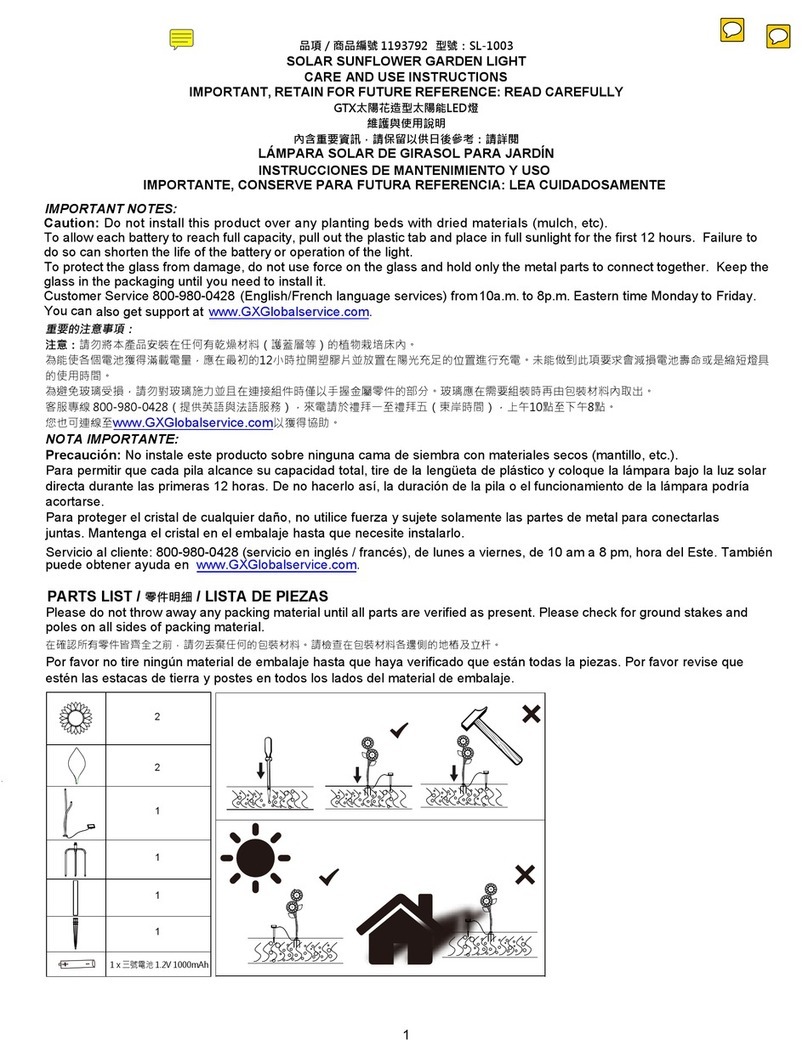
PARTS LIST / 부품 목록 / LISTA DE PIEZAS
Please do not throw away any packing material until all parts are verified as present. Please check for accessories on all
sides of packing material.
모든 부품이 확인되기 전까지는 포장 재료를 버리지 마십시오. 남아 있는 부속품이 없는지 포장 재료를 꼼꼼히
살펴보십시오.
Por favor, no tire ningún material de embalaje hasta que haya verificado que todas las piezas estén incluidas. Revise por
ambos lados del material de embalaje.
1

ASSEMBLY / 조립 방법 / ENSAMBLAJE
BATTERY INFORMATION / 배터리 정보 / INFORMACIÓN SOBRE LAS PILAS
INSTALLATION / REPLACEMENT INSTRUCTIONS
BATTERY WARNINGS
•Do not use alkaline, standard (carbon-zinc) or NiCd (nickel cadmium) batteries in GTX solar lights.
•Only use AA 1.2V 1300mAh NiMh rechargeable batteries (product includes 4 NiMh rechargeable batteries).
•Do not mix battery types. Only use NiMh batteries.
•Battery performance is affected by weather and temperature.
•Please expect REDUCED performance in adverse conditions of cold, extreme cold, extreme heat plus humidity and
dampness.
•Do not open, short circuit or mutilate batteries as injury may occur. Batteries must be recycled or disposed of
properly.
•Replace all batteries of a set at the same time.
•Clean the battery contacts prior to battery installation.
•Ensure the batteries are installed correctly with regard to polarity (+ and -).
•Remove batteries from equipment that will not be used for an extended period of time.
•Remove used batteries promptly.
SUGGESTIONS
•Rechargeable batteries need to be charged for approximately 12 hours before using to perform correctly.
•Our batteries come pre-charged but some discharge may happen during storage or transit.
•Less than full sunlight during the day charges the batteries less. On cloudy days or rainy days it may take several
days for the batteries to fully charge.
WINTERTIME TIPS
It is recommended that solar lights are not used in freezing conditions. Monitor weather and take solar items indoor for
storage as needed. Keep snow or other buildup off the solar panels so that the batteries are able to recharge.
TROUBLESHOOTING
If solar lights fail to come on:
1. Check to be sure there are no obstructions over the photocell located on the top of solar panel.
2. Check to make sure that the batteries are installed correctly and there is nothing blocking the battery terminals
from making contact.
2

3. Check to make sure the photocell is positioned to sense both daylight and night phase. If bright lights shine near
or into the photocell, these lights may trigger the light sensor and the lights may turn off. Bright lights can have
the same effect as sunlight and keep the system from starting.
4. Batteries may need to be changed and vary by use, temperature, weather conditions and heat. Replace batteries
with the exact same type of rechargeable batteries.
5. Make sure the batteries are fully charged. It is important to charge the batteries for 12 hours in full sun before
usage. Cloudy or rainy days may require a longer charging time.
6. In some cases, you may have to open the battery compartment and "seat" the batteries correctly between metal
clips as some dislodging may occur during the shipment, ensuring correct polarity (+) and (-).
설치 / 교체 안내
배터리 관련 경고
•GTX 솔라라이트에 알칼리, 일반(탄소-아연) 또는 NiCd(니켈 카드뮴) 배터리를 사용하지 마십시오.
•AA 1.2V 1300mAh NiMh(니켈 수소) 충전지만 사용하십시오(본제품에는 NiMh 충전지 4개가 포함되어 있습니다).
•배터리 유형을 섞어서 사용하지 말고 NiMh 배터리만 사용하십시오.
•배터리 성능은 날씨와 기온에 영향을 받습니다.
•추운 날씨, 혹한, 매우 고온 다습한 기후 등악천후 조건에서는 배터리 성능이 저하됩니다.
•배터리를 뜯거나, 합선시키거나 훼손하게 될경우 부상의 위험이 있으므로 하지 마십시오. 배터리는 반드시
재활용하거나 올바르게 폐기하십시오.
•용도에 맞게 항상 올바른 크기와 등급의 배터리를 구입하십시오.
•한세트에 들어있는 배터리를 교체할 때는 모든 배터리를 동시에 교체하십시오.
•배터리를 삽입하기 전에 배터리와 제품의 연결부를 청소하십시오.
•극성(+ 및-)에맞게 배터리를 올바르게 삽입했는지 확인하십시오.
•장시간 사용하지 않을 경우 제품에서 배터리를 뺀후보관하십시오.
•다사용한 배터리는 즉시 교체하십시오.
제안 사항
•충전지가 성능을 제대로 발휘하려면 사용 전약12 시간 동안 충전해야 합니다.
•제공된 배터리는 미리 충전을 하였지만 보관 또는 유통 중에 방전될 수있습니다.
•햇빛이 충분히 들지 않는 날에는 배터리 충전 시간이길어집니다. 흐린 날이나 비가 오는 날에는 배터리가
완전히 충전될 때까지 며칠이 걸릴 수있습니다.
겨울철 팁
영하의 날씨에서 솔라라이트 사용은 권장하지 않습니다. 날씨를 모니터링하고 필요에 따라 솔라 제품을 보관하십시오.
배터리를 원활하게 재충전하려면 눈이나 다른 물질이 솔라 패널에 쌓이지 않도록 하십시오.
문제 해결
솔라라이트에 전원이 들어오지 않는다면 아래 지침을 참고하십시오.
1. 솔라 패널 상단에 있는 광전지에 장애물이 없는지 확인하십시오.
2. 배터리가 제대로 삽입되었는지, 배터리 단자에 이물질이 있어 연결을 방해하는지 확인하십시오.
3. 광전지가 주간 및야간 단계 모두 감지할 수있도록 배치됐는지 확인하십시오. 밝은 빛이 광전지 주변을
비추거나 광전지에 직접적으로 비추게 되면 센서가 작동될 수있고 조명이 꺼질 수있습니다. 밝은 빛은 햇빛과
같은 역할을 하여 시스템이 작동하지 않을 수있습니다.
4. 배터리는 용도, 기온, 날씨, 열기 등에 따라 교체해야 할수있습니다. 충전지와 동일한 유형의 배터리로
교체하십시오.
5. 배터리가 완전히 충전된 상태인지 확인하십시오. 배터리를 사용하기 전햇볕에 12 시간 동안 충분히 두어야
합니다. 흐리거나 비가 오는 날에는 충전 시간이 더길어질 수있습니다.
6. 간혹 수송 중배터리가 제자리에서 벗어나게 되는 경우가 생길 수있으며, 이런 경우 양극(+)과음극(-)이
올바르게 작용하는지 확인하기 위해 배터리함을 열어 배터리를 금속제 클립에 정확하게 “놓는” 작업을 해야 할
수있습니다.
INSTRUCCIONES DE INSTALACIÓN / REEMPLAZO
PRECAUCIONES SOBRE LAS PILAS
•No utilice pilas alcalinas, estándar (carbón-zinc) o NiCd(níquel cadmio) en estas lámparas solares.
•Use solarmente pilas AA recargables de 1.2 V 1300mAh de NiMh (el producto incluye 4 pilas recargables de NiMh).
•No mezcle diferentes tipos de pilas. Utilice solamente pilas de NiMh.
•El rendimiento de la pila se ve afectado por clima y la temperatura.
•Tenga en cuenta que, el rendimiento se veráREDUCIDO en condiciones adversas como frio, frio extremo, calor
extremo y humedad.
3

•No abra, cortocircuite o mutile las pilas, ya que podría ocasionar daños. Debe desechar o reciclar las pilas de
manera adecuada.
•Reemplace todas las pilas al mismo tiempo.
•Limpie los contactos de las pilas y de las lámparas antes de su instalación.
•Asegúrese de que las pilas se hayan instalado correctamente en relación a la polaridad (+ y -).
•Retire las pilas del producto cuando no vaya a ser utilizado durante un largo periodo de tiempo.
•Retire lo antes posible las pilas gastadas.
SUGERENCIAS
•Las pilas recargables necesitan cargarse durante 12 horas antes de utilizarlas para que funcionen correctamente.
•Nuestras pilas ya vienen pre-cargadas, pero puede que se descarguen un poco durante su almacenamiento o envío.
•La falta de luz solar durante el día cargará en menor grado las pilas. En días nublados o lluviosos puede que tarden
varios días en cargarse las pilas.
CONSEJOS DURANTE EL INVIERNO
Se recomienda no utilizar las lámparas solares en condiciones de temperaturas de congelamiento. Monitoree el clima y
coloque las lámparas en el interior para almacenarlas si lo necesita. Evite la acumulación de nieve en los páneles solares
para que la(s) pila(s) pueda(n) recargarse.
SOLUCIÓN DE PROBLEMAS
Si no se enciende la lámpara solar:
1. Compruebe que no haya obstrucciones en la célula fotoeléctrica ubicada en la parte superior del panel solar.
2. Asegúrese que la(s) pila(s) esté(n) instalada(s) correctamente y que no haya nada que bloquee los terminales de
las pilas y eviten que hagan contacto.
3. Asegúrese que la célula fotoeléctrica esté ubicada de manera que perciba las fases de luz solar y nocturna. Si hay
luces brillantes cerca de la célula fotoeléctrica, estas luces pueden activar el sensor de iluminación y las luces
podrían apagarse. Las luces brillantes pueden parecer luz diurna y evitar que el sistema se inicie.
4. Puede que necesite reemplazar la(s) pila(s) por uso, temperatura, condiciones atmosféricas y calor. Reemplace las
pilas con exactamente el mismo tipo de pilas recargables.
5. Asegúrese que las pilas estén completamente cargadas. Es importante cargarlas durante 12 horas de luz solar
antes de ser utilizadas. Los días nublados o lluviosos pueden requerir más tiempo para cargar.
6. En algunos casos, puede que necesite abrir el compartimiento de las pilas y “asentar” las pilas correctamente entre
los clips de metal, ya que es probable que alguna se mueva de lugar durante la transportación, asegurando así la
correcta polaridad (+) y (-).
MADE IN CHINA / 제조국: 중국 / HECHO EN CHINA
4
Table of contents
Other Costco Outdoor Light manuals
Popular Outdoor Light manuals by other brands

Hubbell
Hubbell Kim Lighting KLV Series installation instructions

Spitzer LIGHTING
Spitzer LIGHTING WS15W3K installation manual

Haag-Streit
Haag-Streit BM 900 instruction manual

Philips
Philips Ecomoods 169108716 brochure

LIGMAN
LIGMAN ALD-30071 instruction manual

SLV Elektronik
SLV Elektronik ROX ACRYL POLE Series operating manual

Kichler Lighting
Kichler Lighting Brix 59123BKT installation instructions

MOOD
MOOD CHIC instruction manual

Philips
Philips SV16 Series Installation and operating instructions

Philips
Philips ecoMOODS 16916/93/16 user manual

Aurora
Aurora EN-HBD100MS quick start guide

Nordic D'Luxx
Nordic D'Luxx FLOWERPOT user manual