Costway MU10071 User manual


EN DE FR ES IT PL
Kid Drum Set
MU10071

Please read all instructions carefully and keep it for future reference.
WARNING
Attention: The Product is not suitable for the children under 3 years
Danger: Keep all small parts and packaging materials for this product away from babies and
children, otherwise they may pose a choking hazard.
General Warnings:
The product must be installed and used under the supervision of an adult.
Read through each step carefully and follow the proper order.
Remove all packaging, separate and count all parts and hardware.
Please ensure that all parts are correctly installed, incorrect installation can lead to a danger.
We recommend that, where possible, all items are assembled near to the area in which they will
be placed in use, to avoid moving the product unnecessarily once assembled.
Ensure a secure surface during construction, and place the product always on a flat, steady
and stable surface.
WARNING:
CHOKING HAZARD-Small parts.
Not for children under 3 years.
02

PARTS
1) Bass Drum
2) Bass Drum Heads
3) Bass Drum Hoops
4) Bass Drum Tension Rods
&Claw Hooks
5) Bass Drum Spur
6) Bass Drum Pedal
7) Floor Tom
8) Floor Tom Heads
9) Floor Tom Hoops
10) Floor Tension Rods
11) Floor Tom Legs
12) Tom 25,5cm
13) Tom 25,5cm Drum Head
14) Tom 25,5cm Hoops
15) Tom Tom Tension Rods
16) Tom Arm
17) Tom 20,5cm
18) Tom 20,5cm Drum Head
19) Tom 20,5cm Hoops
20) Snare Drum
21) Snare Drum Stand
22) Hi Hat Stand
23) 20,5cm Hi Hat Cymbal 1 Pair
24) 25,5cm Cymbal
25) Cymbal Holder
26) Drum Throne Base
27) Drum Throne Surface
28) Drum Key
29) Drum Stick
03

Step 1: Place the Bass Drum (1) flat on the floor
to attach the heads (2) and hoops (3). Place one
of the colored hoops (3) over the top of the drum
head so that the head is sandwiched between the
hoop and the shell. Bass tension rods (4) are
longer in length than floor tom rods and tom tom
rods. And you need to put a white washer on
them. Place them thru the claw hooks, then place
the claw hooks on the hoop (3) straight in line
with bass drum lug. Hand tighten the tension rod
with drum key (28) into the lug; repeat all the
way around the drum.
Step 2: Insert one bass drum spur (5) on each
side and push it fully into the leg bracket and
lightly tighten the wing nut on bass drum to stop
the leg from falling out; repeat the other spur on
the drum.
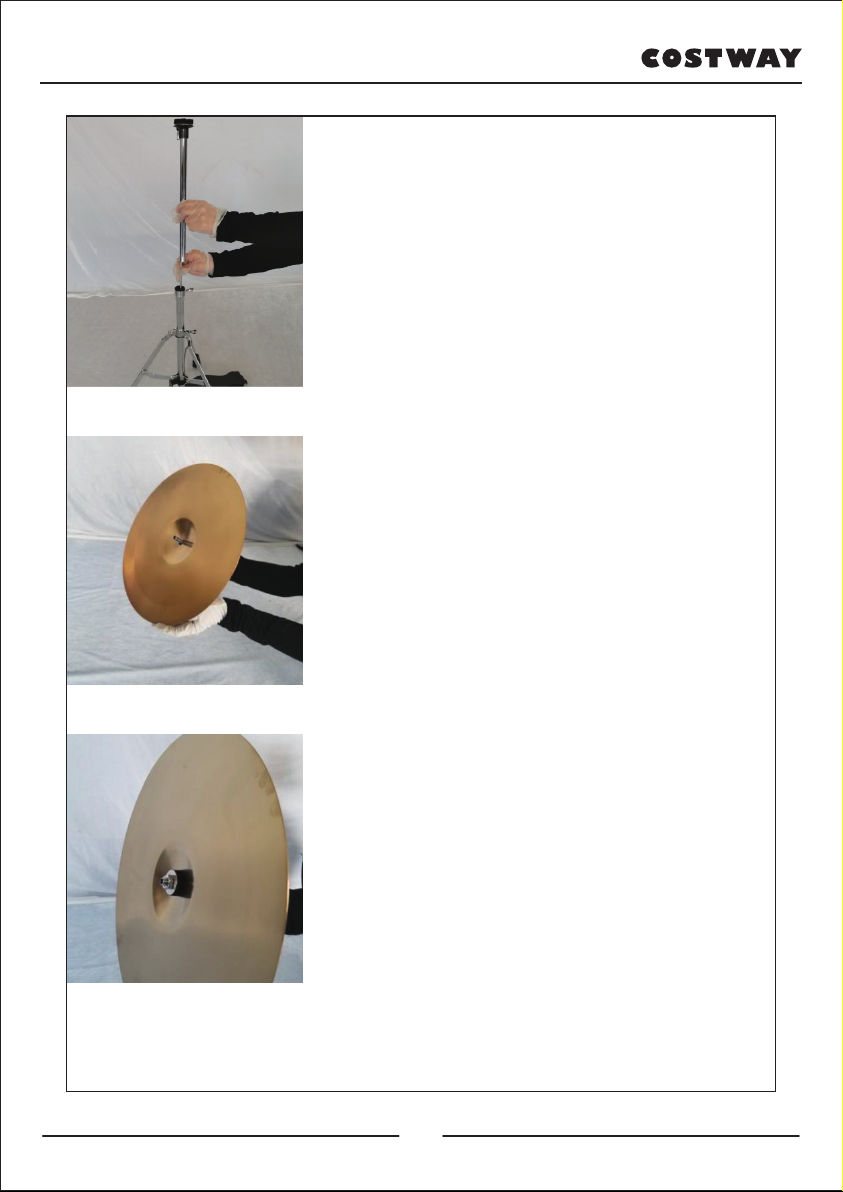
Step 3: Insert the cymbal holder (25) into the
hole. Tension the T-rod.
Fit the pedal (6) to the hoop by slipping it over
the trailing edge of the hoop and tightening the
wing nut that is underneath the footplate. The
beater should be pushed into the pedal and
tightened so that the beater strikes the drum head
near its centre.
04

Step 4: The tom arm (16) needs to be inserted
into the tom arm bracket which is on the top of
the bass drum.
Step 5: For the floor tom (7), please place the
black rim (9) on the head (8) of the drum, then
insert the tension rods (10) with drum key (28)
thru the holes of the rim and into the lugs on the
drum. Repeat above steps for tom toms
(12&17).
Step 6: With the floor tom sitting upside down,
insert the three floor tom legs (11) thru the
brackets and tighten them in using the T-handle.
05

Step 7: Expand the three legs of snare drum
stand (21). Adjust the height by tightening the
T-handle located at the middle of the snare
stand.
Step 8: When you place the snare drum (20) into
the stand, the basket will need to be tightened up
against the snare drum.
Step 9: For putting together the Hi Hat Stand
(22), begin by folding out the three legs located
on the bottom half of the stand (22). Once the
legs are touching the floor use the T-handle to
tighten them down for stability.
06

Step 10: Tighten the thin metal upper pull rod
into the base of the Hi Hat Stand. After you’ve
done this, place the upper tube over the top of
this pull rod and down into the base of the stand.
Simply tighten down the T-rod located at the top
of the case of the stand to hold the upper tube in
place.
Step 11: Now you’re ready to place the Hi Hat
cymbals (23) onto the Hi Hat stand. Remove the
bottom stop nut, metal washer and felt washer
from the Hi Hat clutch and insert the clutch thru
the top Hi Hat cymbal.
Step 12: Place the other felt thru the bottom of
the clutch and make it is in contact with the
bottom of cymbal. Then place the metal washer
provided onto the felt and tighten the stop nut
onto the clutch and against the washer.
07

Step 14: Insert the tom tom 25,5cm (12) by
sliding it onto the arm. If you are right handed
then it is normal practice for the toms to start
with the smallest on the left, working through to
the floor tom on the farthest right and the
reverse if you are left handed.
Step 15: Tom tom 20,5cm (17) same method
with above fitted on the other side.
Place the 25,5cm cymbal (24) on top of one of
the cymbal felts at the top of the stand, then
place the second felt on top of the cymbal.
Tighten down the wing screw at the top of the
stand.
Step 13: Slide the clutch back onto the pull rod.
The foot pedal should be depressed slightly
before the clutch wing nut is tightened so that
there is some space between the two cymbals
when you take
your foot off the pedal. The cymbals can now be
played with a stick whilst opening and closing
them with the foot pedal.
08

Step 16: Expand the drum throne base (26) on
the floor and tighten it with the T-handle. You
can change the location of the T-handle to
different holes when you need to adjust the
height.
Step 17: Put the drum throne surface (27) on the
drum throne base (26) you have just assembled
well. Tighten them with the T-handle and you
are ready to play!
09

Welcome to visit our website and purchase our quality products!
this product and giving us valuable feedbacks.
With yourinspiring rating, COSTWAY will be more consistent to offer you
EASY SHOPPING EXPERIENCE, GOODPRODUCTS and EFFICIENT SERVICE!
US office: Fontana, California
UK office: Ipswich
Reward Points
Exclusive Customer Service
Permanent Shopping Cart
Order History
10

Kindertrommel Kit
MU10071
Bitte geben Sie uns eine Chance,
es zu korrigieren und besser zu machen!
Wenden Sie sich zunächst an unseren freundlichen Kundendienst.
Ersatz für fehlende oder beschädigte Teile wird so schnell wie möglich versendet!
EN DE FR ES IT PL
11

Bitte lesen Sie alle Anweisungen sorgfältig durch und Bewahren Sie die Anweisungen zur
zukünftigen Verwendung auf.
Warnung!
Achtung: Das Produkt ist nicht geeignet für Kinder unter 3 Jahren.
Gefahr: Halten Sie alle kleinen Teile und Verpackungsmaterialien fern von Babys und Kindern, da
Erstickungsgefahr besteht.
Warnhinweise:
Das Produkt muss unter Aufsicht eines Erwachsenen installiert und verwendet werden.
Lesen Sie jeden Schritt sorgfältig durch und befolgen Sie die richtige Reihenfolge.
Entfernen Sie alle Verpackungen, separieren und zählen Sie alle Teile und Hardware vor der
Montage oder Verwendung.
Bitte beachten Sie darauf, alle Teile richtig anzubringen, eine falsche Montage kann zu einer
Gefährdung führen.
Wir empfehlen, wenn möglich, alle Artikel in der Nähe des Einsatzortes zu montieren, um eine
unnötige Bewegung der Artikel zu vermeiden.
Achten Sie auf einen sicheren Untergrund während des Aufbaus stellen, und stellen Sie das
Produkt immer auf eine glatte, flache und stabile Oberfläche.
ACHTUNG:
Nicht für Kinder unter 36 Monaten
geeignet. Enthält Kleinteile, die
verschluckt werden können.
( Erstickungsgefahr!)
Senden Sie diesen Artikel NICHT zurück.
Wenden Sie sich zunächst an unseren freundlichen Kundendienst.
Vor dem Beginnen
12

Teileliste
1) Basstrommel
2) Basstrommelkopf
3) Ring von Basstrommel
4) Vierkantschraube & Klauenhaken
5) Bein von Basstrommel
6) Pedal von Basstrommel
7) Bodentrommel
8) Bodentrommelkopf
9) Ring von Bodentrommel
10) Zymbalhalter
11) Bein von Bodentrommel
12) Tom-Trommel 25,5cm
13) Tom-Trommelkopf
14) Ring von Tom-Trommel
15 Zugstangen
16 Tom-Halter
17 Tom-Trommel 20,5cm
18 Tom-Trommelkopf
19 Ring von Tom-Trommel
20 Kleine Trommel
21 Halter von Kleinen Trommel
22 Zymbalhalter
23 20,5cm Zymbal ein Paar
24 25,5cm Zymbal
25 Zymbalhalter
26 Sitzbeine
27 Sitzplatte
28 Schlüssel
29 Trommelstock
13

1) Legen Sie die Basstrommel (1) flach auf den
Boden, um die Köpfe (2) und den Ring (3) zu
befestigen. Legen Sie einen der farbigen Ringe
(3) über die Oberseite des Trommelkopfs, so
dass der Kopf zwischen dem Reifen und der
Schale eingeklemmt ist. Zugstangen (4) sind
länger als Bodentomstangen und
Tomtomstangen. Und Sie müssen eine weiße
Unterlegscheibe auf sie setzen. Stecken Sie sie
durch die Klauenhaken und setzen Sie die
Klauenhaken gerade in einer Linie mit dem
Basstrommel -Ansatz auf den Ring (3). Ziehen
Sie die Zugstange mit dem Schlüssel (28) von
Hand in der Nase fest. Wiederholen Sie den
ganzen Weg um die Trommel.
2) Führen Sie auf jeder Seite ein Bein von
Basstrommel (5) ein, drücken Sie es vollständig
in die Beinhalterung und ziehen Sie die
Flügelmutter an der Basstrommel leicht an,
damit das Bein nicht herausfällt. Wiederholen
Sie die anderen Beine auf der Trommel.
3) Setzen Sie den Zymbalhalter (25) in das Loch
ein. Spannen Sie die T-Stange.
Setzen Sie das Pedal (6) in den Reifen ein,
indem Sie es über die Hinterkante des Reifens
schieben und die Flügelmutter unter der
Fußplatte festziehen. Der Schläger sollte in das
Pedal getreten und festgezogen werden, damit
der Schläger nahe seiner Mitte auf den
Trommelkopf trifft.
14

4) Der Tom-Halter (16) muss in die
Tom-Armhalterung oben auf der Bassdrum
eingesetzt werden.
5) Setzen Sie für den Bodentrommel (7) den
schwarzen Rand (9) auf den Kopf (8) der
Trommel und führen Sie die Zugstangen (10)
mit dem Trommelschlüssel (28) durch die
Löcher des Randes und in die Ösen ein die
Trommel. Wiederholen Sie die obigen Schritte
für Tom-Trommel (12 & 17).
6) Führen Sie die drei Bodentombeine (11) mit
dem Bodentom auf dem Kopf stehend durch die
Halterungen und ziehen Sie sie mit der
Flügelschraube fest.
15

7) Erweitern Sie die drei Beine von Halter von
Kleinen Trommel (21). Stellen Sie die Höhe ein,
indem Sie die Flügelschraube in der Mitte der
Halter von Kleinen Trommel festziehen.
8) Wenn Sie die Kleine Trommel (20) in den
Ständer stellen, muss der Korb gegen die Kleine
Trommel festgezogen werden.
9) Zum Zusammensetzen des Zymbalhalters
(22) klappen Sie zunächst die drei Beine in der
unteren Hälfte des Halfters (22) aus. Sobald die
Beine den Boden berühren, ziehen Sie sie mit
der Flügelschraube fest, um die Stabilität zu
gewährleisten.
16

10) Ziehen Sie die dünne obere Zugstange aus
Metall in der Basis des Zymbalhalters fest.
Nachdem Sie dies getan haben, platzieren Sie
das obere Rohr über der Oberseite dieser
Zugstange und unten in der Basis des Ständers.
Ziehen Sie einfach die T-Stange oben am
Gehäuse des Ständers fest, um das Oberrohr an
Ort und Stelle zu halten.
11) Jetzt können Sie das Zymbal (23) auf den
Zymbalhalter legen. Entfernen Sie die untere
Anschlagmutter, die Metallscheibe und die
Filzscheibe von der Zymbal und setzen Sie die
Kupplung durch das oberen Zymbal ein.
12) Legen Sie den anderen Filz durch die
Unterseite des Zymbals und stellen Sie sicher,
dass er mit der Unterseite des Zymbals in
Kontakt kommt. Setzen Sie dann die
mitgelieferte Metallscheibe auf den Filz und
ziehen Sie die Stoppmutter am Zymbal und
gegen die Unterlegscheibe an.
17

14) Setzen Sie den Tom-Trommel (12) ein,
indem Sie ihn auf den Tom-Halter schieben.
Wenn Sie Rechtshänder sind, beginnen die Toms
normalerweise mit dem kleinsten links und
arbeiten bis zum Bodentom ganz rechts und
umgekehrt, wenn Sie Linkshänder sind.
15) Tom-Trommel 20,5 cm (17) gleiche
Methode mit oben auf der anderen Seite
montiert. Legen Sie das 25,5 cm große Zymbal
(24) auf einen der Zymbalfilze oben auf dem
Ständer und legen Sie den zweiten Filz auf das
Zymbal. Ziehen Sie die Flügelschraube oben am
Ständer fest.
13) Schieben Sie das Zymbal zurück auf die
Zugstange. Das Fußpedal sollte leicht gedrückt
werden, bevor die Zymbal-Flügelmutter
angezogen wird, damit zwischen den beiden
Zymbals etwas Platz ist, wenn Sie den Fuß vom
Pedal nehmen. Die Zymbals können jetzt mit
einem Stock gespielt werden, während sie mit
dem Fußpedal geöffnet und geschlossen werden.
18

16) Erweitern Sie die Sitzbeine (26) auf dem
Boden und ziehen Sie sie mit der Flügelschraube
fest. Sie können die Position der Flügelschraube
in verschiedene Löcher ändern, wenn Sie die
Höhe anpassen müssen.
17) Legen Sie die Sitzplatte (27) auf die
Sitzbeine (26), die Sie gerade gut
zusammengebaut haben. Ziehen Sie sie mit der
Flügelschraube fest und Sie sind bereit zu
spielen!
19
This manual suits for next models
1
Table of contents
Languages:
Other Costway Drum manuals