Step5:
A ccording to the size of hook
key holes. Drill 3 holes in level
in the wall with 10mm in diameter
and 75~85mm in depth. Press
the 3 expanding tube provided
into the holes. Fix the hook using
the 5x50 metal screw provided.
Then insert three M5X50 screws
to A and B And C holes to fix the
hook on the wall steadily.
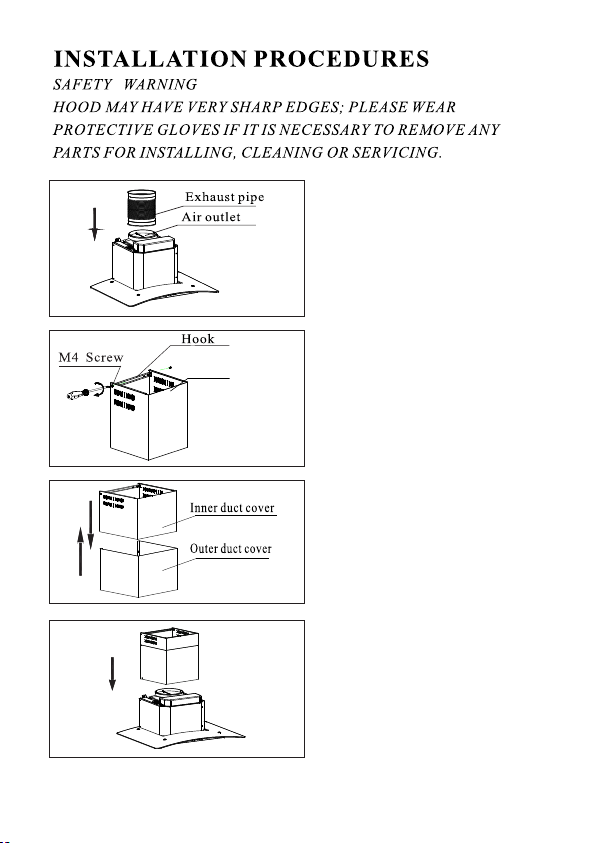
Step 6:
Hang the entire hood onto the
hook, ensure the hood is level
and vertical.
Step 7:
1. Draw the inner duct cover up to
the suitable height, mark on the
wall two keyhole of the outer duct
cover bracket with pen .
2. Put down the inner duct cover
gently, drill the keyholes in 7
5-85mm depth on the horizontal
level using 10mm drill.
3. Press the expanding tube provided
into the holes.
4. Matching the inner duct cover
with the holes, tighten the inner
duct cover with two 5x50 metal screw
provided.
Step 8:
Extend the air outlet of the exhaust
pipe out-of-door. Try to make the
end of the exhaust pipe is no more
than 120°.
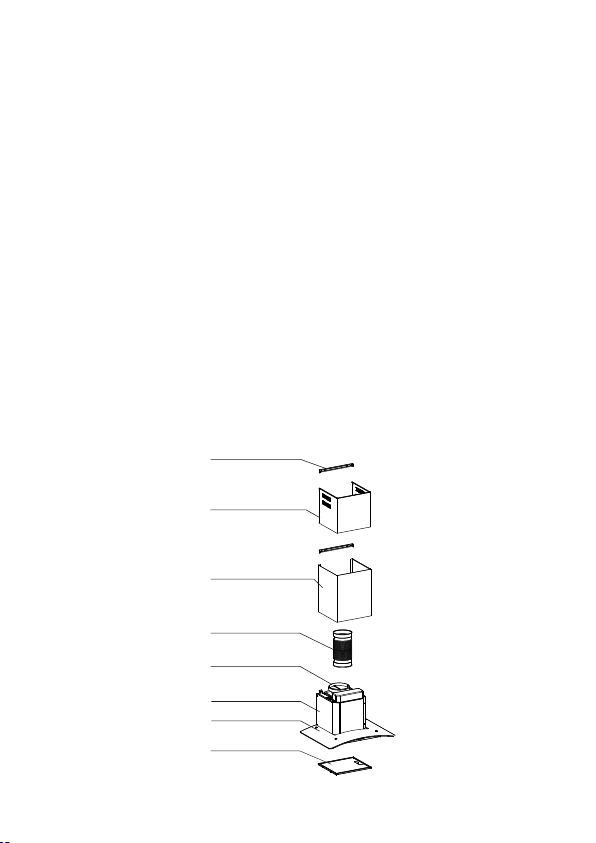
5x50
Metal Screw
Expanding Tube
5x50
Wood Screw
Expanding Tube
Metal Screw
5x50
Expanding Tube
Hook
A
B
20 0
36 7
C
3