Covox Voice Master User manual

USER MANUAL
FOR APPLE
II+,
IIe,
IIc
SOFTWARE VERSION
4.0
(II+
requires
64K and paddle adapter)
SUPPORTS SOUND MASTER (II+ and
IIe)
Includes
:
SPEECH RECORDING AND PLAYBACK
SPEECH WORD RECOGNITION
APPLICATION EXAMPLES ON DISK
PROGRAM LIST EXAMPLES WITH
VOICE CONTROL OF EXTERNAL SWITCHES
\
WITH AMPLITUDE EDITOR
Copyright 1986,
1987
COVOX, Inc.
675 Conger Street
Eugene, Oregon 97402
First Printing November,
1986
Second Printing August, 1987
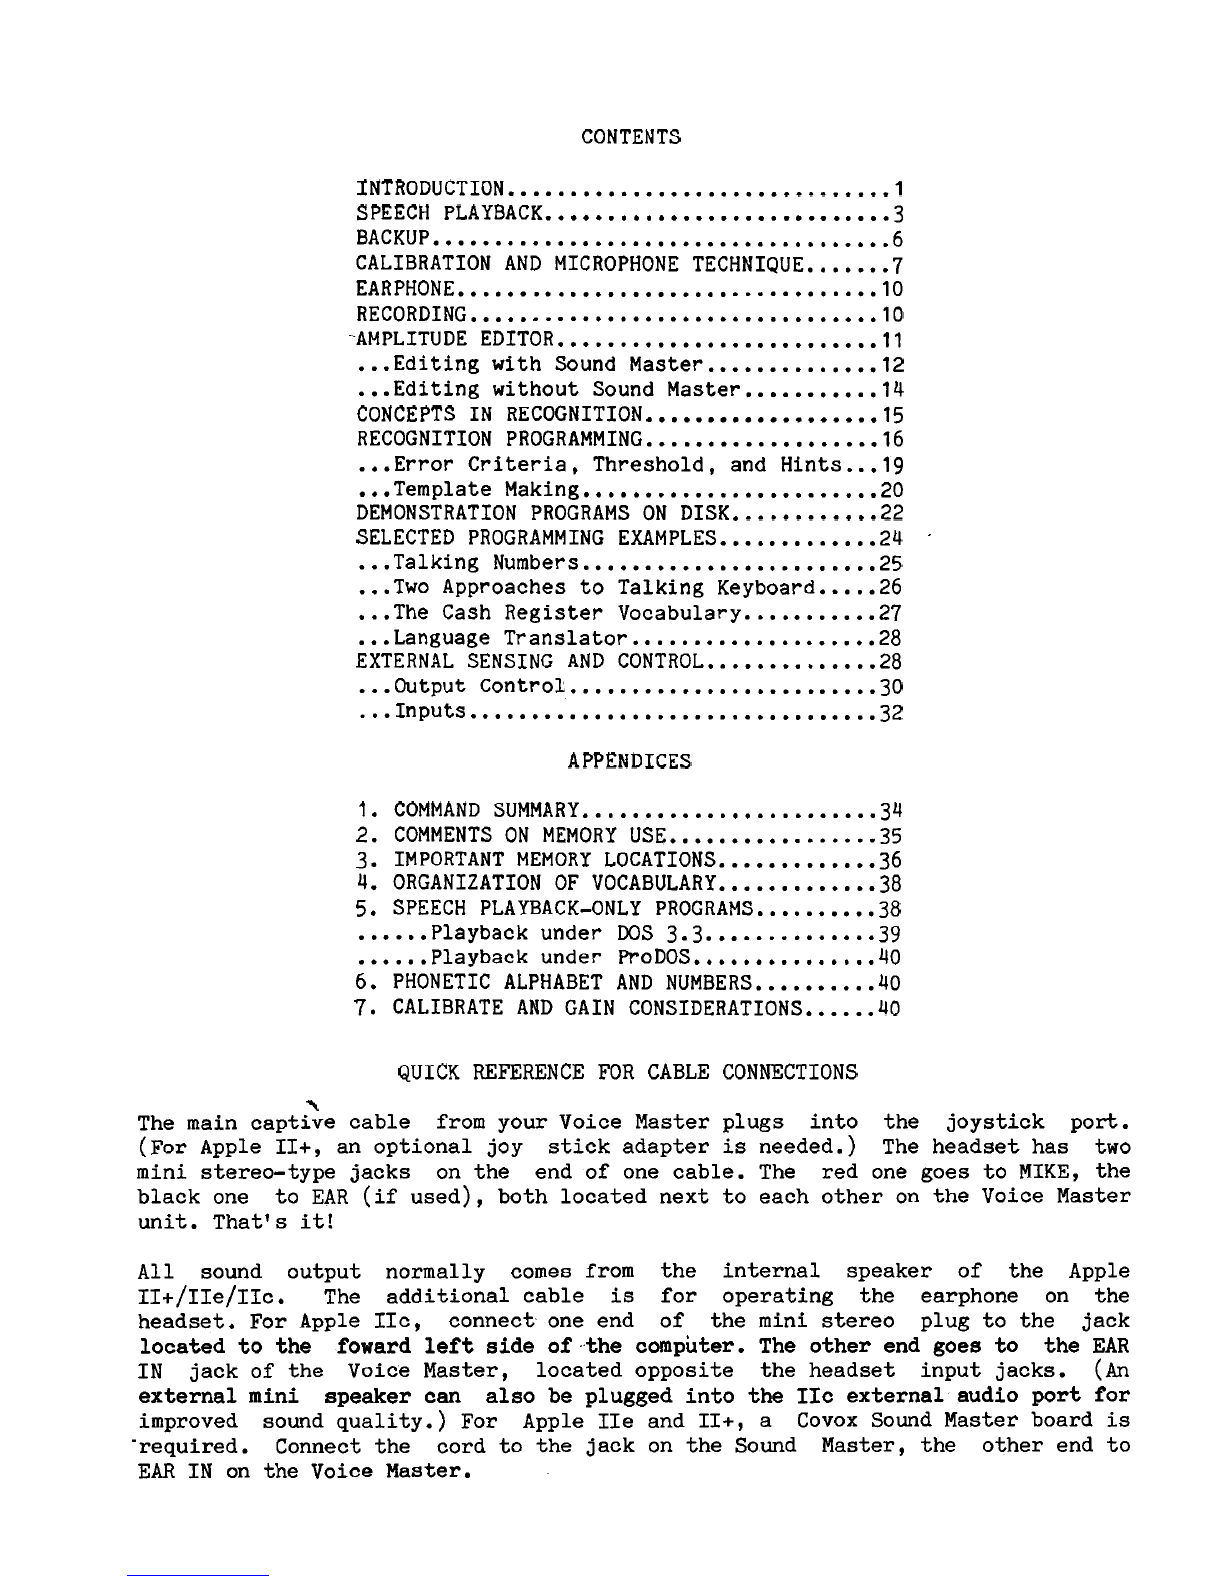
CONTENTS
INTRODUCTION...............................l
.........................
SPEECH PLAYBACK.. .3
BACKUP.....................................6
CALIBRATION AND MICROPHONE TECHNIQUE.......7
EARPHONE..................................lO
RECORDING.................................lO
-AMPLITUDE
EDITOR..........................ll
...
Editing with Sound Master..............12
...
Editing without Sound Master...........l4
...................
CONCEPTS IN RECOGNITION 15
RECOGNITION
PROGRAMMING...................16
...
Error Criteria, Threshold, and Hints...lg
...
Template Making......
..................
20
DEMONSTRATION PROGRAMS ON DISK............22
.
SELECTED PROGRAMMING EXAMPLES.............24
...
Talking
Numbers........................25
...
Two Approaches to Talking Keyboard.
....
26
...
The Cash Register Vocabulary
...........
27
...
Language
Translator....................28
EXTERNAL SENSING AND CONTROL..............28
...
Output Control
.........................3
0
...
Inputs
.................................3
2
APPENDICES
1.
COMMAND SUMMARY
........................3
4
2. COMMENTS ON MEMORY USE.................35
3. IMPORTANT MEMORY LOCATIONS
.............
36
4. ORGANIZATION OF VOCABULARY..
...........
38
5. SPEECH PLAYBACK-ONLY PROGRAMS...
.......
38
......
Playback under DOS 3.3..............39
......
Playback under P~oDOS...............~~
6.
PHONETIC ALPHABET AND NUMBERS..........40
7.
CALIBRATE AND GAIN CONSIDERATIONS......40
QUICK REFERENCE FOR CABLE CONNECTIONS
\
The main captive cable from your Voice Master plugs into the joystick port.
(For Apple II+, an optional joy stick adapter is needed.) The headset has two
mini stereo-type jacks on the end of one cable. The red one goes to MIKE, the
black one to EAR (if used), both located next to each other on the Voice Master
unit. That1s it!
All sound output normally comes from the internal speaker of the Apple
II+/II~/II~. The additional cable is for operating the earphone on the
headset. For Apple IIc, connect one end of the mini stereo plug to the jack
located to the foward left side of the computer. The other end goes to the EAR
IN jack of the Voice Master, located opposite the headset input jacks.
(An
external mini speaker can also be plugged into the IIc external audio port for
improved sound quality.) For Apple IIe and II+, a Covox Sound Master board is
'required. Connect the cord to the jack on the Sound Master, the other end to
EAR
IN on the Voice Master.

LIMITED WARRANTY STATEMENT
COVOX, Inc. guarantees the VOICE MASTER to be free from defective materials and
workmanship for a period of one year from the date of purchase. COVOX, InC.
will replace defective parts and make repairs under this warranty when the
defect occurs under normal use, provided the unit is returned to the factory
via prepaid transportation. The warranty provides that examination of the
returned product must disclose a manufacturing defect to be judged by COVOX,.
Inc. The warranty does not extend to any product which has been subject to
misuse, neglect, accident, improper installation, or where the panel legends or
other markings have been removed or defaced, and is given in lieu of any other
warranty implied or expressed, and will not cover any consequential damages.
Information in this manual and associated software are provided on an llas isn
basis. No warranty, either expressed or implied, is made by COVOX, Inc.
pertaining to suitability for any specific application or commercial use. It is
the purchasers responsibility to make appropriate evaluations for such
purposes. COVOX, Inc. disclaims liability for direct, indirect, or incidental
damages arising from the use of this product, including but not being limited
to interruption of service, loss of business or potential profits, legal
actions, or other consequential damages.
Control of environmental factors by means of voice could expose the user to
some risk. Word recognition remains an unreliable technology due to
uncontrollable variations in the way that normal speech is produced in an
uncertain and noisy acoustic environment. Covox, Inc. specifically disclaims
liability as stated in the preceding paragraph when applied to word
recognition.
PATENTS AND COPYRIGHTS
The software supplied with VOICE MASTER is copyrighted. It may not be copied,
reproduced, translated, or reduced to any readable medium or code for other
than personal use without prior written permission of COVOX, Inc.
The hardware/software system comprising the COVOX VOICE MASTER is subject to
existing patent applications. Unauthorized duplication for commercial purposes
or to otherwise avoid payment of appropriate royalties or license fees will be
deemed to be a violation of proprietary rights under patent and trademark laws.
The names COVOX, VOICE MASTER, and VOICE HARP, and the COVOX are
registered trademarks and are the propEfrty of COVOX, Inc.
RESTRICTIONS ON SOFTWARE USE
Software may generally not be used in programs which are sold or otherwise
distributed in violation of copyright laws. There is one exception. Speech
that has been produced with Voice Master software may be put into other
programs along with playback software, without royalty charges provided
(1)
software is not for commercial sale, and
(2)
the source of the speech must be
given on the disk jacket, instruction book, and in the disk program itself in
sufficient detail to permit a user to acquire a Voice Master. Those wishing to
use recognition software and/or edited playback software in programs for Sale
are advised to contact Covox, Inc. for licensing information.

INTRODUCTION
If you are new to Voice Master, you may wish to experiment with some of
the many demonstration programs contained on the Voice Master disk, such as a
talking calculator, blackjack game, and others. If this interests you, then
turn to the section on wDEMONSTRATION PROGRAMSw before reading the first parts
of this manual (but after finishing this INTRODUCTION). You will be guided
from there. The Voice Master disk will auto-load to "MENUw for the
demonstration programs--simply put the disk in disk drive number
1
and turn on
the computer. Then make selections from "MENUw. But if you want to follow the
procedure in this manual, you will be asked at times to load in essential Voice
Master programs in a way that the auto-load function on the Voice Master disk
will not do. In this case, select from "MENUw the "RETURN TO BASICN option.
We chose to organize the manual with demonstration programs given later on so
that the manual itself would continue to serve as a reasonably compact
programmers1 reference guide. We expect that the serious programmer will make
backup disks that do not contain all of the demonstration programs (if any of
them).
The DOS on the Voice Master disk is version
3.3.
However, utilities not
required for Voice Master programs have been removed in order to make
sufficient room on the single disk to hold important applications examples.
Utilities not supplied may be found on the disk that you originally received
with your computer.
If your interest is in the music capabilities of Voice Master, a different
manual than this one applies. Music programs are not software related to those
described in this manual. Software relating to speech on the Voice Master disk
is very extensive. In fact, it is so extensive that we were forced to put
music software on the reverse side of the disk. It can be loaded directly from
the reverse side (with BLOAD), or you can follow instructions on "MENUM from
the speech side of the disk.
The Voice Master disk contains essential utility software as well as a
number of demonstration programs. We presume that the reader is familiar with
the BASIC programming language. But it is not presumed that knowledge of this
language is extensive. Thus a more or less detailed discussion of
demonstration programs is not presented at the outset. Rather, we want to give
essential Voice Master programming information as rapidly and thoroughly as
possible in the first part of this manual. The demonstration programs and
other less impelling topics can then be covered.
Voice Master has three main functions, speech recording and playback, word
recognition, and music writing from voice input. This last topic is covered in
a
separate manual and will. not be cotbidered further here. Speech recording
and playback can be had in combination with word recognition so as to implement
a two way dialog with the computer.
A
speech recording can also be modified
with forms of editing to improve quality and intelligibility on playback (or to
create sounds not like those recorded).
Voice Master may find its greatest use in recording speech for later
playback. Voice Master hardware is not required for playback from pre-recorded
vocabularies. High quality speech can be realized with various forms of
editing.
There are different variations of the Covox speech editor. The one
contained on the Voice Master disk is an amplitude editor.
A
more
-1
-

sophisticated (optional) version called nSpeech Construction Setn allows **cut
and pasten operations with
time
slices
in the millisecond range.
Audio output capability of the Apple
is
limited. The internal speaker
is
capable only of being toggled by a constant voltage such that the driving
signal consists of a rectangular wave of constant amplitude. Surprisingly
intelligible speech can be produced. With full editing using the "Speech
Construction Set1*,
it
becomes difficult to believe that the audio system
is
not
high quality. Even with the limited amplitude editing capability provided on
the Voice Master disk, where t*tricks!* are used to fool the ear, good results
are obtained.
Speech quality can be further improved if a range of amplitude values
is
imposed.
A
low cost plug-in card called *!Sound Masterw provides for
16
amplitude levels.
It
also permits a broad range of musical expression to be
enjoyed, similar to that available from music "chipsl1 that are standard in
certair, other low cost personal computers. Note, however, that Sound Master
is
not applicable to the Apple IIc because no expansion ports are provided.
Recorded speech for later playback retains amplitude information whether
or not the Sound Master
is
present.
It
is
the responsibility of the user to
install the correct software. The word recognition function
is
independent of
Sound Master.
Voice Master software utilizes DOS
3.3.
There
is
one playback (only)
program that can function with ProDOS. Conversion of this particular program
to RoDOS form can be accomplished with,the conversion routine on the ProDOS
systems disk. An Appendix provides further information.
In preparing a general manual for the Apple
I1
family, we have had to
contend with systems variations and models II+, IIe, and IIc, with and without
extended memories (for 11+ and IIe) and with and without Sound Master. Each
variation requires somewhat different Voice Master software.
We
have tried to
explain this profusion of systmes in simple
terms.
The foregoing discussion reveals the rationale for the organization of
this manual--first speech playback, then speech recording (including attaching
the Voice Master and microphone "techniqueN), then editing (amplitude type),
and then word recognition. Finally, demonstration programs are described.
Appendices present memory locations and other details.
Note a nbonusn: Demonstration programs and/or vocabularies not described
in this manual may be included on the Voice Master disk. This extra software
will
usually be found on the back sid-of the disk.
Use
the normal CATALOG
command to determine disk contents. Examples: Numbers vocabularies in German
and Chinese.

SPEECH PLAYBACK
This section explains how to load essential machine language programs
directly, without the auto-load function. (Auto-load requires that you turn on
the computer system with the disk installed. You are presented with llMENU1*
from which a selection can be made.)
But first, we urge that you lock the keyboard to capital
letters.
Because Apple
I1
system have several model numbers and configurations,
four different programs are provided on the Voice Master disk.
All
four
support functions of recording, playback, and word recognition. (Six more are
for playback only as described in an Appendix.)
All
4 load as:
BLOAD PARTAxx
BLOAD PARTBxx
CALL 35072
where 35072
is
$8900 (Hex) and where llxxW values are:
xx
=
X
for 64K systems without Sound Master
xx
=
(nothing) for 64K systems with Sound Master
xx
=
EX for 128K systems without Sound Master
xx
=
E for 128K systems with Sound Master
The Voice Master disk contains several pre-recorded word vocabularies
which are used with the various demonstration programs. One of these
vocabularies (for a talking calculator) has spoken numbers and symbols. Select
this vocabulary with a keyboard loading comnand as:
where
it
is
implied that there may be another vocabulary for the same words,
but in a different language. Note the ampersand
ll&ll.
Voice Master commands
have been ltwedgedWinto Applesoft BASIC and all such commands begin with this
symbol.
A
Pre-recorded vocabulary
is
loaded into the lower 64K memory bank
if
the
version of Voice Master software that you choose to employ
is
for
a
64K system,
whether or not your actual system has extended memory.
A
vocabulary
automatically loads to the upper 64K memory bank if the version of Voice Master
software allows for extended memory, irregardless of memory
size
when the
original vocabulary was created.
Also remember that a Voice ~astlrcommand with llLW
is
meaningless to
Applesoft BASIC unless this BASIC has been augmented with Voice Master
software.
It
is
the userls responsibility to install software that does or does not
presume that the Sound Master
is
a resent.
Speech output
is
routed through the
internal speaker for non-Sound Master software versions, whether or not the
Sound Master
is
present.
If
the software version for Sound Master
is
installed
but no physical Sound Master
is
plugged into one of the slots (specifically
named if not the default slot number 4), then no sound will be produced at all.
You can use Sound Master when
it
is
plugged into a slot other than number 4
with the keyboard command
-3-

where n
is
the slot number (in the range 1-7). The default value (i.e., that
presumed if no &SLOT
is
specified)
is
slot number
4.
The current slot number
can be determined by peeking memory location 35075. If software has been
installed which does not use the Sound Master, this location
will
contain the
number 255. The &SLOT command
is
not applicable to Apple IIc. (The &SLOT
command can be a BASIC statement. This suggests the possibility of using two
or more Sound Masters with different audio circuits so that speech can be
caused to be produced at different locations.)
Next get ready to hear sounds from the computer's built-in speaker or on
earphones or on a speaker that
is
plugged into the Sound Master. (Additional
information on the headset
is
given later in this manual.)
On
Apple IIc,
it
is
suggested that you use earphones or an external speaker because the one in the
computer
is
very small with only marginal performance for speech.
Now type
and you
will
hear the spoken word ".fivew from the vocabulary called "ENGLISHu.
Do
the same for other numbers and symbols in the vocabulary. There are 17,
numbered 0 to 16. If you SPEAK 20, or any other number above 16 (but
less
than
64).
you
will
hear a tone beep. This indicates that a word for that index
number was not recorded. The range of indices
is
0-63 and playback can
be
in
any order.
Now type &SPEED
4
&SPEAK 5
and you
will
hear "fivew slowed down. The sampling
rate
during playback
has
been slowed. The range of &SPEED values
is
0-10 and 6
is
the default value
(which
exists
in the absence of a specific &SPEED command). The &SPEED index,
like all other Voice Master commands, can be computed. This means that
a
symbol or string with a value specified elsewhere can be used instead of an
actual number. This ability to compute
is
the same as for normal Applesoft
commands.
A
&SAMPLE command controls the sampling rate during recording, and
it
also has a range of values 0-10. The &SPEED during playback must be the
same as the &SAMPLE dwing recording if the reproduced sound
is
to be at a
normal rate.
Before proceeding, return &SPEED to the normal (default) value by typing
&SPEED 6. Then type
A
and then &SPEAK 5. The word comes back with lower volume-but only if you have
a Sound Master in place and have specified the correct slot number if other
than the
4.
(Not applicable for Apple IIc.) The volume range
is
0-15 with 15
bei~gthe maximum value, and also the default value. Return to the default
condition by typing &VOLUME 15.
If you next type &RESET, your vocabulary
is
erased. But the machine
language program remains. You can reload a different vocabulary
as

and your words
will
be the same, but in a different language. (You don't
actually have to &RESET because loading in a different vocabulary with the
&FIND command does this automatically.) Note: &RESET has more specific
significance in recording.
It
also specifies where in memory the vocabulary
is
stored. This
will
be discussed in greater detail in the section on
"RECORDING".
Let us next
write
a simple program that speaks out all of the words in the
vocabulary. including some tone beeps. We
will
have the program load in the
vocabulary as well. For now, presume that Voice Master software (parts
A
and
B)
has been loaded by keyboard command. We
will
shortly show how this too can
be loaded in with BASIC statements so that a single
RUN
command can do
everything.
10 &FINDWENGLISH"
20 FOR J=0 TO 18
30 &PAUSE 4
40 &SPEAK J
50 NEXT J
60 END
The &PAUSE command
is
essentially a time-wasting FOR-NEXT loop, and in
fact can easily be replaced with such a loop. The index number after &PAUSE
is
the number of one-tenth second delay increments. For example, &PAUSE 10 gives
a one second delay.
A
word vocabulary
is
placed in main memory beginning at a particular page
number.
A
page
is
a block of memory 256 bytes long (with a starting address
given by the upper 8 bits of the 16 bit address). There are a total of 256
pages of memory in the lower bank of memory (256*256=65536 bytes) and another
256 pages in the upper bank for Apple IIc and memory augmented IIe. (Memory
augmented versions of Apple 11+ beyond 64K may not perform properly with Voice
Master.)
The command
defines the location of a vocabulary when the vocabulary
is
originally created
where index n
is
the starting page number.
It
can be in the range 16-114 with
the 64K memory version, or 16-176 with extended memory. The default value
(when &RESET
is
not specifically given when a vocabulary
is
produced)
is
n=64.
This puts the starting address at 69*256=16384. The first few hundred bytes
contain individual word memory
limits
and other data. The nominal rate of
memory useage
is
about 1000 bytes for each full second of speech. Short words
may require less than 1000 bytes, and long words or phrases may require more.
A
"base addressw
is
defined here as the address in memory where vocabulary
information begins (16384 for the default case).
All
parameters and word
boundary
limits
are specified in terms of this base address. Switching a given
base address from low to high 64K banks (for n in the range 16-114)
is
automatic according to the particular Voice Master program that resides in main
memory. But other changes as, for example, moving speech from page'number 60
to page number 70, are not possible without a special (user written) program

that avoids overwriting parts of the vocabulary as memory locations are
shifted..
We have now defined the following "wedged-inn Voice Master commands:
&FIND &SPEAK &VOLUME &PAUSE &SPEED &SLOT &RESET
These act like ordinary BASIC commands. But the computer
will
not
recognize them unless the proper Voice Master machine language program resides
in the computerv
s
main memory.
And that's really all there
is
to playback from pre-recorded vocabularies
(edited or not edited) except for information on how to load parts
A
and B
from a BASIC program. (There
is
another playback program which does not
contain wedges. This
is
discussed in an Appendix.)
As
stated, you cannot use Voice Master commands in a program unless Voice
Master software has first been loaded. You should not attempt to load, save,
list,
or
RUN
a program that contains Voice Master commands without this
software in memory. Thus, your BASIC program must load in Voice Master
software before
it
encounters any Voice Master commands, that
is,
after
statement number 70 in the following example:
...
50 PRINT D$"BLOAD PARTA"
60 PRINT D$"BLOAD PARTBvv
70 CALL 35072
When running a BASIC program, you can stop the progr'am with the CONTROL/C
key at any time and change playback characteristics such as &SPEED
or
&VOLUME
with keyboard commands (or equivalent POKEvs to memory locations as discussed
an Appendix). Then type CONT to continue.
When playback
is
in progress, you can press the space bar in order
to
restart playback from the beginning. This can help to evaluate the beginning
parts of a recording.
It
also serves to produce novel stuttering sounds.
\
BACKUP
The Voice Master disk jacket
is
not notched, or if
it
is,
the notch
is
covered. Without a notch,
it
is
not possible to write anything to the disk.
It
is
write
protected for the benefit of the user, and not because copying
is
discouraged. To the contrary,
it
is
suggested that you make at
least
one copy.
You could of course make or open a notch and then record
to
the Voice Master
disk. This wonvt do much good because there
is
very little empty space on the
disk. Also, you could lose the disk by accident and than be forced
to
wait for
a replacement.
BASIC programs copy easily with LOAD-SAVE sequences (load from the Voice
Master. disk and save to a formatted disk). Vocabularies can be loaded from a
-6-

disk with &FIND and saved to another disk with &PUT, and similarly for
recognition with LTFIND and LTPUT. (These additional save and load commands
are explained in later sections of this manual.) Copying machine language
programs
is
not quite so straightforward but can be done with some third party
software. Voice Master programs with wedges are in two parts. The
"Av
parts
are loaded directly from disk. But the *Bn parts share memory addresses with
read-only memory which requires a separate loading step.
A
backup of the entire disk can be made with an Apple utility called
"FIDm. Third party software
is
also available. After loading, follow
instructions for a one or two disk system.
Disk space
is
limited on the Voice Master disk. You
will
probably want to
make some special disk backup copies containing only a small part of what
is
on
the disk. The easiest way to do this
is
to delete programs and files from a
full backup copy.
A
useful disk must contain the elements of DOS (not
cataloged and not easily deleted from the disk) and both parts of one of the
two-part (A,B) Voice Master programs (or perhaps the playback-only program).
In order to calibrate, you can use the wedged-in &CALIB command (described
later) or the separate ffBARw program. If the playback-only program
is
the one
that you intend to use, then calibration
is
not a factor.
A
catalog of programs on the Voice Master disk can be examined on the
video display in the usual manner.
CALIBRATION
AND
MICROPHONE TECHNIQUE
Getting speech into the computer for recording or word recognition
normally depends on proper operation of a voice operated switch, sometimes
referred to as
llVOXw.
A
command to record should not normally cause recording
to start until a reasonably loud signal
is
measured. And when the speech
sample ends, a short period of low amplitude levels indicates that the
recording process should end. (An Appendix presents a more detailed
explanation of
VOX
operation.)
If
speech
is
in a noisy background, then
recording starts as soon as the command to record occurs and does not end until
the buffer has been filled (which takes about 8 second's for recording and 2
seconds for recognition).
A
filled buffer can return an error signal and
require that you re-enter your speech.
In a noisy environment, one should
first
attempt to adjust gain, voice
loudness, and microphone placement in an effort to make the
VOX
operate
properly.
If
this
is
not possible, then start talking the moment that the
recording (or recognizing) command
is
given and press any key the moment you
stop speaking. Normally, however, thig won't be required.
To manually stop the recording or playback process (including recording
when inputting speech for word recognition or in order to create a recognition
template), press any key (except the space bar during playback). This puts an
error code number 251 into memory location 25 in page zero. (Other conditions
associated with inputting speech place characteristic numbers in this same
location as
will
later be described.)
If the computer
is
waiting for input and
it
is
not noisy and you wish to
do something without worrying about the computer sensing a sound, put
it
on
"holdn. Use Control
A
for the
64K
version (CTL and
"Av
keys pressed together),
or the Open-Apple key for the 128K version. In order to go back to the active
mode, press the same key(s) again.
-
7
-

A
time-out function exists in programs involving speech input when the
VOX
is
operating and waiting
for
meaningful input. After a certain length of
time,
the wait
is
terminated and the program returns to the pre-input command state.
Time-out duration
is
set in memory location number 31 (page zero). Change
time-out with POKE 31,n where n determines the number of approximately
half-second increments (10 for
5
seconds,
etc.,
but not more than 255). When a
time-out occurs, memory location number
25
(page zero) contains the number 250.
The default value for
n
is
60. (The exact time-out varies with the sampling
rate.)
When the computer
is
waiting for speech input, a question mark
(?)
appears
in
the
lower
right hand corner. This mark
is
steady
in
the absence of sounds,
but
jitters
about during speech input. Clicks and other short and/or weak
sounds may show a brief flicker, but may not start the recording process. If
the system
is
operating properly, then at the end of a speech sample, the
?
should become stable, and
a
very short
time
thereafter the program should leave
the input state. Pressing any key when the screen display shows
?
in the upper
right corner puts the number 251
into
memory location 25. The particular key
that was pressed can be determined
in
a BASIC program with the statement GET
A$.
There
is
a
red
monitor
light on the Voice Master itself. This should
flicker during speech peaks to indicate an adequate speech level. But in the
absence of speech, or for low level sounds,
it
should not glow at all.
Proper operation of the
VOX
requires that the Voice Master be calibrated.
Once this
is
done,
it
may not have to be repeated. But
it
should be checked
occasionally in case inadvertent jarring, temperature effects, or aging have
changed the effective setting. There are
two
different ways
to
calibrate, one
with a machine language program called "BARw, and another with a wedged-in
command &CALIB. (One of the options on
**MENU**
is
CALIBRATION, which selects
the wedged command. "BARw can be loaded directly as
will
be described, or
it
can be selected from, the
"DEMOv
program, which
is
in turn selected from the
main '*MENUw.) In either case, a suitable microphone
is
plugged into the Voice
Master jack labeled
"MIKEN
and the Voice Master itself
is
plugged into the
joystick port. Voice Master comes with an electret microphone havingtwo (not
three) connecting
wires,
and a suitable biasing voltage
is
also applied. An
alternative
is
a
low
or
medium impedance dynamic microphone, provided sound
level
is
high enough.
Or
sounds can come from a radio or tape deck. (The
Voice master microphone
is
combined with an earphone as a headset. The
microphone .plug
is
normally red
in
color. On some units, this was reversed,
with red on the earphone. If
in
doubt. reverse the plugs. No harm results.
The earphone
will
in fact act like
a
dynamic microphone, but sound level
is
too
low to be useful in this application.)
\
We
first describe the use of "BAR1*. This program
is
independent of Voice
Master
programs and so
it
can be loaded directly after power up as
BLOAD BAR
CALL 16405
Turn up the gaiil on Voice
Master
and talk into the microphone.
A
system
of dancing bars should appear. There are 16 of these representing a measure of
sound frequency content, plus two more bars on the right side of the display.
The furthest
to
the right measures speech amplitude.
Next
to
this
is
a bar
that indicates fundamental voice pitch. To the right of the amplitude bar
is
a
-
8
-

number that indicates the height of this bar. You can experiment with various
sounds. The bar graph system
is
used in part for word recognition.
Adjust the gain so that the average maximum level
is
about 16, which
is
where the amplitude bar changes from asterisks to plus signs. The red
indicator on Voice Master should glow at levels in the range of 16 or more. In
the absence of speech the level as indicated on the display should be zero. If
not, or if more than a soft sound
is
required in order to make the number
rise
above zero, then calibration
is
required. Calibration
sets
the
VOX
level. If
set
above zero, the
VOX
will
always be on. If too far below zero, a large
signal may be required in order to record speech and distortion can result.
Unplug the microphone so that input sound level
is
zero. The microphone
jack physically shorts the input to ground.
Use
a small screwdriver (or the
99toolw supplied with Voice Master) in the nCALIBRATE99hole on Voice Master.
Adjust for an index of zero just below where nlll appears.
Now replace the microphone plug. Gain should be
set
for average maximum
of 16 for sounds such as "ahf9and the level should be 1 or
3
for nasal sounds
such as
"m".
Microphone placement
will
help to get proper values. Locate the
microphone not too far from your nose if nasal sounds need strengthening. If
external noise
is
a problem, talk closer to the microphone or talk louder and
reduce gain. Changing the calibration setting to reduce effects of noise
is
not the proper thing to do.
The second method for calibrating requires that one of the Voice Master
programs with wedges be in main memory. Then use the special wedged-in command
When this command
is
issued, the question mark in the lower right corner
appears as in normal recording. But recording never takes place. Proper
calibration has the question mark motionless in the absence of speech. When
gain
is
set
for normal flickering of the indicator light on Voice Master during
average speech peaks, the
?
should remain motionless with no speech input, or
at most give only an occasional brief flicker. If
it
becomes too active, the
recording process
will
begin. This
is
a rapid method for calibrating which
will
usually be quite satisfactory. The command can in fact be put into
a
program as a program statement. There
will
be a time-out to continue the
program with a duration depending on the value placed in memory location 31 as
previously described. You can press any key to exit the &CALIB command before
time-out occurs.
Another check on proper calibration
is
to record a word and then play
it
back to see if the word fills the
ti&
space without blanks or noise at the
ends, which indicates the
VOX
operates in the absence of speech. Also, weak
word parts should not be eliminated, which would indicate that the VOX
is
too
insensitive to respond to weak but necessary speech sounds.
A
direct check on amplitude levels
is
had with the amplitude "EDITORn
program described later. In a way, this program provides the final and most
definitive evaluation of amplitudes. Experimenting with your recording
technique with the aid of llEDITOR1l
is
perhaps the best way to get the most from
the system.

EARPHONE
No specific information has yet been given on use of the headset provided
with Voice Master.
It
has an earphone as well as a microphone. The two plugs
are plugged into ffMIKEtt (red plug) and ''EARw (black plug) on Voice Master. The
microphone boom swings on a hinge at the earpiece. You can bend the boom, but
don't twist
it.
Swing completely around for
left
or right side placement on
the head. The microphone under the foam piece should be pointing inward
(towards the mouth) in all positions.
If
in doubt, peel the foam back a
little
to show a screw, which
is
on the microphone side.
There are three ways to get audio output from Apple
I1
systems. The
internal speaker, which
is
toggled with a square wave,
is
the first. The
second
is
from the audio output of Sound Master. The third, for the Apple
IIc
only,
is
from the external audio jack on the side of the keyboard. There
is
a
jumper cable supplied with Voice Master which has miniature phone plugs at both
ends. One end can be plugged into the Voice Master jack labeled EAR
IN.
The
other end can go to the Sound Master on Models 11+ or
IIe,
if installed, or to
the external audio jack on Model IIc. Then both miniature plugs on the headset
supplied with Voice Master can be plugged into the Voice Master.
If
no Sound
Master
is
installed on Models 11+ or IIe, then audio comes only from the
internal speaker.
A
user-made cable can connect the Voice Master to the audio
lead that normally goes to the internal speaker. Of course, a separate audio
power amplifier, or telephone connection, can be adapted to suit special needs.
RECORDING
With essential Voice Master software installed, have the microphone ready
and type
Upon pressing RETURN, speak a word or phrase. But don't stop prematurely
if
you don't want the recording to stop. You can then &LEARN 27, &LEARN
2,
etc., in any order, using an index number in the range
0-63.
At
any time, you can check the quality of a recorded word with &SPEAK
5,
etc.
If
not satisfactory, then simply re-&LEARN the designated indexed word.
The computer program automatically adjusts the memory to
fit
the repeated word.
If
you make a complete vocabulary, you can check
it
word by word, or write
a short FOR-NEXT loop to speak the words in sequence. You can also record in
sequence with a similar loop, using &PAUSE so you can catch your breath between
recorded words. You might want
t~,
&SPEAK the word immediately after
&LEARN(ing
)
it
.
There are only three more wedged-in commands to worry about for use in
recording in addition to &LEARN. One saves the vocabulary to disk as:
which saves to disk number
1,
as the default disk. To save to disk drive
number 2, then write &PUTwfilename,D2w. (The same procedure applies with &FIND
from a second disk drive.)
There are two more commands that affect the way that words are recorded.
One of these
is
&SAMPLE, which controls the rate at which speech
is
sampled.
-1
0-

Each word in a vocabulary can be recorded with a different &SAMPLE value, or
all can be the same.
If
a rate other than the default value
is
desired, then
just before each word or group of words to be recorded at the desired rate.
type as a keyboard command (or as a BASIC statement in a recording program):
where the index n
is
in the range 0-10 with 6 the default value. The values
correspond to those used with &SPEED as previously described and as tabulated
in an Appendix.
A
high sampling rate yields somewhat improved speech quality
as compared to the default value. But more memory
is.
then required to store
the speech.
A
rate lower than the default value results in more distortion,
but the memory that
is
required can be reduced.
A
technique that might be
tried to reduce distortion while not increasing memory needs
is
to speak a word
rapidly using a somewhat elevated sampling rate, and then reproduce
it
with a
lower &SPEED value than the &SAMPLE value.
Finally there
is
&RESET as has previously been described. Only one such
command
is
allowed per complete vocabulary.
A
vocabulary in main memory
is
deleted
if
this command
is
given:
where n in the range 16-114 (64K version) or 16-176 (128K version) specifies
the page number where the vocabulary begins--it
is
the BASE address previously
discussed. The default value, which applies if no &RESET
is
specified,
is
&RESET 64. If the Voice Master program
is
meant for a 128K system, the &RESET
value
will
apply to the page number in the upper bank of 64K. But this same
vocabulary
is
loaded into the lower 64K bank if Voice Master software
is
for a
64K system.
As
described briefly in sections on playback, a recording with the
?
showing in the lower right corner can be put on hold with Control
A
(64K
version) or the Open Apple key (128K version). Recording can be terminated
with any key, the result being that 251
is
put into memory location 25.
A
time-out due to an excessively long duration input puts 250 into location 25
and the sounds preceding the time-out are not recorded. Recording in a noisy
environment
will
usually cause the recording to start as soon as the command
&LEARN
is
executed, and
will
continue until the buffer
is
full.
A
satisfactory
recording can
still
be made
if
speech starts upon execution of &LEARN and a
terminating key
is
pressed as soon as the speech word
or
phrase has been
completed.
In the.section on playback,
it
was stated that &SPEAK(ing) a number that
was never:recorded (with &LEARN) resilts in a tone beep. In addition, this
condition places the number 249 into memory location 25. Other numbers are
placed in \location 25 as a result of different conditions in recording and
recognition!. These are listed in the section on recognition.
AMPLITUDE EDITOR
The quality and intelligibility of recorded speech can be improved with
the special program called "EDITORn. This program, written in BASIC. also
loads in a short machine language routine, "WORD EDIT 64Kw OR "WORD EDIT 128KW.
With the proper Voice Master program in memory, type
-1
1
-

LOAD EDITOR
and
RUN.
A
shorter way
is
to
type
RUN
EDITOR. There are two ways to get words
into memory for editing. Words may
be
recorded one by one while running
"EDITORw,
or
a previously recorded vocabulary can be loaded from disk. In
either case, the final result can
be
saved back to disk memory. The "EDITORn
program presents a menu from which the appropriate selection can be made.
Effective use of "EDITORn
is
enhanced
if
you understand the nature of the
speech coding. Voice Master converts speech to a rectangular wave which
is
sampled (at the specified &SAMPLE) and placed in memory as a sequence of wllsn
and
"O1sW,
usually several of each in sequence. Speech
is
played back by
reversing the process. Voice Master also measures speech amplitude. Preceding
each 15
bytes
of fast samples (at the specified &SAMPLE), a byte
is
added for
amplitude data. (Four of the
8
bits are used, giving
16
levels of amplitude,
including zero.) Playback
first
sets
the amplitude value in the Sound Master,
assuming the Sound Master version
is
installed. Then the 15 following bytes,
converted to a square wave similar to that originally sampled, are sent to the
audio output with the proper amplitude. Amplitude can
be
changed with every
ampli\tude byte (every 15 bytes of high speed data), or even set to zero. But
because the 15 bytes of sampled data remain, the original signal can be
recovered (with exceptions to be described).
Of course,
if
you do not have a Sound Master in place, all amplitudes will
be the same--that
is,
maximum or zero. There
is
a method for modifying this,
however, so as to reduce the intensity of high frequency sounds even when no
Sound Master
is
installed. Presence or absence of Sound Master has no bearing
on the nature of the speech initially presented for editing.
Editing with Sound Master: The use of the "EDITORn will be discussed
first
for
the case when the Sound Master
is
installed. Then the special methods and
techniques which can improve speech without the presence of Sound Master can be
explained. The principal one of these special manipulations
is
ignored when a
Sound Master
is
functioning. Similarly, amplitude adjustments which are
effective with Sound Master are ignored when Sound Master
is
not present.
Thus, one vocabulary can perform well in both environments.
The wEDITOR1l program shows the amplitude levels throughout the word in
convenient graphical form, with cursors to keep track of where you are in the
edit process. From the menu for wEDITORw, select number
1
(by pressing the
number
1
key) to &LEARN a current word, with a chosen index number for the
word. Then record the word and edit
it.
Or select number 5 to load a speech
file, then type in the file name, then proceed to edit specific numbered words.
To edit the speech, select numhr
3.
The speech amplitude data then
appears on the screen. The complete speech pattern can be scrolled right or
left with right and left arrow keys respectively. Scrolling
is
necessary
if
the recorded word or phrase
is
too long to
fit
on the screen (40 amplitude
samples for 40*15=600 bytes, which
is
approximately
2/3
of a second).
Scrolling can also help edit parts of words rather than complete words because
what
is
heard begins at the left side of the screen. This will not correspond
to the beginning of the word
if
some scrolling has been done.
There
is
a vertical bar on the screen which
is
the edit bar. This bar
occurs at the amplitude sample to be edited. Move the bar
left
or right with
the
"Jfl
and
"KW
keys respectively.
-1
2-

When the edit bar
is
over the amplitude sample to be edited, move the
cursor mark up or down with corresponding arrows on Apple Models
IIe
and IIc,
or with the
"Iw
key for up and the
"MW
key for down for the 11+ (which does not
have up-down arrow keys).
The selected amplitude value
is
installed by pressing the space bar. The
following 15 fast bytes
will
be played back at this amplitude level, including
a level of zero if this value
is
selected.
Editing
is
done after selecting number
3
for EDIT
A
WORD from the menu.
Recording a word and other tasks are also done from the main menu. If a word
has been edited and you return to the menu by pressing the "QWkey (for quit),
then the edited amplitude values are permanently changed in main memory and may
not be recovered (except possibly if they originally came from disk memory).
However, you can restore the original value at the edit bar (one value at a
time) before returning to the main menu by pressing the
wRw
key.
But an escape
is
still
possible. If you edit and return to the menu, you
can always go back and re-edit to original values, provided you remember what
these
were.
Getting back to truly original values
will
not usually be very
important to your editing. Editing has only changed the amplitude bytes
preceding each 15 bytes of fast samples. You have not changed these samples
themselves.
There remain some additional edit options that
will
permanently and
irrevocably change data in main memory once you return to the menu. Prior to
this, they too can be cancelled with the
"Rw
key. These additional edit
functions change the 15 bytes of fast data.
First
is
the "BW key. This
is
a fast way to zero an amplitude. Whereas
amplitudes
set
to zero as previously described can be recovered, the method
with the
**Bv
key zeros the fast bytes in a way that cannot be cancelled once
you leave the edit mode.
Another special edit option
is
the
"XI*
key. This removes every fourth
positive square wave half cycle from the 15 bytes. Pressing
"XW
repeatedly
repeats the fourth half cycle removal process until nothing
is
left. Reverse
to the starting point with
"RW.
Changes are not recoverable after leaving the
edit mode.
A
number on the screen indicates how many
**Xw
pressing you have
made, but the count does not show a number above
3
even though the act exceeds
this number.
Some
fricative sounds can be improved in quality and naturalness
with the
"XW
key.
The
"Z1*
key makes another change in the 15 fast bytes somewhat akin to a
high pass filter. Also recoverable whib in the edit mode with
"RV,
the change
is
permanent after leaving this mode. Some fricatives can be improved with
"XW
or
"ZV
or a combination. These edit methods may not be so useful with voiced
sounds.
The final special key
is
**Sn. Changes with this key are partially
recoverable. When the "SW key
is
pressed, two things happen on the screen.
First, the amplitude level
is
automatically set to 7--about half value. In
addition, the asterisk representing the amplitude value
is
replaced with the
letter
wSw. You can change the amplitude value up or down from
7,
but the "Sw
remains. If software using Sound Master
is
installed, the only effect' of this
is
to
set
amplitude at value 7, or whatever
else
you
set
it
at. But
if
a
non-Sound Master version
is
installed, sounds are reduced in amplitude by a
-1
3-

substantial amount. What happens
is
that each half square wave in the
15
bytes
following an amplitude sample
is
made much narrower. This reduces the sound
energy without changing the fact that the square wave switches between two
fixed values. The principal use for "Sn
is
to soften sibilants ("ssn and "sh")
when not using a Sound Master.
When you are in the edit mode, press the ESC key and you get a description
of the various edit functions. Getting this
list
does not set amplitude
val~es--~R~
still
works. Two charts are shown below. One gives the selections
available from the main WEDITOR"menu. The other gives the edit commands as
displayed with ESC.
CATALOG on the menu displays disk contents. CHANGE DRIVE facilitates use
of two disk drives. RETURN TO
MAIN
MENU goes back to the menu that
first
appeared when you booted the Voice Master disk. Other selections should be
self explanatory.
Editing as described
is
all fine and good, but rather meaningless unless
you can listen to the results of your efforts. When in the edit mode, press
the "Pn key to hear the entire word being edited, including the effects of the
editing already done. The "0" key (letter) plays the word from the left edge
of the screen to the edit bar. You can also hear a word by selecting SPEAK
A
WORD from the menu.
Not much more can be said about the mechanics of editing--gaining
practical experience
is
more valuable. Try recording a word such as "sixff.
Reduce amplitude of the beginning
"sW
part (use the "SW keyn) and see
if
it
improves the word. Do the same for the ending
"sW
sound. Next try reducing
amplitudes following the end of the voiced sound so as to enhance the
sudden amplitude drop. The word might be a little easier to understand.
Fricatives such as "fWand "thn also can be improved by reducing amplitudes
and/or with "Sn and
"ZV
keys.
But you can do more. Try changing ffsixwto "ticksm by putting a zero
amplitude-gap just before the voiced
l1in
sound and by shortening the leading
I1sw
sound, but not weakening
it.
Try making the Ifsix" into flsickll by
eliminating the final sibilant
"sW.
Your objective
is
to gain skill in
improving words and changing them as you wish. And you will learn quite a bit
about the nature of speech itself.
The edit program does not directly allow beginning and ending parts of
words to be deleted so as to reduce memory storage requirements. Putting
amplitudes to zero does not also remove this part of the speech. Such a
procedure could in many cases shorten the words so that
less
memory would be
required for storage. This
manipulation
is
possible by modifying memory
locations for words with suitable PEEK(s) and POKE(s), but the process
is
not
simple (especially for 128K systems).
A
better procedure
is
to use the more
extensive "Speech Construction Setn (a separate optional software program).
With this program, words can be shortened, even during a prolonged sound, voice
pitch can be changed, and pitch periods can be repeated to achieve noise
reduction. An extremely versatile capability for creating and changing words
is
provided by the lfSpeech Construction Setn.
Those who want to directly experiment with speech data
files
can do so
with the aid of memory location information in an Appendix.
Editing Without Sound Master: This
is
really a special case of general editing
-1
4-

,
.
because the same editing commands remain available except for amplitude itself.
That
is,
changing amplitude values through cursor positioning does not apply.
You have at your disposal only the wBn,
trXrr,
ttZn,
and ltS1t keys. The l1BVkey
is
important because
it
provides the only means for forcing amplitude to zero
(although repeated
rtX1tts
might approximate this). The
"Xn
and
"Zrr
keys affect
sound quality, especially for fricatives. The "SW key
is
perhaps the most
valuable one, especially for creating improved
"ssW
and *shWsounds.
If you have a Sound Master, you may wish to edit speech so that
it
takes
advantage of
its
presence, but at the same
time
speech without Sound Master
retains good quality. the "SW
is
ignored with Sound master, while the actual
amplitude level of the rrSwon the display
is
ignored when Sound Master
is
not
in place (including when the "SW
is
at the zero level). To get zero amplitudes
in both cases, the rlBtl key must be used. ThewXwand "2" keys can be used, but
with some care.
The sophisticated (optional) program, "Speech Construction Setw, depends
in part on the same amplitude editing procedures discussed here. If you gain
skill with the amplitude editor, handling the "Speech Construction Setw
will
not be difficult.
AMPLITUDE EDITOR
BLANK DATA AT CURSOR
RAISE AMPLITUDE VALUE
MOVE
CURSOR LEFT
MOVE CURSOR RIGHT
LOWER AMPLITUDE VALUE
PLAY TO CURSOR
PLAY ENTIRE
WORD
QUIT TO EDITOR MENU
RESTORE AT CURSOR
SILENCE
A
SIBILANT
REMOVE EVERY 4TH CYCLE
LOW PASS AT CURSOR
SCROLL LEFT
SCROLL RIGHT
LOWER AMPLITUDE (M)
RAISE AMPLITUDE (I)
MENU
-
LEARN
A
WORD
SPEAK
A
WORD
EDIT
A
WORD
CHANGE
WORD
NUMBER
LOAD
A
SPEECH FILE
SAVE
A
SPEECH FILE
CATALOG
CHANGE
DRIVE
RETURN TO
MAIN
MENU
CONCEPTS
IN
RECOGNITION
If a speech word
is
reduced to a
set
of comparatively simple
characteristics, and if each characteristic
is
transformed to a graphical
variation of time, then this
set
of
&me
functions forms a wtemplatevwhich
characterizes the word. If several different words are formed into templates,
the result
is
a catalog which can be used in the study of some unknown word.
Recognition
is
based on the best fit, or match, of the unknown template with
one in the catalog. This requires that the unknown be compared with each
template in the catalog. If no comparison gives a good match, then
it
is
implied that the unknown word
is
not in the catalog. If two or more good
matches are found, then a decision involves uncertainty and advising the
operator of this situation might be warranted.
The forgoing applies to virtually all kinds of pattern recognition such as
speech, vision,
smells,
etc. Differences arise in the nature of the
characteristics used to form templates and in the error criteria used to
-1
5-

measure the closeness of a match.
It
may not be necessary to complete a match
with every member of the catalog if one or more cues contained in the
characteristics can narrow down the choices at an early stage.
A
process that
sequentially narrows choices
is
sometimes called a tree pattern search. Voice
Master recognition does involve a limited form of tree search in that a poor
match may be indicated before the process for a given template has been
completed with the process then jumping to the next template. Another form of
tree search applies when sub-vocabularies of words and sub-catalogs of
templates are employed. Voice Master allows for sub-vocabularies.
The dancing pattern of the bar graph provides the basic characteristic
used in Voice Master recognition (although additional cues not shown on the bar
graph may be used as well). Pattern shapes are measured at (approximately) 20
millisecond intervals and each individual pattern
is
designated with a set of 8
numbers. The total number of 8-number sets depends on the length of the word.
Adjacent patterns are subjected to a running average in order to reduce random
variations. Then the set of patterns for the entire word
is
time normalized
with the end result being 12 8-number sets. Templates for each word in the
catalog as well as the template for the unknown are processed in the same way.
The total number of bytes in each template
is
12*8=96 (plus four more for
memory location data).
Pattern matching could commence at this time by simply taking differences
between corresponding numbers for templates in the catalog and those for the
unknown.
A
closeness score can be computed as the sum of the differences in
magnitudes (or root-mean-square magnitudes). Certain weightings might be
applied to the patterns according to relative importance of their various
parts. The lowest score then indicates the best estimate for the unknown.
A
large lowest score indicates no good match. Two or more low scores indicate
uncertainty. (In order to maintain proper comparative measures, stored
templates must be normalized.)
In the Voice Master recognition algorithm, a variation of the matching
process called "dynamic time warpingvv
is
employed. This procedure accounts for
some minor differences in the way a word
is
said. The cues as functions of
time can be moved slightly, as if the template were a rubber sheet.
A
word
such as "hellovt
will
then continue to give a good match'even though the last
syllable may be stretched out compared to that used in making the catalog
template for the word.
The Voice Master allows for up to 32 templates per catalog. These may be
broken into
4
sets of 8 templates. Each
8
may in turn be broken into
subgroups.
A
tree-like search results if the first recognition from a
restricted set of words then points, or vectors, to a second set of words, and
so on. Words in each set can be made very distinctive with an error being
unlikely. In this way, two very similar words can be recognized reliably,
provided that they occur in different subgroups and that neither subgroup
will
be addressed by the incorrect word.
There are two error criteria: No match good enough, or two or more good
matches giving uncertainty. Both of these error criteria can be changed in a
user written program.
RECOGNITION PROGRAMMING
One of the Voice Master programs must be in main memory. In order to make
a template for
a
catalog, type
-1
6-

where n
is
the index number given to the template, in the range 0-31. Unless
your interest
is
limited to only the existence or non-existence of a particular
word, you will want to have a catalog of 2 or more templates. Thus &TRAIN
additional words.
Suppose you have &TRAIN(ed) a few words in the range 0-7. Now you
present a word to the microphone for recognition. Type
and all 32 templates are scanned for a best
fit.
Scanning all templates takes
time.
The scan can be limited to the first 8 templates with
or to the second group 8-15 with &RECOG 2, and so on to &RECOG 4. You can scan
two template groups, the
first
and third, for example, with &RECOG 1,3 (or in
reverse order with &RECOG 3,l).
Note: Template numbers that were never &TRAIN(ed) are quickly passed by in
the scanning process.
If,
for example, only templates 0-7 were &TRAIN(ed),
then &RECOG with scanning of all 32 templates would take about the same amount
of
time
as &RECOG 1. Speed-up with partitioning
is
most effective when
templates outside the sub-group of interest have been &TRAIN(ed).
What happens when you &RECOG? The index number of the best match
is
put
into memory location 25 in page zero.
If
the best match was, for example, for
word index number 3, then the decimal number
3
will appear on the screen with
PRINT PEEK(25).
What
if
you get no good match?
A
different number appears.
A
table of
possibilities follows, including codes for recording and playback as well as
those for recognition. Several of the items in the table are also discussed in
the section on "CALIBRATION AND MICROPHONE TECHNIQUE".
LOC. 25 Situation
248 Tone beep produced.
&RECOG when nothing was &TRAIN(ed).
Repeated &TRAIN word too long.
249 Tone beep produced.
&SPEAK a word never &LEARN(ed).
250 Time-out. Number of half-second
increments in Loc.
3.
25
1
Any key pressed during &LEARN, &TRAIN,
&RECOG, or &SPEAK. Read key: GET A$.
Exception
:
Space bar during playback
resets
&SPEAK to start of word.
252 Speech memory full (&LEARN only).
253 Speech input buffer full. About 8
seconds for &LEARN. About 2 seconds
for &RECOG and ITRAIN.
254 Min. error. No &RECOG because 2
or
more
words too similar.
Table of contents