Cowlacious Designs CAD-200 User manual

Manual rev. C
Cowlacious
Designs
Cowlacious Audio Device
CAD-200, Rev. A
Manual

Manual rev. C
Product Overview
This audio board allows triggered or continuous playback of WAV and MP3 audio files.
It can be triggered by a switch (not included), motion sensor (not included), or any DC voltage from 3.3V
up to 24V.
When triggered it can play back a single track or the next track. You can also have a track which plays
continuously and then when the unit is triggered it will pause the playback of that track, jump to a
specific track and play it, and then return to the previous track and continue playing it.
In continuous mode it can play the same track over and over, loop through all the tracks, or playback the
tracks in random order.
It has a built in 3 Watt mono amplifier that can connect directly to a speaker and a stereo line-out jack
for sending the sound to an external amplifier or amplified speakers (such as the type you connect to
your computer).
In addition, we have included a DPDT relay (two electronic switches that can turn one thing off while it
turns another one on) on the board so you can switch other things on or off when your triggered sound
plays!
Techinical Specifications
•Power Requirements: 9-12VDC, barrel connector is center positive, 2.1mmx5.5mm mating
connector.
•Supports FAT16 and FAT32 file system on the uSD card (not included).
oSupports maximum 32GB micro SD (uSD) card.
•WAV and MP3 Decoding
oMP3
oSupports 11172-3 and ISO13813-3 layer3 audio decoding.
oSampling rates (KHz): 8, 11.025, 12, 16, 22.05, 24, 32, 44.1, and 48.
•24-bit DAC output and supports dynamic range 90dB and SNR 85dB.
•Supports 3000 audio files under the root directory of the storage device.
•Built in 3W mono amplifier that can directly drive a speaker.
•PCB is designed to fit a Hammond 1591XXASFLBK case.
•Relay Technical Specs:
oMax Switching Voltage: 220VDC, 250VAC
oRated Current: 5A, Please note the graph below as DC switching current capability goes
down as voltage goes up. So, at 12VDC you can switch 5A, but at 20VDC only 3A etc.

Manual rev. C

Manual rev. C
Board Overview
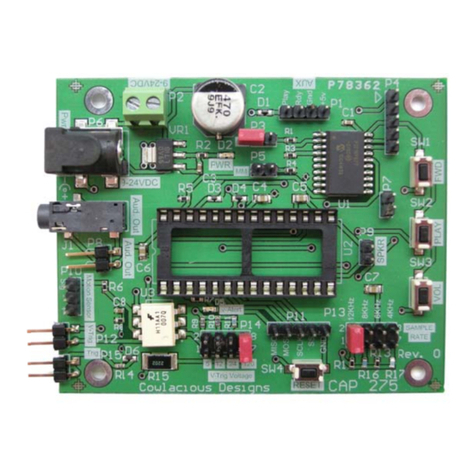
Play Button: Pressing this button is the same as using the trigger connection.
Audio Line-Out Jack: Use the jack to feed the audio ouput to an amplifier or set of ampflified
speakers. It will also drive headphones, but be careful as it is LOUD!
MP3 Module: The MP3 module has a uSD card slot on it. This is where you will put your uSD card
after loading audio files on it.
Power Jack: Connet a DC power source to this jack. Anything from 9VDC to 12VDC.
Speaker Jack: The speaker jack is for connecting a regular speaker (not amplified). It puts out up to
3W of audio power. It combines the stereo channels from the MP3 device and plays them over a single
speaker. Pin 1 is positive (+) and pin2 is negative (-), though it really doesn’t matter which pins are
connected to the speaker terminals.
AdKey Jack: Unused at this time and jack is not populated (mounted) on the board.

Manual rev. C
Operation Mode Switches:
•All switches OFF. This is normal operation mode.
•Switch 1 ON. This is PLAY NEXT mode.
•Switch 2 ON. This is RANDOM PLAY mode.
•Switch 3 ON. This is a PLAY CONTINUOUS mode that jumps to specific track when triggered and
returns to the previous track when done playing the triggered track.
Trigger Connections:
1. Signal or Trigger input from a motion sensor, switch, or 3.3VDC to 24VDC signal.
2. Ground for the motion sensor or signal voltage.
3. +5VDC for the motion sensor or a switch. This output is limited to 50mA and protected by a self-
resetting PTC fuse.
Relay Connections:
1. Switch 1; Normally Open (N.O.)
2. Switch 1; Common (C)
3. Switch 1; Normally Closed (N.C.)
4. Switch 2; Normally Open (N.O.)
5. Switch 2; Common (C)
6. Switch 2; Normally Closed (N.C.)
To install or remove wires from the connection jacks, use a sewing pin (or similar stiff wire) and insert
it into the slot above the wire hole (see picture below), insert or remove your wire, and then remove
the pin from the slot. Note: The wire should be stripped aprox. 1/4” (7mm) and inserted into the hole
until the insulation is just inside.

Manual rev. C
Operation:
The unit can be triggered by pressing the play button or by the trigger input. The play button also
operates as a volume button. Hold the play button in while a track is being played back and the sound
level will decrease. It will stay at that volume level as long as the unit has power. Once power is removed
it will go back to its default volume level. If you lower the volume too much, just disconnect power for a
few seconds and then power the unit back up to set it back to its default volume level.
There are several modes of operation as described below:
Standard Mode
With the dipswitches all turned to the off position, when triggered, the unit will play the
first track that was copied to the uSD card on the root directory. If the root directory looked like the one
below, then it would start playing “101 Digital Sound Effects – sounds of nature –09- Crow cawing…”. If
the triggered is held constant, then the unit will play the track over and over again.
The relay will turn on whenever the unit is triggered and it is playing back a track. The relay will turn off
whenever a track is not playing. An LED next to the relay will turn on every time the relay is turned on.
Next Mode
With only dipswitch 1 turned on, as shown, when triggered, the unit will play the next file
on uSD card. It will play one track and then wait to be triggered again. This mode includes all files on the
uSD card, not just the root directory. It will start with track number after it has played the last track. The
order the files are copied to the uSD card is the order the tracks will be played back.
The relay will turn on whenever the unit is triggered and it is playing back a track. The relay will turn off
whenever a track is not playing.

Manual rev. C
Random Mode
With only dipswitch 2 turned on, as shown, when triggered, the unit will start playing back
tracks from the uSD card. It will play from all the tracks on the card, even if they are in different
directories. It will play continually in this mode once it is triggered. It does not my pause between tracks
to wait for an additional trigger.
Interupt Mode
With only dipswitch 3 turned on, as shown, it will play the first track in directory 01 over
and over again until it it is triggered. Then, it will pause playback of that track, play the first track in the
ADVERT directory. When it is done playing the track in the ADVERT directory it will resume playback of
the track in the 01 directory, from where it was interupted, and continue until the unit is triggered again
and then the process is repeated.
The directories must be called “01” and “ADVERT” as shown above. The file within the 01 directory must
be renamed to have 001 in front of the name, such as:
The file in the ADVERT directory must be renamed to have an 0001 in front of the file name, such as:
The files can keep their original name, but must be prefaced with 001 (for the 01 directory) or 0001 (for
the ADVERT directory). So, if the original file was scream.mp3 it would need to be renamed to 001-
scream.mp3.
If switch 1 and 2 are off, then the relay will turn on for 5 seconds, while the file in the ADVERT directory
is being played.
If switch 1 is on and 2 is off, then the relay will turn on for 10 seconds, while the file in the ADVERT
directory is being played.
If switch 1 and 2 are both on, then the relay will turn on for 15 seconds, while the file in the ADVERT
directory is being played.

Manual rev. C
Thank you for buying a Cowlacious Designs product!
Cowlacious Designs
420 Rawl Rd.
Lexington, SC 29072
(775) 741-1086
Table of contents
Other Cowlacious Designs Computer Hardware manuals
