HERRAMIENTAS
NECESARIAS:
10 mm Llave
14 mm Llave
EQUIPOS
LATERAL MANGO ACCESORIO
GARANT A LIMITADA DE CRAFTSMAN LIFETIM E
HERRAMIENTA INCLUIDO:
M12 Perno
Hexagonal (CANT: 4)
M8 x 25 Perno
Hexagonal (CANT: 16)
Arandelas
(CANT: 16)
6 x
Necesarios:
ASAMBLEA
exagonal (CANT: 4)
M6 x 12 Perno H
NOTA: No todas las
con su modelo.
Use una llave de 10 mm y 2 pernos hexagonales de
M6 x 12 para apretar la manija en los orificios de fijación
en el gabinete como se muestra. Apriete firmemente
solo a mano. No apriete demasiado.
A
5
movimiento.
gratuitamente. Si una pieza de repuesto no est disponible,el producto
ser reemplazado por uno de igual valor.
Transform SR Brands Management LLC, Hoffman Estates, IL 60179.
CON PRUEBA DE VENTA una pieza defectuosa ser reemplazada
DURANTE EL TIEMPO QUE SE UTILICE desde la fecha de venta,
este producto est garantizado contra defestos de material or mano
de obra.
ado o alterado por
10 mm Llave
INSTALACION DE LAS RUEDAS
Necesarios:
Arandelas (CANT: 16)
M8 x 25 Perno H
exa onal (CANT: 16)
g
10 mm Llave
Para obtener la cobertura de la garantía, devuelva una pieza
defectuosa al minorista donde compró el producto por primera vez.
Cabinet handle M6 x 12 Hex Bolt
4 X
1 X
Caster giratorio de bloqueo
Arandelas
M8 x 25 Perno
Ruedas Giratorias
16 X
16 X
2 X
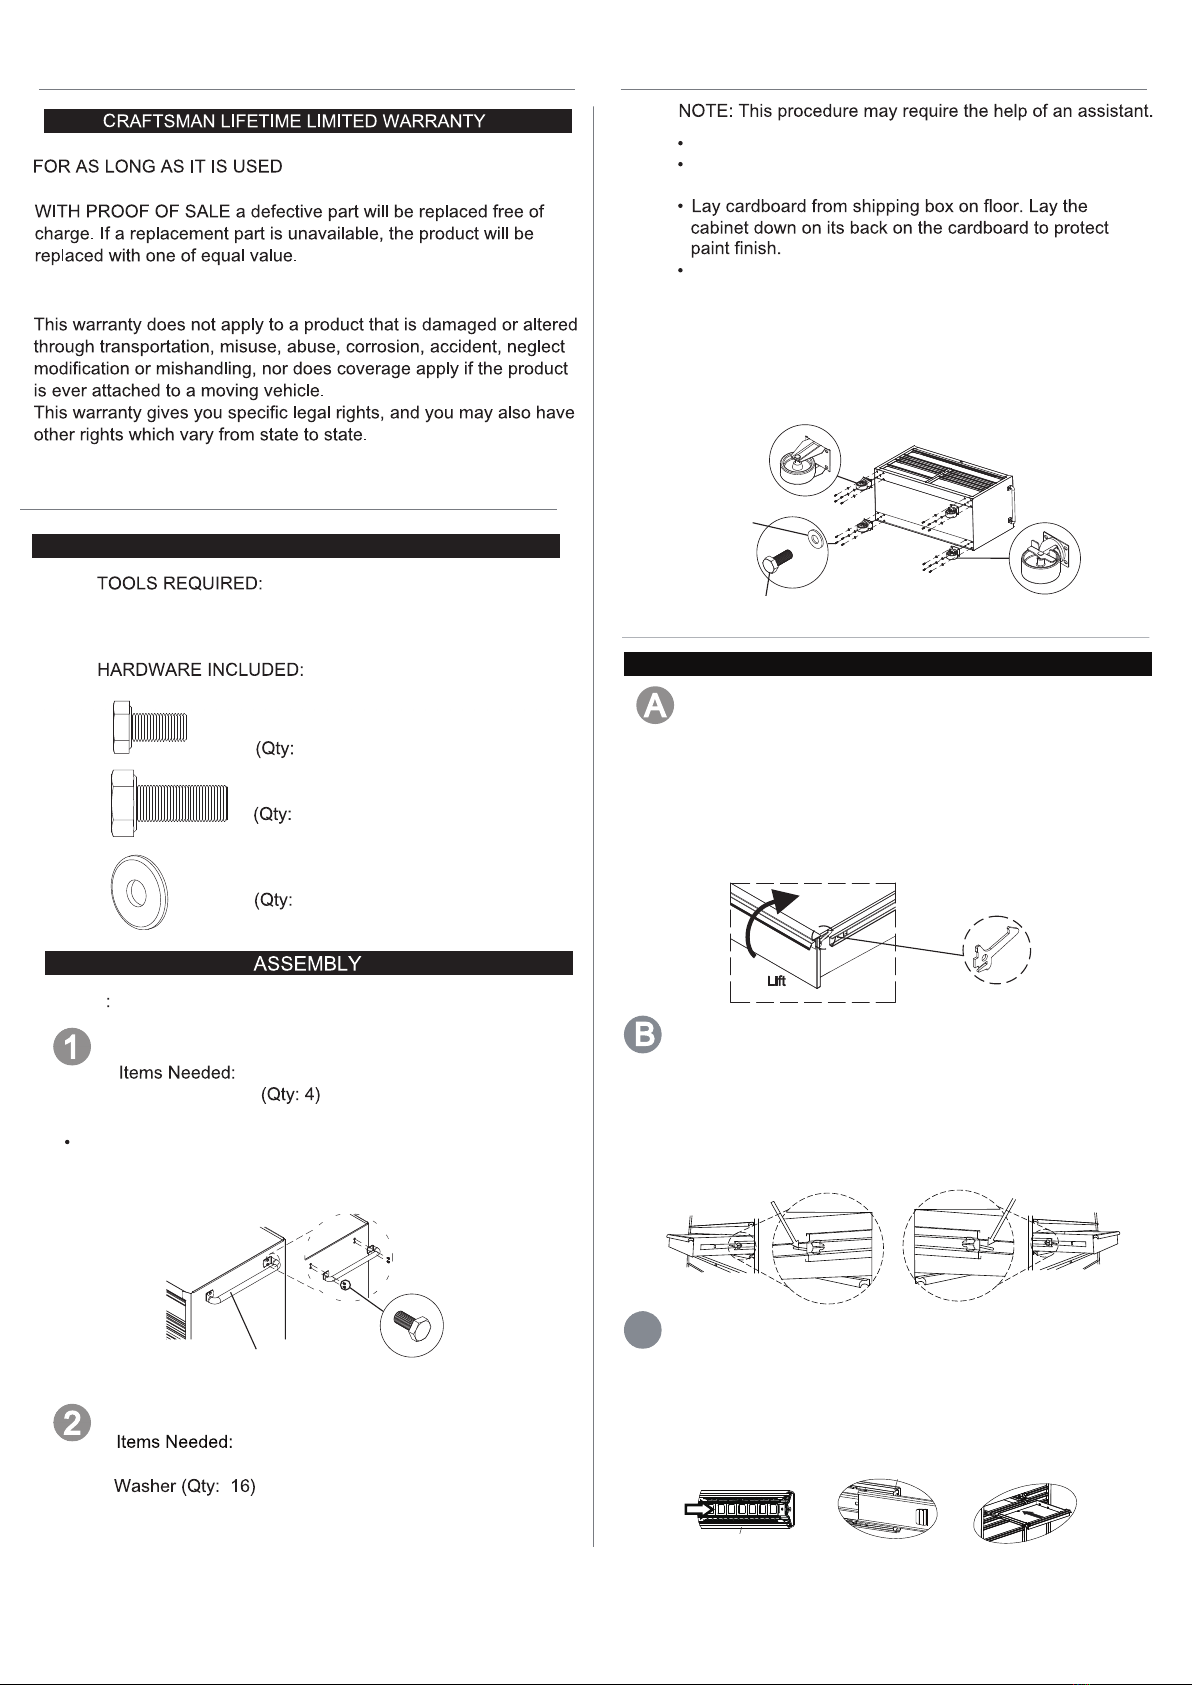
Coloque el gabinete hacia abajo sobre su espalda
Use una llave de 14 mm y 4 pernos y arandelas
hexagonales M8 x 25 para fijar cada rueda a la esquina
inferior del gabinete, como se muestra. Instale las
ruedas giratorias de bloqueo en el lado de la manija
del gabinete. Instale las ruedas fijas en el costado
del gabinete opuesto a la manija.
Apriete bien todos los tornillos. Devuelva el carro a su
posiscion vertical.Coloque la tapa de madera maciza
en la parte superior del gabinete.
NOTA: Este procedimiento puede requerir la ayuda de un
asistente.
OPERACION
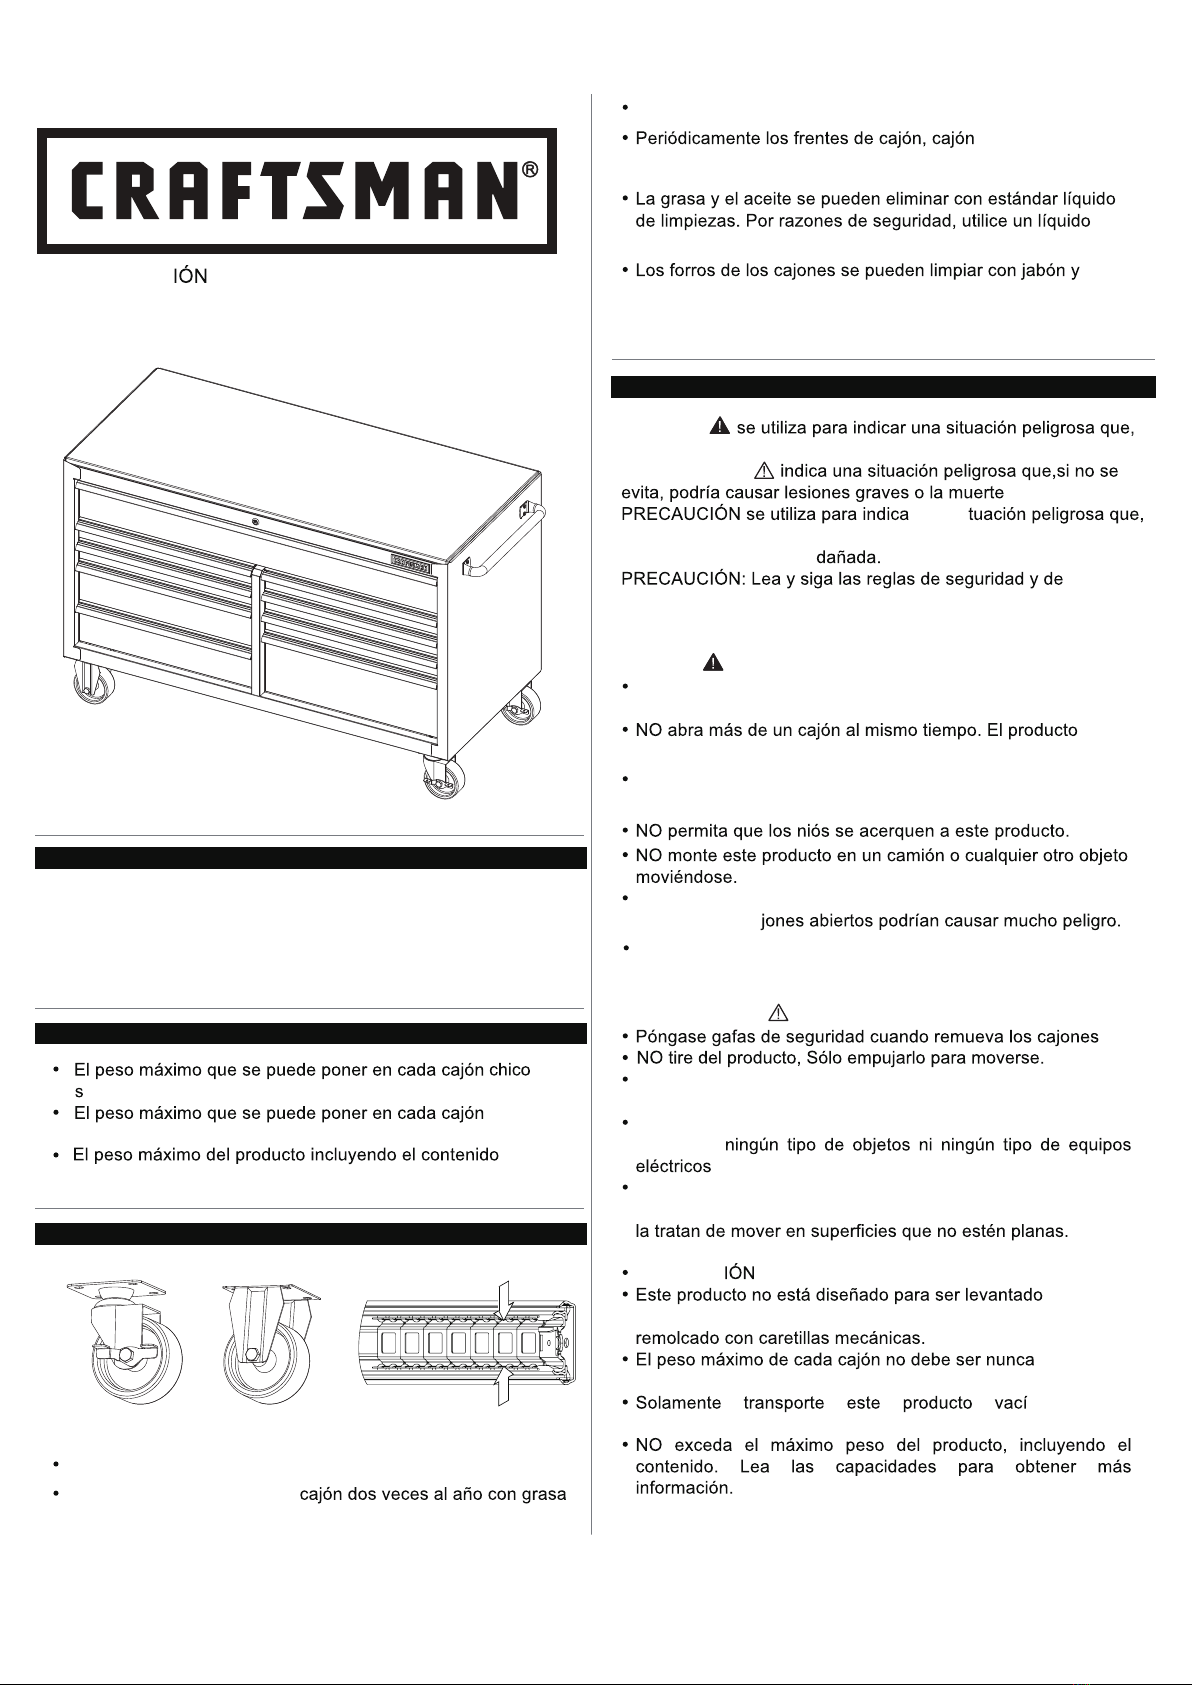
REMOVIENDO CAJONES
completamente
.
EMPUJE PARA ARRIBA
PALANCA DE LIBERACIÓN
EMPUJE PARA ABAJO
LA OTRA PALANCA DE LIBERACIÓN
GIRAR Y DESCARGAR MANGOS DE CAJA
Estas unidades están equipadas con cierres de cajones
de seguridad. Para abrir, levante la manija del cajón
mientras tira del cajón hacia usted. Para cerrar, cierre
el cajón firmemente hasta que se enganche el pestillo.
Si el cajón no permanece cerrado, el gancho de
seguridad puede estar doblado, o puede estar frotando
contra los deslizadores del cajón. Para solucionar este
problema, doble ligeramente el gancho hasta que
encaje en el pestillo.
Latch Hook
INSTALACION DE LOS CAJONES
Soporte
Diapositiva
Extender la Diapositiva
c
Extender las diapositivas del gabinete grande. Inserte
los soportes en cada lado cajón en las ranuras de las
diapositivas en los dos gabinetes, teniendo cuidado de
que estan correctamente posicionados. Ya insertado
correctamente, cierre completamente el cajón para
establecer las diapositivas en su posiciones adecuadas.
Saque las ruedas del cajón inferior izquierdo.
Retire la superficie de trabajo de la parte superior
del gabinete antes de colocar el gabinete.