manuals.online logo
Brands
  1. Home
  2. •
  3. Brands
  4. •
  5. Craftsman
  6. •
  7. Saw
  8. •
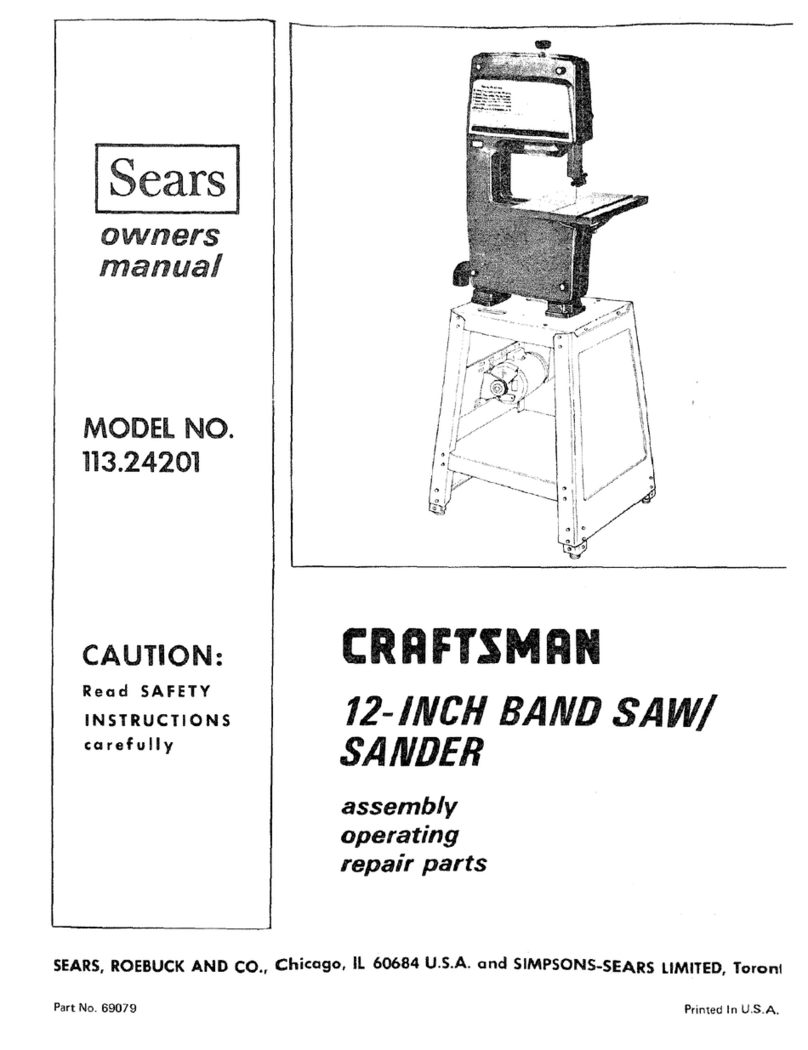
  9. Craftsman 113.290060 User manual

Craftsman 113.290060 User manual

Other Craftsman Saw manuals

Craftsman Accra-Arm 113.29440 Datasheet

Craftsman

Craftsman Accra-Arm 113.29440 Datasheet

Craftsman 320.28191 User manual

Craftsman

Craftsman 320.28191 User manual

Craftsman Professional 320.27311 User manual

Craftsman

Craftsman Professional 320.27311 User manual

Craftsman 315.17250 User manual

Craftsman

Craftsman 315.17250 User manual

Craftsman 351.228031 User manual

Craftsman

Craftsman 351.228031 User manual

Craftsman 113.290650 User manual

Craftsman

Craftsman 113.290650 User manual

Craftsman 351.243971 User manual

Craftsman

Craftsman 351.243971 User manual

Craftsman 315.108240 User manual

Craftsman

Craftsman 315.108240 User manual

Craftsman 351.221140 User manual

Craftsman

Craftsman 351.221140 User manual

Craftsman 113.2941 User manual

Craftsman

Craftsman 113.2941 User manual

Craftsman 315.114260 User manual

Craftsman

Craftsman 315.114260 User manual

Craftsman 315.2121O0 User manual

Craftsman

Craftsman 315.2121O0 User manual

Craftsman 21217 - 12 in. Miter Saw User manual

Craftsman

Craftsman 21217 - 12 in. Miter Saw User manual

Craftsman CMCS500M1 User manual

Craftsman

Craftsman CMCS500M1 User manual

Craftsman 137.21807 User manual

Craftsman

Craftsman 137.21807 User manual

Craftsman 315.108470 User manual

Craftsman

Craftsman 315.108470 User manual

Craftsman 113.221740 User manual

Craftsman

Craftsman 113.221740 User manual

Craftsman 320.2190 User manual

Craftsman

Craftsman 320.2190 User manual

Craftsman 315.271810 User manual

Craftsman

Craftsman 315.271810 User manual

Craftsman table saw User manual

Craftsman

Craftsman table saw User manual

Craftsman 320.10871 User manual

Craftsman

Craftsman 320.10871 User manual

Craftsman Craftsman 172.10855 12 Amp User manual

Craftsman

Craftsman Craftsman 172.10855 12 Amp User manual

Craftsman 21805 - 10 in. Table Saw User manual

Craftsman

Craftsman 21805 - 10 in. Table Saw User manual

Craftsman 137.415020 User manual

Craftsman

Craftsman 137.415020 User manual

Popular Saw manuals by other brands

General 90-125 M1 Setup & operation manual

General

General 90-125 M1 Setup & operation manual

Scheppach sd1600v instruction manual

Scheppach

Scheppach sd1600v instruction manual

Skil 5750 Operating/safety instructions

Skil

Skil 5750 Operating/safety instructions

Black & Decker Sawcat 3027-10 owner's manual

Black & Decker

Black & Decker Sawcat 3027-10 owner's manual

Uni-Vent PS-COS12 manual

Uni-Vent

Uni-Vent PS-COS12 manual

Bosch GKS 190 Professional Original instructions

Bosch

Bosch GKS 190 Professional Original instructions

Black & Decker KS999E user guide

Black & Decker

Black & Decker KS999E user guide

Ingco CS18528 instruction manual

Ingco

Ingco CS18528 instruction manual

IMET BS 300/60 SHI Instructions for use

IMET

IMET BS 300/60 SHI Instructions for use

Scheppach Deco-flex instruction manual

Scheppach

Scheppach Deco-flex instruction manual

CMi C-KGS-1450/210 Original instructions

CMi

CMi C-KGS-1450/210 Original instructions

Bosch GCO 14-2 operating instructions

Bosch

Bosch GCO 14-2 operating instructions

Clarke CCS185B Operation & maintenance instructions

Clarke

Clarke CCS185B Operation & maintenance instructions

Makita 2107F instruction manual

Makita

Makita 2107F instruction manual

Holzmann DKS 21PRO user manual

Holzmann

Holzmann DKS 21PRO user manual

RIDGID BS1400 owner's manual

RIDGID

RIDGID BS1400 owner's manual

Optimum OPTisaw CS 275 operating manual

Optimum

Optimum OPTisaw CS 275 operating manual

Makita BPB180 instruction manual

Makita

Makita BPB180 instruction manual

manuals.online logo
manuals.online logoBrands
  • About & Mission
  • Contact us
  • Privacy Policy
  • Terms and Conditions

Copyright 2025 Manuals.Online. All Rights Reserved.

JSave This Manual
For Future Reference
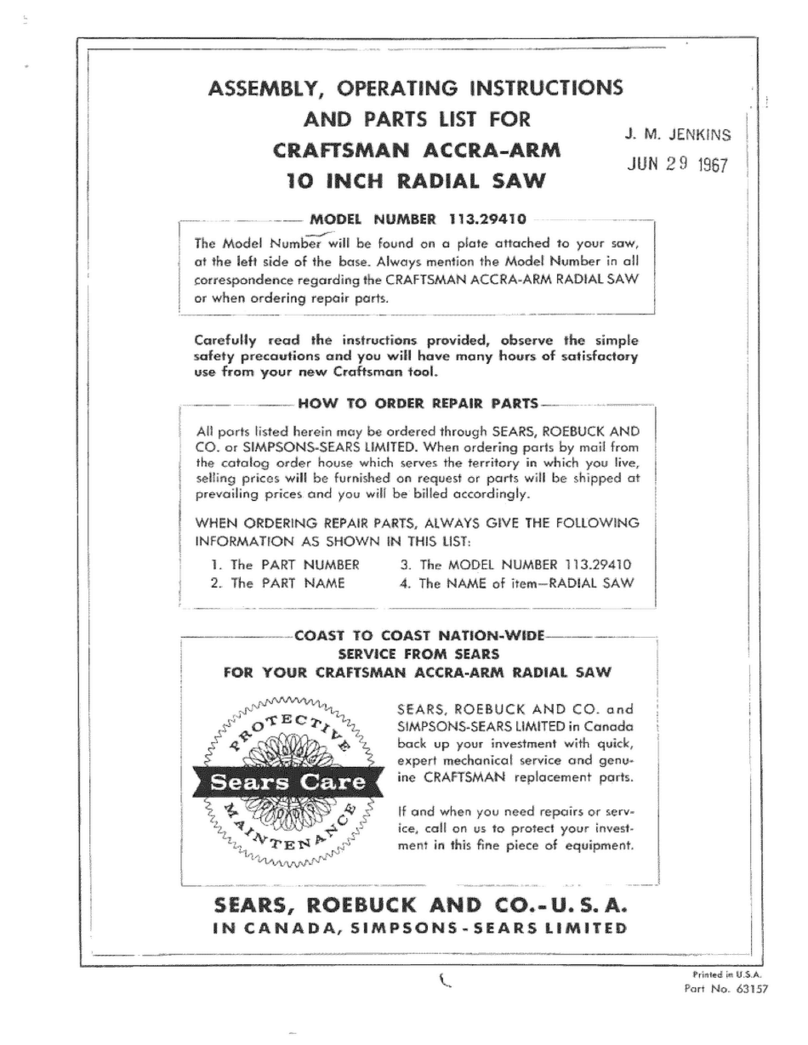
Sears
owners
manual
MODEL NO,
113.290060
SAW WITH MOTOR,
LEGS AND
TWO TABLE EXTENSIONS
Serial
Number
Model and seria
numbers may be found
at the left-hand side
of the base
You should record both
model and serial number
ira safe place for future
use.
CAUTION:
Read GENERAL
and ADDITIONAL
SAFETY
INSTRUCTIONS
carefully
CRRFTSMRN1
ELECTRONIC
IO-INCH TABLE SA W
•assembly
•operating
•repair parts
Sold by SEARS, ROEBUCK AND CO., Chicago, IL. 60684 U.S.A.
Part No. 62850 Printedin U.S.A.
FULL ONEYEARWARRANTYON CRAFTSMANTABLESAW
If within one year from the date of purchase, this Craftsman Table Saw falls due to adefect in material or
workmanship, Sears will repair it, free of charge.
WARRANTY SERVICE IS AVAILABLE BY SIMPLY CONTACTING THE NEAREST SEARS SERVICE
CENTER/DEPARTMENT THROUGHOUT THE UNITED STATES.
This warranty applies only while this product is used in the United States.
This warranty gives you specific legal rights, and you may also have other dghts which vary from state to state.
SEARS, ROEBUCK AND CO., DEPT. 698/731A Sears Tower, Chicago, IL 60684
GENERAL SAFETY INSTRUCTIONS FOR POWER TOOLS
1. KNOW YOUR POWER TOOL
Read and understand the owner's manual and
labels affixed to the tool. Learn its application
and limitations as well as the s3ecific potential
hazards peculiar to this tool.
2. GROUND ALL TOOLS
This tool _s equipped with an approved
3-conductor cord and a 3-prong grounding
type plug to fit the proper grounding type
receptacle. The green conductor in the core is
the grounding w_re. Never connect the green
wire to a live terminal.
3. KEEP GUARDS IN PLACE,
in working order, and in proper adjustment and
alignment.
4. REMOVE ADJUSTING KEYS
AND WRENCHES
Form habit of checking to see that Keys and
adjusting wrenches are rerroved from too!
before turning it on.
5. KEEP WORK AREA CLEAN
C uttered areas aria benches invite accidents.
Floor must not De slippery due to wax or
sawdust:
6. AVOID DANGEROUS ENVIRONMENT
Don't use power tools in damp or wet ocations
or expose them to ram. Keep work area well
lighted. Provide adequate surrounding work
space.
7. KEEP CHILDREN AWAY
All visitors should be kept a safe distance from
work area.
8. MAKE WORKSHOP KID-PROOF
-- with padlocks, master switches, or by
removing starter keys.
9. DON'T FORCE TOOL
It will dO the job better and safer at the rate for
which it was designed.
10. USE RIGHT TOOL
Don't force tool or attachment to do a job it was
not designed for.
11. WEAR PROPER APPAREL
Do not wear loose clothing, gloves, neckties or
jewelry (rings, wrist watches) to get caught in
moving parts. Nonslip footwear is
recommended. Wear protective hair covering to
contain long hair. Roll long sleeves above the
elbow.
12. USE SAFETY GOGGLES (Head Protection)
Wear Safety goggles (must comply with ANSI
Z87.1) at all umes. Everyoay eyeg asses only
have mpact resistant lenses, they are NOT
safety glasses Also. use face or dust mask if
cutting operation is-dusty, and ear protectors
(plugs or muffs) during extended periods of
operation.
13. SECURE WORK
Use clamps or a vise to hold work wnen
practical, t's safer than using your hand. frees
both banes to operate tool.
14. DON'T OVERREACH
Keep proper footing and balance at all times.
15. MAINTAIN TOOLS WITH CARE
Keep tools sharp and clean for best and safest
performances. Follow instructions for
lubricating and changing accessories.
16. DISCONNECT TOOLS
before servicing; when changing accessories
such as blades, bits. cutters, etc.
17. AVOID ACCIDENTAL STARTING
Make sure switch is in "OFF" position before
;)lugging m.
18, USE RECOMMENDED ACCESSORIES
Consult the owner's manua_ for recommended
accessories Follow the instructions that
accompany the accessories The use of
mproper accessories may cause hazards.
19. NEVER STAND ON TOOL
Serious injury could occur if thetool istipped or
if the cutting tool is accidentally contactea.
Do not store materials above or near the tool
such that rt is necessary to stand on the tool to
reach them
20. CHECK DAMAGED PARTS
Before further use of the tool, a guard or other
;)art that is damaged ghould be carefully
checked to ensure that it will operate properly
and perform its intended function. Check for
alignment of moving parts, binding of moving
parts, breakage of parts, mounting, and any
other conditions that may effect its operation. A
guard or other part that is damaged should be
properly repaired or replaced.
21. DIRECTION OF FEED
Feed work into a blade or cutter against the
direction of rotation of the blade or cutter only.
22. NEVER LEAVE TOOL RUNNING
UNATTENDED
Turn power off. Don't leave tool until it comes to
a complete step.
ADDITIONAL SAFETY INSTRUCTIONS FOR TABLE SAWS
WARNING: FOR YOUR OWN SAFETY, DO NOT B. Wear safety goggles that comply with ANS!
OPERATE YOUR SAW UNTIL IT IS COMPLETELY Z87.1, and aface shield or dust mask if
ASSEMBLED AND INSTALLED ACCORDING TO
THE INSTRUCTIONS... AND UNTIL YOU HAVE
READ AND UNDERSTAND THE FOLLOWING:
1. GENERAL SAFETY INSTRUCTIONS FOR
POWER TOOLS... SEE PAGE 2
2. GETTING TO KNOW YOUR SAW... SEE PAGE
22
3. BASIC SAW OPERATION ..... SEE PAGE 27
4. MAINTENANCE ............... SEE PAGE 41
5. STABILITY OF SAW
If there is any tendency for the saw to tip over or
move during certain cutting operations such as
cutting extremely large heavy panels or long
heavy boards, the saw should be bolted down.
If you attach any kind of table extensions over
24" wide to either end of the saw, make sure you
either bolt the saw to the bench or floor as
appropriate, or support the outer end of the
extension from the bench or floor, as
appropriate.
6. LOCATION
The saw should be positioned so neither the
operator nor a casual observer is forced to stand
in line with the saw blade.
7. KICKBACKS
A "KICKBACK" occurs during a rip-type
operation when a part or all of the workpiece is
thrown back violently toward the operator.
Keep your face and body to one side of the
sawblade, out of line with a possible "Kickback."
Kickbacks -- and possible injury from them --
can usually be avoided by:
A. Maintaining the rip fence parallel to the
sawblade.
B. Keeping the sawblade sharp. Replace or
sharpen antikickback pawls when points
become dull.
C. Keeping sawblade guard, spreader, and
antikickback pawls in place and operating
properly. The spreader must be in alignment
with the sawb!ade and the pawls must stop a
kickback once it has started. Check their
action before ripping.
D. NOT ripping work that is twisted or warped or
does not have a straight edge to guide along
the rip fence.
E. NOT releasing work until you have pushed it
all the way past the sawblade.
F. Using a push stick for ripping widths of 2 to 6
in., and an auxiliary fence and push block for
ripping widths narrower than 2in. (See "Basic
Saw Operation Using The Rip Fence"
section.)
G. NOT confining the cut-off piece when
ripping or cross-cutting.
8. PROTECTION: EYES, HANDS, FACE, EARS,
BODY
A. If any part of your saw is missing,
malfunctioning, or has been damaged or
broken . ..such as the motor switch,
electronic controls, or other operating
control, a safety device or the power cord...
cease operating immediately until the
particular part is properly repaired or
reptaced.
C.
D,
E.
F.
operation is dusty. Wear ear plugs or muffs
during extended periods of operation.
Small loose pieces of wood or other objects
that contact the rear of the revolving blade
can be thrown back at the operator at
excessive speed. This can usually be avoided
by keeping the guard and spreader in place
for all thru-sawing operations (sawing
entirely thru the work) AND by removing all
loose pieces from the table with a long stick of
wood IMMEDIATELY after they are cut off.
Use extra caution when the guard assembly is
removed for resawing, dadoing, rabbeting, or
molding -- replace the guard as soon as that
operation is completed.
For rip or rip-type cuts, the following end of a
workpiece to which a push stick or push
board is applied must be square
(perpendicular to the fence) in order that feed
pressure applied to the workpiece by the
push stick or block does not cause the
workpiece to come away from the fence, and
possibly cause a kickback.
During rip 6nd rip type cuts, the workpiece
must be held down on the table and against
the fence with a push stick, push block, and
featherboards, as required. A featherboard is
made of solid lumber (at least 3/4" thick) per
sketch. I' 24., .I
5,/16" APART
G. NEVER turn the saw "ON" before clearing the
table of all tools, wood scraps, etc., except the
workpiece and related feed or support
devices for the operation planned.
H. NEVER place your face or body in line with
the cutting tool.
I. NEVER place your fingers or hands in the
path of the sawblade or other cutting tool.
J. NEVER reach in back of the cutting tool with
either hand to hold down or support the
workpiece, remove wood scraps, or for any
other reason. Avoid awkward operations and
hand positions where a sudden slip could
cause fingers or hand to move into a
sawbiade or other cutting tool.
K. DO NOT perform layouL assembly, or setup
work on the table while the cutting tool is
rotating.
L. DO NOT perform any operation
"FREEHAND" -- always use either the rip
fence or the miter gauge to position and
guide the work.
M. NEVER use the rip fence when crosscutting
or the miter gauge when ripping. DO NOT use
the rip fence as a length stop.
Never hold onto or touch the "free end" of the
workpiece or a !'free piece" that is cut off,
while power is "ON" and!or the sawblade is
rotating.
N. Shut "OFF" the saw and disconnect the
oower cord wnen removmg the table insert
changing the cutting tool. removing or
replacing the blade guara, or making
adjustments.
O. Provide aaequate support to the rear and
sides of the saw table for wider or long
work _)ieces.
P. Plastic and composition (_ike hardboard)
materials may be cut on your saw. However
since these are usually aurte hard ana
slippery, the antikickback pawls may not stop
a kickback.
Therefore, be especially attentive to
following proper set-Lp and cutting
;3rocedures for ripping. Do not stand or
permit anyone else to stand, m line with a
3otential kickback.
Q. If you stall or jam the sawblade in the
workpiece turn saw "QFF" and remove the
workpiece from the sawblade. Check to see if
the sawblade is parallel to the m_ter gauge
grooves and if the spreader is in proper
alignment with the sawblade. If ripp_ ng at the
time. check to see if the rip fence is parallel
with the sawblade. Readjust as indicated.
R. DO NOT remove small pieces of cut-off
materia that may become trapped inside the
blade guard while the saw is running. This
could endanger your hands or cause a
kickback Turn saw "OFF" and wait until
blade stops.
S. Use extra care when ripping wood that hasa
twistec grain or is twisted or bowed -- it may
rock on the table and/or oinch the sawblade.
9. KNOW YOUR CUTTING TOOLS
A. Dull. gummy, or improperly sharpened orset
cutting tools can cause material to stick, jam.
stall the saw. or kickback at me operator.
Minimize 3otential injury by proper cutting
tool ana machine maintenance
NEVER ATTEMPT TO FREE A STALLED
SAWBLADE WITHOUT FIRST TURNING
THE SAW OFF.
B. Never use grinding wheels, abraswe cut-off
wheels friction wheels (metal slitting blades)
wire wneels or buffing wheels.
10. USE ONLY ACCESSORIES DESIGNED FOR
THIS SAW
11 Crosscutting operations are worked more
conveniently and with greater safety if an
auxiliary wood facing is attached to the miter
gauge using me holes orovided. However. the
facing mus_ not interfere with the proper
functioning of the sawoJaae guard.
12. Make sure the top of me ardor or cutting tool
rotates toward you when standing in normal
operating position. AIsd make sure the cutting
too, arbor collars and arbor nut are installed
Properly. Keeo the cutting tool as Jow as
possJble for the operauon being performea.
Keep all guards in place whenever possible
13. Do not use any blade or other cutting tool
marked for an operating speed _ess than 3450
RPM. Never use a cutting tool larger in diameter
than the diameter for which the saw was
designed.. For greatest safety and efficiency
when r_ppmg, use the maximum diameter blade
for which the saw isdesigned, since under these
conditions the spreader is nearest the blade.
14. Adjust table inserts flush with the table top.
NEVER operate the saw unless the proper insert
is installed.
15. NEVER feed material into the cutting tool from
the rear of the saw. An accident and serious
injury could result.
16. THINK SAFETY.
Safety is a combination of operator common
sense and alertness at all times when the saw is
being usea.
17. NEVER use another person as a substitute for a
table extension, or as additional support for a
workpiece that is longer or wider than the basic
saw table, or to assist in feeding or supporting or
pulling the workpiece.
DO NOT pull the workpiece through the
sawblade - position your body at the nose (in-
feed) side of the guard: start and complete the
cut from that same side. This will require added
table support for long or wide workpieces that
extend beyond the length or width of the saw
table.
18. NOTE AND FOLLOW SAFETY INSTRUC-
TIONS THAT APPEAR ON THE FRONT OF
YOUR SAW.
ir_ FOR YOUR OWN SAFETY: ,=or oo.z _4,5A,,_.
19. WARNING: DO NOT ALLOW FAMILIARITY
(GAINED FROM FREQUENT USE OF YOUR
SAW) TO BECOME COMMONPLACE.
ALWAYS REMEMBER THAT A CARELESS
FRACTION OF A SECOND IS SUFFICIENT TO
INFLICT SEVERE INJURY.
20. WARNING: THE 2-1/2" SAW PULLEY AND THE
2-112" MOTOR PULLEY FURNISHED, WILL
RUN THE BLADE AT APPROXIMATELY 3450
RPM WHEN USED WITH A 3450 RPM MOTOR.
NEVER SUBSTITUTE THESE PULLEYS TO
INCREASE THIS SPEED BECAUSE IT COULD
BE DANGEROUS.
NOTE: Do not overtighten arbor nut. Use the arbor
wrench to just "snug" it
WEAR YOUR
The operation of any power tool can result in foreign
objects being thrown into the eyes, which can result
msevere eye damage• Always wear safety goggles
complying with ANSI Z87.1 Ishown on Package)
before commencing power tool operation. Safety
Goggles are available at Sears retail or catalog.
stores.
WARNING: DO NOT UNDER ANY CIRCUMSTANCES
ATTEMPT TO SERVICE, REPAIR. DISMANTLE, OR
DISASSEMBLE ANY OF THE ELECTRICAL OR
ELECTRONIC (COMPUTER ETC.) PARTS. REPAIRS ARE TO
BE PERFORMED BY SEARS SERVICE PERSONNEL ONLY.
4
MOTOR SPECIFICATIONS AND ELECTRICAL REQUIREMENTS
This saw is designed to use a 3450 RPM motor only.
Do not use any motor that runs faster than 3450
RPM. It is wired for operation on 110-120volts, 60
Hz., alternating current. IT MUST NOT BE
CONVERTED TO OPERATE ON 230 VOLTS.
CONNECTING TO POWER SOURCE OUTLET
This saw must be grounded while in use to protect
the operator from electrical shock.
If power cord is worn or cut, or damaged in anyway,
have it replaced immediately.
Your saw has a plug that looks like the one below.
3-PRONG PLUG
<
GROUNDING PRONG
_PROPERLY GROUNDED
3-PRONG OUTLET
Plug power cord into 110-120V properly grounded
type outlet protected by a 15-amp. time delay or
Circuit-Saver fuse or circuit breaker.
IF YOU ARE NOT SURE THAT YOUR OUTLET IS
PROPERLY GROUNDED, HAVE IT CHECKED BY
A QUALIFIED ELECTRICIAN.
WARNING: DO NOT PERMIT FINGERS TO
TOUCH THE TERMINALS OF PLUG WHEN
INSTALLING OR REMOVING THE PLUG TO OR
FROM THE OUTLET.
WARNING: IF NOT PROPERLY GROUNDED THIS
POWER TOOL CAN HAVE THE POTENTIAL
HAZARD OF ELECTRICAL SHOCK, PARTICU-
LARLY WHEN USED" IN DAMP LOCATIONS,
AROUND PLUMBING, OR OUT OF DOORS. IF AN
ELECTRICAL SHOCK OCCURS THERE IS THE
POTENTIAL OF ASECONDARY HAZARD SUCH
AS YOUR HANDS CONTACTING THE
SAWBLADE.
This saw is equipped with a 3-conductor cord and
grounding type plug which has a grounding prong,
approved by Underwriter's Laboratories and the
Canadian Standards Association. The ground
conductor has a green lug and isattached to the tool
housing at one end and to the ground prong in the
attachment plug at the other end.
This plug requires a mating 3-conductor grounded
type outlet as shown.
If the outlet you are planning to use for this saw is of
the two prong type DO NOT REMOVE OR ALTER
THE GROUNDING PRONG IN ANY MANNER. Use
an adapter as shown and always connect the
grounding lug to a known ground.
It is recommended that you have a qualified
electrician replace the TWO prong outlet with a
properly grounded THREE prong outlet.
An adapter as shown below is available for
connecting plugs to 2-prong receptacles. The
green grounding lug extended from the adapter
must be connected to a permanent ground such as
to a properly grounded outlet box.
GROUNDING LUG
_MAKE SURE THIS IS
3-PRONG _Y"7_ I_'-'_.--. CONNECTED TO A
PLUG _--_ _[_"_, II KNOWN GROUND
__ _ 2-PRONG
lRECEPTACLE
ADAPTER
NOTE: The adapter illustrated is for use only if you
already have a properly grounded 2-prong
receptacle.
The use of any extension cord will cause some loss
of power. To keep this to a minimum and to prevent
over-heating and motor burn-out, use the table
below to determine the minimum wire size (A.W.G.)
extension cord. Use only 3 wire extension cords
which have 3 prong grounding type plugs and
3-pole receptacles.which will accept the plug on the
saw.
1 H.P. MOTOR 110-120V
Extension Cord Length Wire Size A.W.G.
Up to 50 Ft.................. 14
50 to 100 Ft .................. 12
100 - 200 Ft .................. 10
200 - 400 Ft.................... 8
CONTENTS
Warranty .................................... 2
General Safety Instructions
For Power Tools ........................... 2
Additional Safety Instructions
For Table Saw ............................. 3
Motor Specifications/_nd
Electrical Requirements .................... 5
Unpacking And Checking Contents ........... 6
Assembly .................................... 8
Getting To Know Your Saw .................. 22
Location And Function of
Electronic Controls ..................... 22
Location And Function of
Mechanical Controls .................... 23
Basic Saw Operation ........................ 27
Calibrating The Saw For
Electronic Operations ................... 29
Recommended Accessories ................. 40
Maintenance ................................ 41
Lubrication ................................. 41
Trouble Shooting ........................... 42
Repair Parts ................................ 46
UNPACKING AND CHECKING CONTENTS
TOOLS NEEDED
Medium Screwdriver
Small Screwdriver
__ =_'i'iilr"_Pliers
'Wrenches
_,..._, ,.', :[ 3/8in. 7/ls in.
1/2 in. 9/16 in.
Combination Square 3/4 in.
#2 Phillips Type
Screwdriver
COMBINATION SQUARE MUST BE TRUE.
STRAIGHT EDGE OF BOARD
3/4" THICK. THIS EDGE MUST
DRAW LIGHT LINE ON BE PERFECTLY STRAIGHT.
L_
/
SHOULD BE NO GAP OR OVERLAP
HERE WHEN SQUARE IS FLIPPED
OVER IN DOTTED POSITION.
Model 113.290060 Table Saw isshipped corn plete in
one carton and INCLUDES Motor, Two Table
Extensions an€ Steel Legs.
Separate all parts from packing materials and check
each one with the illustration and the list of Loose
Parts to make certain all items are accounted for
before discarding any packing material.
If any parts are missing, do not attempt to assemble
the table saw. plug in the power cord or turn the
switch or7 until the missing parts are obtained and
are installed correctly.
Remove the protective oil that is applied to the table
top and eoges of the table. Use any ordinary
household type grease and spot remover.
CAUTION: Never use gasoline, naptha or similar
highly volatile solvents.
Apply a coat of automobile wax to the table.
Wipe all parts thoroughly with a clean, dry cloth.
Io
WARNING: FOR YOUR OWN SAFETY, NEVER
CONNECT PLUG TO POWER SOURCE OUTLET
UNTIL ALL ASSEMBLY STEPS ARE COMPLETE,
AND YOU READ AND UNDERSTAND THE
SAFETY AND OPERATIONAL INSTRUCTIONS.
SUPPLIEDLOOSEIN CARTON
Item Part Name Qty.
A Blade Guard and Spreader .............. 1
B Rip Fence ............................. 1
C Miter Gauge .......................... 1
D Rip Fence Guide Bar Rod ............... 1
E Rip Fence Guide Bar with Rip Scale (Front) 1
F Rip Fence Guide Bar (Rear) ............. 1
G Motor 9ase ........................... 1
H Bag Containing ........................ 1
Owner's Manual ....................... 1
Calibration Gauge ..................... 1
Owner's Information Card .............. 1
J Leg .................................. 4
K Stiffener. Side ......................... 2
L Stiffener. End .......................... 2
M Extension. 10 x 27 ..................... 2
N Motor ................................ 1
0Guard. Belt ........................... 1
P Clip, '%" 3
Q Screw, Pan Hd. Type "T" 10-32 x 1/2 .... 3
R Support, Belt Guard .................... 1
S Bracket, Support ...................... 1
T Switch Key ........................... 1
Loose Parts Bag No. 62836
(Containing the Following Items):
U Rod Assembly, Spreader ............... 1
V Support, Guard ........................ 1
W Belt, Vee 1/2 x 41 ..................... 1
X Pulley ................................ 1
Y Wrench, Arbor ........................ 1
Z Support, Spreader ..................... 1
Loose Parts Bag N0, 62835 ............. 1
6i
Item Part Name Qty.
Loose Parts Bag No. 62745 ............. 2
(Containing the Following Items):
AA Bracket, Corner Support ............... 2
BB Bracket, Corner Stiffener ............... 2
Loose Parts Bag No. 62837 ............. 1
Loose Parts Bag No. 62837
(Containing the Following Items):
CC Screw, Truss Hd. 1/4-20 x 1 ............ 8
DD Lockwasher, External 1/4 .............. 8
DD Lockwasher, External 5/16 ............. 4
EE Nut, Hex 1/4-20 ....................... 8
FF Nut, Hex 5/16-18 ...................... 4
FF Screw, Hex Hd. 5/16-18 x 1-1/4 ......... 4
GG Washer, 11/32 x 11/16 x 1/16 .......... 4
GG Washer, 17/64 x 3/4 x 1/16 ............ 2
Loose Parts Bag No. 62835
(Containing the Following Items):
DD Lockwasher, External 5/16 .............. 10
DD Lockwasher, External 1/4 .............. 2
EE Nut, Hex 5/16-18 ...................... 8
EE Nut, Hex 1/4-20 ....................... 2
FF Screw, Hex Hd. 5/16-18 x 5/8 ........... 3
FF Screw, Hex Hd. 5/16-18 x 1 ............. 4
FF Screw, Hex Hd. 5/16-18 x 1-3/4 ......... 2
FF Screw, Hex Hd. 1/4-20 x 5/8 ............ 2
HH Bolt, Carriage 5/16-18 x 3/4 ............ 4
JJ Spacer, Fence Guide Bar ............... 2
KK Nut, Self Threading .................... 2
LL Screw, Thumb 5/16-18 x 1 .............. 1
MM Wrench, Hex "L" 1/8 ..... _............. 1
MM Wrench, Hex "L" 3/32 .................. 1
MM Wrench, Hex "L" 5/32 .................. 1
NN Key, Square 3/16 ...................... 1
Loose Parts Bag No. 62752 for Legs
(Containing the Following Items):
CC Screw, Truss Hal. 1/4-20 x 5t8 .......... 24
DD Lockwasher, External 1/4 .............. 24
DD Lockwasher, External 5/16 4
EE Nut, Hex 1/2-13 ....................... 8
EE Nut, Hex 1/4-20 ....................... 24
EE Nut, Hex 5/16-18 ...................... 4
FF Screw, Hex 5/16-18 x 1-1/4 ............. 4
GG Washer, 11/32 x 11/16 x 1/16 .......... 8
O0 Foot, Leveling ......................... 4
CC DD EE
AA BB
GG HH
SiTE NN
@
KK
OO "
ASSEMBLY
ASSEMBLING STEEL LEGS
NOTE: Steel Legs are furnished with Model
113.290060.
From among the loose parts, find the following
Hardware:
24 Truss Head Screws, 1/4-20 x 5/8 in. long (top
of screw is rounded)
24 Lockwashers, 1/4 in. External Type (approx.
dia. of hole 1/4 in.)
24 Hex nuts, 1/4-20 (approx. dia. of hole 1/4 in.)
8 Hex Nuts, 1/2-13 (approx, dia. of hole 1/2 in.)
4 Leveling feet.
Assemble the legs as shown...
1. Insert the Truss Head Screws through the holes
in the legs, then through the holes in the
stiffeners. MAKE SURE THE SCREWS GO
THROUGH THE HOLES IN THE SIDE
STIFFENERS MARKED "X".
2. Install the Iockwashers... screw on the nuts
but do not tighten until completely assembled.
3. Install leveling feet.
END
STIFFENER '
ASSEMBLE SCREWS
THROUGH HOLES
MARKED "X"
SIDE STIFFENER
,1/2 IN. HEX NUTS
MOUNTING SAW
1. From among the loose parts, find the following
hardware:
4 Hex Head Screws, 5/16-18 x 1-1/4 in. long.
4 Hex Nuts, 5/16-18 (approx. dia. of hole 5/16
in.)
4 Lockwashers, 5/16 in. External Type (approx.
dia. of hole, 5/16 in.)
8 Flat Washers, (dia. of hole 11/32 in.)
NOTE: Do not lift saw by plastic housing.
2.Placesawonlegssothatholesinbottonofsaw
lineupwithholesin topof legs.
3.Installscrews,washers,Iockwashersandnuts
asshown.
If you mount the saw on any other bench, make sure
that there is an opening in the top of the bench the
same size as the opening in the bottom of the saw so
that the sawdust can drop through. Recommended
working height is 33 to 37 inches from the top of the
saw table to the floor.
SAW BASE T
HEX HEAD SCREW _"-_1
FLAT WASH ER-----_ =;_ 1
END
STIFFENER--_I I
FLAT WASHER ---'-_
LOCKWASHER -"__
HEX NUT/_
13
2-3/4
7/16 DIA. HOLES
11-1/4
-- 10-1/4 --
OPENING
16
FRONT OF SAW _r_--
NOTE: All dimensions in inches
13
1/2
CHECKING TABLE INSERT
1. Insert should be flush with table top along its
entire length. Check as shown. Loosen flat head
screw that holds insert and adjust the four set
screws as necessary. Tighten flat head screw. Do
not tighten screw to the point where it deflects the
insert.
3/32 IN
SETSCREW WRENCH
2. To remove insert.
A) Loosen Screw
B) Lift insert from end, and pull toward front of
saw.
3. To replace insert.
Place insert into insert opening in table and push
toward rear of saw to engage spring clip and until
keyslot in insert will drop over screw. Tighten
screw.
Do not tighten screw to the point where it will
deflect the insert.
MOUNTING THE MOTOR
1. From among the loose parts, find the following
hardware:
2 Hex Head Screws 5/16-18 x 5/8 in. long
4 Carriage Bolts, 5/16-18 x 3/4 in. long
4 Hex Nuts. 5/16-18
(approx. dia. of hole 5/16 in.)
4 Lockwashers, 5/16 in. External Type
(approx. dia. of hole 5/16 in.)
2. Place motor on MOTOR BASE... insert bolts
through holes in base., then through the
motor. Install Iockwashers. and nuts.
3. Position motor so that edge of MOTOR FOOT
and MOTOR BASE are even.., slide motor all
the way to the RIGHT.. tighten the four nuts,
LOCKWASHER
5/16 IN.
NUT I
5/16-18 I
THESE TWO CARRIAGE BOLT
EDGES EVEN 5116-18 X 314 IN.
A
./"
BASE
BASE
4. Screw the two 5/16-18 x 5/8 in. motor base
clamp screws part way into tapped holes in
cradle.
5. Lift motor and insert the TWO PINS on motor
base into HOLES in cradle.., push motor in as
far as it will go.
6. Tighten the two motor base clamp screws.
CLAMPSCREWS
5/16-18XS/81N.
HEX. HD. SCREWS
7. Loose_ the two MOTOR CLAMP SCREWS on
each end of motor. Rotate the motor so that the
CAPACITOR COVER is on _op... tighten the
screws. The ventilation holes are now facing
downward which will help prevent sawdust from
entering motor.
CAPACITOR
COVER
VENTILATION
HOLES MOTOR
CLAMPSCREWS
(BOTH ENDS)
10