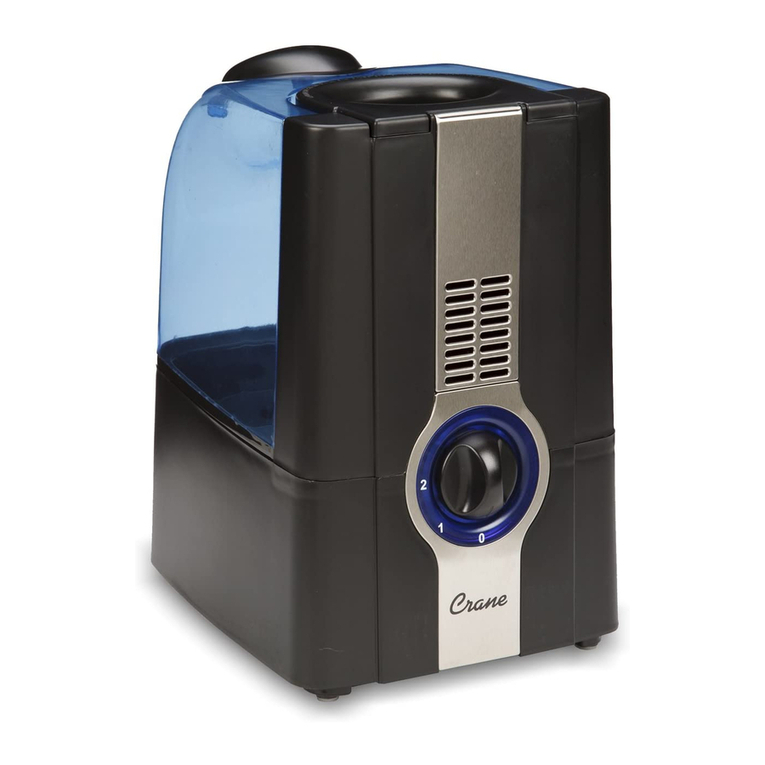
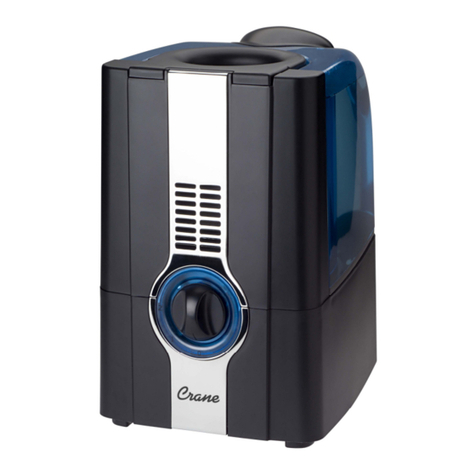
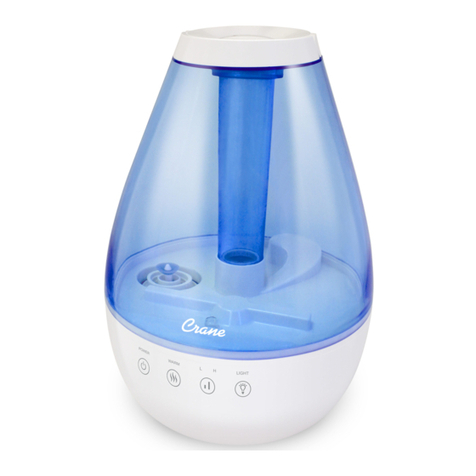
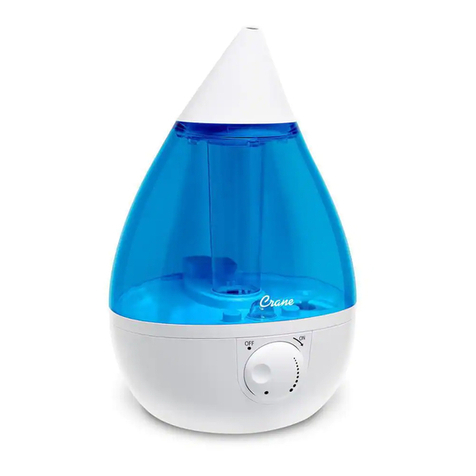
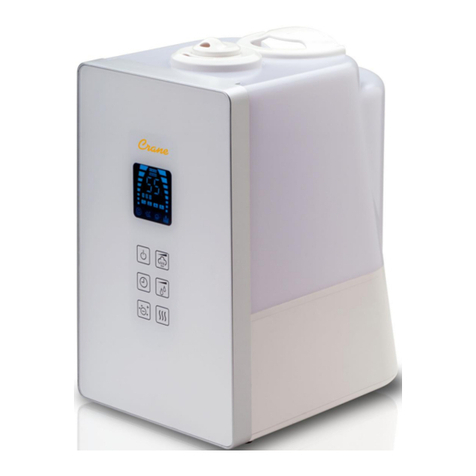
Crane EE-4109 User manual

Adorable Humidifiers
1 GALLON/ 3.78 LITER
ULTRASONIC HUMIDIFIER
MODEL # EE-4109
PLEASE READ AND SAVE ALL INSTRUCTIONS TO ENSURE THE SAFE AND
EFFECTIVE USE OF THIS APPLIANCE.

TABLE OF CONTENTS
Table of Contents P.1
Important Safety Instructions P. 2
General Safety Instructions P.3
List of Main Parts P.4
Tech. Specifications, Contents of Packaging P.5
Operation and Use, Set the Correct
Humidity Output
P.5-8
Maintenance P.8-9
Trouble Shooting P.10
Service Center Information P.10
Warranty Information P.11
Warranty Card P.12


3
GENERAL SAFETY INSTRUCTIONS
Read and understand all instructions. Failure to follow all instructions
listed below may result in electric shock, fire or serious personal injury. The warnings,
cautions, and instruction discussed in this instruction manual cannot cover all possible
conditions and situations that may occur. It must be understood by the operator that
common sense and caution are a factor which cannot be built into this product, but must
be supplied by the operator.
THIS HUMIDIFIER IS NOT A TOY!
Do not let your child play with this appliance. As with any electrical
appliance, serious injury and electrocution might be possible. This appliance has to be
operated by an adult only. Children should be supervised to ensure that they do not play
with the humidifier.
SAVE ALL INSTRUCTIONS!
A short power supply cord is provided to reduce the risk of personal injury
resulting from becoming entangled in or tripping over a longer cord. Extension cords are
available from local hardware stores and may be used if care is exercised in their use. If
an extension cord is required, special care and caution is necessary. Also the cord must
be: (1) marked with an electrical rating of 125 V and at least 13 A., 1625 W., and (2)
the cord must be arranged so that it will not drape over the countertop or tabletop
where it can be pulled on by children or tripped over accidentally.
ELECTRIC POWER
If electric circuit is overloaded with other appliances, your appliances may not operate
properly. The appliances should be operated on a separate electrical circuit from other
operating appliances.
POLARIZED PLUG
This appliance has a polarized plug (one blade is wider than the
other). As a safety feature to reduce the risk of electrical shock, this
plug is intended to fit in a polarized outlet only one way. If the plug
does not fit fully in the outlet, reverse the plug. If it still does not fit,
contact a qualified electrician. Do not attempt to defeat this safety
feature.
SAFETY WARNING
Although your appliance is easy to operate, for your safety, the below warnings must be
followed:
1. Do not place the appliance near a heat source.
2. Never leave the appliance unattended while connected to the electrical outlet.
3. To avoid any accidents, never put a hand over a steam/heat vent or cover when the
appliance is in operation.
4. Use the appliance on a stable surface away from water.
5. Do not unplug from the wall socket by pulling on the supply cord.
6. The appliance must be unplugged:
A. Before either filling or emptying
B. Before any cleaning or maintenance
C. After use
D. If it appears to be faulty
THIS PRODUCT IS INTENDED FOR HOUSEHOLD USE ONLY.

4
LIST OF MAIN PARTS
PARTS DESCRIPTION
Fig. 1 (Central Body)
1. Night Light Switch
2. On/Off Switch/Regulator
Control Knob
3. Power Cord
4. Central Body with water basin
5. Humidity Output Indication
6. Red/Green Power Light
3 6 5 1 2 4 6
Fig. 1
Fig. 2 (Top of Water Tank)
7. Vapor Outlet Channel
8. Water Tank Handle
87
Fig. 2
Fig. 3 (Water Basin)
9. Nebulizer
10. Vaporization Chamber
11. Fan Vent
12. Valve Opener
13. Water Level Sensor
14. Night Light
13 9 10 11 14 12
Fig. 3
Fig. 4 (Bottom of Water Tank)
15. Water Tank Valve
16. Water Tank Cap
17. Vapor Outlet channel
15 16 17
Fig. 4
Fig. 5 (Water Tank Lid)
18. Water Tank Lid
19. Vapor Output Slots
18 19
Fig. 5

5
TECHNICAL SPECIFICATIONS:
Rating Voltage 120V
Frequency 60Hz
Power 45W
Water Tank Capacity Approx. 1.0 Gallon / 3.78
Liter
Output Per 24 Hours Approx. 2.1 Gallon / 8
Liter
Run Time Per Tank Min. 11 Hours
Humidifying Capacity Up to 500 sq.ft. / 46 m2
Noise < 36.5 (dB) A
CONTENTS OF PACKAGING
a. Instruction Manual
b. Central Humidifier Body
c. Water Tank
d. Water Tank Lid with Vapor Output Slots
If any of the above items are missing, please contact our service department:
Chemotec
Tel: 514-729-6321 or 1-800-729-6321
(Business hours Mon-Fri 9:00am - 4:30pm)
OPERATION AND USE
BEFORE EACH USE
CHECK HUMIDIFIER PLACEMENT - Place the Humidifier on an elevated hard surface
for best performance. This is to help disperse the mist in the air, and prevent it from
being knocked or tipped over.
CHECK WATER LEVEL SENSOR - Make sure that the water level sensor is secured
properly. Refer to “cleaning and maintaining water level sensor” on page 8 for
instructions on how to assemble water level sensor.
CHECK FAN VENT
This fan vent is located on the bottom of
the humidifier. The purpose of the Fan
Vent is to blow the cool mist through the
vapor outlet slots. It is important that this
part is kept clean and free of obstructions.
We recommend checking the fan vent
before using this item (i.e. lint, paper)
Fan Vent
Do not place Humidifier on top of a towel, or a carpeted surface. The air vent on
the bottom may become blocked, and overheat the humidifier.
Crane CANADA Inc.
1-855-20-CRANE Monday to Friday 9:00-16:00 eastern time
23
250

6
DO NOT operate the humidifier without water in the water tank.
DO NOT plug or unplug the cord with wet hands; electric shock
could happen, as with any electrical appliance.
ASSEMBLY
1. Lift the water tank off the central body.
2. Turn over the water tank and unscrew the water tank cap
at the bottom of the tank by turning it counterclockwise.
(See Fig. 6)
Fig. 6
3. Fill water tank with cold water; do not fill all the way to
the rim.
(See Fig. 7)
Note: To avoid possible white dust due to hard water it
is recommended to use distilled water.
DO NOT use hot water. Use cool tap water.
DO NOT add any medication to other additives to the
water
DO NOT pour water into Vapor Outlet Channel (part 7,
Fig.2 on page 4)
Fig. 7
4. Replace the water tank cap, aligning the threads on the
tank with the threads on the cap, and turn it clockwise.
(See Fig. 8)
Fig. 8
5. Turn the tank over, holding it by the top handle, and
place it on the central body, making sure it fits perfectly.
Place the water tank cap with output slots on top of the
water tank. (see Fig. 9)
Note: Do not attempt to move humidifier while water tank is
placed on the water basin. Doing so may cause leakage of
water. Also do not place humidifier on the floor. Place
humidifier on an elevated surface. Fig. 9
6. Plug the power cord into a wall socket (do not use
extension cord) and turn on the unit. The On/Off switch
is located at the turning knob, “O” = off, “I” = on.
(see Fig. 10)
Fig. 10

7
7. The Power Light will turn on red. In a few seconds it will switch to green, indicating
that enough water is in the water basin, and vapor will start emitting through the
openings at water tank lid.
8. Use the humidity output regulator control knob to adjust the intensity of the vapor
output. Turning the knob clockwise will increase the moisture output, turning the
knob counterclockwise with reduce the moisture output. (see Fig. 10)
Note: When at maximum level it is normal to hear a faint dripping sound.
To switch the unit off turn the knob all the way counter-clockwise until a click sound is
heard
9. The night light can be turned on by
the knob located at the center
wheel. (See Fig. 11)
Fig. 11
10. When the humidifier runs out of water the power light will turn red, and the mist
output will stop. This is a safety feature to prevent the humidifier from possibly
over heating and damaging the nebulizer. This safety feature uses a water level
sensor to stop the nebulizer once the water level sinks below the required level in
the water basin. Turn the humidifier off and unplug before removing and refilling
the water tank.
Please note that the Power Light on the humidifier body will stay on. The
(red) light signal indicates that the humidifier is turned on and needs to be
refilled.
SET THE CORRECT HUMIDITY OUTPUT
ALWAYS PLACE THE HUMIDIFIER ON AN ELEVATED NON-METALLIC
WATERPROOF SURFACE FOR BEST PERFORMANCE.
Adjust the vapor control so that the
vapor rises up and gets absorbed by
the room air. Do not turn on too high
output as the vapor cannot be
absorbed by the air and accumulates
on the surface around the humidifier.
If the humidifier is placed near a fan
or air conditioning outlet the vapor
may be forced down by the foreign air
stream. Change the location of the
humidifier or reduce the output of the
other room conditioning appliances.
correct wrong
A NOTE ABOUT HUMIDITY
It is best to keep the humidity level at about 30-50 percent of relative humidity.
The comfort level of humidity will vary from room to room and with changing room
conditions.
In cold weather, windows and even some walls may fog or develop frost from
excessive indoor humidity. If this occurs, reduce the mist intensity setting to avoid
damage from condensed water dripping on windowsills.
Too much humidity in the room may allow moisture to accumulate on surfaces where
bacteria and fungi can grow. Moisture that gathers may also damage furniture and
walls, especially wallpaper.
To eliminate excessive humidity, especially in small rooms, leave the room door open

8
and adjust the mist intensity control setting.
MAINTENANCE
Always be sure that the appliance is unplugged and switched OFF before cleaning or
attempting to store the item. NEVER PLUG OR UNPLUG UNIT WITH WET HANDS.
DO NOT leave water in water tank or water basin when unit is not in use as it may
result in the build up of mineral deposits and bacteria that can inhibit the output
efficiency of the humidifier. PLEASE NOTE that if water remains in the water tank for
more than a day or two, bacterial growth is possible. ALWAYS use fresh cool water
when using unit.
NOTE: When removing water tank, water may accumulate under vapor lid and on the
bottom of the water tank. It is recommended to have a dry cloth ready to dry wet
surfaces.
CLEANING THE WATER TANK AND WATER BASIN
1. Fill water tank with add a few capfuls of our odorless Crane Humidifier Cleaner
and mix with water allowing the solution to stand for several minutes. Rinse
thoroughly with clean water before use. For heavily soiled surfaces apply the
cleaner and let it soak for a longer period of time. (If Crane Humidifier Cleaner is
unavailable, you can use white vinegar. Rinse the water basin with cool water
repeatedly until the vinegar smell is gone.)
2. Dry with a clean cloth or paper towel.
3. Wipe the water basin with a soft cloth dampened in the cleaner and water
solution. Rinse the water basin with cool water. DO NOT IMMERSE WATER BASIN
IN WATER.
4. Wipe all exteriors surfaces of the base with a soft, dry cloth. Do not immerse the
base in water or use water to clean the base. As with any electrical appliance, an
electric shock may result or the humidifier may be damaged.
NOTE:Please read the label on the Cleaner label before using.
GENERAL MAINTENANCE AND CLEANING
Before any cleaning operation, switch the humidifier off and unplug it.
1. Always unplug the unit before cleaning.
2. The humidifier must be drained and cleaned before storing.
3. Once unplugged the exterior of the unit may be cleaned by wiping with a dry cloth.
Caution: The ON/OFF (ON = “I”, OFF = “O”) switch must be thoroughly dry before
unit is again plugged into power source.
4. There may be some lime deposits in the nebulizer, particular in areas with hard
water. Overcome this drawback by cleaning the nebulizer with our odourless Crane
Humidifier Cleaner (if Crane Humidifier Cleaner is unavailable, you can use white
vinegar. Rinse with cool water repeatedly until the vinegar smell is gone.) on a soft
cloth regularly, as follows:
A. Dampen a cloth with the cleaner and wipe the nebulizer gently, until the lime
deposits disappear completely.
B. Rub down gently with a dry cloth and remove remains of humidity.
C. Do not rub the nebulizer with solid objects.
D. Do not use any other humidifier cleaner or harsh chemical as this may result
in possible damage to your appliance and void your warranty.
5. When cleaning the water basin do not place the nebulizer directly under the water
9
tap.
6. Never immerse the unit in water or let water enter the fan vent (see figure 3) or
any other openings.
7. It is normal for water to be in the water basin. However water must not get inside
the central body. If this should happen, take the humidifier to an authorized service
center before using it again.
8. Clean the inside of the water tank at least once a week, as stated above.
9. To clean the water float remove the plastic cap on the pin by pulling it up (see
Fig.13). Remove the water float and cap and clean by wiping the parts with a soft
damp cloth. Replace the parts by first putting the water float onto the pin and then
pressing the plastic cap on the end of the pin to secure the float.(see Fig.14).Do not
use excessive force.
plastic cap
Fig. 12 Fig. 13 Fig. 14
STORING YOUR HUMIDIFIER
Allow the appliance to cool completely before storing. Store the appliance in a dry
location. Do not place any heavy items on top of appliance during storage as this may
result in possible damage of the appliance. Store the cord in a clean, dry location away
from metal objects. Always check the plug before use to assure metal items have not
become attached.
Save the box for off-season storage.
Make sure the tank, water basin and water tank cap are thoroughly dry before
storing.
If water is left in the unit during storage, it may evaporate completely and leave
deposits that can prevent the unit from operating properly.
Leave the water tank refill cap loose to prevent the water cap (see figure 4) and
gasket from sticking together. This will prolong the life of the gasket.

10
TROUBLE SHOOTING
DO NOT attempt to repair the motor or nebulizer yourself.
noituloSmelborP
Humidifier Light is staying red and not
turning green
Humidifier is working then stops:
Ensure that water level sensor is
assembled properly.
Clean water float
Call service center and request
replacement water float
If humidifier does not work at all: Ensure it is properly plugged into a
power outlet.
Check that the switch is in the ON
position.
If Power On indicator light does not
come on, bring to authorized service
station.
If there is a strange odor: Clean the tank as stated on Page 8.
The power light is green but there is no
mist being emitted:
Check that there is water in the tank.
Check for possible lime deposits on the
water level sensor or the nebulizer (see
page 8 and 9).
Make sure that nothing blocks the
vapor output channel.
Check that the air vent on bottom of
humidifier is not blocked.
Empty the humidifier and rinse the
water basin with cool tap water and
allow to dry for 15 to 30 min.
White dust appears and settles outside the
humidifier:
Area tap water may have too many
minerals, change to filtered or distilled
water.
SERVICE CENTER
If you have any question in regards to the operation of this appliance or are in need of a
spare part please contact our service center at:
Chemotec
Tel: 514-729-6321 or 1-800-729-6321
(Business hours Mon-Fri 9:00am - 4:30pm)
ENVIRONMENTAL PROTECTION
If the appliance should no longer work at all, please make sure that it is disposed in an
environmentally friendly way, by handing it into a public collection point. Please do not
put it with your household waste.
If the humidifier continues to not operate please call our service center (see toll
free number below).
Crane CANADA Inc.
1-855-20-CRANE
Business hours Mon-Fri 9:00-16:00 eastern time

LIMITED WARRANTY
Thank you for purchasing a top quality Crane product. This Ultrasonic Humidifier
was tested and meets our stringent quality standards. This product is warranted
to be free from manufacturing defects in original materials, including original
parts, and workmanship for 1 year with proof of purchase.
The warranty is void if the defect is due to accidental damage, misuse, abuse,
neglect, improper repair or alteration by unauthorized persons or failure to follow
operation instructions provided with the product. This warranty does not apply to
commercial use.
The warranty is non-transferable and applies only to the original purchase and
does not extend to subsequent owners of the product. Liability under this
warranty is limited to repair, replacement or refund. In no event shall liability
exceed the purchase price paid by the purchaser of the product. Under no
circumstances shall there be liability for any loss, direct, indirect, incidental,
special or consequential damage arising out of in connection with use of this
product. This warranty is valid only in Canada. This Warranty gives you specific
legal rights. However you may have other rights that vary from state to state.
Some states do not allow limitation on implied warranties or exclusion of
consequential damages therefore these restrictions may not apply to you.
In case you find this product to be defective please proceed as follows:
Please fill out the Warranty Card and send it together with the product and
purchase receipt.
To arrange pick-up of the defective item please call our service center:
Chemotec
Tel: 514-729-6321 or 1-800-729-6321
(Business hours Mon-Fri 9:00am - 4:30pm)
WARRANTY INFORMATION
Crane CANADA Inc.
1-855-20-CRANE
Business hours Mon-Fri 9:00-16:00 eastern time
A. Within the retailer’s standard return policy period:return the product to your
retailer for a refund or exchange.
B. After the retailer’sstandard return policy period: contact our service center,
information listed below. After evaluating the problem, you will receive your
repaired item, a new product or arefund at the service center’s discretion.

Service Centre Address:
Crane CANADA Inc.
1-855-20-CRANE
Business hours Mon-Fri 9:00-16:00 eastern time
1-855-20-CRANE


TABLE DES MATIÈRES
Index P.1
Précautions importantes P. 2
Consignes de sécurité générales P.3
Liste des pièces principales P.4
Fiche technique, contenu de l’emballage P.5
Mode opératoire, Réglage de la sortie de
l’humidificateur
P.5-8
Entretien P.8-9
Dépannage P.10
Renseignements sur le centre de service P.10
Renseignements sur la garantie P.11
Carte de garantie P.12


3
CONSIGNES DE SÉCURITÉ GÉNÉRALES
AVERTISSEMENT ! Bien lire et comprendre toutes les instructions, afin d’éviter
tout risque de secousse électrique, d’incendie ou de graves blessures corporelles. Les
avertissements, les mises en garde et les instructions fournis dans le présent manuel ne
peuvent couvrir toutes les conditions et les situations susceptibles de survenir.
L’utilisateur doit comprendre que le bon sens et les précautions sont des facteurs qui ne
peuvent être intégrés à ce produit mais qui dépendent plutôt de l’utilisateur.
CET HUMIDIFICATEUR N’EST PAS UN JOUET!
Ne pas laisser les enfants jouer avec cet appareil. Comme c’est le cas
avec tous les appareils électriques, il existe des risques de blessure grave et
d’électrocution. Cet appareil doit être manipulé uniquement par des adultes. Il est
important de surveiller les enfants afin qu’ils ne jouent pas avec l’humidificateur.
CONSERVER TOUTES CES INSTRUCTIONS !
MISE EN GARDE : Un cordon d’alimentation court vous est fourni pour réduire le risque
de blessure personnelle en vous empêtrant ou en trébuchant dans un cordon plus long.
Des rallonges électriques sont disponibles auprès des quincailleries locales. Si une
rallonge électrique est requise, vous devrez faire preuve de prudence et d’attention. De
plus, la rallonge doit être : (1) marquée d’une capacité nominale de 125 V et d’au moins
13 A, 1625 W, et (2) elle doit être disposée de manière à ne pas passer par-dessus le
comptoir ou la table car des enfants pourraient la tirer ou y trébucher accidentellement.
PUISSANCE ÉLECTRIQUE
Si le circuit électrique est surchargé par d’autres appareils électriques, votre
humidificateur risque de ne pas bien fonctionner. Les humidificateurs devraient être
branchés sur un circuit électrique distinct de celui des autres appareils.
FICHE POLARISÉE
Cet appareil est muni d’une fiche polarisée (une lame est plus large
que l’autre). À titre de dispositif de sécurité visant à réduire les
secousses électriques, cette fiche ne peut être insérée que dans un
sens dans une prise de courant polarisée. Si la fiche ne s’adapte pas
parfaitement dans la prise, inverser la fiche. Si elle ne s’adapte
toujours pas, communiquer avec un électricien qualifié. Ne pas essayer pas d’annuler
cette caractéristique de sécurité.
AVERTISSEMENT SUR LA SÉCURITÉ
Bien que cet appareil soit facile à utiliser, observer les avertissements suivants, pour des
raisons de sécurité :
1. Ne pas placer l’appareil près d’une source de chaleur.
2. Ne jamais laisser l’appareil sans surveillance lorsqu’il est branché à la prise de
courant électrique.
3. Pour éviter tout accident, ne jamais placer une main sur l’évent de vapeur/chaleur ou
le couvercle lorsque l’appareil est en marche.
4. Utiliser l’appareil sur une surface stable, loin de l’eau.
5. Ne pas débrancher l’appareil de la prise murale en tirant sur le cordon d’alimentation.
6. Débrancher l’appareil :
A. avant de le remplir ou de le vider
B. avant tout nettoyage ou entretien
C. après usage
D. s’il semble défectueux.
CE PRODUIT EST RÉSERVÉ À UN USAGE DOMESTIQUE.

4
LISTE DES PIÈCES PRINCIPALES
DESCRIPTION DES PIÈCES
Fig. 1 (Bâti central)
1. Commutateur lumineux
d’allumage / éteignement
2. Bouton de contrôle d’allumage
/ éteignement du commutateur
et du régulateur de l’unité.
3. Cordon d’alimentation
4. Bâti central (bassin d’eau)
5. Indicateur de sortie d’humidité
6. Voyant rouge/vert 3 6 5 1 2 4 6
Fig. 1
Fig. 2 (Dessus du réservoir
d’eau)
7. Canal de sortie de la vapeur
8. Poignée du réservoir d’eau
87
Fig. 2
Fig. 3 (Bassin d’eau)
9. Nébuliseur
10. Chambre de vaporisation
11. Évent de ventilation
12. Dispositif d’ouverture de la
vanne
13. Indicateur de niveau d’eau
14. Bougie-veilleuse pour la nuit 13 9 10 11 14 12
Fig. 3
Fig. 4 (fond du réservoir
d’eau)
15. Vanne du réservoir d’eau
16. Bouchon du réservoir d’eau
17. Canal de sortie de la vapeur
15 16 17
Fig. 4
Fig. 5 (Couvercle de sortie de
la vapeur)
18. Couvercle de sortie de la
vapeur
19. Ouvertures de sortie de la
vapeur
18 19
Fig. 5

5
FICHE TECHNIQUE:
Tension nominale 120 V
Fréquence 60 Hz
Alimentation 45 W
Capacité du réservoir
d’eau
3,78 litres/1 gal. US.
Sortie par 24 heures 8 litres/2,1 gal. US.
Temps de
fonctionnement par
réservoir
Min. 11 heures
Capacité
d’humidification
Jusqu’à 46 m2/500 pi2
Bruit < 36,5 (dB) A
CONTENU DE L’EMBALLAGE
a. Manuel d’instructions
b. Bâti central de l’humidificateur
c. Réservoir d’eau
d. Couvercle du réservoir d’eau avec ouvertures de sortie
Si l’un des articles ci-dessus manque, veuillez communiquer avec le Service d’entretien:
Chemotec 514-729-6321 ou 1-800-729-6321 pour obtenir un remplacement.
MODE D’OPÉRATION ET UTILISATION
AVANT CHAQUE UTILISATION
VÉRIFIER L’EMPLACEMENT DE L’HUMIDIFICATEUR – Pour obtenir des résultats
optimaux, placer l’humidificateur sur une surface surélevée non métallique et à l’épreuve
de l’eau. Le choix d’un tel emplacement favorise la dispersion de la vapeur dans l’air et
prévient que l’appareil soit accroché ou que son contenu soit renversé.
VÉRIFIER L’INDICATEUR DE NIVEAU D’EAU – S’assurer que l’indicateur de niveau
d’eau est bien en place. Voir les « instructions d’entretien et de nettoyage de l’indicateur
de niveau d’eau » à la page 9 pour savoir comment assembler l’indicateur de niveau
d’eau.
VÉRIFIER L’ÉVENT DE VENTILATION
L’évent de ventilation se situe à la base de
l’humidificateur. Cet évent sert à pousser
la vapeur fraîche à travers les ouvertures
de sortie. Il est important de garder cette
partie propre et libre de toute obstruction.
Il est recommandé de vérifier l’évent de
ventilation avant d’utiliser l’appareil pour
s’assurer qu’il est exempt de fibres ou de
papier, par exemple.
L’évent de ventilation
Ne pas placer l’humidificateur sur une serviette ou sur une surface recouverte
de tapis. L’évent de ventilation pourrait se trouver obstrué et faire surchauffer
23 250
1-855-20-CRANE du Lundi au vendredi de 9:00 à 16:00 heure normal de l’ est

6
MISE EN GARDE :
NE PAS faire fonctionner l’humidificateur lorsque le réservoir
d’eau est vide.
NE PAS brancher ou débrancher le cordon d’alimentation avec les
mains mouillées, ce qui pourrait provoquer un choc électrique,
comme avec tout autre appareil électrique.
ASSEMBLAGE
1. Soulever le réservoir d’eau du bâti central.
2. Tourner le réservoir d’eau et dévisser le bouchon du
réservoir d’eau situé au fond du réservoir en sens anti-
horaire. (Voir Fig. 6)
Fig. 6
3. Remplir le réservoir d’eau avec de l’eau froide; éviter de
remplir jusqu’au bord. (Voir Fig. 7)
Note : Pour éviter la formation de poussière blanche due
à une eau dure, nous recommandons d’utiliser de l’eau
distillée.
NE PAS utiliser d’eau chaude. Utiliser l’eau froide du
robinet.
NE PAS ajouter de médicament ou tout autre additif à
l’eau.
NE PAS verser d’eau dans le canal de sortie de la vapeur
(partie 7, illustrée à la Figure 2 de la page
Fig. 7
4. Replacer le bouchon du réservoir d’eau en alignant les
filets sur le réservoir avec les filets du bouchon, et le
tourner dans le sens des aiguilles d’une montre.
(Voir Fig. 8)
Fig. 8
5. Retourner le réservoir en le tenant par la poignée sur le
dessus, et le placer sur le bâti central en s’assurant qu’il
s’ajuste parfaitement. Replacer le couvercle. (Voir Fig.
9)
Note : Ne pas essayer de déplacer l’humidificateur lorsque
le réservoir d’eau est placé sur le bassin d’eau. Cela pourrait
provoquer un déversement. Éviter également de placer
l’humidificateur sur le sol; le placer à un endroit surélevé
Fig. 9
6. Brancher le cordon d’alimentation dans la prise murale
(ne pas utiliser de rallonge électrique) et mettre
l’appareil en marche. Le commutateur de l’unité est situé
sur le bouton avant, “O” = Fermer, “I” = En marche. (Voir
Fig. 10)
Fig. 10
Other manuals for EE-4109
2
Table of contents
Languages:
Other Crane Humidifier manuals

Crane
Crane EE-5306 Series User manual

Crane
Crane Germ Defence SH8201 User manual

Crane
Crane EE-5949 User manual

Crane
Crane EE-5953AD User manual

Crane
Crane EE-6916 User manual

Crane
Crane EE-6918 User manual

Crane
Crane EE- 5200 W User manual

Crane
Crane EE-5951AD User manual

Crane
Crane EE-5302 User manual

Crane
Crane smartDROP User manual

Crane
Crane EE- 5200 W User manual

Crane
Crane EE-0865 User manual

Crane
Crane RB-6913 User manual

Crane
Crane EE-5306CW User manual

Crane
Crane Germ Defence SH8201 User manual

Crane
Crane EE-0865 User manual

Crane
Crane EE-6908 User manual

Crane
Crane EE-6919 User manual

Crane
Crane EE-864 User manual

Crane
Crane EE-5301 User manual