Crazy Monkey Creations Electric Skein Winder Quick setup guide

Electric
Skein Winder
Assembly and Use
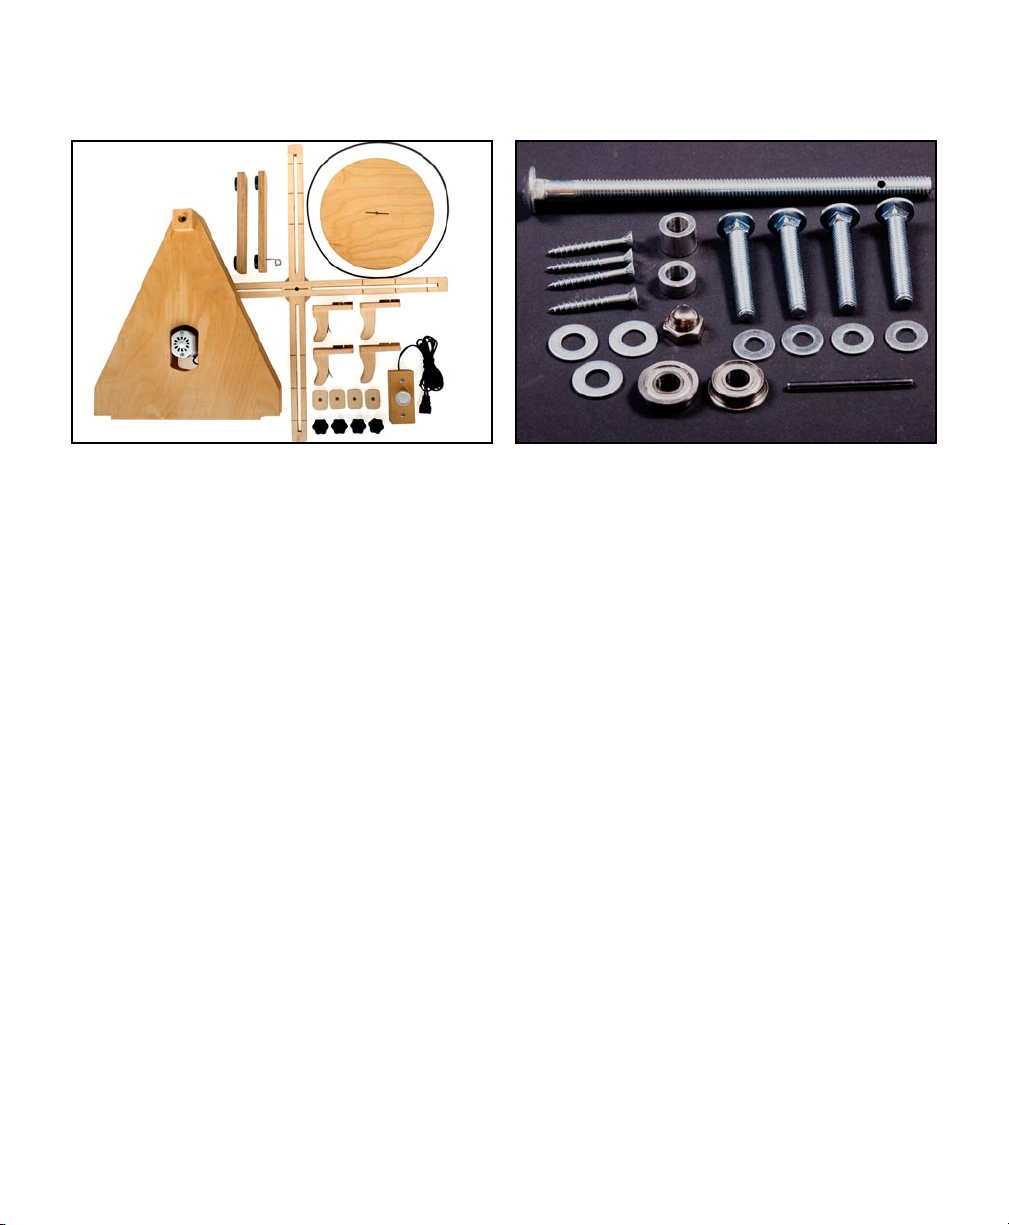
Package Contents
• 1 - Triangular Body (w/ motor)
• 1 - Cross Arm
• 1 - Left Foot (w/ yarn guide)
• 1 - Right Foot
• 1 - Adjustable Finger (w/ yarn clip)
• 3 - Adjustable Fingers (no clip)
• 4 - Slider Pads
• 1 - Drive Pulley
• 1 - Variable Speed Control
(w/ power cord)
• 1 - V-Belt
• 4 - Plastic Knobs
• 1 - 3/8 x 7” Carriage Bolt
• 2 - Ball Bearings
(may already be installed)
• 1 - 1/2” Aluminum Spacer
• 1 - 5/16” Aluminum Spacer
• 1 - Roll Pin
• 3 - 3/8” Washers
• 1 - 3/8” Acorn Nut
• 4 - 1-1/2” Flat Head Wood Screws
• 4 - 5/16 x 2” Carriage Bolts
• 4 - 5/16” Washers
Tools Required
• #2 Phillips Screwdriver
• 5/8” Wrench or Adjustable Wrench
Assembling the Winder
Inspect the contents of your package. If
any parts are missing or damaged, e-
mail us so we can send you replacement
parts immediately.
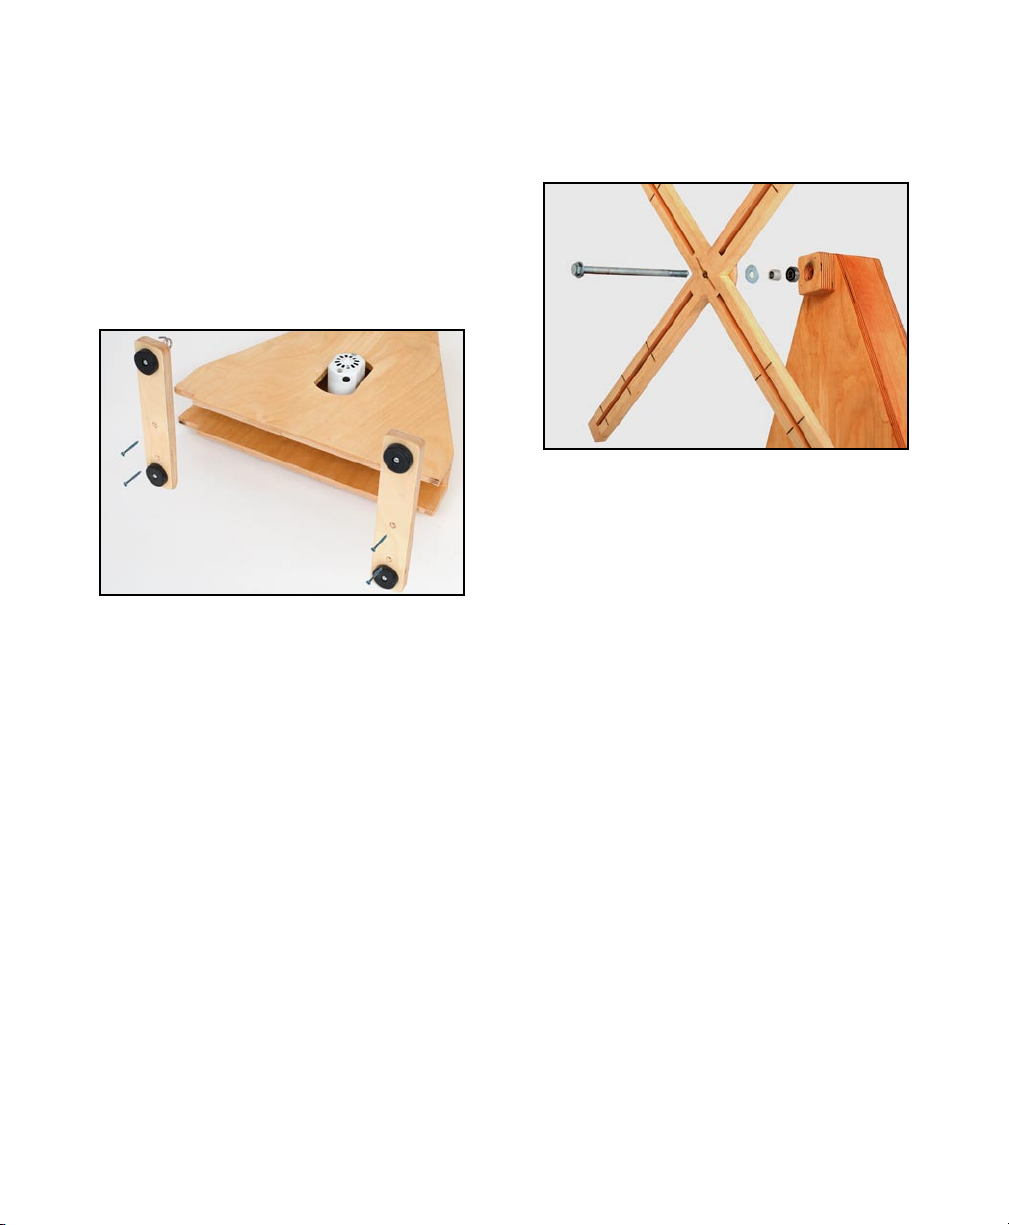
Main Body:
Screw left foot (with yarn guide) and
right foot (without yarn guide) to the
bottom of the triangular winder body
with the provided 1-1/2” long at head
wood screws using a #2 Phillips screw
driver.
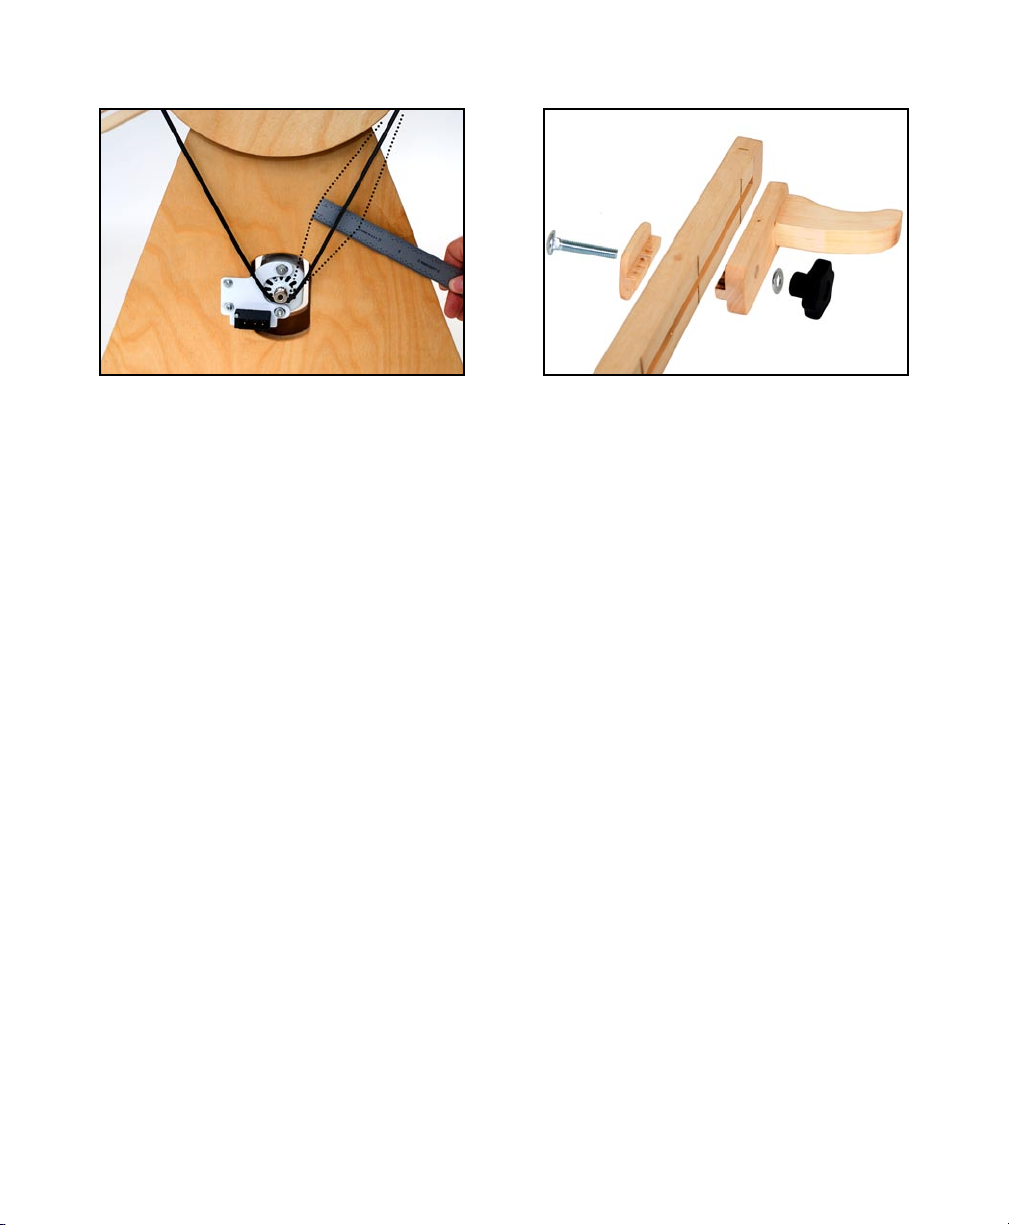
Cross Arms:
Insert 3/8 x 7” carriage bolt through the
hole in the center of the cross arms. Be
sure the metal plate and engraved size
markings are facing forward. The square
neck of the carriage bolt seats in the
square hole on the front of the arms.
Place a 3/8” washer on the bolt, against
the back side of the cross arms, followed
by the 1/2” aluminum spacer. Note,
there are two aluminum spacers, this is
the larger of the two.
Insert one of the ball bearings into the
large hole on the front of the winder
body, if it is not already installed. The
wider anged portion of the bearing
should be on the outside. The ange of
the bearing should sit tight against the
winder body.
Insert the entire arm and bolt assembly
into the front of the winder body, through
the bearing in the front of the body.

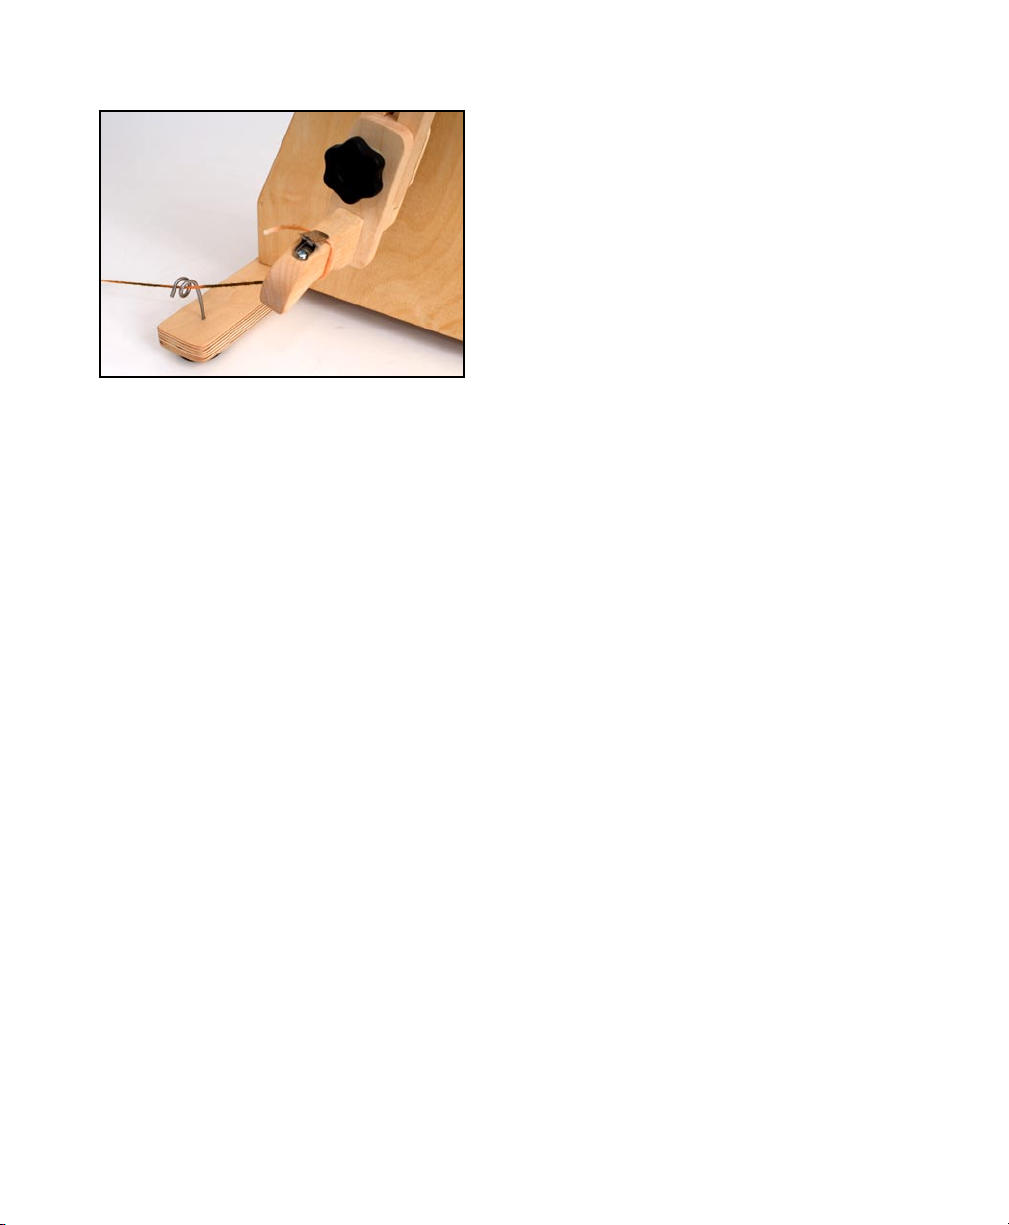
Pulley & Belt:
Place the second ball bearing on the
bolt on the back side of the wider with
the anged side of the bearing facing
away from the head of the bolt. Press
the bearing into the large hole on the
back of the winder body until the ange
is tight against the body. Place the 5/16”
(the smaller) aluminum spacer and a
3/8” washer on the end of the bolt. Insert
the roll pin through the hole in the bolt,
just behind the washer. Turn the arms
so that the hole is horizontal, this will
keep the pin from falling out while you
install the pulley.
Loop the v-belt around the large wooden
pulley and hold with one hand on each
side to keep the belt from slipping.
Insure that the slot on the front of the
pulley is facing towards the winder body.
Hook the extra length of the belt under
the small pulley on the motor shaft.
Carefully lift the wooden pulley until you
can slip it on the end of the bolt, while
being sure not to drop the belt. Push the
pulley onto the bolt and align the slot
with the roll pin. The pin should t snugly
in the slot on the pulley, and the pulley
should be at against the washer.
Place a 3/8” washer on the bolt, followed
by the 3/8” acorn nut. Hold the cross
arms steady with one hand while using
a 5/8” wrench to tighten the nut. Tighten
the nut just until the cross arms and
pulley feel solid. Do not over tighten the
nut as this will put undue pressure on
the bearings and make the winder turn
slower.
Belt Tension:
The drive belt tension is adjusted to
the correct tension before shipping.
However should the motor move during
shipping or assembly readjustment may
be necessary.
The drive belt should appear slightly
loose, but be tight enough that it can not
be easily removed from the lower drive
pulley. To check the tension grasp one
side of the belt half way between the
two pulleys and move it back and forth.
There should be approximately 2 inches
of play. If the belt is too tight it will put
more load on the motor, if too loose it
may slip off the pulley.
If adjustment is necessary, loosen the
two screws securing the motor bracket
to the body using a Phillips screwdriver.
Slide the motor up or down to achieve
the correct tension, then retighten the
mounting screws.
Adjustable Fingers:
Insert a 5/16 x 2” carriage bolt through
the wooden slider pad, so that the
square neck of the carriage bolt seats
in the square hole in the pad. Hold an
adjustable nger on the front of one arm
of the cross arms, so that the tongue
on the back side of the nger ts in the
groove of the arm. Insert the carriage
bolt/pad assembly through the back of
the arm, and through the hole in the
nger, so that the tongue on pad ts into
the groove in the arm.
Place a 5/16” washer on the end of the
carriage bolt, followed by the plastic
knob. Tighten the knob until the head of
the carriage bolt seats fully.
Repeat for the three remaining nger
assemblies.

Danger: The winder arms
are very solid and spin
at very high speed. Keep
hands, arms, head and other
appendages clear of spinning winder.
Severe injury can occur.
Danger: The yarn moves
at very high speed. Do not
touch the yarn or attempt to
guide it with your hand while
winding. The yarn may cause a severe
and painful cut.
Warning: Do not leave the skein winder
unattended while in use. If yarn catches
on the swift or other object the yarn,
swift or winder may be damaged.
Warning: Keep pets and children clear
of the winder and yarn.
Using the Winder
Adjusting Skein Size:
The winder arms can be adjusted for any
circumference from 36 inches up to 89
inches. Each arm is marked at 1 yard,
1-1/2 yard, and 2 yard circumferences
for convenience.
To adjust, loosen the knob on one
slider and slide to desired position, re-
tighten the knob. For a 1 yard, 1-1/2
yard or 2 yard skein position the slider
so the notch on the edge of the slider is
aligned with the respective line marked
on the arm. Repeat for the other three
arms. The sliders should be positioned
equally on each arm for proper balance
during use.
Do not position the ngers to their
smallest size, or it will not be possible to
remove the skein later.
Winding a Skein:
Pass the yarn through guide loop on
the left foot and under the arms. Bring
the yarn up and around the arms in a
counter-clockwise motion. Wrap the
yarn counter-clockwise around a nger
which has a clip and secure it with the
clip. Rotate the winder counter-clockwise
by hand for a few revolutions to be sure
that yarn feeds smoothly. This will also
help further secure the yarn before
starting powered operation. Make sure
the yarn is taut and not snagged on any
obstructions.
Turn the control knob clockwise slowly
until the desired speed is reached.
Continue winding until the skein is the
desired size. Turn the knob counter-
clockwise until it clicks to the off position
to stop the winder. When winding thin
yarn which is easily broken, or yarn
which tangles easily it is best to use a
slower speed.
Winding From a Swift:
Securely attach your swift to a table or
solid object. The winder winds very fast
causing strong vibrations in the swift.
Be sure that the yarn is not tangled on
the swift. If the yarn gets stuck it could
break or damage the swift. If the swift
is not secured if could be pulled toward
the winder, causing personal injury or
damage to the swift or winder.
Tuck the loose end of the yarn on the
swift under the coil of yarn. If left to ap
about, the loose end can wrap around
the yarn as you are winding, causing
the yarn to break.
Removing the Skein:
Tie off the skein. Remove the end of the
yarn from the clip. Loosen the knob on
any slider and move it toward the center.
If the yarn is very tight the slider may not
move easily. Pinching the outside end of
the slider to the arm will usually free the
slider. If the skein does not easily come
off the winder, it may be necessary to
loosen another slider. Remove the
skein and return the slider to the desired
position. Re-tighten the knob. You are
now ready to wind your next skein.

Warranty
We produce our skein winders to the highest standards
of quality and performance. Your skein winder is backed
by a one year warranty against defect in material or
workmanship. If your winder breaks or becomes non
functional for any reason, within one year from the date
of delivery we will repair or replace it free of charge.
arrange for the repair of your winder.
Table of contents


