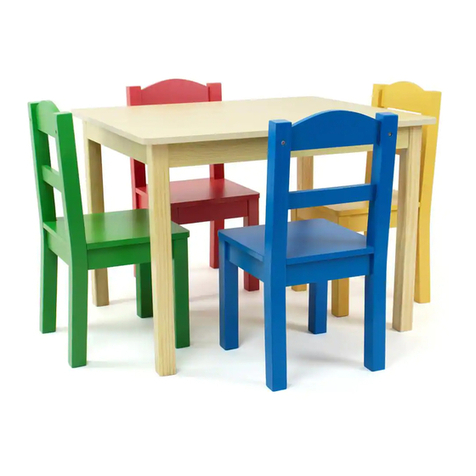
Create Achair 464Wb User manual

Service Policy: We will replace any
parts which are defective, missing or
damaged during assembly. Please contact
Whittier Wood Products customer service
department directly (by phone, fax, mail or
email) for replacement parts.
Hours: Our friendly customer service staff
can be reached Monday-Friday 7:00 a.m. to
5:00 p.m. (Pacific Time). A message can be
left 24 hours a day, 7 days a week.
To Order: Provide the complete furniture
model number, part letter, production code,
quantity needed, reason for replacement
and your full name and address along with
a telephone number in case we need to
contact you.
Parts ship from our Eugene, Oregon factory
within 1 or 2 business days from the time
we receive the request. Please allow 5-10
business days for delivery.
OOuuttsside ide UU..S. or Canada: S. or Canada: 554411--668877--00221133
FFaax:x: 554411--668877--2200660 0 •• wwwwww..wwhhiittttiieerrwwoooodd..ccoomm
MMaaiill: : PP..OO. . BBoox 28x 28227 • 7 • EEugenugenee, , OOrregon egon 997744002, 2, UU..SS..AA..
Production Code:
For normal household use only.
recommended for commercial use.
Do not climb or stand on this piece of
furniture.
Congratulations!
This fine piece of furniture will make a handsome
addition to your home. For the best results, start by
reading both the Assembly Instructions and
Finishing Hints before you begin your project.
Read both the Assembly Instructions and Finishing
Hints completely before beginning.
Store the parts: 1) in their box; 2) in a dry place; 3) in
temperatures ranging from 40° to 90°. (Not on a cold,
possibly damp, cement floor.)
Inspect your furniture periodically for any loose glue
joints or screws, or any other problem which may
be affecting the stability of your furniture. Tighten or
repair as needed.
Rev. 01/08
464Wb
Chateau
Chair Frame
(2 pack)
462Wb
Bordeaux
Chair Frame
(2 pack)
Shown with 413W
Wood Seat
NOT INCLUDED
Assembly Instructions
VN
P.O. Box 2827
Eugene, OR 97402 USA

Page 2 — 462Wb & 464Wb (Rev. 01/08)
462Wb Bordeaux & 464Wb Chateau Chair — Parts List
Before beginning assembly, check that the quantities of the parts received match those on the parts list below.
T — Front Leg Assembly — Qty. 1
BB — Side Apron — Qty. 2
AA — Back Leg Assembly — Qty. 1
(462W Back Assembly Shown)
HH — Front Corner Block — Qty. 2
GG — Back Corner Block — Qty. 2
O — 1¼" Black Screw — Qty. 4
DD — Side Stretcher — Qty. 2
MM — #8 x 1" Pan Head Screw — Qty. 16
7/8"
1¾"

462Wb Bordeaux & 464Wb Chateau Chair
ASSEMBLY INSTRUCTIONS
TOOLS REQUIRED: Phillips Screwdriver, Wood Glue, Hammer
FIG. 1
1)
BB
BB
DD
AA
T
DD Square end of
Side Apron.
Angled end of
Side Apron.
Spread glue in the elongated holes and side stretcher holes in the back legs. Tap the Side Stretch-
ers (DD) into the round holes and the angled end of the Side Aprons (BB) into the elongated holes
with the grooves facing in.
462Wb & 464Wb (Rev. 01/08) — Page 3
FIG. 2
2) Spread glue in the holes in the Front Leg Assembly (T) and attach to the side aprons and the side
stretchers. Tap firmly in place.
DO NOT LAY THE CHAIR ON ITS BACK WHEN TAPPING THE FRONT LEG ASSEMBLY IN
PLACE AS YOU MAY DAMAGE THE BACK. Quickly remove any glue that may drip out of the
holes.
IMPORTANT:
READ GLUING HINTS
BEFORE ASSEMBLING!

3)
FIG. 3
GG
Corner Block
MM
Corner Block
GG & HH
MM
HH
FIG. 3A
HH
Before attaching corner blocks, verify that the side aprons are seated snugly against the front and
back legs. Spread a light layer of glue in the upper and lower notches of a Back Corner Block (GG)
and insert in the grooves in the back and side aprons. Fasten in place with four #8x1" Pan Head
Screws (MM) through the predrilled holes. Repeat with the other back corner block. See FIGURE 3.
Spread a light layer of glue in both notches in a Front Corner Block (HH) and insert in the grooves in
the side and front aprons. Fasten in place with #8x1" Pan Head Screws (MM). Repeat for the other
front corner block. See FIGURE 3A.
Page 4 — 462Wb & 464Wb (Rev. 01/08)
4)
5)
FIG. 4
O
O
For added strength, screw a 1¼" Black Screw (O) through the bottom of the front center stretcher
and both side stretchers into the front and back legs. The screws must be inserted at such an angle
so that they do not go through the other side of the leg. See FIGURE 4.
Attach the seat of your choice using the appropriate instructions.
To insert screw at proper angle, the
screw head should be approximately
1/2" from the nearest surface when
starting screw.

Choosing the Finish:
1.
2.
3.
4.
5.
Getting Started:
1.
2.
3.
4.
5.
6.
Gluing Hints:
These are general hints. Refer to the instruction sheet for detailed
information on gluing your specific product. Your unit may not need glue.
1.
2.
Basic
Equipment:
Finishing Hints
Choose a finish that will meet your expectations for the product you are
finishing. Are you matching existing furniture or do you want a “natural”
finish? Is the piece to be functional, decorative or both? The answers to
these questions may affect the type of finish you choose.
ALWAYS follow the stain manufacturer’s instructions. Alder is a porous
hardwood
and often looks best when following the finishing directions for
softwoods.
Assembly Instructions may contain special finishing information for
that item. Read both the Assembly Instructions and these Finishing Hints
completely before beginning.
When sanding is completed, wipe the surface of your furniture with a cloth or tack rag. Make sure the
item is free of dust before proceeding.
Glue usually takes several hours to cure (or harden) but it will sometimes set up, or grab, in several
seconds. Therefore, once you begin final assembly, be sure to proceed quickly and diligently.
For most products, we recommend preparing and staining the wood prior to assembly. Due to the
assembly procedures for chairs, rockers and stools, we recommend assembling these items prior to
finishing.
It is imperative that you protect the ends of dowels and spindles, and the mortise holes where the
wood is joined, from finishing products. Use masking tape around the ends, being careful to cover only
the section that will be inserted (remove the tape after the finish has dried and before the furniture is
assembled). Wood glue will not
bond if finishing products are present. If you do get finishing product in
these areas, it must be removed
to ensure proper bonding.
If glue is used in assembly of your furniture, remove any excess glue spots or drips before finishing.
Wood surfaces with glue WILL NOT accept stains, and will leave a light spot. To remove glue, wipe
off as much as possible while wet, then lightly sand the surface until the remaining glue is removed.
We strongly recommend that you first lay out all the parts and familiarize yourself with how they fit
together before assembling with glue. Glue will set up quickly and can cause damage to the parts if
you try to reposition any that have been assembled incorrectly.
Sand the entire piece, using #220 grit sandpaper. Sand with the grain of the
wood on flat surfaces and opposite the grain on turnings. Some parts are
plywood. Be careful not to sand through the veneer. End grain (table top
ends, seat edges, grooves on turnings, etc.) accepts more stain. Extra sand-
ing in these areas with a #320 grit sandpaper will reduce stain absorption,
creating a more evenly stained piece.
Use products of the same brand to ensure compatibility of products.
We recommend using a wood conditioner under oil base stains.
Work in a well ventilated and well lit area.
Rubber gloves
Rags
Paper towels
Q-tips
Tack cloth
Drop cloth
Paint brushes
(bristle and foam)
#220 & #320
sandpaper
Mineral spirits
Masking Tape
Rev. 01/08

Rev. 01/08
Gluing Hints (cont.)
3.
4.
5.
6.
.
1.
2.
3.
4.
5.
.
No top coat is required if using paint.
1.
2.
3.
4.
1.
2.
3.
We recommend that you use a good wood glue, such as Elmer’s Wood Glue or White Glue, Titebond
Wood Glue or the equivalent; unless the instructions call for a special type such as a slow drying epoxy
glue. Carefully read the glue manufacture
r’s label and follow all instructions.
Avoid getting glue on surfaces to be finished! Most stains or finishes will not penetrate where glue
has been spilled. Wet glue can be wiped off with a damp cloth. Follow with a light sanding of the area
to ensure a proper finish.
Do not over glue! It is important to apply an even coat inside all holes and slots. Use a small dowel or
pencil to spread glue evenly around the inside of the holes. Because of the fit of the spindles or dowels
in the holes, the spindle or dowel pushes glue to the bottom of the hole. If too much glue is used, it will
fill the hole and not allow the spindle or dowel to go all the way in.
Test stain on an inconspicuous spot on your project, or use the sample chip if one is provided. The
sample chip must be sanded in the same way as your furniture kit to ensure the piece will accept the
stain similarly. Put at least one coat of your top coat over the stain sample, as it also affects the look of
the stain. Test every type of wood that is in your kit. Some of our products include more than one
type of wood, which may react differently to the stain color. Sample chips for the different woods may
be included. It may be necessary to add a second coat of stain to lighter woods to match the darker
woods in your kit.
Be sure the holes are clear of any dust so the glue will have a clean surface to adhere to. Blowing in
the holes before gluing is recommended, but be sure to protect your eyes.
Read and follow label directions. Stir stain well before starting.
Q-tips are ideal for hard to reach areas.
Allow to dry thoroughly before proceeding.
Apply stain with a poly brush or lint-free cloth. Apply stain over a small area and wipe off excess. Working
in small areas will make the color easier to control.
Always read and follow all label directions. Stir your finish coat gently, do not shake. It will create
bubbles that are hard to remove.
All surfaces (including the underside of table tops and inside drawers) must be sealed with at least
one layer of a top coat. This will help minimize wood swelling, shrinkage, warping and cupping due
to changes in moisture content or temperature.
We recommend that you apply a minimum of two coats when using polyurethane or varnish
(especially on all table top and work surfaces). Sand lightly between coats using a #320 grit
sandpaper or 00 steel wool for the smoothest possible finish.
Some water-based finishes tend to raise the grain slightly. This can be easily controlled with this sanding
step. However, do not use steel wool when using water-based finishes. Strands of steel fiber caught
in the wood can cause rust spots when coated with any water-based product.
For best results when painting, first coat the wood with a primer. An oil based primer would be best for
a smooth finish. If you do not wish to use a solvent based primer, a water based primer would work
almost as well.
Buy a quality brand paint. You may use a satin, semi-gloss, or gloss sheen. Apply a second coat for
a smooth finish. Lightly sand between coats using a #320 grit sandpaper, so that the second coat will
bond well. Repeat as desired.
Since there is such a variation between paint manufacturers, refer to your paint supplier for specific
advice on using the paint that you purchase.
Painting:
Applying the Top Coat:
Staining:
This manual suits for next models
1
Table of contents
Popular Indoor Furnishing manuals by other brands

Lifestyle Solutions
Lifestyle Solutions LANGFORD2 Assembly instructions

mobirolo
mobirolo EHLEVA MOTION 04 Assembly instructions

FourStarGroup
FourStarGroup 11222236F manual

Twin-Star International
Twin-Star International TC52-6336 manual

Nucraft
Nucraft Flow NT installation instructions

Euromate
Euromate 660959 quick start guide

American Standard
American Standard 7837.016 Specification sheet

Article
Article LENIA SKU15229 Assembly instructions

Hatco
Hatco DL-400 Installation and operating manual

CORONA
CORONA SECWG1116TB1 Assembly instructions

Pradel
Pradel MIRALITE CONNECT 60 user manual

Bakker Elkhuizen
Bakker Elkhuizen WORK & MOVE installation guide