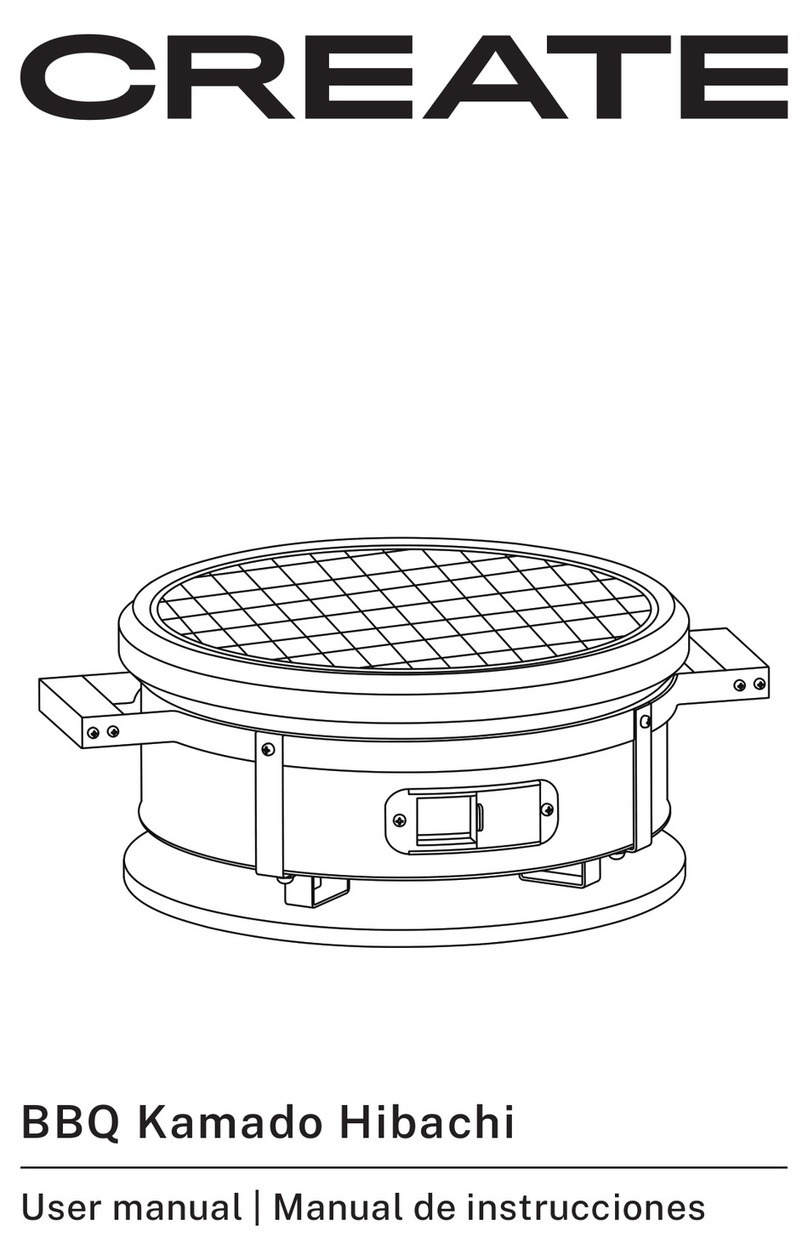
Create KAMADO User manual

16” CERAMIC SMOKER BARBECUE
BARBACOA AHUMADORA DE CERÁMICA 16”
USER MANUAL
BBQ KAMADO


4
INDEX
ENGLISH
Security instructions 6
Parts list 7
Recommendations 7
Storage 7
Cleaning 8
Use and care 8
Cooking modes 8
Cooking tips 9
Cooking temperature guide 10
Mounting 11
Care and maintenance 13
ESPAÑOL
Instrucciones de seguridad 14
Listado de partes 15
Recomendaciones 15
Almacenamiento 16
Limpieza 16
Uso y cuidado 16
Modos de cocción 17
Consejos de cocción 18
Guía de temperatura de cocción 18
Montaje 19
Cuidado y mantenimiento 21
PORTUGUÊS
Instruções de segurança 22
Lista de peças 23
Recomendações 23
Armazenar 24
Limpeza 24
Uso e cuidado 24
Modos de cozimento 25
Dicas de culinária 26
Guia de temperatura de cozimento 26
Montagem 27
Cuidado e manutenção 29
FRANÇAIS
Consignes de sécurité 30
Liste des pieces 31
Recommandations 31
Stockage 32
Nettoyage 32
Utilisation et entretien 32
Modes de cuisson 33
Conseils de cuisine 34
Guide des températures de cuisson 34
Montage 35
Entretien et maintenance 37
BBQ KAMADO

5
ITALIANO
Istruzioni di sicurezza 38
Elenco delle parti 39
Raccomandazion 39
Magazzinaggio 40
Pulizia 40
Uso e cura 40
Modalità di cottura 41
Consigli di cucina 42
Guida alla temperatura di cottura 42
Montaggio 43
Cura e manutenzione 45
DEUTSCH
Sicherheitshinweise 46
Liste der Einzelteile 47
Empfehlungen 47
Lagerung 48
Reinigung 48
Gebrauch und Pege 48
Kochmodi 49
Kochtipps 50
Leitfaden für die Kochtemperatur 50
Montage 51
Pege und Wartung 53
NEDERLANDS
Beveiligingsinstructies 54
Onderdelen lijst 55
Aanbevelingen 55
Opslag 56
Schoonmaak 56
Gebruik en verzorging 56
Kookmodi 57
Kook tips 58
Kooktemperatuurgids 58
Montage 59
Verzorging en onderhoud 61
POLSKI
Instrukcje bezpieczeństwa 62
Lista części 63
Zalecenia 63
Składowanie 64
Czyszczenie 64
Użytkować i pielęgnować 64
Tryby gotowania 65
Porady kulinarne 66
Przewodnik po temperaturze gotowania 66
Montowanie 67
Opieka i utrzymanie 69
INDEX
BBQ KAMADO

6ENGLISH
ENGLISH
Thank you very much for choosing our product. Before using it, read the instructions for use
carefully for its correct use.
The included safety precautions reduce the risk of burns, injury, or even death if strictly
followed. Please keep this manual in a safe place for future reference, together with the
completed product warranty card, the original product packaging and proof of purchase. If
possible, pass these instructions on to the next owner of the product. Observe basic safety
precautions and accident prevention regulations at all times when using the appliance. The
company is not responsible for non-compliance with these instructions by customers.
SECURITY INSTRUCTIONS
Before using this product, please read the basic safety precautions carefully.
• Carefully remove any packaging before using the product.
• This product is intended for outdoor use only. Never use it indoors.
• Always keep children and pets away from the oven when it is in use.
• Never leave a re burning unattended.
• Never light this product or allow it to burn or cool indoors as there is a danger of
carbon monoxide poisoning.
• Do not use this product in a tent, caravan, car, basement, attic, or boat.
• Do not use under awnings, umbrellas or pergolas.
• Take special care with hot coals as they may emit sparks while in use and create
a re hazard.
• Do not use gasoline, thinner, lighter uid, alcohol, or other similar chemicals to
light this product.
• It is recommended to use charcoal in your kamado. This type of coal burns longer
and produces less ash.
• Do not use charcoal in this product.
Important: When opening the lid at high temperatures, it is essential to lift it only
slightly, allowing air to enter slowly and safely, avoiding kickbacks or are-ups that
could cause injury.
• Do not use the kamado on wooden decks or any other ammable surface, such as
dry grass, wood chips, leaves, or decorative bark.
• Make sure the kamado is located at least 2 meters away from ammable objects.
• Do not use this kamado as a stove.
Attention: This product gets very hot, do not move it during operation.
• Always wear heat resistant gloves when handling hot ceramic or cooking
surfaces.
• Allow unit to cool completely before moving or storing.
• Always inspect the product before use for damage. If there is damage to the prod-
uct, do not use it.

7
ENGLISH
PARTS LIST
RECOMMENDATIONS
• Kamado barbecues are extremely versatile. Not only can they be used for grilling or smok-
ing, but they can also easily bake pizzas, bread, cakes and cookies inside.
• Due to their excellent heat retention properties, they can reach and maintain high temper-
atures through precise control of airow through the top and bottom vents.
• High heat is ideal for quickly cooking burgers and sausages, while low heat will cook larger
cuts of meat for a longer period of time.
• You can add wood chips to charcoal or combine different avored wood chips to give your
meats even more avor.
• To extinguish the unit, stop adding fuel and close all openings and lid to allow the re to
die down naturally.
• Do not use water to extinguish the re or ashes, as this could damage the Ceramic Kamado.
• Tighten the bands and lubricate the hinges twice a year or more if necessary.
STORAGE
• When not in use, and if stored outdoors, cover the Kamado once completely cool with a
suitable rain cover.
• The cooking grate is not dishwasher safe, use a mild detergent in warm water.
• When using the Kamado, press down on both locking wheels to prevent the unit from mov-
ing during use.
• It is recommended to store the Kamado under a cover in a garage or shed during the winter
for complete protection.
1. Top ventilation
2. Top
3. Thermostat
4. Opening handle
5. Side grab handle
6. Product body
7. Ventilation outlet
8. Paws
9. Ash picker
10. Heat deector
1
3
2
7
6
5
8
4
9
10

8ENGLISH
CLEANING
USE AND CARE
• The Kamado cleans itself. Heat it at 260°C for 30 minutes and it will burn off all food and
residue.
• Do not use water or any other type of cleaning product to clean the inside of your Kamado.
The walls are porous and will absorb any liquid used which could cause the Kamado to
crack. If the soot is excessive, use a wire brush or the ash tool to scrape off any carbon
residue before next use.
• To clean the grills, use a non-abrasive cleaner after the unit is completely cool.
• To clean the outer surface, wait for the Kamado to cool down and use a damp cloth with a
mild detergent.
• Make sure the Kamado is placed on a permanent, at, level, heat resistant and non-am-
mable surface, away from ammable objects.
• Make sure the Kamado has a minimum height distance of 2 meters from the top and a min-
imum distance of 2 meters from other surrounding objects.
• To start the re, place rolled newspaper with a few starter cubes or solid re pellets on the
charcoal plate. Then place 2-3 handfuls of the charcoal on top of the newspaper. Maximum
amount of charcoal is 0.4 kg.
• Do not use gasoline, white spirit, lighter uid, alcohol, or other similar chemicals to light
charcoal.
• Open the bottom vent and light the newspaper using a long wick lighter or safety
matches. Once lit, leave bottom vent and lid open for about 10 minutes to create a small
layer of hot coals.
• Allow the charcoal to heat up and stay red hot for at least 30 minutes before cooking on the
Kamado for the rst time. Do not cook before the fuel has a layer of ash.
• It is recommended not to fan or turn the coals once they are lit. This allows the coals to burn
more evenly and efciently.
• Once lit, wear heat resistant gloves when handling hot ceramic or cooking surfaces.
COOKING MODES
1. Turn on the kamado according to the instructions above. Do not move or fan the coals once
lit.
2. Fully open the bottom vent and leave the lid open for about 10 minutes to build a small bed
of hot coals.
3. Wait until the Kamado reaches the desired temperature.
4. Completely close bottom vent to maintain temperature.
5. The kamado will be ready to start cooking.
Low temperature cooking

9
ENGLISH
1. Light the charcoal according to the instructions above.
2. Close the lid and fully open the top and bottom air vents.
3. Control the temperature of the Kamado until it reaches the desired temperature.
4. Close the top vent halfway and continue to monitor the temperature for a few more minutes.
5. • You are now ready to use the Kamado for cooking.
1. Follow the instructions above as if you were starting a slow cooker.
2. Wait until the Kamado reaches the desired temperature.
3. Leave the bottom vent slightly open.
4. Close the top vent and continue checking the temperature for a few more minutes.
5. Wearing heat-resistant gloves, spread the wood chips in a circle over the hot charcoal.
6. The kamado will be ready to start smoking.
Advice:
• Soak wood chips or cooking planks in water for 15 minutes to prolong the smoking process.
high temperature cooking
Smoke
IMPORTANT:
• When opening the lid at high temperatures, it is essential to lift it only slightly, allowing air
to enter slowly and safely to prevent kickbacks or are-ups that could cause injury.
• Always follow the food cooking information indicated in this instruction manual.
• Always wear heat resistant gloves when handling hot ceramic or cooking surfaces.
COOKING TIPS
• Do not cook until the fuel has a layer of ash.
• Always read the safety instructions and follow the tips when cooking on your kamado.
• Always wash your hands before and after handling raw meat and before eating.
• Always keep raw meat away from cooked meat and other foods.
• Before cooking, make sure grill surfaces and tools are clean and free of old food residue.
• Do not use the same utensils to handle cooked and raw foods.
• Make sure all meat is fully cooked before eating.
Caution:
• Eating raw or undercooked meat can cause food poisoning, so be extra careful when
cooking your food.
• To reduce the risk of undercooked meat, cut off a piece and make sure it is fully cooked.
• If the meat has been cooked long enough, the meat juices should be clear and there
should be no traces of pink/red juices or meat coloring.
• It is recommended to pre-cook larger pieces of meat and joints before nally cooking on
your grill.
• After cooking on your kamado, always clean the cooking surfaces of the grill and tools.

10 ENGLISH
COOKING TEMPERATURE GUIDE
SLOW COOKING / SMOKING (110ºC-135ºC) TIME VENTILATION
Beef steak 2 hours
Open | Closed
Pulled pork 2 hours
Whole chicken 3-4 Hours
Ribs 3-5 Hours
Roasts 9+ Hours
GRILL / ROAST (160ºC-180ºC) TIME VENTILATION
Fish 15-20 min.
Open | Closed
Pork loin 15-30 min.
Chicken pieces 30-45 min.
Whole chicken 1-1.5 hours
Loin leg 3-4 hours
Turkey 2-4 hours
Ham 2-5 hours
GILD (260ºC-370ºC) TIME VENTILATION
Steak 5-8 min.
Open | Closed
Pork chop 6-10 min.
Burgers 6-10 min.
Sausages 6-10 min.

11
ENGLISH
MOUNTING
1. Place part two on the at part of the three
parts 9 tting the holes and screw them
with the help of screws and nuts A and B.
Mounting the legs and side grab handles
2. Attach parts 5 to the previously assem-
bled base using screws and nuts A and
B. Then attach part 4 on top by adjusting
the holes with screws and nuts A and B.
1
5
9
6
7
2 3 4
8
x3
x3
x3
9
2
A
B
3. Place part 1 on one side of the previous-
ly assembled base and screw it in with
screws A and B until it is secure.
A
4
5
B
4. Repeat the same step with the side han-
dle on the opposite side.
1A
B
1
A
B

12 ENGLISH
Before assembling the charcoal bucket, place the kamado on the wheel base, with the help
of another person, since this product has a lot of weight, in this way the kamado will weigh
less at the time of assembly and will be easier to transport.
3. Remove the nuts that are placed on the
kamado where the handle goes.
5. Place part 13 on top of the kamado’s air
outlet and carefully screw it down with
screws C and brake nuts D one on each
side. Make sure the piece is tight but do
it carefully.
Coal Bucket Assembly
Handle assembly
Air outlet mounting
1. Insert the charcoal grate, the top ring of
the kamado and then the cooking grill
into the charcoal bucket.
4. Place part 1 tting the holes in the
screws that protrude from the kamado
and screw the nut until the handle is well
attached.
2. Once the cube is assembled, insert it into
the body of the kamado, being careful
not to pinch your ngers.
1
2
3
C
D
3
1

13
ENGLISH
CARE AND MAINTENANCE
After use, the surface of your ceramic barbecue may show lines of cracks. However, this does
not mean that the ceramic is cracked. This is known as "crazing" and is caused by a differ-
ence in the coefcient of expansion between the glaze and the clay. The crazing pattern has
a spider web appearance and is different from a crack in that it cannot be felt on the surface
unless a ngernail is used to detect it. However, it may be more apparent when the surface
is dusty or magnied. Although this “crazing” may appear to be an imperfection, it does not
affect the performance or lifespan of your ceramic barbecue, therefore it cannot be claimed
as a warranty issue. In fact, the crazing process increases the resistance of the unit.
To improve its use, follow the following tips:
• Wooden side shelves should be covered when not in use and may require renishing from
time to time.
• Regularly check that all band assist spring bolts are tight and secure.
• Do not remove container from re. The purpose of the re bowl is to hold the charcoal and
it will continue to work even if it is cracked.
6. Once all the parts of the kamado are assembled, you can place the body of the product at
the base of the legs, always with the help of another person since it is a heavy product. You
will be able to start enjoying your kamado.

14 ESPAÑOL
Muchas gracias por elegir nuestro producto. Antes de utilizarlo, lea detenidamente las instruc-
ciones de uso para su correcta utilización.
Las precauciones de seguridad incluidas reducen el riesgo de sufrir quemaduras, lesiones e
incluso la muerte si se respetan estrictamente. Guarde este manual en un lugar seguro para
consultarlo en el futuro, junto con la tarjeta de garantía del producto debidamente cumpli-
mentada, el embalaje original del producto y el justicante de compra. Si es posible, entregue
estas instrucciones al siguiente propietario del producto. Respete en todo momento las pre-
cauciones básica de seguridad y las normas de prevención de accidentes cuando utilice el
aparato. La empresa no se hace responsable del incumplimiento de estas instrucciones por
parte de los clientes.
INSTRUCCIONES DE SEGURIDAD
Antes de usar este producto lea detenidamente las precauciones básicas de
seguridad.
• Retire con cuidado cualquier embalaje antes de usar el producto.
• Este producto está destinado únicamente para uso en exteriores. No lo utilice
nunca en interiores.
• Mantenga a los niños y las mascotas siempre lejos del horno cuando esté en uso.
• Nunca deje un fuego encendido sin supervisión.
• Nunca encienda este producto ni permita que se consuma o enfríe en espacios
cerrados ya que existe peligro de intoxicación por monóxido de carbono.
• No utilice este producto en una tienda de campaña, caravana, automóvil, sótano,
ático o barco.
• No lo use debajo de toldos, sombrillas o pérgolas.
• Tenga especial cuidado con las brasas calientes ya que pueden emitir chispas
mientras está en uso y existe peligro de incendio.
• No utilice gasolina, disolvente, líquido para encender, alcohol u otros productos
químicos similares para encender este producto.
• Se recomienda utilizar carbón vegetal en su kamado. Este tipo de carbón arde
durante más tiempo y produce menos ceniza.
• No use carbón en este producto.
Importante: Cuando abra la tapa a altas temperaturas, es esencial levantarla solo
ligeramente, permitiendo que el aire entre lentamente y de manera segura, evitan-
do retrocesos o llamaradas que puedan causar lesiones.
• No utilice el kamado sobre plataformas de madera ni en ninguna otra supercie
inamable, como pasto seco, astillas de madera, hojas o corteza decorativa.
• Asegúrese de que el kamado esté ubicado al menos a 2 metros de distancia de
objetos inamables.
• No utilice este kamado como una estufa.
ESPAÑOL

15
ESPAÑOL
LISTADO DE PARTES
1. Ventilación superior
2. Tapa
3. Termostato
4. Asa de abertura
5. Asa de agarre lateral
6. Cuerpo del producto
7. Salida de ventilación
8. Patas
9. Recogecenizas
10. Deector de calor
RECOMENDACIONES
• Las barbacoas kamado son extremadamente versátiles. No solo se pueden utilizar para
asar a la parrilla o ahumar, sino que también pueden hornear pizzas, pan, pasteles y galle-
tas fácilmente en su interior.
• Debido a sus excelentes propiedades de retención de calor, pueden alcanzar y mantener
altas temperaturas mediante un control preciso del ujo de aire a través de las aberturas
superiores e inferiores.
• Las altas temperaturas son ideales para cocinar rápidamente hamburguesas y salchichas,
mientras que los fuegos bajos cocinarán cortes de carne más grandes durante un período
de tiempo más prolongado.
• Puede agregar astillas de madera al carbón vegetal o combinar diferentes astillas de ma-
dera con sabores para darle a sus carnes aún más sabor.
• Para extinguir la unidad, deje de añadir combustible y cierre todas las aberturas y la tapa
para permitir que el fuego se apague naturalmente.
• No utilice agua para extinguir el fuego o las cenizas, ya que esto podría dañar el Kamado
de cerámica.
• Apriete las bandas y lubrique las bisagras dos veces al año o más si es necesario.
Atención: Este producto se calienta mucho, no lo mueva durante su funcionamiento.
• Siempre use guantes resistentes al calor al manipular cerámica caliente o su-
percies de cocción.
• Permita que la unidad se enfríe completamente antes de moverla o almacenarla.
• Inspeccione siempre el producto antes de usarlo por si esta dañado. Si existen
daños en el producto no lo use.
1
3
2
7
6
5
8
4
9
10

16 ESPAÑOL
ALMACENAMIENTO
LIMPIEZA
USO Y CUIDADO
• Cuando no esté en uso, y si se guarda al aire libre, cubra el Kamado una vez que esté com-
pletamente frío con una funda adecuada para la lluvia.
• La parrilla de cocción no es apta para lavavajillas, utilice un detergente suave con
agua tibia.
• Cuando utilice el Kamado, presione hacia abajo en ambas ruedas de bloqueo para evitar
que la unidad se mueva durante el uso.
• Se recomienda guardar el Kamado bajo una cubierta en un garaje o cobertizo durante el
invierno para una protección completa.
• El Kamado se limpia solo. Caliéntelo a 260°C durante 30 minutos y quemará todos los
alimentos y residuos.
• No use agua ni ningún otro tipo de producto de limpieza para limpiar el interior de su Kama-
do. Las paredes son porosas y absorberán cualquier líquido utilizado, lo que podría causar
que el Kamado se agriete. Si el hollín es excesivo, use un cepillo de alambre o la herramien-
ta de ceniza para raspar los restos de carbón antes del próximo uso.
• Para limpiar las parrillas, use un limpiador no abrasivo una vez que la unidad esté comple-
tamente fría.
• Para limpiar la supercie exterior, espere a que el Kamado se enfríe y use un paño húmedo
con un detergente suave.
• Asegúrese de que el Kamado esté colocado sobre una supercie permanente, plana, nive-
lada, resistente al calor y no inamable, lejos de objetos inamables.
• Asegúrese de que el Kamado tenga una distancia de altura mínima de 2 metros desde la
parte superior y una distancia mínima de 2 metros de otros objetos circundantes.
• Para encender el fuego, coloque papel de periódico enrollado con algunos cubos de encen-
dido o pastillas de fuego sólido en la placa de carbón. Luego coloque 2 o 3 puñados de car-
bón vegetal sobre el papel de periódico. Cantidad máxima de carbón vegetal es de0,4 kg.
• No use gasolina, aguarrás, líquido para encendedores, alcohol u otros productos químicos
similares para encender el carbón vegetal.
• Abra la ventilación inferior y encienda el periódico usando un encendedor de mecha larga o
cerillas de seguridad. Una vez que haya prendido, deje la ventilación inferior y la tapa abier-
tas durante unos 10 minutos para crear una pequeña capa de brasas calientes.
• Permita que el carbón se caliente y se mantenga al rojo vivo durante al menos 30 minutos
antes de cocinar por primera vez en el Kamado. No cocine antes de que el combustible
tenga una capa de ceniza.
• Se recomienda no avivar ni voltear las brasas una vez que estén encendidas. Esto permite
que los carbones se quemen de manera más uniforme y eciente.
• Una vez encendido, use guantes resistentes al calor cuando manipule cerámica caliente o
supercies para cocinar.

17
ESPAÑOL
MODOS DE COCCIÓN
1. Encienda el kamado de acuerdo a las instrucciones anteriores. No mueva ni avive las bra-
sas una vez encendidas.
2. Abra completamente la ventilación inferior y deje la tapa abierta durante aproximadamen-
te 10 minutos para construir una pequeña cama de brasas calientes.
3. Espere hasta que el Kamado alcance la temperatura deseada.
4. Cierre completamente la ventilación inferior para mantener la temperatura.
5. El kamado estará listo para comenzar a cocinar.
1. Encienda el carbón vegetal según las instrucciones anteriores.
2. Cierre la tapa y abre completamente las salidas de aire superior e inferior.
3. Controle la temperatura del Kamado hasta que alcance la temperatura deseada.
4. Cierre la salida de aire superior a la mitad y continúe controlando la temperatura durante
unos minutos más.
5. • Ahora estará listo para usar el Kamado para cocinar.
1. Siga las instrucciones anteriores como si estuviera comenzando una cocción lenta.
2. Espere hasta que el Kamado alcance la temperatura deseada.
3. Deje ligeramente abierta la ventilación inferior.
4. Cierre la ventilación superior y continúe revisando la temperatura durante unos minu-
tos más.
5. Con guantes resistentes al calor, esparza las astillas de madera en círculo sobre el carbón
caliente.
6. El kamado estará listo para comenzar a ahumar.
Consejo:
• Remoje las astillas de madera o tablones de cocción en agua durante 15 minutos para pro-
longar el proceso de ahumado.
Cocción a baja temperatura
Cocción a alta temperatura
Ahumar
IMPORTANTE:
• Al abrir la tapa a altas temperaturas, es esencial levantarla solo ligeramente, permitiendo
que el aire entre lentamente y de manera segura para evitar retrocesos o llamaradas que
puedan causar lesiones.
• Siga siempre la información de cocción de los alimentos indicada en este manual de ins-
trucciones.
• Use siempre guantes resistentes al calor al manipular cerámica caliente o supercies de
cocción.

18 ESPAÑOL
CONSEJOS DE COCCIÓN
• No cocine hasta que el combustible tenga una capa de ceniza.
• Lea siempre las instrucciones de seguridad y siga los consejos al cocinar en tu kamado.
• Lávese siempre las manos antes y después de manipular carne cruda y antes de comer.
• Mantenga siempre la carne cruda alejada de la carne cocida y otros alimentos.
• Antes de cocinar, asegúrese de que las supercies de la parrilla y las herramientas estén
limpias y sin residuos de alimentos antiguos.
• No use los mismos utensilios para manipular alimentos cocidos y crudos.
• Asegúrese de que toda la carne esté cocida completamente antes de consumirla.
Precaución:
• Comer carne cruda o insucientemente cocida puede causar intoxicación alimentaria,
tenga especial cuidado a la hora de cocinar sus alimentos.
• Para reducir el riesgo de carne insucientemente cocida, corte un trozo y asegúrese de
que esté cocida completamente.
• Si la carne se ha cocido lo suciente, los jugos de la carne deben estar claros y no debe
haber rastros de jugo rosado/rojo o coloración de la carne.
• Se recomienda pre-cocinar piezas más grandes de carne y articulaciones antes de cocinar
nalmente en tu parrilla.
• Después de cocinar en tu kamado, siempre limpie las supercies de cocción de la parrilla
y las herramientas.
GUÍA DE TEMPERATURA DE COCCIÓN
COCCIÓN LENTA / AHUMADO (110ºC-135ºC) TIEMPO VENTILACIÓN
Bistec de carne 2 Horas
Abierto | Cerrado
Cerdo desmenuzado 2 Horas
Pollo entero 3-4 Horas
Costillas 3-5 Horas
Asados 9+ Horas
GRILL / ASADO (160ºC-180ºC) TIEMPO VENTILACIÓN
Pescado 15-20 min.
Abierto | Cerrado
Lomo de cerdo 15-30 min.
Piezas de pollo 30-45 min.
Pollo entero 1-1,5 horas
Pierna de lomo 3-4 horas
Pavo 2-4 horas
Jamón 2-5 horas
DORAR (260ºC-370ºC) TIEMPO VENTILACIÓN
Bistec 5-8 min.
Abierto | Cerrado
Chuleta de cerdo 6-10 min.
Hamburguesas 6-10 min.
Salchichas 6-10 min.

19
ESPAÑOL
MONTAJE
1. Coloque la pieza dos en la parte plana de
las tres piezas 9 encajando los agujeros
y atornillelas con la ayuda de los tornillos
y las tuercas A y B.
Montaje de las patas y las asas de agarre laterales
2. Acople las piezas 5 en la base montada
anteriormente usando los tornillos y las
tuercas A y B. Después Coloque la pieza
4 en la parte superior ajustando los agu-
jeros con los tornillos y tuercas A y B.
1
5
9
6
7
2 3 4
8
x3
x3
x3
9
2
A
B
3. Coloque la pieza 1 en un lateral de la base
montada anteriormente y atornillela con
los tornillos A y B hasta que quede bien
sujeta.
A
4
5
B
4. Repita el mismo paso con el asa lateral
del lado opuesto.
1A
B
1
A
B

20 ESPAÑOL
Antes de montar cubo de carbón coloque el kamado sobre la base de ruedas, con ayuda de
otra persona ya que este producto tiene mucho peso, de esta manera el kamado pesará me-
nos a la hora del montaje y será mas fácil de transportar.
3. Quite las tuercas que encuentran coloca-
das en el kamado donde va el asa.
5. Coloque la pieza 13 en la parte superior
de la salida de aire del kamado y atorni-
llela cuidadosamente con los tornillos C
y las tuercas de freno D una a cada lado.
Asegúrese de que la pieza quede bien
apretada pero hágalo con cuidado.
Montaje del cubo de carbón
Montaje del asa
Montaje de la salida de aire
1. Introduzca dentro del cubo de carbón
la rejilla para el carbón, el aro superior
del kamado y posteriormente el grill de
cocción.
4. Coloque la pieza 1 encajando los aguje-
ros en los tornillos que sobresalen del
kamado y enrosque la tuerca hasta que
el asa quede bien sujeta.
2. Una vez montado el cubo introduzcalo
dentro del cuerpo del kamado con cuida-
do de no pellizcarse los dedos.
1
2
3
C
D
3
1
Table of contents
Languages:
Other Create Grill manuals
Popular Grill manuals by other brands

Grillvapor
Grillvapor GV 455 Instruction booklet for Installation, Use, Maintenance

Cuisinart
Cuisinart GAS9556AS Aassembly Instructions

ARIETE
ARIETE 730 manual

Coleman
Coleman 9955 Series Use, care & assembly manual

Lincat
Lincat Silverlink 600 CG4 User, installation and servicing instructions

Broil King
Broil King 06695000 Operator's manual