CREATIVE CONCEPTS Glow Bright Lily Lights User manual

Operating
Instructions
For Optimal Use Please Read The Instructions First.
• Solar panel must face direct sunlight.
• Although the battery has been charged by the manufacturer. The stored
charge may have dropped from time of manufacturer to purchase by the
Consumer. Please let the Lily Light charge for a full day for maximum
performance.
• It is normal that Lily Light may turn on or off at slightly different time from
one another as their sensors may detect the sunlight strength differently from
their individual locations.
• Automatic on/off switch works properly only by outdoor direct sunlight.
• Solar panel surface must be kept clean to collect sunlight effectively.
• The LED bulb installed inside the solar light normally lasts over 100,000 hours.
• Switch on Lily Light, if it is in a lighted environment simply cover the solar panel
so the built-in sensor will detect “Dusk” and automatically turn on the light.
Lily Light Warnings and Tips
The pre-installed batteries normally last about 18 months. You may need to replace
batteries when solar light stops working. Use Nickel-Cadmium (or Nickel Metal-Hy-
dride) rechargeable AA battery (1.2V 300mAh or higher mAh) to replace the old
battery.
Follow the illustration to replace battery
Remember to securely-assemble the
solar light after replacing battery.
When and How to Replace Battery
Nickel-cadmium batteries must be recycled or disposed of properly.
Electrical and electronic devices contain hazardous substances that can
have harmful effects on the environment and/or human health and should
be recycled properly.
CAUTION - DISPOSAL OF MATERIALS
How Lily Lights Solar Power Works
Lily Lights must be placed outdoor. The built-in solar panel collects and converts sunlight into DC power everyday while the
pre-installed rechargeable batteries store the energy to power the light at night. The built-in sensor automatically activates the
light at dusk and deactivates it at dawn. The duration of the illuminations will depend on location and weather conditions.
Choosing and Ideal Location
Choosing an outdoor location where the solar panel (see FIG. A) can receive at least 6 hours of full and direct sunlight
as shady areas can reduce the charging of the battery and shorten the amount of illumination time. Also avoid placing
the Lily Lights near bright lights such as street lamps and porch lights as this may cause the Lily Light to turn off automatically.
Lily Lights should be placed in locations such as gardens, pathways, lawns, pools etc. for night time illumination.
First Time Use and Install
Press the ON/OFF switch down to the “ON” position, the light sensor will control the light automatically. When it begins to turns
dark the solar light will automatically turn on and will stay on till dawn and shut off during the day time so that the solar
panels can recharge. If you press the switch during operation the Lily Light will turn off to save energy.
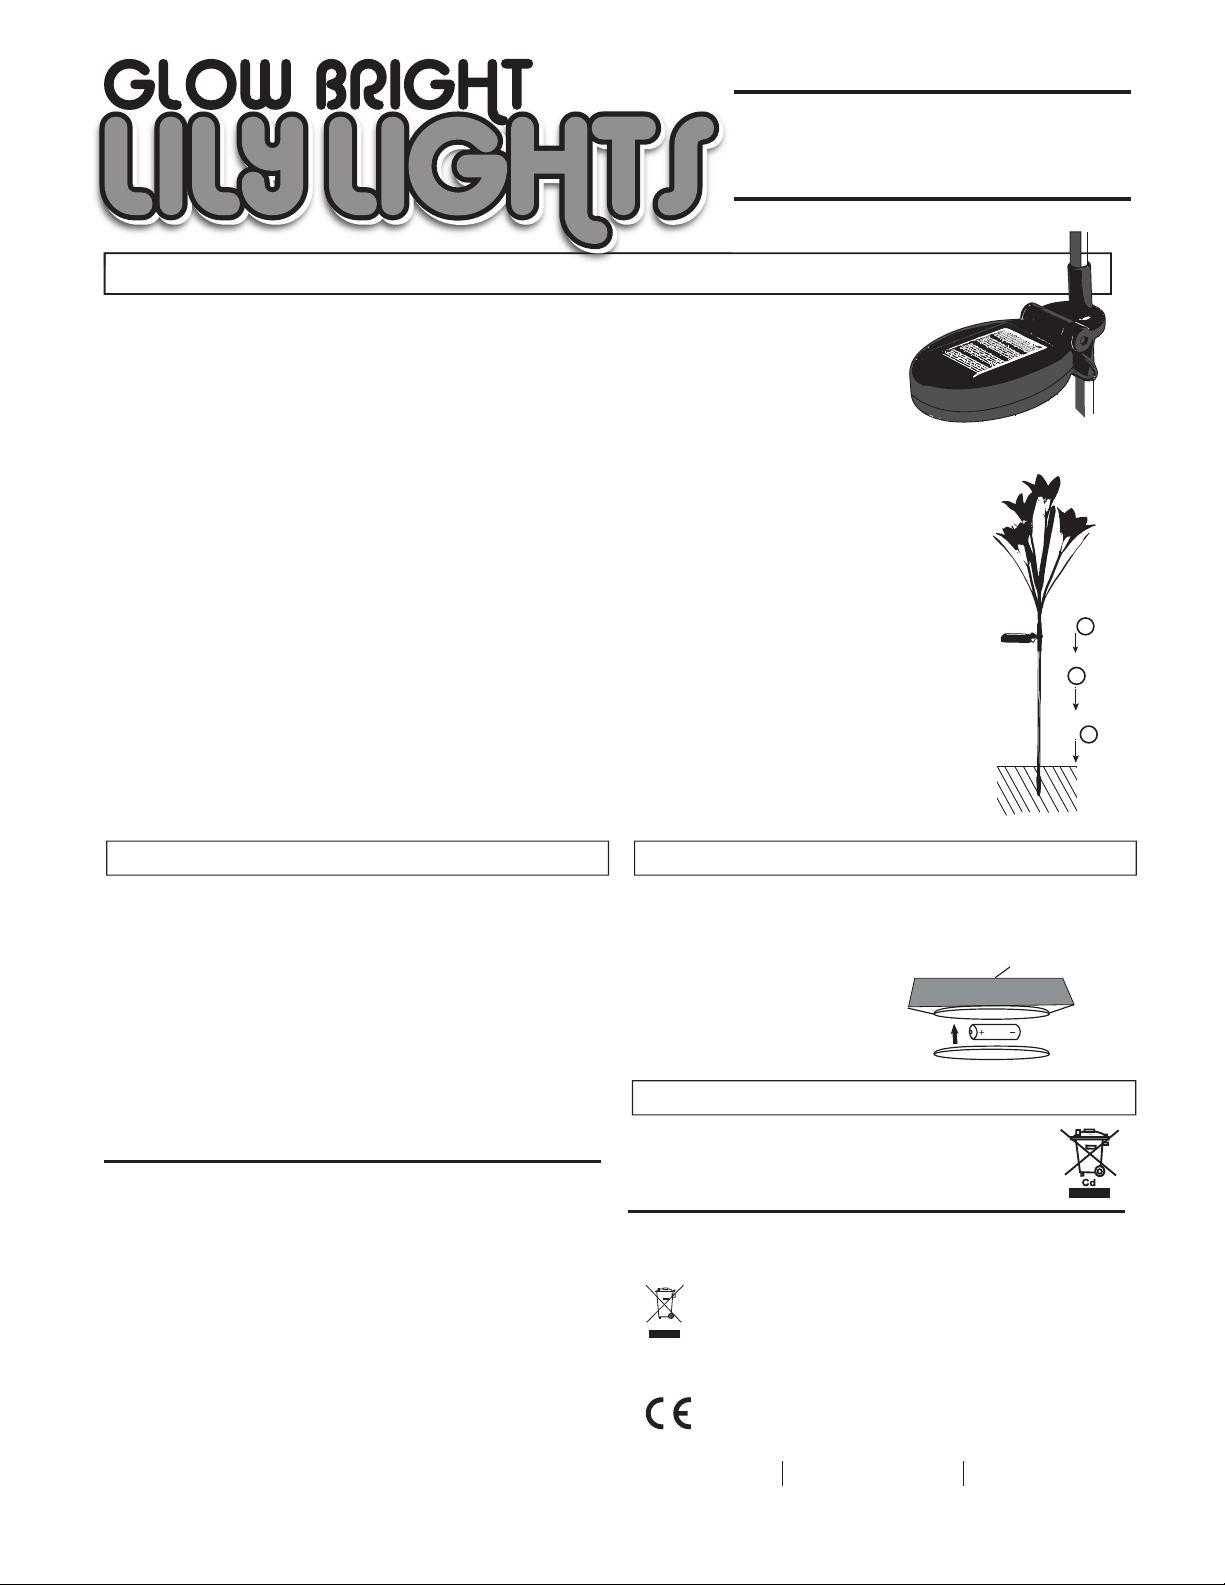
Installation (see FIG. B)
1. Push the spike securely into the ground. 2. Secure the stake onto the spike. 3. Secure the solar light onto the stake.
Precautions (prior to first time use)
1. To maximize battery capacity, the solar light should be fully charged by direct sunlight for eight hours before initial use.
2. Be sure batteries are securely contacted with the correct polarities.
3. Do not place solar light near a lighted object as the automatic on/off switch may not work properly.
4. Under extremely cold temperatures, the batteries may not charge fully. In such cases, the Solar Lights may not stay illuminated as long.
5. When placing stakes in the ground, be careful of underground utilities such as phone lines, cable lines, water pipes, or
any other underground utility conduits.
MADE IN CHINA, ITEM #02595, GBLL2PK_ENG_072519
FIG. A
Battery
Solar Panel
FIG. B
1
2
3
This device complies with part 15 of the FCC Rules. Operation is subject to the following
two conditions: (1) This device may not cause harmful interference, and (2) this device
must accept any interference received, including interference that may cause undesired
operation.
NOTE: This equipment has been tested and found to comply with the limits for a Class B
digital device, pursuant to Part 15 of the FCC Rules. These limits are designed to provide
reasonable protection against harmful interference in a residential installation.
This equipment generates, uses, and can radiate radio frequency energy and, if not
installed and used in accordance with the instructions, may cause harmful interference to
radio communications. However, there is no guarantee that interference will not occur in a
particular installation. If this equipment does cause harmful interference to radio or
television reception, which can be determined by turning the equipment off and on, the
user is encouraged to try to correct the interference by one or more of the following
measures:
• Reorient or relocate the receiving antenna.
• Increase the separation between the equipment and receiver.
• Connect the equipment into an outlet on a circuit different from that to which the
receiver is connected.
• Consult the dealer or an experienced radio/TV technician for help.
This symbol means the product must not be discarded as household waste,
and should be delivered to an appropriate collection facility for recycling.
Proper disposal and recycling helps protect natural resources, human health
and the environment. For more information on disposal and recycling of this
product, contact your local municipality, disposal service, or the shop where
you bought this product.
CREATIVE CONCEPTS MANUFACTURING LTD
Ningbo, Zhejiang, China
Manufactured by:
CREATIVE CONCEPTS ITALIA SRL
Via Santo Stefano 50
40125 Bologna, Italy
CREATIVE CONCEPTS EUROPE LTD
London, NW6 7JR, UK
CREATIVE CONCEPTS USA
Hoboken, NJ 07030, USA
Distributed by:
F O ti l U Pl R d Th I

Istruzioni d’uso
Per prestazioni ottimali, leggere le istruzioni prima dell’uso.
• Il pannello solare dev’essere diretto verso la luce solare.
• Sebbene la batteria sia stata ricaricata dal fabbricante, la carica immagazzinata
potrebbe essere diminuita nel lasso di tempo trascorso tra la fabbricazione e l’acquisto
da parte del consumatore. Lasciar ricaricare la Lily Light per un giorno intero per
massime prestazioni.
• È nella norma che le Lily Lights possano accendersi e spegnersi a orari leggermente
differenti l’una rispetto all’altra, poiché i sensori potrebbero rilevare differentemente la
potenza della luce solare a seconda della loro posizione.
• Il meccanismo automatico di accensione/spegnimento funziona correttamente solo
all’aperto, sotto la luce diretta del sole.
• La superficie del panello solare va tenuta pulita perché catturi efficacemente la luce
solare.
• Il LED all’interno della lampadina solare dura generalmente oltre 100 000 ore.
• Accendere la Lily Light. Se ci si trova in un ambiente illuminato, è sufficiente coprire il
pannello solare in modo che il sensore incorporato rilevi “buio” e accenda automatica-
mente la lampadina.
Avvisi e consigli d’uso delle Lily Lights
Le batterie preinstallate durano generalmente circa 18 mesi. Se la lampadina solare
smette di funzionare, potrebbe essere necessario sostituire le batterie. Usare batterie AA
nichel-cadmio (o nichel-metal idrato) ricaricabili (1.2V 300 mAh o mAh superiore) per
sostituire quelle usate.
Seguire le istruzioni per sostituire la
batteria. Ricordare di rimontare
saldamente la lampadina solare dopo
aver sostituito la batteria.
Quando e come sostituire la batteria
Le batterie nichel-cadmio devono essere riciclate o smaltite correttamente.
Dispositivi elettrici ed elettronici contengono sostanze pericolose, potenzial-
mente nocive per l’ambiente e/o la salute dell’uomo, e per tale motivo
devono essere riciclati correttamente.
ATTENZIONE - SMALTIMENTO DEI MATERIALI
MADE IN CHINA, ITEM #02595, GBLL2PK_ENG_072519
FIG. A
Batteria
Pannello solare
FIG. B
1
2
3
Questo dispositivo è conforme alla sezione 15 del regolamento FCC. Il funzionamento
dell’apparecchio è soggetto alle seguenti condizioni: 1) Questo dispositivo non rischia di
provocare interferenze e (2) questo dispositivo deve accettare tutte le interferenze ricevute,
comprese quelle che potrebbero provocare malfunzionamenti.
NOTA: Questa attrezzatura è stata testata e dichiarata conforme ai limiti per dispositivi
digitali di Classe B in forza della sezione 15 del regolamento FCC. Questi limiti sono
concepiti per fornire una ragionevole protezione contro le interferenze dannose in un
impianto domestico.
Quest’attrezzatura genera, utilizza e potrebbe emanare frequenze radio e, se non installata
e usata secondo queste istruzioni, potrebbe causare interferenze dannose alle comunicazi-
oni radio. In ogni caso, non si garantisce che tali interferenze non possano verificarsi in
alcuni impianti. Se questo dispositivo dovesse causare interferenze alla ricezione di radio o
televisione, dovute ad accensione e spegnimento del dispositivo, esortiamo l’utente a
tentare di correggere le interferenze attraverso uno o più dei seguenti provvedimenti:
• Riorientare o spostare l’antenna ricevente.
• Aumentare la distanza tra dispositivo e ricevitore.
• Connettere il dispositivo a una presa di corrente diversa da quella collegata al ricevitore.
• Consultare il fornitore o un tecnico radio/TV per aiuto.
Questo simbolo indica che il prodotto non può essere smaltito tra i rifiuti
domestici e va depositato presso un luogo di raccolta adibito al riciclo.
Smaltimento e riciclo appropriati aiutano a proteggere le risorse naturali, la
salute dell'uomo e l'ambiente. Per ulteriori informazioni su smaltimento e
riciclo di questo prodotto, contattare il proprio comune, l'ente adibito al
servizio di smaltimento o il punto vendita dove è stato acquistato.
CREATIVE CONCEPTS MANUFACTURING LTD
Ningbo, Zhejiang, China
Fabbricato da:
CREATIVE CONCEPTS ITALIA SRL
Via Santo Stefano 50
40125 Bologna, Italy
CREATIVE CONCEPTS EUROPE LTD
London, NW6 7JR, UK
CREATIVE CONCEPTS USA
Hoboken, NJ 07030, USA
Distribuito da:
P t i i tti li l l i t
Come funziona l’alimentatore solare delle Lily Lights
Le Lily Lights devono essere posizionate all’esterno. Il pannello solare incorporato cattura e converte la luce in corrente continua ogni giorno,
mentre le batterie ricaricabili preinstallate immagazzinano l’energia per alimentare la lampadina di notte. Il sensore incorporato attiva
automaticamente la lampadina al crepuscolo e la disattiva all’alba. La durata dell’illuminazione dipende dalla posizione e dalle
condizioni meteorologiche.
Scegliere l’ubicazione ideale
Scegliere un’ubicazione all’esterno dove il pannello solare (vedi FIG. A) possa ricevere minimo 6 ore di luce solare piena e diretta: zone in penombra
potrebbero rallentare il caricamento della batteria, riducendo la durata dell’illuminazione. Evitare di posizionare le Lily Lights in prossimità di fonti di
luce molto intensa come lampioni o illuminazione del portico: questo potrebbe far spegnere automaticamente le Lily Lights. Le Lily Lights vanno
collocate in giardini, vialetti, prati, bordo piscina ecc. per illuminazione notturna.
Installazione e primo utilizzo
Spostare l’interruttore ON/OFF su “ON”: il sensore controllerà automaticamente la lampadina. Al crepuscolo la lampadina solare si accenderà
automaticamente, rimanendo accesa fino all’alba per poi spegnersi durante il giorno per permettere ai pannelli solari di ricaricarsi. Se l’interruttore
viene premuto durante l’attività, la Lily Light si spegnerà per risparmiare energia.
Installazione (vedi FIG. B)
1. Infilare il supporto appuntito del paletto nel terreno. 2. Fissare il paletto sul supporto. 3. Assicurare la lampadina solare sul paletto.
Precauzioni (prima del primo utilizzo)
1. Per massimizzare la capacità della batteria, lasciar caricare la lampadina alla luce solare diretta per otto ore prima di usarla.
2. Accertarsi che le batterie siano inserite secondo le corrette polarità.
3. Non posizionare la lampadina solare vicino a fonti di luce artificiale: questo potrebbe interferire con il corretto funzionamento del meccanismo
di accensione/spegnimento.
4. A temperature molto basse, le batterie potrebbero non ricaricarsi completamente. In questi casi, le lampadine solari potrebbero spegnersi prima
del previsto.
5. Posizionando i paletti nel terreno, fare attenzione a non danneggiare sottoservizi come linee telefoniche, cavi, condutture dell’acqua o altre
condutture sotterranee.

Mode d’emploi
Pour une utilisation optimale, commencer par lire les instructions.
• Le panneau solaire doit être dirigé vers la lumière directe du soleil.
• Bien que les batteries aient été chargées par le fabricant, il est possible que la charge
stockée ait diminué jusqu’au moment de l’achat par le consommateur. Pour des
performances optimales, laissez la Lily Light se charger pendant une journée entière.
• Il est normal que les Lily Lights s’allument ou s’éteignent à des moments légèrement
différents les unes des autres, car les capteurs peuvent détecter la force de la lumière
du soleil d’une manière différente selon leur emplacement.
• Le commutateur automatique on/off fonctionne correctement uniquement avec la
lumière directe du soleil, en plein air.
• La surface du panneau solaire doit être propre pour bien recueillir la lumière du soleil.
• L’ampoule à DEL installée dans la lampe solaire dure normalement plus de 100 000
heures.
• Allumez la Lily Light ; si elle se trouve dans un environnement éclairé, couvrez
simplement le panneau solaire de manière à ce que le capteur intégré détecte le
crépuscule et allume automatiquement la lumière.
Avertissements et conseils concernant les Lily Lights
La pile préinstallée dure généralement 18 mois environ. Vous devrez peut-être la
remplacer quand la lampe solaire cessera de fonctionner. Utilisez une pile AA au
nickel-cadmium (ou Ni-MH) rechargeable (1,2 V 300 mAh ou plus) pour remplacer la
pile usée.
Quand et comment remplacer les batteries
Les piles au nickel-cadmium doivent être recycles ou mises au rebut
correctement. Les appareils électriques et électroniques contiennent des
substances dangereuses qui peuvent avoir des effets nuisibles sur
l’environnement et/ou la santé humaine. Ils doivent être recyclés
correctement.
ATTENTION : MISE AU REBUT DES MATERIAUX
Fonctionnement de l’énergie solaire des Lily Lights
Les Lily Lights doivent être placées en plein air. La panneau solaire intégré recueille et convertit chaque jour la lumière du soleil en courant
continu, alors que les batteries rechargeables préinstallées stockent l’énergie pour fournir de la lumière la nuit. Le capteur intégré active
automatiquement l’éclairage au crépuscule et la désactive à l’aube. La durée de l’éclairage dépend de l’emplacement et des conditions
météorologiques.
Choisir un emplacement idéal
Choisir un emplacement à l’extérieur où le panneau solaire (voir la FIG. A) pourra recevoir au moins 6 heures de lumière solaire pleine et directe, car les
zones d’ombre peuvent réduire le chargement de la batterie et écourter le temps d’éclairage. En outre, éviter de placer les Lily Lights près d’éclairages
lumineux comme des réverbères et des lumières de porche, car les Lily Light risqueraient de s’éteindre automatiquement. Les Lily Lights doivent être
placées dans des endroits comme des jardins, des chemins, des pelouses, des piscines, etc. pour l’éclairage nocturne.
Installation et première utilisation
Appuyer sur le commutateur ON/OFF pour le mettre à la position « ON » ; le capteur de lumière contrôlera automatiquement la lampe. Quand il commence
à faire nuit, la lampe solaire s’allume automatiquement et reste allumée jusqu’à l’aurore. Pendant la journée, elle reste éteinte pour que les panneaux
solaires puissent se recharger. Si vous appuyez sur le commutateur pendant le fonctionnement, la Lily Light s’éteint pour économiser du courant.
Installation (voir la FIG. B)
1. Enfoncer fermement la pointe dans le sol. 2. Fixer le pieu sur la pointe. 3. Fixer la lampe solaire sur le pieu.
Précautions (avant la première utilisation)
1. Pour optimiser la capacité de la batterie, il faut charger complètement la lampe solaire sous la lumière directe du soleil pendant huit heures avant la
première utilisation.
2. Vérifier que les batteries sont fermement enfoncées et que la polarité est correcte.
3. Ne pas placer la lampe solaire près d’un objet éclairé, car le commutateur automatique risque de mal fonctionner.
4. Par temps extrêmement froid, il est possible que les batteries ne se chargent pas complètement. Dans ce cas, les lampes solaires pourraient ne pas
rester allumées aussi longtemps.
5. Lorsque vous placez les pieux dans le sol, veillez à ne pas toucher des installations souterraines comme des lignes téléphoniques, des câbles, des
conduites d’eau, etc.
MADE IN CHINA, ITEM #02595, GBLL2PK_IM_MULTI_092019
FIG. A
Pile
Panneau solaire
FIG. B
1
2
3
Cet appareil est conforme à la section 15 de la Réglementation FCC. Son utilisation est
assujettie aux deux conditions suivantes : (1) Cet appareil ne risque pas de provoquer des
interférences nuisibles et (2) cet appareil doit accepter toute interférence reçue, y compris
celles pouvant provoquer un fonctionnement indésirable.
REMARQUE : Cet équipement a été testé et déclaré conforme aux limites pour les appareils
numériques de Classe B, conformément à la section 15 de la réglementation FCC. Ces
limites sont conçues pour assurer une protection raisonnable contre les interférences
nuisibles dans une installation résidentielle.
Cet équipement génère, utilise et peut émettre une énergie radiofréquence ; s’il n’est pas
installé et utilisé conformément aux instructions, il peut provoquer des interférences
nuisibles aux communications radio. Toutefois, il n’est pas garanti que ces interférences
n’auront pas lieu dans une installation en particulier. Si cet équipement provoque des
interférences nuisibles à la réception radio ou TV, qui peuvent être dues à l’allumage et
l’extinction de l’équipement, nous conseillons à l’utilisateur d’essayer de remédier aux
interférences en prenant une ou plusieurs mesures ci-dessous :
• Réorienter ou repositionner l’antenne de réception.
• Augmenter l’espace entre l’équipement et le récepteur.
• Connecter l’équipement à une prise sur un circuit différent de celui où le récepteur est
connecté.
•
Consulter le concessionnaire ou un technicien radio/TV expérimenté pour obtenir de l’aide.
Ce symbole indique que le produit ne doit pas être mis au rebut avec les
déchets ménagers et doit être confié à un lieu de collecte approprié pour le
recyclage. La mise au rebut appropriée et le recyclage permettent de protéger
les ressources naturelles, la santé des personnes et l’environnement. Pour en
savoir plus sur la mise au rebut et le recyclage de ce produit, contactez votre
municipalité locale, le service d’élimination des déchets ou le magasin où vous
avez acheté ce produit.
CREATIVE CONCEPTS MANUFACTURING LTD
Ningbo, Zhejiang, China
Fabriqué par :
CREATIVE CONCEPTS ITALIA SRL
Via Santo Stefano 50
40125 Bologna, Italy
CREATIVE CONCEPTS EUROPE LTD
London, NW6 7JR, UK
CREATIVE CONCEPTS USA
Hoboken, NJ 07030, USA
Distribué par :
P tili ti ti l
Consultez l’illustration pour remplacer
la pile. N’oubliez pas de bien remonter
la lampe solaire après avoir remplacé
la pile
Gebruikershandleiding
Lees Eerst De Handleiding Voor Optimaal Gebruik.
• Het zonnepaneel dient in contact te komen met direct zonlicht.
• Alhoewel dat de batterij door de fabrikant geladen is, zou de opgeslagen energie
verloren kunnen zijn gegaan van het productiemoment tot de aankoop door de
Consument. Laat de Lily Light een volledige dag laden voor maximale prestaties.
• Het is normaal dat de Lily Light lampen iets verschillend van elkaar aan of uit gaan
aangezien de sensoren de sterkte van het zonlicht anders zouden kunnen waarnemen
vanuit de verschillende plaatsen.
• De automatische aan/uit knop werkt alleen goed buitenshuis bij blootstelling aan direct
zonlicht.
• Het zonnepaneel oppervlak dient schoon te worden gehouden om zonlicht op te vangen.
• De LED-lamp aan de binnenkant van de solar lamp duurt normaal gesproken ruim
100,000 uur.
• Schakel Lily Light in, indien het in een verlichte omgeving staat bedek alleen het
zonnepaneel De ingebouwde sensor herkent “Schemering” en schakelt automatisch de
verlichting aan.
Lily Light Waarschuwingen en Tips
De voorgeïnstalleerde batterijen duren normaal ongeveer 18 maanden. Indien de solar
lamp niet meer werkt zou het nodig kunnen zijn de batterijen te vervangen. Gebruik
Nikkel-Cadmium (of Nikkel-metaalhydride) oplaadbare AA batterijen (1.2V 300mAh of
hoger mAh) om de oude te vervangen batterij.
Hoe en Wanneer de Batterijen Vervangen
Nikkel-cadmium batterijen dienen naar behoren verwerkt of gerecycled
te worden. Elektrische en elektronische apparaten bevatten schadelijke
stoffen die schadelijke effecten kunnen hebben op het milieu en/of
menselijke gezondheid en dienen naar behoren gerecycled te worden.
PAS OP - VERWERKINGEN VAN MATERIALEN
Hoe de Lily Light Solar Lamp Werkt
Lily Lights dient buiten geplaatst te worden. Het ingebouwde zonnepaneel verzamelt en zet zonlicht iedere dag om in gelijkstroom terwijl de
voorgeïnstalleerde oplaadbare batterijen de energie bewaren om de verlichting in het donker aan te drijven. De ingebouwde sensor activeert
automatisch de verlichting bij schemering en deactiveert deze bij zonsopgang. De duur van de verlichting is afhankelijk van plaats- en
weersomstandigheden.
Een Ideale Plaats Kiezen
Kies een buitenlocatie waar het zonnepaneel (zie AFB. A) tenminste 6 uur vol en direct zonlicht ontvangt aangezien schaduwrijke plaatsen het opladen van
de batterij kunnen verminderen en de verlichtingstijd kunnen verkorten. Vermijd het plaatsen van uw Lily Light in de buurt van heldere verlichting zoals
straatverlichting en buitenverlichting omdat dit kan leiden tot de automatische uitschakeling van Lily Light. Lily Light dient op locaties geplaatst te worden
zoals tuinen, paden, gazons, zwembaden etc. als nachtverlichting.
Installatie en Eerste Gebruik
Druk de AAN/UIT schakelaar naar beneden op “AAN”, de lichtsensor zal de verlichting automatisch beheren. Zodra het donker begint te worden zal de
verlichting automatisch aan gaan en aan blijven tot zonsopgang en uit blijven gedurende de dag zodat de zonnepanelen kunnen opladen. Indien de
schakelaar tijdens het gebruik wordt ingedrukt zal de Lily Light uitschakelen om energie te besparen.
Installatie (zie Afb. B)
1. Duw de punt stevig in de grond. 2. Bevestig de staaf op de punt. 3. Bevestig de solar lamp op de staaf.
Voorzorgsmaatregelen (voor het eerste gebruik)
1. Om het batterijverbruik te optimaliseren dient de solar lamp voor het eerste gebruik volledig opgeladen te zijn met acht uur blootstelling aan direct
zonlicht.
2. Zorg dat de batterijen veilig contact maken met de juiste polariteit.
3. Plaats de solar lamp niet nabij een verlicht voorwerp, hierdoor zou de automatische aan/uit knop niet goed kunnen werken.
4. Bij extreem koude temperaturen zouden de batterijen niet volledig opgeladen kunnen worden. In dit geval zou de Solar Lamp korter verlicht kunnen
blijven.
5. Wees voorzichtig met ondergrondse voorzieningen zoals telefoondraden, kabels, waterleidingen of iedere andere ondergrondse voorzieningen bij het
plaatsen van de staaf in de grond.
MADE IN CHINA, ITEM #02595, GBLL2PK_IM_MULTI_092019
FIG. A
Batterij
Zonnepaneel
FIG. B
1
2
3
Dit apparaat voldoet met deel 15 van FCC Regels. Gebruik is onderworpen aan de volgende
twee voorwaarden: 1) Dit apparaat mag geen schadelijke interferentie veroorzaken, en (2)
dit apparaat dient iedere ontvangen interferentie te accepteren, inclusief interferentie die
ongewenste werkingen kunnen veroorzaken.
OPMERKING: Deze apparatuur is getest en voldoet aan de beperkingen van een digitaal
apparaat uit Categorie B, in overeenstemming met Deel 15 van de FCC Regels. Deze
beperkingen zijn ontworpen om een redelijke bescherming te bieden tegen schadelijke
interferentie bij installatie in een niet-commerciële omgeving.
Deze apparatuur genereert, gebruikt en kan radiofrequentie-energie uitzenden, en kan,
indien niet geïnstalleerd en gebruikt in overeenstemming met de gebruiksaanwijzing,
storende interferentie bij radiocommunicatie veroorzaken. Er is echter geen garantie dat er
geen interferentie zal plaatsvinden bij een bepaalde installatie. Indien dit apparaat
schadelijke interferentie veroorzaakt bij radio- of tv-ontvangst, wat kan worden vastgesteld
door het apparaat aan en uit te zetten, wordt de gebruiker gevraagd de interferentie op een
van de volgende manieren te proberen te verhelpen:
• De ontvangstantenne opnieuw richten of verplaatsen.
• De afstand vergroten tussen het apparaat en de ontvanger.
• Het apparaat aansluiten in een stopcontact op een verschillend stroomcircuit dan waar
de ontvanger mee verbonden is.
• Neem voor hulp contact op met de dealer of een ervaren radio/TV monteur.
Dit symbool betekent dat dit product niet als huishoudelijk afval weggegooid
mag worden, en ingeleverd dient te worden bij een geschikte inzamelingsfacili-
teit voor recycling.
Correcte afvalverwerking en recycling helpen natuurlijke bronnen, de
menselijke gezondheid en het milieu te beschermen. Voor meer informatie
m.b.t. de afvalverwerking en recycling van dit product kunt u contact opnemen
met uw gemeente, lokale afvalwerkingsbedrijf of de winkel waar u dit product
gekocht heeft.
CREATIVE CONCEPTS MANUFACTURING LTD
Ningbo, Zhejiang, China
Geproduceerd door:
CREATIVE CONCEPTS ITALIA SRL
Via Santo Stefano 50
40125 Bologna, Italy
CREATIVE CONCEPTS EUROPE LTD
London, NW6 7JR, UK
CREATIVE CONCEPTS USA
Hoboken, NJ 07030, USA
Gedistribueerd door:
L E t D H dl idi V O ti
Volg de afbeelding om de batterij te
vervangen en vergeet niet de solar
lamp weer stevig te monteren na het
vervangen van de batterij.
This manual suits for next models
1
Table of contents
Languages:
Popular Outdoor Light manuals by other brands


HUBBELL LIGHTING
HUBBELL LIGHTING MATRIX Series installation instructions

iGuzzini
iGuzzini 7167 instructions

Deco Lighting
Deco Lighting Small Gladetino installation guide

JONATHAN Y
JONATHAN Y Traditional JYL8003A manual

Access Lighting
Access Lighting 20351 installation instructions

Travis Industries
Travis Industries Tempest Portable Torch troubleshooting guide