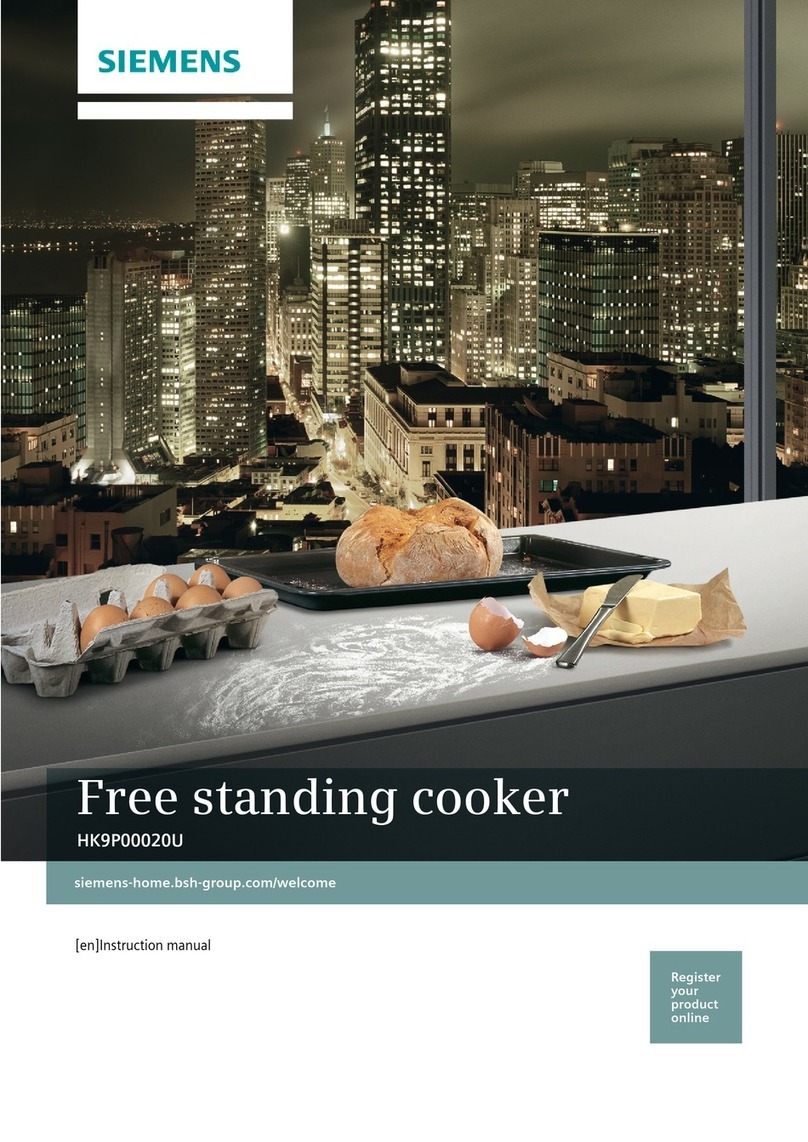
Creda C90RCCCBL User manual

MODEL/S
C90RCCCBL
C90RCCCS
C90RCCTBL
C90RCCTCRM
C90RCCTA
INSTRUCTION
MANUAL
90CM CERAMIC 3 CAVITY
RANGE COOKER
COOKER
V 1.0

INSTRUCTION
MANUAL
2
You’ll soon be enjoying your new CredaRange Cooker!
It all begins here, with your instructions. Don’t worry, there’s nothing too
technical coming up. Just simple, step-by-step guidance to get you up and
running quickly. Sound good? Then let’s get started.
Help and Guidance
We’re here to help you get the most from your Range Cooker.
Should you require any guidance, a simple solution can often be found online at:
www.creda.co.uk
If you still require further assistance, call one of our experts on 01759 487836.
If you require any technical guidance or find that your product is not operating as intended, a simple solution can often
be found in the Troubleshooting section of these instructions, or online at www.creda.co.uk If you still require further
assistance, call one of our experts on 01759 487836.

INSTRUCTION
MANUAL
3
Contents
PAGE
6
7
10
13
18
23
25
—
Safety Information
Getting to Know Your Appliance
Installation Advice
Using Your Appliance
General Oven and Cooking Tips
Care and Maintenance
Product Support

INSTRUCTION
MANUAL
4
SAFETY INFORMATION
Important: Please read these instructions fully before installing or operating
INSTALLATION WARNINGS
IMPORTANT: Prior to Installation ensure that the local supply conditions (electricity voltage and frequency) are
compatible with the requirements of your Range cooker.
IMPORTANT: Carefully unpack and examine the appliance for any damage. If you think there is a defect, do not use
the appliance and contact Creda Product Support on 01759 487836. Packaging materials should be collected
together and disposed of immediately as they may be harmful to children.
IMPORTANT: Keep the electrical cable (not supplied) of your built-in oven away from the hot areas of your appliance,
do not let the cable touch the appliance. Keep the cable away from sharp edges and heated surfaces.
IMPORTANT: Ensure that the electric supply cable is not trapped or damaged during installation.
IMPORTANT: In the event that the cable connecting your freestanding cooker becomes damaged, it must be
replaced by a suitably qualified person. This cable must not be replaced by an unauthorised person.
IMPORTANT: Protect your freestanding cooker against atmospheric effects. Do not expose your cooker to effects
such as sun, rain, snow etc.
IMPORTANT: The materials surrounding the appliance (cabinets) must be able to withstand a minimum temperature
of 100°C.
IMPORTANT: When using your oven for the first time your cooker may give off an unusual odour from the heating
elements and insulation materials. This is normal for cooking appliances. To eliminate this odour run the oven at 250
degrees for 40-60 mins with the oven empty.
WARNING: Before obtaining access to terminals, all supply circuits must be disconnected.
DURING USAGE
IMPORTANT: This appliance can be used by children aged from 8 years and above and persons with reduced
physical, sensory or mental capabilities or lack of experience and knowledge if they have been given supervision or
instruction concerning use of the appliance in a safe way and understand the hazards involved. Children shall not
play with the appliance.
Cleaning and user maintenance shall not be made by children without supervision.

INSTRUCTION
MANUAL
5
WARNING: The appliance and its accessible parts become hot during use. Care should be taken to avoid touching
heating elements. Children less than 8 years of age shall be kept away unless continuously supervised.
WARNING: NEVER try to extinguish a cooking fire with water. Instead switch off the appliance and cover flame e.g
with a lid or a fire blanket.
CAUTION: Do not allow children in the kitchen when cooking or after, as the parts may still be hot. Many parts of the
cooker will become hot and present a considerable hazard to children.
CAUTION: When the cooker is hot never touch the oven glass by hand or with tools.
CAUTION: Before starting to use your appliance, ensure curtains, paper or flammable items are kept away from your
appliance. Do not keep flammable materials inside of or around your cooker.
CAUTION: Take care when closing the oven door that there is nothing obstructing it from closing as this may break
the glass door.
IMPORTANT: When using the grill, the oven door must be kept closed.
IMPORTANT: Make sure the oven control knobs are all in the off position when not in use.
IMPORTANT: If you do not intend to use your built- in oven for a long period of time turn off the electric supply to the
oven.
GENERAL SAFETY WARNINGS
IMPORTANT: This appliance has been designed for non-professional, domestic use only. Do not use this oven for
commercial use or any other application e.g. room heating.
WARNING: Danger of fire: do not store flammable items on or near the cooking surfaces or inside the oven.
IMPORTANT: Do not try to lift or move this appliance by pulling on the door handle.
WARNING: Ensure that the appliance is switched off before replacing the lamp to avoid the possibility of electric
shock.
IMPORTANT: Your appliance is produced in accordance with all applicable local and international standards and
regulations.
IMPORTANT: Maintenance and repair work must only be performed by authorised service technicians. Installation
and repair work that is carried out by unauthorised technicians is dangerous and could invalidate your guarantee.
IMPORTANT: When the door of the oven is open, do not hang or lean anything on it. You may unbalance your
appliance or damage the door or door hinges.
IMPORTANT: Do not hang towels, dishcloths or clothes from the built-in oven or its handles.
INSTRUCTION
MANUAL
6
Electrical Safety
1. Have an authorized electrician set grounding equipment. Our company shall not be responsible for the damages
that shall be incurred due to using the product without grounding according to local regulations.
2. The circuit breaker switches of the oven shall be placed so that end user can reach them when the oven is
installed.
3. The power supply cord shall not contact the hot parts of the appliance.
4. If the power supply cord is damaged, this cord shall be replaced by the manufacturer or its service agent or an
equally qualified personnel to prevent a hazardous situation.
5. Never wash the product by spraying or pouring water on it! There is a risk of electrocution.
6. WARNING: To avoid electric shock, ensure that the device circuit is open before changing the lamp.
7. WARNING: Cut off all supply circuit connections before accessing the terminals.
8. WARNING: If the surface is cracked, turn off the appliance to avoid risk of electric shock.
9. Do not use cut or damaged cords or extension cords other than the original cord.
10. The rear surface of the oven also heats up when the oven is operated. Electrical connections shall not touch the
rear surface, otherwise the connections may be damaged.
11. Do not tighten the connecting cables to the oven door and do not run them over hot surfaces. If the cord melts,
this may cause the oven to short circuit and even a fire.
12. If the power supply cable is damaged, it must be replaced by its manufacturer or authorized technical service or
any other personnel qualified at the same level, in order to avoid any dangerous situation.
13. Do not use steam cleaners for cleaning the appliance, otherwise electric shock may occur.
14. An omnipolar switch capable to disconnect power supply is required for installation. Disconnection from power
supply shall be provided with a switch or an integrated fuse installed on fixed power supply according to building
code.
15. Appliance is equipped with a type ‘’Y’’ cord cable.
16. Fixed connections shall be connected to a power supply enabling omnipolar disconnection. For appliances with
over voltage category below III, disconnection device shall be connected to fixed power supply according to
wiring code.

INSTRUCTION
MANUAL
7
CLEANING AND MAINTENANCE
IMPORTANT: Always turn the appliance off before operations such as cleaning or maintenance. You can do this by
switching the built-in oven off using cooker isolation switch.
IMPORTANT: Do not remove the control knobs to clean the control panel.
WARNING: Do not use harsh abrasive cleaners or sharp metal scrapers to clean the oven door glass since they can
scratch the surface, which may result in shattering of the glass.
Ceramic glass surface is unbreakable and scratch resistant to a certain degree. However, to avoid any damage,
please do the following:
1. Never pour cold water on hot cookers.
2. Do not stand on a ceramic glass plate.
3. Sudden pressure, for example, the effect of a falling saltshaker, may be critical. So do not place such
object on a place above the hob.
4. After each use, make sure that the base of the cooking pot and surface of cooking zones are clean and
dry.
5. Do not peel vegetables on the hob surfaces. Sand grains falling from the vegetables may scratch the
ceramic glass plate.
6. Do not lay flammable materials such as cardboard or plastic on the cooker. Objects such as tin, zinc, or
aluminum (as well as aluminum foils or empty coffee pots) may melt on hot cooking surfaces and thus
cause damage.
7. Take care not to let sugary foods or fruit juices make contact to the hot cooking zones. The ceramic glass
surface may be stained by these.
TO MAINTAIN THE EFFICIENCY AND SAFETY OF YOUR APPLIANCE, WE RECOMMEND YOU
ALWAYS USE OUR AUTHORISED SERVICE AGENTS AND ORIGINAL SPARE PARTS.
FOR ASSISTANCE CALL CREDA PRODUCT SUPPORT 01759 487836

INSTRUCTION
MANUAL
8
Getting to Know Your Appliance
You’ll be up and running in no time!
Ready? Let’s begin...
Please read these instructions carefully. They contain important information which will help you get the best from
your freestanding cooker and ensure safe and correct installation and operation.
If you require any further assistance, our technical experts are happy to help. For full details, refer to the product
support section at the end of these instructions.

INSTRUCTION
MANUAL
9
OVERVIEW
1. Glass Top Plate
2. Control Panel
3. LHS Grill
4. LHS Main Oven
5. RHS Oven
1. LHS Grill control temperature control
2. LHS main oven temperature control
3. Digital timer
4. Left front ceramic zone
5. Left back ceramic zone
6. Centre ceramic zone
7. Right back ceramic zone
8. Right front ceramic zone
9. RHS oven temperature control
Note: Not every symbol is on every model, only take notice of the symbols on your device.
1
2
5
4
3
6
7
8
9

INSTRUCTION
MANUAL
10
Accessories
* Not all accessories are included with your purchase

INSTRUCTION
MANUAL
11
Installing your Freestanding Cooker
Bringing it all together
Installation requirements
THIS COOKER MUST BE INSTALLED BY A QUALIFIED INSTALLER IN ACCORDANCE WITH LOCAL
REGULATIONS
IMPORTANT: CONTACT AN AUTHORISED SERVICE AGENT FOR INSTALLATION OF YOUR OVEN!
First Use
IMPORTANT: When using your oven for the first time your cooker may give off an unusual odour from the heating
elements and insulation materials. This is normal for new cookers. To eliminate this odour run the oven at 250
degrees for 40-60 mins with the oven empty.
Unpacking
Carefully unpack and examine the appliance for any damage. If you think there is a defect, do not use the appliance
and contact Product Support on 01759 487836.
Positioning
Check if the electrical installation is proper to bring the appliance in operating condition. If electricity installation is not
suitable, call an electrician and plumber to arrange the utilities as necessary. Manufacturer shall not be held
responsible for damages caused by operations performed by unauthorized persons.
WARNING: It is customer’s responsibility to prepare the location the product shall be placed on and to have the
electrical installation prepared.
WARNING: The rules in local standards about electrical installations shall be followed during product installation.
WARNING: Check for any damage on the appliance before installing it. Do not have the product installed if it is
damaged. Damaged products cause a risk for your safety.
Right Place for Installation and Important Warnings
Appliance feet should not stay on soft surfaces such as carpets. The kitchen floor shall be durable to carry the unit
weight and any other kitchenware that may be used on the oven.
The appliance is suitable for use on both side walls, without any support, or without being installed in a cabinet. If a
hood or aspirator will be installed above the cooker, follow the instructions of the manufacturer for height of
mounting. (min. 650 mm)

INSTRUCTION
MANUAL
12
WARNING: The kitchen furniture near the appliance must be heat resistant.
WARNING: Do not install the appliance beside refrigerators or coolers. Heat radiated by the appliance increases
the energy consumption of cooling devices.
WARNING: Do not use the door and/or handle to carry or move the appliance
Levelling Feet
The height and level of the appliance can be adjusted by rotating the feet located underneath the appliance at each
corner. Rotate the feet to decrease or increase the height.
Safety Chain
The appliance must be secured against overbalancing by using the supplied two safety chains on your oven.
Fastenhook (1)by using aproper peg to thekitchen wall (5) andconnect safety chain
(3) to the hook via the locking mechanism (2).

INSTRUCTION
MANUAL
13
1
2
1.
Safety chain (supplied and mounted to oven)
2.
Stability hook
3.
Firmly fix chain to cooker rear
4.
Rear of cooker
5.
Kitchen wall

INSTRUCTION
MANUAL
14
USING YOUR APPLIANCE
Using the Oven
•When your oven is operated first time, an odor will be spread out which will be sourced from using the
heating elements. In order to get rid of this, operate it for 45 minutes while it is empty. To make cooking in
your oven; oven switch must have been rotated and ignition must have been made. Otherwise, your oven
will not run.
•Kinds of meals you will cook, cooking times and Thermostat positions (Optional) were given in cooking table.
The values given in the cooking table are characteristic values and were obtained as a result of the tests
performed in our laboratory. You can find different flavors suitable for your taste depending on your cooking
and using habits.
•Open the oven cover when grilling on your oven.
•Cooking times: The results may change according to the local voltage and material having different quality,
amount, and temperatures.
•During the time when cooking is being performed in the oven, the lid of the oven shouldn’t be opened
frequently. Otherwise circulation of the heat may be imbalanced and the results may change.
•Cake forms while cooking cake gives better result.
Using the Grill
•When you place the grill on the top rack, the food on the grill shall not touch the grill.
•You can preheat for 5 minutes while grilling. If necessary, you may turn the food upside down.
•Food shall be in the center of the grill to provide maximum air flow through the oven.
To turn on the grill,
1. Place the function button over the grill symbol
2. Sit it to the desired grill temperature
To turn the grill off,
Set the function button to the off position.
WARNING: Keep the oven door closed while grilling. (electrical grill)
Thermostat
Used for determining the cooking temperature of the dish to be cooked in the oven.
After placing the food inside the oven, turn the switch to adjust desired temperature
setting between 40-240 °C. For cooking temperatures of different food, see cooking
table.

INSTRUCTION
MANUAL
15
Using The Hob
1. Heating Place 140 mm
2. Heating Place 140 x 250 mm
3. Heating Place 180 mm
4. Heating Place 120/180 mm
5. Heating Place 140 mm
6. Residual heat indicator
1. You operate the hob with the ring switches on the control panel of oven. This switch regulates the energy to
reach desired temperature set by you.
2. To have a good cooking result from the hob, the pans bottom should be as thick and flat as possible.
3. Bottom of pans and cooking zones should be the same size. If possible, always place lids on the pans.
Always place cookware on the cooking zone before it is switched on. Switch cooking zones off before the
end of the cooking time, to take advantage of residual heat.
4. Turn the knob to clockwise for starting to operate. Temperature set up by the knob position on the line
gradually increasing up to max.
5. For dual cooking zone the first ring operating like single zone; second ring starts to operate after extra
turning by some more force to clockwise on the “max” region end of the ring sign. When you turn to counter
clockwise, the first ring will operate as maximum range and the second ring’s power will reduce up to you
desire temperature.
Using and Power of Hob Zones
Level 1
Level 2
Level 3
Level 4
Level 5
Level 6
Level 7
Level 8
Level 9
Max
140 mm
1200 W
1200 W
1200 W
1200 W
1200 W
1200 W
1200 W
1200 W
1200 W
180 mm
1800 W
1800 W
1800 W
1800 W
1800 W
1800 W
1800 W
1800 W
1800 W
140/250 mm
1000 W
1000 W
1000 W
1000 W
1000 W
1000 W
1000 W
1000 W
1000 W
1800 W
120/180 mm
700 W
700 W
700 W
700 W
700 W
700 W
700 W
700 W
700 W
1700 W
Please use long handled pot which is well placed on the hotplate and suitable for the hotplate surface.

INSTRUCTION
MANUAL
16
Electrical Connection
⚫Your oven requires 40 Amp fuse for mono phase or 3x16 Amp fuse or 3 phase supply according to electrical power
for cooker section has 4 ceramic heater and oven section has electric models. Installation by a qualified electrician is
mandatory.
⚫Your oven is adjusted in compliance with 220-240V / 380-415V AC,50/60Hz. electric supply. If the mains are different
from this specified value, contact your authorized service.
⚫Electrical connection of the oven should only be made to connections /sockets with an earth system installed in
compliance with local regulations. If there are no connections/sockets with an earth system in place where the oven
will be installed, immediately contact a qualified electrician to install. The manufacturer is not responsible for
damages that will arise because of the appliance not be connected to an earth system.
⚫If your supply cable gets damaged, it should be replaced by an authorized service agent or qualified electrician in
order to avoid danger or electric shock.
⚫Electrical cable should not touch the hot parts of the appliance.
⚫The oven should be using a well ventilation place and should be installed on flat ground.
⚫Operate your oven in dry atmosphere.
⚫When placing your oven to its location, ensure that it is at the counter level. Bring it to the counter level by adjusting
the feet if necessary.

INSTRUCTION
MANUAL
17
Oven Functions
Grill
Fan Oven
Grill: The top central heating elements comes on. The extremely high and direct temperature of the grill makes it
possible to brown the surface of meats and roasts while locking the juices in to keep them tender. The grill is also
highly recommended for dishes that require a high temperature on the surface: beef steaks, veal, rib steak, fillets,
hamburgers etc.
Fan Oven: When set to Fan mode, the element and the fan operate providing a consistent heat distributed uniformly
throughout the oven. This mode is ideal for baking and cooking foods on multiple shelves at the same temperature.
Oven light -The oven light will operate on all oven functions.
Oven Light: The oven light will operate on all oven functions
Using your Appliance for the First Time
The first time you use your appliance, we recommend that you set the temperature setting to the highest mark. Set
the function switch control knob to a cooking mode and leave the oven on for about 40-60 minutes with nothing in it
and the oven door shut. Then, open the oven door and allow the oven to cool Any odour that may be detected during
this initial use is due to the evaporation of substances used to protect the oven during storage.

SCREEN SYMBOLS
Oven status indication
• On: Cooking or ready for cooking.
• Off: No cooking.
Minute minder status indication
• On: Minute minder alarm active.
• Flashing: Minute minder adjustment mode, adjustment possible by
or buttons or current minute minder alarm completed.
• Off: Minute minder is not active.
Child lock indication
• On: Child Lock is active.
• Off: Child Lock is inactive.
Automatic cooking status indication
• On: Full or semi auto-cooking active.
• Flashing: Auto cooking completed or power on condition.
• Off: No auto cooking active.
Minus button Plus button
Time of day
adjustment button
1H10-20-340-001 / GB Rev 001
It is an electronic timing module enabling your food you have put in the oven to be
ready for service at any time you like. The only thing you need to do is to programme the
cooking time of the food and also the time when you would like your food to be ready.
It is also possible to use a minute-programmed alarm clock independent from the oven.
The case where the time clock is behind or ahead is not a malfunction. The oven time
clock may be put back or ahead according to mains frequency as it runs directly with
mains voltage. This is not a malfunction.
POWER ON
At power on, oven is inactive, time of day and ªSYMBOLSªAREªmASHINGª4HEªINDICATEDª
time of day is not correct and has to be adjusted. Press to activate the oven and
proceed adjusting the time of day as below.
TIME OF DAY ADJUSTMENT
Time of Day adjustment is only possible when no cooking program is in progress.
Press and simultaneously for 3 seconds to enter the adjustment mode and then
THEªDOTªSYMBOLªINªBETWEENªHOURSªANDªMINUTESªDIGITSªWILLªSTARTªTOªmASH5SINGªEITHERª and
adjust the desired duration. The maximum adjustable duration is 23h 59 minutes.
Adjustment mode will be abandoned within 6 seconds after the last button press or can
be terminated immediately by pressing the button.
Note: 4IMEªOFªDAYªADJUSTMENTªISªALSOªACTIVATEDªINªlRSTªªSECONDSªAFTERªPOWERªON
SETTING THE MINUTE MINDER
With this function, you can adjust a duration in minutes. After the adjusted time has
been elapsed, an alarm sound will be produced.
Press button once to enter the minute minder adjustment mode, symbol will
STARTªmASHINGªONªTHEªSCREEN 5SINGªEITHERª or , adjust the desired duration. The
maximum adjustable duration is 10 hour. Adjustment mode will be abandoned within
6 seconds after the last button press or can be terminated immediately by pressing
the button.
CANCELLING THE ALARM BUZZER SOUND
Once the adjusted minute minder duration is elapsed, the buzzer alarm will start to
SOUNDªACCOMPANIEDªBYªTHEªmASHINGª symbol on the screen. Any button press will
stop the alarm sound and this indication. If no button is pressed, the alarm sound will
ENDªAUTOMATICALLYªAFTERªªMINUTESªBUTªTHEªmASHINGªSYMBOLªWILLªGOªON
2
18

It is an electronic timing module enabling your food you have put in the oven to be
ready for service at any time you like. The only thing you need to do is to programme the
cooking time of the food and also the time when you would like your food to be ready.
It is also possible to use a minute-programmed alarm clock independent from the oven.
The case where the time clock is behind or ahead is not a malfunction. The oven time
clock may be put back or ahead according to mains frequency as it runs directly with
mains voltage. This is not a malfunction.
POWER ON
At power on, oven is inactive, time of day and ªSYMBOLSªAREªmASHINGª4HEªINDICATEDª
time of day is not correct and has to be adjusted. Press to activate the oven and
proceed adjusting the time of day as below.
TIME OF DAY ADJUSTMENT
Time of Day adjustment is only possible when no cooking program is in progress.
Press and simultaneously for 3 seconds to enter the adjustment mode and then
THEªDOTªSYMBOLªINªBETWEENªHOURSªANDªMINUTESªDIGITSªWILLªSTARTªTOªmASH5SINGªEITHERª and
adjust the desired duration. The maximum adjustable duration is 23h 59 minutes.
Adjustment mode will be abandoned within 6 seconds after the last button press or can
be terminated immediately by pressing the button.
Note: 4IMEªOFªDAYªADJUSTMENTªISªALSOªACTIVATEDªINªlRSTªªSECONDSªAFTERªPOWERªON
SETTING THE MINUTE MINDER
With this function, you can adjust a duration in minutes. After the adjusted time has
been elapsed, an alarm sound will be produced.
Press button once to enter the minute minder adjustment mode, symbol will
STARTªmASHINGªONªTHEªSCREEN 5SINGªEITHERª or , adjust the desired duration. The
maximum adjustable duration is 10 hour. Adjustment mode will be abandoned within
6 seconds after the last button press or can be terminated immediately by pressing
the button.
CANCELLING THE ALARM BUZZER SOUND
Once the adjusted minute minder duration is elapsed, the buzzer alarm will start to
SOUNDªACCOMPANIEDªBYªTHEªmASHINGª symbol on the screen. Any button press will
stop the alarm sound and this indication. If no button is pressed, the alarm sound will
ENDªAUTOMATICALLYªAFTERªªMINUTESªBUTªTHEªmASHINGªSYMBOLªWILLªGOªON
2
SEMI AUTOMATIC COOKING
4HISªCOOKINGªPROGRAMªISªINTENTEDªTOªSTARTªCOOKINGªIMMEDIATELYªFORªAªSPECIlEDªDURATIONª
After the oven is set to the desired function and temperature via the oven knobs:
1. Press the button twice, ªSYMBOLªWILLªmASHªONªTHEªSCREENª and duration
of cooking will show on the screen one after another.
2.ª5SINGª or buttons, adjust the desired cooking duration.
3. After 6 seconds of the last button press or by pressing twice, the adjustment
is completed. will be steady on the screen and the display shows the current time
of day.
FULL AUTOMATIC COOKING
This cooking program is intented to perform a delayed cooking by programming the
time of day, when the food should be ready. In other words, the oven will start cooking
not immediately but will automatically calculate the time to start cooking.
1. Perform step 1 and 2 of the semi auto cooking as above (cooking duration
adjustment).
2. Press button once again, ªSYMBOLªWILLªmASHªONªTHEªSCREENªANDªDURATIONªOFª
cooking will show on the screen one after another.
3. 5SINGª or buttons, adjust the desired end of cooking time. symbol will
disappear but ªSYMBOLªWILLªBEª STILLª mASHINGªONªTHEª SCREENª 4HISªINDICATESªTHATª ANª
automatic cooking is programmed but cooking has not started yet.
4. After 6 seconds of the last button press or by pressing , the adjustment will be
completed, the display shows the current time of day.
%.$ª/&ª!54/ª#//+é.'ª
7HENªTHEªCOOKINGªISªlNISHEDªAUTOMATICALLYªTHEª ªICONªSTARTSªTOªmASHª!LARMªMAYªBEª
turned off by pressing any key. To disable the key lock, press the key for 2 seconds.
Oven is taken to the manual mode by pressing the key. Audible alarm shall sound
FORªªMINUTESªIFªYOUªDOªNOTªPRESSªANYªKEY
3
19

SEMI AUTOMATIC COOKING
4HISªCOOKINGªPROGRAMªISªINTENTEDªTOªSTARTªCOOKINGªIMMEDIATELYªFORªAªSPECIlEDªDURATIONª
After the oven is set to the desired function and temperature via the oven knobs:
1. Press the button twice, ªSYMBOLªWILLªmASHªONªTHEªSCREENª and duration
of cooking will show on the screen one after another.
2.ª5SINGª or buttons, adjust the desired cooking duration.
3. After 6 seconds of the last button press or by pressing twice, the adjustment
is completed. will be steady on the screen and the display shows the current time
of day.
FULL AUTOMATIC COOKING
This cooking program is intented to perform a delayed cooking by programming the
time of day, when the food should be ready. In other words, the oven will start cooking
not immediately but will automatically calculate the time to start cooking.
1. Perform step 1 and 2 of the semi auto cooking as above (cooking duration
adjustment).
2. Press button once again, ªSYMBOLªWILLªmASHªONªTHEªSCREENªANDªDURATIONªOFª
cooking will show on the screen one after another.
3. 5SINGª or buttons, adjust the desired end of cooking time. symbol will
disappear but ªSYMBOLªWILLªBEª STILLª mASHINGªONªTHEª SCREENª 4HISªINDICATESªTHATª ANª
automatic cooking is programmed but cooking has not started yet.
4. After 6 seconds of the last button press or by pressing , the adjustment will be
completed, the display shows the current time of day.
%.$ª/&ª!54/ª#//+é.'ª
7HENªTHEªCOOKINGªISªlNISHEDªAUTOMATICALLYªTHEª ªICONªSTARTSªTOªmASHª!LARMªMAYªBEª
turned off by pressing any key. To disable the key lock, press the key for 2 seconds.
Oven is taken to the manual mode by pressing the key. Audible alarm shall sound
FORªªMINUTESªIFªYOUªDOªNOTªPRESSªANYªKEY
3
POWER INTERRUPTS
Product is not affected by short power failures (up to 50 seconds approximately), and
the timer and the clock shall resume working at this period.
Your oven shall be deactivated on other failures than short term power failures (that
ISªMOREªTHANªªSECONDSªDUEªTOªSAFETYªREASONSª4HISªISªINDICATEDªWITHªTHEªmASHINGªOFª
the clock and the on the screen. The clock shall be displayed as 12:00 and it should
be set again. (See power on)
Note: 4HEªmASHINGª symbol indicates that the oven is inactive and you have to enter
the manual mode.
CHILD LOCK
4HISª FUNCTIONª ISª INTENTEDª TOª PREVENTª ANYª UNAUTHORIZEDª MODIlCATIONª OFª THEª TIMERª
settings. This function will be active, within 30 seconds after the last button press.
will appear. To deactive it, press the button for 3 seconds. will disappear.
PROGRAMMABLE OPTIONS
Alarm tone:
Pressing and holding the button for 3 seconds will result in the currenly valid
buzzer tone being produced. By pressing and buttons, you may scroll through
3 available buzzer tones. The last heard buzzer tone will be automatically recorded
as the selected tone. After 6 seconds of the last button press or by pressing , the
adjustment is completed.
Brightness setting:
Pressing and holding the button for 3 seconds will result in the currenly valid
brightness setting being showed. By pressing and buttons, you may scroll through
8 available brightness setting. The last seen brightness setting will be automatically
recorded as the selected setting. After 6 seconds of the last button press or by pressing
, the adjustment is completed.
Note: Default settings are highest.
Note: Programmable options are nonvolatile and will be resident after any power
failure.
4
20
This manual suits for next models
4
Table of contents
Other Creda Cooker manuals

Creda
Creda HB49228 Quick guide

Creda
Creda HB49416 User manual

Creda
Creda HB48313 Product guide

Creda
Creda H250E Assembly Instructions

Creda
Creda HB49108 Quick guide

Creda
Creda HBEDCG61 Guide

Creda
Creda HBEDCG50 Assembly Instructions

Creda
Creda HB49707 User manual

Creda
Creda HB49119 Quick guide

Creda
Creda HB49513 User manual
Popular Cooker manuals by other brands

Indesit
Indesit KN6C11/EX operating instructions

montpellier
montpellier MSE60W Installation and operating instructions

Tricity Bendix
Tricity Bendix RE50GC Operating and installation instructions

Diamond
Diamond EERV Installation, use and maintenance instructions

Indesit
Indesit K6G21/R Installation and use

Salvis
Salvis Smartline AKP1 Operating instruction