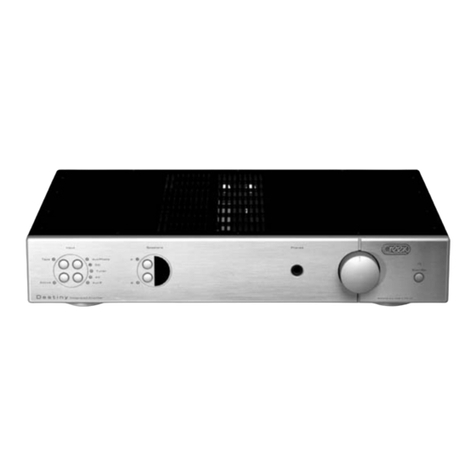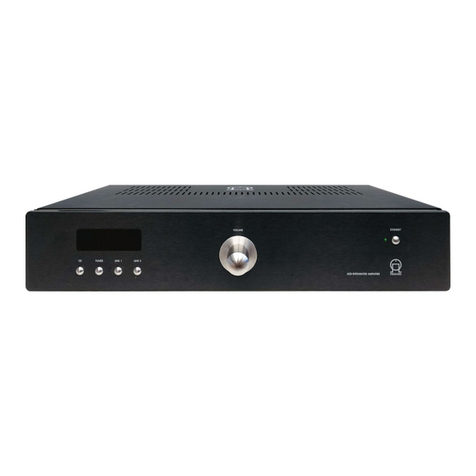
Destiny 2 Integrated Amplifier
ACTIVE AND PASSIVE OPERATION cont’d
This will introduce extra amplification (gain) into the pre-amplifier. In addition, the additional amplification is switchable in +3dB, +6dB and +9dB (x 1.5, x 2, x 3)
steps, selected by a slider switch on the bottom plate of the pre-amp section. Increasing the sensitivity (gain) does not make the amplifier more powerful.
Introducing gain will not improve the sound quality.
It will be necessary to turn the amplifier upside down to make this change, so please make sure the amp is switched off from the mains supply first. The switch is
factory set in the +3dB position (centre). When placed upside down with the back of the amplifier closest to you, slide the switch to the left for +6dB gain, or to the
right for +9dB gain (6dB - 3dB - 9dB). The label next to the switch explains. It might be necessary to use a small screwdriver to help when moving the switch. If you
are in any doubt please consult your dealer.
LED INDICATORS AND POWERING ON
The Destiny 2 works differently to the original Destiny amplifier. Blue LEDs indicate when a function is in operation. When the Destiny 2 amplifier is first
switched on from the wall socket and rear panel switch, the blue Standby LED will light but the amplifier will effectively be switched off. The control
circuitry will be in Standby mode and will draw less than 1 Watt of power. Pressing the Standby button on the remote will not wake the amp up.
Wake up the Destiny 2 amplifier by pressing the Standby button on the front panel or any of the black amplifier specific buttons on the remote, with the
exception of the button labelled AMP. The Standby LED will flash for a short time and turn off. The selected input will then be indicated by a blue LED.
Remote volume changes will cause the Standby LED to flash. Pressing the Mute button on the remote handset will cause the Standby LED to flash while
it is in Mute. Pressing the Mute button again, or increasing the volume from the remote handset, will un-mute the amp and the Standby LED will stop
flashing and turn off. The amplifier will not be un-muted if the volume control is turned down from the remote handset.
If the LED in the IR window turns red it indicates a serious fault and your amplifier may need to be returned to the supplying dealer for inspection.
PROTECTION MODES
The Destiny 2 amplifier has a sophisticated, computer controlled, protection mechanism against over-temperature, over current drive and output DC
offset.
Current Protection: If the speaker outputs are shorted while there is a signal playing, or if the speaker load impedance is too low (less than 4 Ohms) and the input
signal is too high, it may over-drive the amplifier. For a short period of time the amp will be muted. During this short period the Standby/Mute LED will flash.
Reducing the volume will normally restore correct operation. The Destiny 2 amp will automatically reduce the volume before un-muting the signal. If after 5
automatic reductions in volume the fault still persists, the Red protection LED will light in the crescent shaped window and the amplifier will be shut down. If this
happens check the wiring for shorts or other irregularities and re-boot the amplifier from the rear panel switch.
Thermal Protection: If the amplifier is driven hard for a long time and/or has insufficient ventilation, or if the ambient temperature is high, the signal will be
muted to enable the amp to cool down to an acceptable working temperature. During this period the Standby/Mute LED will flash and the input buttons sequence
up and down until the right temperature is restored.
DC Offset: If direct current is input to the Destiny 2 amplifier it will sense this and cause the output to be disconnected, to avoid damaging the loudspeakers.
In the unlikely event of a failure of the amplifier itself, the output and/or the mains supply
will be disconnected. This may require it to be returned to the dealer for servicing. Retain the packaging for this purpose if possible.
The volume control will turn down automatically for 2 seconds when active is selected. This is to avoid a sudden
increase in sound level. You can adjust it to your preferred level after this.
The amp can also be un-muted
from the front panel by pressing the Standby button once.
The
Standby LED and both Loudspeaker LEDs will flash until the fault is removed.
If the fault is not removed in 10
seconds the red LED in the crescent window will light showing a serious fault and the amp will be locked. Check the source equipment for problems and re-boot the amp from the
mains switch on the rear panel.
The SRC3 is a System Remote Control Handset designed to operate the new and old Creek Destiny and Evolution products. The SRC3
has several buttons that control future Creek products that will be redundant for the Destiny 2 amp. It can also operate older types of
Creek products. It allows the user to operate the volume control, input and speaker selection, active or passive pre-amp selection,
mute and display brightness. Some functions on the SRC3 are reserved for other Creek models and are not enabled on the Destiny 2,
such as balance and tone controls.
The coloured buttons allow the user to find the features dedicated to the device more easily. Press any of the amplifier specific black
buttons to operate the amplifier, blue buttons for the CD and green buttons for the tuner.
Several buttons have multiple functions to reduce the total number of buttons. This can be achieved by first pressing the product
button just below the circle of buttons in the middle, CD, Amp and Tuner. The remote will then be programmed to make the dark grey
buttons work for that device only, until another product button is pressed. So, if for example you want to select a specific track on the
CD player, press the Blue CD button, then the numeric button at the top. It is not necessary to press CD again if you want to select
another track.
If you want to select a specific amplifier input, press the black amp button and then the numeric button at the top which is marked
with the required input label above - i.e. Aux1, CD, Tuner, AV, Aux2 and Tape. The remote will continue to operate amp functions until
either CD or Tuner is pressed.
If you require the Tuner to go to a specific pre-set station, press the green Tuner button and then the desired pre-set number button.
All tuner function buttons are coloured green. The remote will continue to operate tuner functions until either Amp or CD is pressed.
Up and Down refers to CD track, amplifier input and tuner pre-set. Disp on the top right refers to Display and LED brightness for each
product. It is necessary to press one of the product buttons first before the Disp will work.
Scan forward and back also refers to CD and Tuner plus any future Creek amplifiers that might have a remote balance control.
REMOTE CONTROL
Standby shuts down every device in the range that can go into Standby. N.B. Some Creek products so not have this feature. Please check the
appropriate manual. Waking up from Standby requires a button to be pressed for each product - i.e. wake up CD - press any CD button with the
exception of the CD product button as that only programmes the remote internally. Pressing the remote Standby button does not wake up the
product.
Page Three


