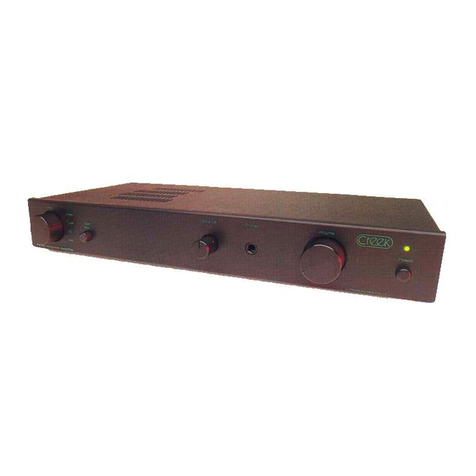
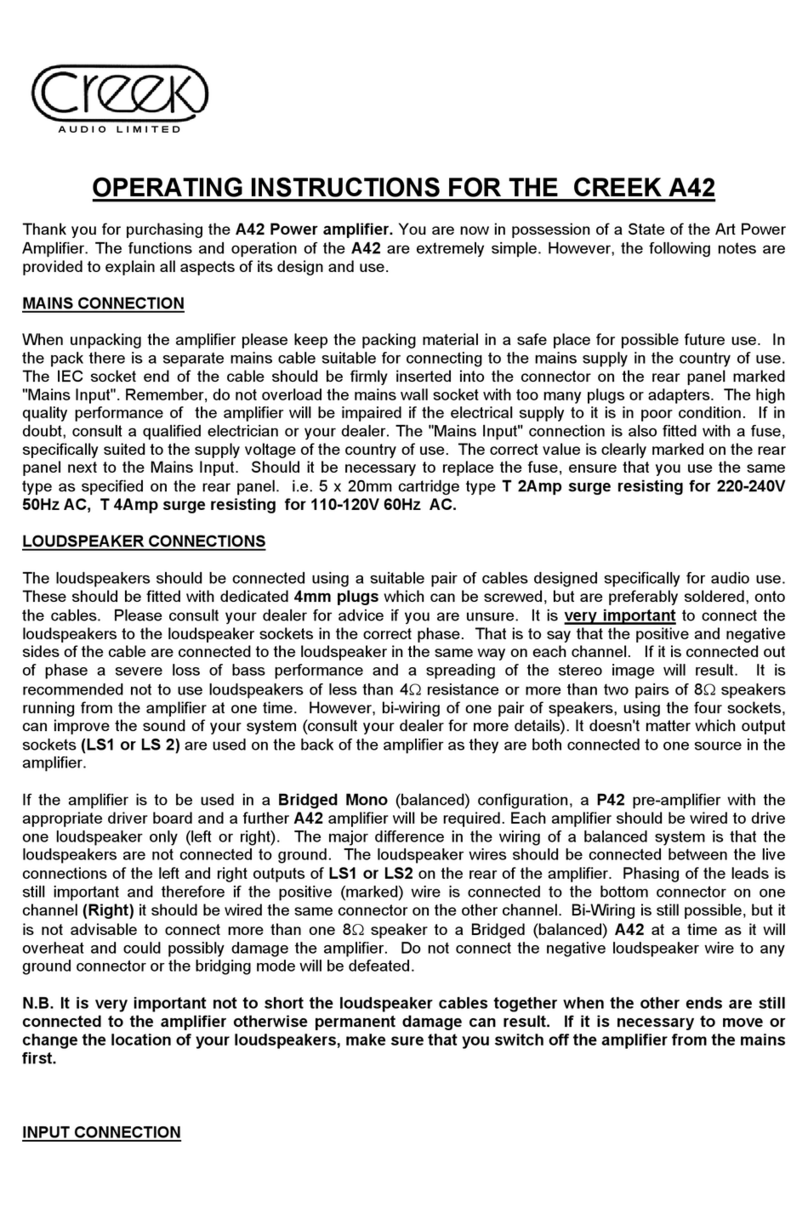
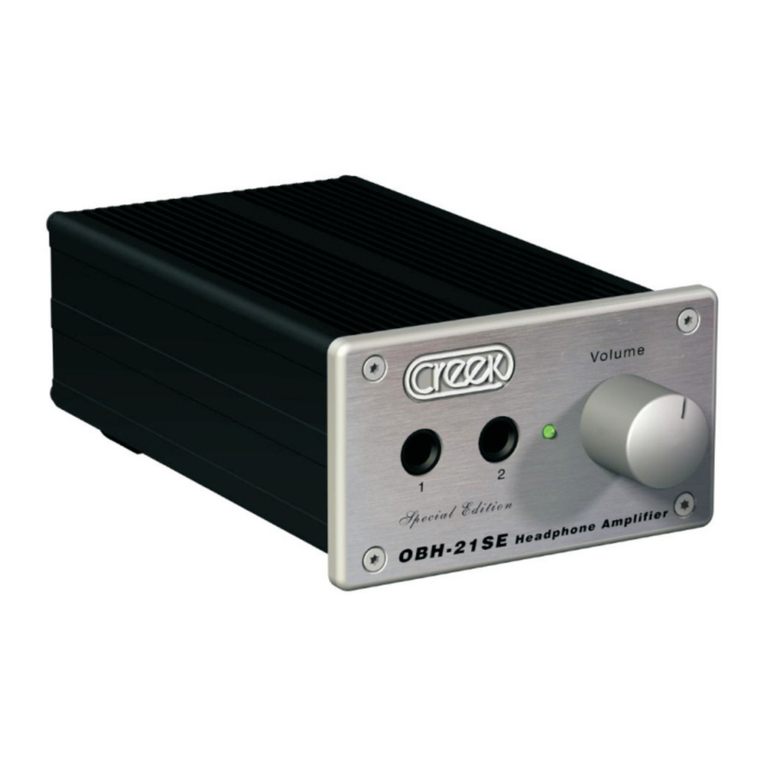
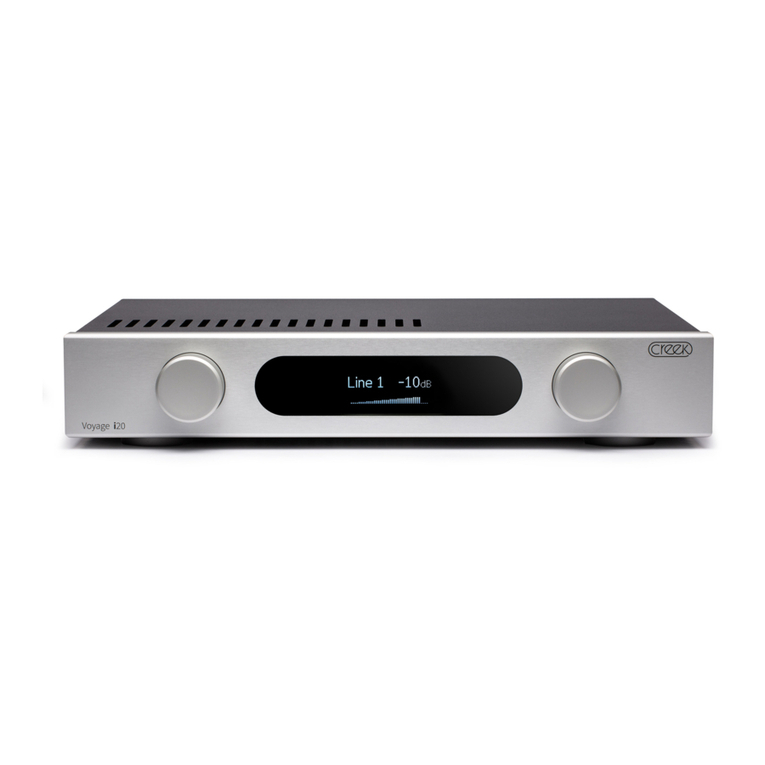
manuals.online logo
Brands
  1. Home
  2. •
  3. Brands
  4. •
  5. Creek Audio
  6. •
  7. Amplifier
  8. •
  9. Creek Audio EVOLUTION 50A User manual

Creek Audio EVOLUTION 50A User manual

EVOLUTION 50A
Integrated Amplifier
Instruction Manual
Rev 1.1
사용 설명서
Creek Audio Ltd
England
WWW.CREEKAUDIO.COM
Tel (02) 597-4100
www.audioland.co.kr
EVOLUTION 50A 인티 앰프 구입을 축하합니다. 이 앰프는 영국 Creek Audio 가 디자인한 첨단
성능과 기능의 앰프입니다. 본 설명서에는 이 앰프의 설계와 사용법에 대하여 상세히 서술하고
있습니다. 혹 차후에 업그레이드 된 최신 매뉴얼이 있을 수 있으니 Creek Audio 웹사이트
www.creekaudio.com 를 방문하여 사용설명서를 다운로드 받으시고, 제품 등록도 하시기 바랍니다.
Thank you for purchasing a Creek Audio EVOLUTION 50A Integrated Amplifier. You are now in possession
of a State of the Art performance product. The functions and operation of this integrated amplifier are simple,
however, the following notes are provided to explain all aspects of its design and use. Although this User
Manual is intended to provide the latest instructions for use, it is possible that a later version may be
available to download from the Creek website.
Please check at www.creekaudio.com Go to the EVOLUTION 50A product page and click on the tab marked
Instructions. Now please take a few minutes to register your new EVOLUTION 50A on the Creek website at
www.creekaudio.com
주의 사항
1. 주의사항 및 사용법을 숙지하십시오. Take heed of warnings & instructions
사용 전에 본 사용설명서를 꼭 읽으시고, 사용설명서를 잘 보관해서 필요 시 참고 하시기
바랍니다.
You should read all the safety and operating instructions before operating this appliance. Retain this handbook for
future reference and adhere to all warnings in the handbook or on the appliance.
2. 습기와 물기 Water and moisture
물기가 있는 주변에 전기기구를 두면 감전, 화재의 위험이 있습니다. 욕조, 세면대, 주방, 습한
지하실, 수영장 등 근처에서는 사용을 금합니다. 이물질이나 액체가 케이스 안으로 흘러
들어가지 않도록 주의하시고, 꽃병 같은 액체 용기는 오디오 기기 주변에 두지 마십시오.
The presence of electricity near water can be dangerous. Do not use the appliance near water – for example next
to a bathtub, washbowl, kitchen sink, in a wet basement or near a swimming pool, etc.
3. 환기 Ventilation
본 기기 상부와 주변에 5 센티 이상 여유를 두어 통풍이 잘 되도록 하시기 바랍니다. 환기가 좋지
않은 침대, 소파, 천으로 된 장소, 밀폐된 책장, 캐비닛 등에는 사용하지 마십시오.
Do not place the equipment on a bed, sofa, rug or similar soft surface, or in an enclosed bookcase or cabinet, since ventilation
may be impeded. We recommend a minimum distance of 50mm around the sides and top of the appliance to provide adequate
ventilation.
4. 열기 Heat
열기가 있는 곳, 라디에터, 스토브, 기타 열이 발생하는 기기에서 멀리 떨어져 설치하십시오.
본 기기는 적당한 실온에서 사용하도록 설계되었습니다.
①
Locate the appliance away from naked flames or heat producing equipment such as radiators, stoves or other
appliances (including other amplifiers) that produce heat.
5. 오디오 랙과 스탠드
가급적이면 오디오 전용으로 제작된 랙과 스탠드에 사용하십시오.
이동식 랙에 설치할 경우 기기가 흔들리지 지지 않도록 각별히 주의 바랍니다.
6. 청소: Cleaning
청소할 때는 먼저 전원 코드를 뽑으십시오. 씬너, 솔벤트, 기타 화공약품을 사용하지 마십시오.
가구용 클리닝 스프레이도 사용하지 마십시오. 지울 수 없는 흰 자욱이 남을 수 있습니다.
7. 안전 제일 Safety First
전원 스위치는 한 선만 단선하는 ONE-POLE 스위치입니다. 그러므로, 전원 스위치를
끄더라도, 다른 한 선은 본 기기에 연결되어 전기가 흐르고 있습니다. 따라서, 안전을 위해
설치 및 연결, 이동 등 작업 시에는 반드시 전원 코드를 뺀 상태에서 하시기 바랍니다.
The power switch is a single-pole switch. When the switch is in the “Off” position, the appliance is not completely
disconnected from the main power.
8. 접지 Grounding
본 기기의 접지를 무력화시키지 마십시오.
9. 실외 안테나 Outdoor Antenna 는 전선에 접촉하지 않도록 멀리 설치 바랍니다.
Locate any outdoor antenna/aerial away from power lines.
10. 장기간 미사용 시 Non-use periods
장기간 사용하지 않을 경우 전원 코드를 뽑아 놓으십시오.
11. 이상한 냄새가 날 때 Abnormal smell
즉시 전원 스위치를 끄고, 콘센트에서 전원 코드를 뽑으십시오. 그리고 문의 바랍니다.
12. 수리를 요하는 고장 Servicing
다음의 경우 전문가에게 수리를 의뢰하십시오.
* 기기 내부로 물 등 액체가 들어간 경우, 혹은 비에 젖은 경우
* 정상적인 작동을 않거나, 성능에 변화가 생긴 경우
* 기기에 충격을 주어 파손된 경우
* 사용 중 아무 이유 없이 후면의 퓨즈가 나간 경우
②
포장 풀기와 앰프의 설치 UNPACKING AND LOCATING THE AMPLIFIER
앰프의 포장 박스는 안전한 곳에 보관하여 차후에 이사, 아프터 서비스 등으로 앰프의 이동이
필요할 경우 사용하시기 바랍니다. 포장 내부에는 전원케이블, 리모컨과 바테리,
영문사용설명서가 내장되어 있습니다.
앰프는 오디오 장식장 혹은 안전한 선반 위에 설치하십시오. 다른 오디오와 같이 설치할 경우에는
앰프를 다른 오디오의 상단에 설치하거나 사이에 선반을 두십시오. 앰프 뚜껑의 통풍구를 막지
마십시오. 앰프 위해 다른 오디오 기기를 두면 과열되어 전원이 차단될 수 있습니다. 이 경우 전면
디스플레이 창에 과열 경고 등이 켜집니다.
When unpacking the EVOLUTION 50A please keep all the packing material in a safe place for possible
future use. In the carton there is a separate mains cable suitable for connecting to the mains supply in the
country of use. You will also find a remote control unit and batteries.
Make sure that the EVOLUTION 50A is on a suitable table, shelf or hi-fi equipment cabinet.
It is important to allow good ventilation to the heat-sinks inside the case. Avoid obstruction of the ventilation
slots on the top and bottom of the EVOLUTION 50A. It may be necessary to place the EVOLUTION 50A on
the top of other equipment, or a separate shelf to allow for this. Do not place it at the bottom of a stack of
equipment, as it may get too hot and switch-off, with an over-temperature warning on the display.
전원 케이블 연결 MAINS CONNECTION
본 제품은 공장 출고 시 220V 에 세팅되어 있습니다. 사용 전압을 확인하시고 제품과 함께
전원케이블을 사용하여 전원을 연결하십시오. 하나의 같은 전원 콘센트에 앰프 이외에 너무 많은
전기장치를 꼽아서 동시에 사용하지 마십시오. 잡음이 유입될 수 있고 불충분한 전원공급으로
음질에 현저한 저하를 가져 올 수 있습니다.
IMPORTANT: Before connecting the amplifier to the mains supply, please check that the voltage selector
switch on the rear of the amplifier is set to the correct supply voltage for your region. Permanent damage can
be caused by using an incorrect setting.
The IEC socket end of the supplied cable should be firmly inserted into the connector on the rear panel.
Connect the mains plug to your AC outlet. Do not overload the mains outlet with too many plugs or adaptors.
The high quality performance of the 50A may be impaired if the electrical supply to it is in poor condition. If in
doubt, consult your hi-fi dealer, or a qualified electrician for advice.
퓨즈는 후면 전원케이블 삽입구(우측 사진)에 있습니다. 퓨즈의 규격은 5mm x 20mm 유리관
카트리지 타입이며, 용량은 5 Amp 의 시간지연 (time lag) 퓨즈입니다. 항상 동일한 규격의 퓨즈로
교환하십시오. (사용 중 아무런 이유 없이 퓨즈가 나갔을 경우에는 기기 내부에 이상이 발생했을
가능성이 농후하오니 문의하십시오)
The Mains Input connector on the rear panel is also fitted with a fuse in a pull-
out drawer. The value of the 5 x 20mm cartridge fuse is clearly stated (T5AL
250V) next to the socket, on the rear panel. This means it is a 5 Amp Time-
lag (Anti-surge) type fuse, rated at 250V. Always replace the fuse with one
of identical rating to prevent the risk of fire! Page: 1
③
입력단자 및 출력단자 연결 INPUT AND OUTPUT CONNECTIONS
본체 후면에는 5 개의 Line Level* 입력단자가 있고 ①②③④⑤의 번호가 붙여져 있습니다.
①③④번은 Line Level 외에 다른 입력으로도 사용 가능하며 그 방법은 뒤에 설명되어 있습니다.
On the rear panel there are 5 standard Line level* inputs labelled 1-. Some of these inputs can be configured
for different requirements and these options are described below. Input configuration is controlled by a
special menu which is available only during power-up, please see the section below.
참고: * Line Level 이란 오디오 기기간의 표준 신호 전달 방식을 말하며, 보통 300mV 에서 2V 의
입력전압 특성을 갖습니다. (Line Level 입력은 Phono 입력이 아닌 일반 소스들을 연결하는
입력을 말함). EVOLUTION 50A 앰프는 0V ~ 5.0V 의 입력을 수용할 수 있어 모든 소스에 대응합니다.
*Line level refers to a standardized way of transferring audio signals between equipment. It is typically
characterized by a voltage level of between 300mV and 2V r.m.s. The EVOLUTION 50A will accept levels
between 0 to 5.4V r.m.s. and should therefore be compatible with all sources.
Line 1 입력은 라인 레벨 소스 (예 CDP, Tuner 등)에 연결할 수 있으며, Phono 모듈을
장착하면 Phono 입력으로 사용할 수 있습니다. 포노 입력 사용법은 뒤에 설명되어 있습니다.
Line 1 is suitable for any source (CD, Tuner, Tape, etc), and can also be used as a dedicated MM
/ MC Phono Input when an optional Creek Plug-in Phono pre-amp is fitted. See separate section
below.
Line 2 는 라인 레벨 전용으로 모든 Line Level 소스기기에 연결할 수
있습니다.
Line 2 is suitable for any line level source.
Line 3 는 두 가지 기능을 갖고 있습니다.
첫 기능으로는 Line 2 와 마찬가지로 Line Level 입력단으로 사용 가능합니다.
두 번째 기능으로는 AV Direct 기능으로서 내부의 볼륨과 프리앰프를 거치지 않고 파워
앰프로 사용할 수 있습니다. 이 경우 볼륨이 있는 소스기기나 AV 리시버의 Pre-Out 에
연결합니다.
Line 3 has two possible functions. Firstly as an additional line level input, equivalent to Line 2 or
secondly, as a direct input to the power amp, bypassing the internal pre-amp and volume control. Known as
“AV Direct” this is useful for AV applications where the EVOLUTION 50A can be used for the front Left and
④
Right channel sound, with volume controlled by the AV receiver. This allows a multi-channel AV system to be
integrated into your high quality 2-channel hi-fi system with ease. Simply connect the Line 3 input to your AV
amplifier’s Front L/R pre-out connections.
Line 3 에 다른 Evolution 50A 의 Pre-out 에 연결하여 Bi-Amping 으로 구동할 수도 있습니다.
AV Direct also makes it possible to “Slave” the amplifier to another EVOLUTION 50A using the pre-out
connection, thus producing a bi-amplified system.
Line 4 도 Line 3 과 같은 두 가지의 입력 기능 (Line Level / Amp Direct)을 갖고 있습니다.
Line 4 duplicates the dual functionality of the Line 3 input whilst also adding a different connection option.
Line 4 에는 RCA 단자 외에 Balance 밸런스* 단자가 구비되어 있습니다. 주의: RCA 입력단자
혹은 밸런스 입력 단자 중에 하나만 연결해야 하며 두 개를 동시에 연결해서는 안됩니다.
Connections for standard line level RCA jacks are provided but equip-
ment with Balanced outputs* can also be connected to the provided
XLR input connectors. Use only one or other connection method, not
both!
*참고: Balance 밸런스 출력은 RCA 출력에 비하여 외부의 노이즈와 간섭으로부터 안전한
신호전달 방법으로 특히 케이블 길이가 길 때 유익합니다.
*Balanced outputs use a differential signalling technique which makes the interconnection much more
resistant to external noise and interference. It is ideal for preserving signal fidelity, especially if long cable
runs are required. Page: 2
Line 4 도Line 3 와 마찬가지로 내부 프리앰프 회로를 바이패스하여 파워앰프 기능으로 사용할 수
있습니다. 이 때 프리앰프 기능을 갖춘 Evolution CD50D 와 같은 소스 기기를 연결할 수 있습니다.
As with Line 3 it is possible to input the signal directly to the power amp, bypassing the internal pre-amplifier.
This feature, called “Line 4 Direct”, is intended for sources whose output is already influenced by another
volume control, such as the EVOLUTION 50D DAC and CD player.
Pre-Out 단자는 내부의 앰프 부분을 구동시킬 수 있는 프리앰프 출력 신호를 외부로
제공합니다. 이 신호는 볼륨, 톤 콘트럴 등에 의해 영향을 받습니다. 이 신호는 다른 파워
앰프를 구동할 수 있습니다. 또 다른 Evolution 50A 에 연결하여 바이-앰핑으로
사용하거나, 서브 우퍼의 앰프에 입력으로 사용할 수 있습니다.
Pre-out is an output signal replicating the feed to the internal power amplifier section. It is affected by
all the controls of the amplifier such as volume, tone etc. It allows the user to drive another power amp
if required. This can be used to “bi-amplify” a suitably equipped pair of loudspeakers or to connect an
active sub-woofer for example.
⑤
Line5는 라인 레벨의 RCA 입력단자입니다. Line5 는 옵션 품목인 Ambit
튜너 모듈이나 Ruby DAC (3개의 digital 입력과 튜너 내장) 모듈을 장착할 수
있는 포트로 사용될 수 있습니다.
Line 5 in factory default mode is suitable for any line level source via its RCA sockets. Line 5
is also an expansion port and it can be configured with two options: AMBIT Tuner, or RUBY DAC; 3 x digital inputs
and FM/AM Tuner.
입력환경 설정 CONFIGURING THE INPUTS
입력환경 설정은 본 기기의 전원을 끈 상태에서 합니다. MENU 버튼을 누른 상태에서 전원
스위치를 켜십시오. 화면에 “Setup Menu” 표시가 나온 다음에 메뉴 버튼을 놓으십시오. 입력
설정 옵션과 공장 초기화 설정 화면을 보실 수 있을 것입니다.
To access the input configuration menu the product must be switched off. Hold down the MENU key whilst turning
on the power and release once you see the “Setup Menu” appear. Here you will see the options for input
configuration and restoring factory defaults. The tree looks like this:
Line 3 옵션 설정
Line Level Input 초기 설정. 이것이 기본 설정입니다.
Power Amp Input 내부의 프리앰프 부분을 바이패스하고 파워앰프로 사용합니다.
Line 3 Options –
Line Level Input Default setting The input is conventional.
Power Amp Input This bypasses the internal pre-amp giving “AV Direct” mode.
Line 4 옵션 설정
Line Level Input 초기 설정. 이것이 기본 설정입니다.
Power Amp Input 내부의 프리앰프 부분을 바이패스하고 파워앰프로 사용합니다.
Factory Default 공장 초기화합니다.
Line 4 Options –
Line Level Input Default setting. The input is conventional.
Power Amp Input This bypasses the internal pre-amp giving “Line 4 Direct” mode.
Factory Defaults Restores all settings to original factory states.
선택 방법은 왼쪽 회전 노브를 돌려서 원하는 옵션을 선택하고 노브를 누르면 결정됩니다. 설정이
끝난 다음 Menu 버튼을 다시 누르면 설정에서 빠져 나가게 됩니다.
Navigate using the left-hand rotary control; pressing the control selects the option. Once configured press the
MENU key again and the product will start up with the new settings. Page: 3
헤드폰 출력 Headphone Output
헤드폰은 단독으로 듣거나 스피커와 동시에 들을 수도 있습니다. MENU 에서 헤드폰 선택옵션을
결정하십시오. 헤드폰을 삽입하면 전면 표시창 좌측에 헤드폰 심볼이 나타납니다.
⑥
Headphones can be used via the front panel Jack socket. It can be used alone or together with loudspeakers.
Go to MENU and make the selection via the Headphone switch option. When headphones are plugged in, a
headphone symbol will show on the bottom left hand corner of the OLED screen.
포노 모듈의 설치 ADDING THE INTERNAL PHONO STAGE OPTION
Line 1 입력은 포노 입력으로도 사용할 수 있습니다. 포노 입력으로 사용하려면
내부에 포노 모듈(사진)을 장착하여야 합니다. 포노 모듈을 장착하면 패널에 Phono
표시가 나타납니다. 참고로, 포노모듈엔 MM40, MM 48 or MC54 등 3 종이 있으며
OBH-15mk2 와 같은 외장 포노프리앰프도 있습니다.
The Line 1 input can be used either for vinyl disc (Phono) or line level. To listen to vinyl discs, it is
necessary to fit the optional Creek plug-in – ‘Sequel Phono’ board. Check with your dealer for which
version (MM40, MM48 or MC54) suits your cartridge. When the Phono PCB is fitted, it will
automatically indicate Phono on the display, when selected. Alternatively, Creek Audio also
produces a range of separate high-grade Phono pre-amplifiers, which can be connected to any input.
본기 후면에 접지(Ground) 단자에는 턴테이블의 접지선과 연결하십시오.
A GROUND terminal post is provided on the rear panel to connect your turntable's ground wire if provided.
스피커의 연결 LOUDSPEAKER CONNECTIONS
스피커 케이블의 연결은 앰프의 전원을 끈 상태에서 연결하십시오. 케이블과 스피커에 관한 자세한
내용에 대해서는 구입하신 대리점에 자문을 구하십시오.
The loudspeakers should be connected using a suitable pair of cables designed specifically for audio use. Check
with your dealer for advice. The terminals allow for bare wire, 4mm plugs or spade lug connectors. Tighten the
terminal fully after fitting the loudspeaker wire. Please consult your dealer for advice if you are unsure.
스피커의 위상 맞춤은 대단히 중요합니다. 앰프의 적색 (+) 흑색 (–) 을 스피커의 + 와 – 에
동일하게 맞추어 연결하십시오. 반대로 연결하여 위상이 맞지 않으면 저음의 감소, 스테레오
이미지의 손상 등의 음질 저하가 발생합니다.
It is very important to connect the loudspeakers with the correct phase. Connect the red (or
‘positive’ or ‘+’) terminal of your loudspeaker to the red terminal of the amplifier and like-
wise for the black. If both channels are not connected with the same polarity, a severe loss
of bass performance and lack of stereo image will result.
앰프의 출력 터미널과 스피커 케이블은 절대로 쇼트(합선)되면 안됩니다. 앰프 작동 중 쇼트 되면
앰프에 치명적인 손상이 갈 수 있습니다. 스피커를 연결하거나 이동할 경우에는 반드시 앰프의
전원을 먼저 끄고 나서 하시고, 전원 스위치를 켜기 전에 연결 상태를 재점검하십시오.
It is very important not to short the loudspeaker cables together when the EVOLUTION 50A is powered on, as
permanent damage may result. Ensure there are no strands of cable bridging the terminals when connecting the
loudspeakers and make all connections with the EVOLUTION 50A turned OFF. If it is necessary to change or
move the location of the loudspeakers, make sure that you first power off the EVOLUTION 50A and then re-check
the wiring once finished.
⑦
리모트 콘트롤 입출력 REMOTE IN/OUT
Evolution 50 시리즈 제품은 리모트 콘트롤 입출력 잭(사진)을 구비하고 있어서 외부의 적외선
센서를 장착하거나 다른 Evolution 제품과 연동할 수 있습니다. Out 잭은 오디오 신호에 영향을
주기 않기 위해서 광 센서로 분리되어 (전기적으로 독립되어) 있습니다. IN 잭 OUT 잭 모두
양방향 통신이 가능합니다. 그러나 IN 잭은 외부 적외선 센서나 OUT 잭의 차폐회로에 전원공급
역할도 하고 있습니다.
연결은 항상 본기의 IN 잭과 다른 기기의 OUT 잭을 연결하십시오. IN 과 IN 을 연결하면 절대로
안됩니다. IN 과 IN 을 연결하면 기기에 손상이 발생할 수 있습니다.
The EVOLUTION range of products are equipped with remote control input and output jacks to
allow the use of external infra-red (IR) sensors and to allow the products to “talk” with each
other, forming an integrated system with additional features. The remote OUT jack is opto-
isolated (electrically ‘floating’) to prevent any interference to the audio signals when linking
equipment. Both IN and OUT jacks are in fact bi-directional for the signals but the IN jack also
provides power which is used to run the external IR sensor or the opto-isolator circuitry on the
OUT jack. Always connect an IN jack to an OUT jack on matching EVOLUTION range products,
NEVER connect and IN jack to an IN jack as damage could result! Page: 4
양방향 통신이 가능하기에 두 개를 연결할 필요가 없고 단 하나의 케이블만 연결하면 됩니다.
케이블은 3 핀3.5mm 스테레오 케이블(사진)입니다. 2 핀의 모노 케이블을 사용하시면 안됩니다.
Because the connections are bi-directional there is no need to form a loop when
connecting equipment together. A single cable between any pair of equipment is
sufficient. The correct cable for connections is a STEREO (3-terminal) 3.5mm
jack plug to jack plug cable, do NOT use mono (2-terminal) 3.5mm jack cables!
본 기기의 IN 잭에 케이블을 연결하면 자동적으로 본 기기 내부의 적외선 센서는 작동을 멈추어
리모컨 신호와의 충돌을 방지합니다. 이 리모트 연결은 표준 변조방식의 리모트 콘트롤 신호와 본
기기 고유의 명령어를 사용하여 다른 Evolution 기기와의 연동하거나 펌웨어 업데이트 기능을
수행하게 됩니다.
Connecting anything to the IN jack will disable the built-in IR sensor to prevent clashing of the signals. The
remote connections carry standard demodulated remote control signals along with proprietary serial
commands to synchronies various EVOLUTION products and carry out firmware updates.
⑧
앰프 본격 사용하기 OPERATING THE EVOLUTION 50A
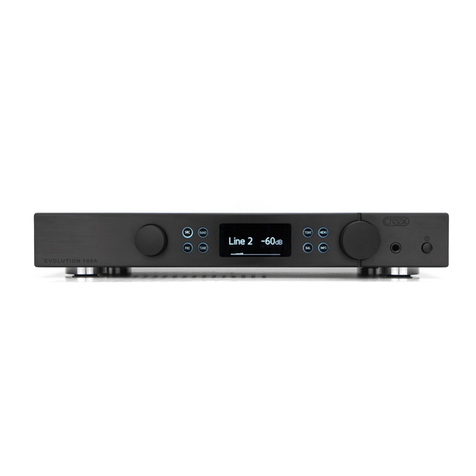
전면에는 좌측에서부터 회전식 입력 셀렉터 노브, 4 개의 버튼 (SRC, PRE, TUNE, BAND)이
있습니다. 중앙에 OLED 표시창이 있고 우측에 네 개의 버튼 (TONE, MENU, BAL and INFO)이
있습니다. 그 외에 볼륨, 헤드폰 소켓, 전원 스위치가 있습니다.
The front panel controls, from left to right, feature a rotary input selector knob, a group of 4 buttons marked
SRC, PRE, TUNE, and BAND for the tuner, if fitted. Next is the OLED display window, then 4 more buttons
marked TONE, MENU, BAL and INFO. The volume control, headphone socket and Power on/off switch
complete the lineup.
주의: 모든 세팅은 기억되어 전원을 끄더라도 기억을 유지하고 있습니다.
NOTE: All control settings are memorized, even when the power is turned off.
전원 스위치를 눌러서 전원을 켜십시오. 맨 처음 CREEK 로고가 표시창에 나타납니다. 로고가
사라지고 입력소스와 볼륨 값이 표시되면 사용 준비가 완료된 것입니다.
Turn on the power using the push-button on the right-hand side of the product. The display will show the
Creek logo whilst the internal electronics are configured and allowed to settle. The amplifier is ready for use
once the display changes to show selected input and volume settings.
입력 선택은 좌측의 회전 노브를 이용하여 선택합니다. 물론 리모컨으로 선택할 수도 있습니다.
The input is selected by the left-hand rotary control, rotate the control until the desired input is shown in the
display. The inputs can also be chosen using the remote control.
볼륨 조정은 우측 볼륨 노브를 돌려 조정하거나 리모트 컨트롤을 사용합니다. 우측 노브를 누르면
뮤트 MUTE 기능이 작동합니다.
The volume can be adjusted via right-hand rotary control on the front panel or remotely with the EVOLUTION
remote handset. Pressing the knob will toggle the mute condition on and off.
⑨
주목해야 할 점은 앰프의 출력은 볼륨 세팅 값과 입력 신호의 크기, 두 가지 변수에 의해서
결정된다는 것입니다. 입력소스의 신호가 작으면 볼륨을 올려야 같은 소리 크기를 얻을 수
있습니다. 반대로 입력소스의 신호가 너무 크면 볼륨을 낮추어야 할 것입니다. 볼륨을 0 까지
낮추어야 하더라도 걱정 마십시오. 입력 소스의 신호 세기가 크다 하더라도 반드시 앰프에 부하가
더 걸리는 것이 아니기 때문입니다.
It is important to note that the power output of the amplifier is the product of both the volume setting AND the
input signal level from the source equipment. Sources with a lower output signal will require a higher volume
setting to reach the same loudness. Do not be worried if you find the volume is approaching 0dB to achieve
the required listening level, it does not necessarily mean the amplifier is working harder or delivering its full
capability.
마지막 볼륨 세팅 값은 전원이 꺼지더라도 기억됩니다. 그러나 다시 전원을 켰을 경우 갑작스런
고음으로 인한 불쾌감을 방지하기 위해서, 시동 볼륨은 -20 을 넘지 않도록 설계되어 있습니다.
만약 마지막 시청한 볼륨 값이 -20 을 초과할 경우라도 다시 전원을 켜면 -20 으로 낮추어 집니다.
The volume setting is remembered during power off but when the amplifier is turned back on, the value will
be limited to a maximum -20dB to prevent unexpected loud sounds from being produced.
Page:
MENU 버튼은 고객의 취향에 맞추어 환경을 설정할 수 있도록 몇 가지 옵션을 제공합니다.
메뉴버튼을 누르면 3 가지 옵션이 나타나는데 왼쪽 노브를 돌려서 원하는 것을 선택할 수
있습니다. 좌측 회전 노브를 누르면 해당 옵션의 더 상세한 사항을 선택할 수 있습니다. 선택지는
다음과 같습니다.
The MENU button offers some set-up options to tailor the operation of the EVOLUTION 50A to your
preference. Pressing this button will reveal 3 options which can be highlighted using the left-hand rotary
control. Depressing the rotary control will select the highlighted option to reveal further options. The options
tree looks as follows:
표시창 세팅 Display Settings -
항상 켜짐 Always On The OLED display will be lit at all times the product is operating
자동으로 꺼짐 Auto Off The OLED display will go out after a short delay
표시창 밝기 조절 Display Brightness -
⑩
최대 밝기 Full Maximum screen brightness
중간밝기 Medium
최소밝기 Low Lowest screen brightness
헤드폰 스위치 Headphone Switch -
스피커 차단 Disable Speakers: Inserting a headphone jack will mute the loudspeaker outputs
스피커 동시사용 Simultaneous Use: Both loudspeakers and headphones will be active simultaneously
좌측 회전 노브를 사용하여 귀하의 취향에 맞는 옵션을 선택하십시오. MENU 버튼을 다시 누르면
빠져나갑니다.
Configure the product to your taste by selecting the desired options with a press of the left-hand rotary
control. Use the MENU key to exit.
BAL 밸런스 버튼은 좌우 채널의 음량 균형을 조절합니다. 혹 스피커의 좌우 균형이 맞지 않을
경우 또는 한쪽 채널만 듣고 싶을 경우에 유용하게 사용합니다. BAL 버튼을 누르고 난 뒤에
우측의 회전 노브를 돌려서 밸런스를 조절하며, 표시창에 좌우 레벨의 차이가 표시됩니다.
밸런스를 Center 로 리세트 시키려면 간단히 우측 회전 노브를 누르면 됩니다.
The BAL (Balance) button allows adjustment of the relative levels of left and right channels. This is used to
compensate for non-ideal loudspeaker placement or to isolate one channel of the audio signal. Once the
BAL button has been pressed the right-hand rotary control adjusts the balance and the relative level
difference is expressed on the display. To reset the balance to Centre, simply press the rotary control
inwards. The characteristic of the control has been tailored to maintain the same perceived volume level from
the system so as to allow easy adjustment.
TONE 버튼은 저음 (Bass)와 고음 (Treble)의 레벨을 조절할 수 있습니다. 최적의 음질을 위해서
보통 톤 콘트롤은 바이패스합니다. 톤 콘트로를 작동시키려면 TONE 버튼을 표시창에 Tone On
나타날 때까지 누르면 됩니다. 이 때TONE 버튼을 누를 때마다 표시창은 Bass, Treble and
Volume 옵션을 차례대로 표시해 줍니다. 조절은 우측 회전 노브를 돌려서 조절하며, 회전 노브를
누르면 설정 값을 0 으로 초기화합니다. 톤 기능을 선택하면 표시창 우측 상단에 음표가
나타납니다. 톤 콘트롤 기능을 끄려면 TONE 버튼을 Tone Off 표시가 나타날 때까지 누르시면
됩니다. 한번 설정한 톤 세팅 값은 기억하여 톤 기능을 켰을 때와 껐을 때의 음질 변화를 비교할 수
있습니다.
The TONE button allows relative Bass and Treble levels to be adjusted if required. To maintain optimum
sound quality, the tone control circuits are normally bypassed. To activate them, simply press and hold the
TONE button until the display indicates “Tone On”. Pressing the TONE button now cycles through Bass,
Treble and Volume options. Adjustment of the tone is done with the right-hand rotary control and pressing
the control will reset the value to zero. When TONE is switched-on, a symbol of two musical notes is
displayed in the top right corner of the display. To disable the tone circuits again, simply press and hold the
TONE button until the screen indicates “Tone Off”. Tone settings are remembered even when the controls
are bypassed allowing comparison of adjusted and “flat” settings. Page: 6
⑪
보호 회로 PROTECTION
본 앰프는 쇼트-합선 (Over-current 과전류), 온도 과상승 (Over-temperature) 및 DC 전류 (DC
Offset) 보호 회로를 갖추고 있습니다. 본체 내부의 릴레이는 합선 시 출력을 차단하고 표시창에
이를 표시합니다. 문제가 해결되면 자동으로 릴레이가 연결됩니다. 온도가 과상승하는 경우,
앰프에 환기가 잘되고 있는지 스피커 선에 문제가 없는지 확인하십시오. Over-current 프로텍션이
걸리는 경우 대개 스피커에 합선 가능성이 있으니 앰프의 전원을 끄고 확인 바랍니다.
The EVOLUTION 50A has short circuit (over-current), over-temperature and DC offset protection. The
internal loudspeaker relay will isolate the output under any of these conditions and the display will indicate
the cause. The loudspeakers will be re-connected after a delay as soon as the fault has cleared. If the over-
temperature condition has occurred then please check the amplifier has adequate ventilation and that there
are no faults with the loudspeaker wiring. Likewise, if the over-current protection has been activated then is
highly likely there has been a short circuit of the loudspeaker wiring so please switch off the amplifier and
check the wiring before continuing.
DC 전류 (DC Offset)의 존재의 경고는 앰프 내부에 이상 발생하거나 앰프 출력에 크리핑
(overload)에 의해서도 발생할 수 있습니다. 경고가 사라지면, 볼륨을 줄여 보십시오. 스피커에서
찌그러진 음이 들릴 정도로 볼륨을 올리지 마십시오. 찌그러진 음이 들리면 앰프 또는 스피커는
한계 허용치를 넘어 사용한 징표로서 앰프와 스피커는 치명적인 손상을 입을 수 있습니다.
The ‘DC presence’ warning is either due to an internal fault with the amplifier or can sometimes be triggered
by severe clipping (overload) of the amplifier. If the condition clears by itself try reducing the volume setting.
Never drive your amplifier to levels which cause obvious distortion to be heard. This is an indication that
either the amplifier or loudspeakers are being pushed beyond their capabilities and can result in permanent
damage.
전기 소모 POWER CONSUMPTION
하이파이 애호가들 사이에는 오디오 기기에 항상 전원을 켜두는 것이 음질을 향상시킨다는 점을
선호하고 있습니다. 그러나 음질 향상은 아주 작은데 비하여 항상 전원의 소모를 요하며
전기사용료의 증가는 물론이고 기기 수명이 단축되는 단점이 있습니다. 장시간 사용하지 않을 때는
앰프 전원을 꺼두기를 권장합니다. 본 앰프는 최신 회로 기술 덕택으로 단시간에 정상적인 성능을
발휘할 수 있기 때문입니다.
It is appreciated by hi-fi enthusiasts that leaving equipment powered up continuously can improve the
performance. However, this small improvement in sound quality comes at the expense of continuous power
consumption from the mains, which will increase your electricity bill and also reduced working life of the
product. The EVOLUTION 50A draws 20 Watts of power when switched-on and not producing a signal.
We recommend switching the EVOLUTION 50A off at the front panel if the equipment is not to be used for a
period of time. Normal performance is achieved in a very short period time due to the advanced circuitry in
your EVOLUTION 50A amplifier.
본체 내부에는 릴레이들이 사용되어 작동 시 마다 기계음을 내는데 이는 정상적인 것으로 고장이
아닙니다.
Relays are used to route signals inside the EVOLUTION 50A and these produce a mechanical click sound
when they operate, this is normal and does not indicate a malfunction with the product. Page: 7
⑫
리모콘 REMOTE CONTROL
본 앰프의 리모콘은 앰프는 물론 CDP 및 튜너도 함께 구동할 수
있습니다. 참고로 이 리모컨은 Creek 의 Evolution50 & 100 시리즈
제품에만 사용할 수 있으며, 전원 스위치는 리모컨으로 끄고 켤 수
없습니다. 작동법은 간단하여 긴 설명이 필요치 않습니다.
The EVOLUTION 50A’s new remote control handset allows the user to
operate the amp and CD/DAC/Pre and tuner functions. It should be noted
that the EVO remote handset will only operate Creek’s EVOLUTION 50
and 100 ranges of products and is not able to switch the mains power.
The operation of the remote is designed to be intuitive, so we do not
intend to describe its functions in great detail here, have a play!
펌웨어 및 하드웨어 설정
FIRMWARE AND HARDWARE CONFIGURATION
본 앰프의 하드웨어 및 펌웨어 상태를 알 수 있습니다. 먼저 앰프를
끄십시오. 전면의 INFO 버튼을 누른 상태에서 전원스위치를 켜십시오.
전면 표시창에 About this unit 이 나타나면 INFO 버튼을 놓으십시오.
펌웨어 버전과 포노모듈 혹인 AMBI Tuner 의 장착 유무가 표시될
것입니다. 이 정보는 업그레이드 혹은 아프터 서비스 시에 필요합니다.
It is possible to check the hardware and firmware status of your 50A on
the display. Turn off the 50A and then, whilst holding down the INFO key,
power up the EVOLUTION 50A. Once the screen has changed to “About
this unit”, release the INFO key. The firmware version will be displayed
along with the presence/absence of a Sequel phono card and AMBIT
tuner card. This information will be required in the event of an upgrade or
service to the product.
무선주파수 간섭 RADIO INTERFERENCE
본 앰프는 정상적인 가정환경에서 작동하도록 설계되어 있습니다.
그러나 만약 본 앰프를 휴대폰과 같은 무선기기 근처에 두면 그
성능에 악영향을 받을 수 있습니다. 그런 경우 앰프 혹은 무선기기
위치를 바꾸면 정상화될 것입니다.
The EVOLUTION 50A is designed to work properly in normal domestic
operating conditions. However, its performance could be affected if sited
near to a radio transmitter such as a mobile phone etc. Relocating the
50A or the radio transmitter will normalize the situation. Page: 8
⑬
당부의 말씀 FINAL WORDS
본 앰프는 수년간 정상적인 사용이 가능하도록 설계되어 있습니다. 만약 필요한 경우 구입하신
대리점에 도움과 자문을 구하십시오.
서비스가 필요한 경우 구입처 혹은 수입상으로 연락하시고 가능한 한 오리지널 박스에 잘 포장하여
서비스를 의뢰하십시오.
제품에 동봉된 보증서는 영국 내에만 해당되며 영국 이외의 국가에서 구입하신 제품의 서비스는
해당 국가의 수입원 및 판매점에 의뢰하십시오.
The EVOLUTION 50A is designed to provide years of reliable use. If you need more assistance, it
is always advisable to go back to the supplying dealer for his expert help. If you are unfortunate
enough to need service work to be carried out on your EVOLUTION 50A, it should be returned to
your dealer in the original packing material if possible.
Creek Audio Ltd reserves the right to change or modify the specification of its products without
prior warning.
If within two years of purchase date your EVOLUTION 50A proves to be defective for any reason
other than accident, misuse, neglect, unauthorized modification, or fair wear and tear, Creek
Audio Ltd. will, at its discretion, replace the faulty parts without charge for labour or return carriage
within the United Kingdom. This warranty is valid only in the United Kingdom and given in addition
to statutory rights. Service enquiries outside the United Kingdom should be addressed first to the
supplying dealer and/or the Creek distributor/importer. See www.creekaudio.com for a list of
distributors. Warranties granted in these countries are entirely at the discretion of the distributor.
Page: 9
⑭
Tel (02) 597
-
4100
/ (02)587
-
7300
www.audioland.co.
kr

Other manuals for EVOLUTION 50A

2

Other Creek Audio Amplifier manuals

Creek Audio EVOLUTION 5350 User manual

Creek Audio

Creek Audio EVOLUTION 5350 User manual

Creek Audio OBH-12 User manual

Creek Audio

Creek Audio OBH-12 User manual

Creek Audio Destiny User manual

Creek Audio

Creek Audio Destiny User manual

Creek Audio OBH-8 User manual

Creek Audio

Creek Audio OBH-8 User manual

Creek Audio 5250 User manual

Creek Audio

Creek Audio 5250 User manual

Creek Audio Wyndsor User manual

Creek Audio

Creek Audio Wyndsor User manual

Creek Audio EVOLUTION 50A User manual

Creek Audio

Creek Audio EVOLUTION 50A User manual

Creek Audio OBH 18 User manual

Creek Audio

Creek Audio OBH 18 User manual

Creek Audio 4240 User manual

Creek Audio

Creek Audio 4240 User manual

Creek Audio OBH-11 User manual

Creek Audio

Creek Audio OBH-11 User manual

Creek Audio 5250 User manual

Creek Audio

Creek Audio 5250 User manual

Creek Audio Destiny 2 User manual

Creek Audio

Creek Audio Destiny 2 User manual

Creek Audio Destiny User manual

Creek Audio

Creek Audio Destiny User manual

Creek Audio CAS 4040 User manual

Creek Audio

Creek Audio CAS 4040 User manual

Creek Audio OBH 21 User manual

Creek Audio

Creek Audio OBH 21 User manual

Creek Audio OBH-22 User manual

Creek Audio

Creek Audio OBH-22 User manual

Creek Audio A50i User manual

Creek Audio

Creek Audio A50i User manual

Creek Audio OBH 21 User manual

Creek Audio

Creek Audio OBH 21 User manual

Creek Audio Evolution 2 User manual

Creek Audio

Creek Audio Evolution 2 User manual

Creek Audio OBH-21mk2 User manual

Creek Audio

Creek Audio OBH-21mk2 User manual

Creek Audio P43 User manual

Creek Audio

Creek Audio P43 User manual

Creek Audio A42 User manual

Creek Audio

Creek Audio A42 User manual

Creek Audio 4040 A User manual

Creek Audio

Creek Audio 4040 A User manual

Creek Audio Evolution 2 User manual

Creek Audio

Creek Audio Evolution 2 User manual

Popular Amplifier manuals by other brands

Lyngdorf Audio DPA-1 RoomPerfect owner's manual

Lyngdorf Audio

Lyngdorf Audio DPA-1 RoomPerfect owner's manual

mygroov micromega user manual

mygroov

mygroov micromega user manual

Kustom Defender V50 owner's manual

Kustom

Kustom Defender V50 owner's manual

Speco PL-60 SA instruction manual

Speco

Speco PL-60 SA instruction manual

Stanford Research Systems SR86 Series Replacement instructions

Stanford Research Systems

Stanford Research Systems SR86 Series Replacement instructions

CIE AVID3AC-WS4 installation guide

CIE

CIE AVID3AC-WS4 installation guide

Audio Note P2 Owners informations

Audio Note

Audio Note P2 Owners informations

Walrus Audio Mako Series manual

Walrus Audio

Walrus Audio Mako Series manual

e-boxx EBD-DS912F user manual

e-boxx

e-boxx EBD-DS912F user manual

Aria A1260 instructions

Aria

Aria A1260 instructions

Harman Ininity INFDSP4425 owner's manual

Harman

Harman Ininity INFDSP4425 owner's manual

Channel Master CM-3410 instruction sheet

Channel Master

Channel Master CM-3410 instruction sheet

Radio Shack 40W Power Booster/Amplifier owner's manual

Radio Shack

Radio Shack 40W Power Booster/Amplifier owner's manual

DX Connection QSK 2500 instruction manual

DX Connection

DX Connection QSK 2500 instruction manual

Epifani UL Series manual 

Epifani

Epifani UL Series manual 

Heritage Audio ELITE Series user manual

Heritage Audio

Heritage Audio ELITE Series user manual

McIntosh MP100 owner's manual

McIntosh

McIntosh MP100 owner's manual

Rupert Neve Designs SHELFORD CHANNEL Operation manual

Rupert Neve Designs

Rupert Neve Designs SHELFORD CHANNEL Operation manual

manuals.online logo
manuals.online logoBrands
  • About & Mission
  • Contact us
  • Privacy Policy
  • Terms and Conditions

Copyright 2025 Manuals.Online. All Rights Reserved.