Creek Audio Destiny User manual

Destiny CD Player
Operating
Instructions
Congratulations on your purchase of Creek’s Destiny CD Player.
Please read this manually thoroughly. It will explain in detail the features and operation of your Destiny CD Player and help to
ensure a trouble free installation. Unpack the player carefully. It is recommended that you save the carton and packing
material for future use, should you need to move your player or return it for service.
Your Destiny CD Player is designed to work in a horizontal position. It is important to allow at least 5 cm of space behind the unit
for adequate ventilation. To avoid damage, never place it near radiators, in front of heating vents, in direct sunlight or in an
excessively humid or dusty location.
SAFETY INFORMATION
This CD player is designed to operate on 220-240 Volts 50 Hz AC or 110-120 Volts 60 Hz AC. Normally the equipment is
supplied with a mains lead with a fitted 3 pin plug suitable for the country in which it is to be used. If the plug needs to be
changed, please note that the wires in the mains lead are coloured in accordance with the following code:
Blue - Neutral Brown - Live Green/Yellow - Earth
The equipment has been tested and found to comply with the limits for a Class B digital device, pursuant to Part 15 of the FCC
Rules. These limits are designed to provide reasonable protection against harmful interference in residential installations.
This equipment generates and can radiate radio frequency energy and if not installed and used in accordance with the
instructions may cause interference to radio communications. However there is no guarantee that interference will not occur
in some instances. If this product causes interference to radio or television reception, which can be determined by turning the
equipment off and on, try to correct this by one or more of the following measures:
uRelocate or re-orient the receiving antenna
Increase the separation between the equipment and the radio or TV receiver
Connect the equipment into a mains outlet on a circuit different from that to which the receiver is
connected
Consult your dealer or an experienced radio/TV technician
TO ACHIEVE MAXIMUM PERFORMANCE FROM YOUR CD PLAYER
Install the equipment in a location which is relatively free of moisture and dust, and is well ventilated.
The equipment may not be able to perform at its best in an extremely cold or hot environment. Do not
attempt to use below 41oF/5oC or above 95oF/35oC.
Always handle discs with clean hands.
Avoid using scratched discs.
Do not attempt to clean the CD player or discs with chemical solvents, as this may cause irreparable
damage. Use a clean, dry cloth, or specially designed cleaning materials for discs.
If the CD player malfunctions, do not open the unit and attempt to repair it yourself. This is a highly technical
product and requires specialist service - return it to your dealer.
Use batteries (2 xAAA) of the same type in the remote control handset. The use of odd or different type cells
will affect its performance. Batteries are supplied.
Keep this manual in a safe place for reference.
u
u
u
u
u
u
u
u
u
u
u

Destiny CD PLAYER
SPECIFICATION
Power requirements Supplied 220/240-50 Hz or 100/120-60Hz
(Selectable by switch on underside of player)
Power consumption 20 W max 6 W in standby mode
Mains filtering Multi-pole bi-directional
Power supply 3 fully encapsulated PCB toroidal transformers
for transport, logic and analogue circuitry
Frequency response 1 Hz - 20 kHz ±0.25 dB
Output level 2.0 V RMS at 1 kHz, 0 dB
Output impedance 50Wrecommended min load 1 K
D to A type 24 bit - 192 kHz (> 120 dB) Crystal CS4396
Total harmonic distortion < 0.0008% at 1 kHz, 0 dB
THD + Noise > -97dB
Dynamic range > 117dB
Clock type Temperature compensated ultra low jitter and
phase noise module with re-clocking
Number of channels 2 via high quality solid RCA gold plated sockets
Digital output Re-clocked optical via TORX and transformer
coupled co-axial gold plated RCA socket.
Laser type Semiconductor ALGaAs
Wavelength 790 nm ± 25 nm
Light output (cw) 0.18 mW typical
Transport DVD loader with ATAPI interface. Firmware
upgradeable
Software Custom Creek software, running loader, display,
remote control and DAC.
Upgradeable via plug-in EPROM
Case Built with custom Creek extruded panels
throughout
Weight 6 Kg (13.2 lbs)
Dimensions (W x H x D) mm 430 x 70 x 310 (16.9 x 2.7 x 12.2 inches)
Remote control Custom Creek SRC2 system remote handset
Uses RC5 codes
MAINS VOLTAGE AND FREQUENCY IS INTERNALLY SET FOR THE COUNTRY OF USE
Creek Audio Ltd reserves the right to change or modify the specification of its products without prior warning
WARRANTY
If within two years of purchase date your Destiny product proves to be defective for any reason other than accident,
misuse, neglect, unauthorized modification, or fair wear and tear, Creek Audio Ltd. will, at its discretion, replace the faulty
parts without charge for labour or return carriage within the U.K.
This warranty is valid only in the U.K. and given in addition to statutory rights.
Service enquiries outside the U.K. should be addressed first to the supplying dealer and/or the Creek distributor/importer.
Warranties granted in these countries are entirely at the discretion of the distributor.
W
Page Two

Destiny CD Player
EXPLANATION OF CONTROLS
FRONT PANEL Skip Skip
Play Stop Back Forward
Disc Open/ Display
Tray Close Pause Window Repeat Display Standby
REAR PANEL
AC Mains Input Power On/Off R Audio L Digital Creek
& Mains Fuse Switch Outputs Outputs Link
AUDIO OUTPUT
Connect one end of the interconnect cable to the CD Player’s audio output sockets and the other end to the sockets labelled CD orAUX or
to other line inputs on the amplifier. Do NOT connect it to the amplifier’s PHONO input if a phono circuit is installed.
DIGITAL OUTPUT
This output enables you to connect the CD player to a stand-alone D to A converter in order to change the signal into stereo analogue. The
digitial output can be accessed via the co-axial SPDIF or optical Toslink socket on the rear panel
CREEK LINK
When development of Creek’s separate interface is completed, it will enable you to connect to a custom room controller and operate your
system from another part of the house.
DISPLAY WINDOW
A B C D E
F G H J K L M
A. TRACK NUMBER display
B. PLAY indicator
C. TOTAL TIME indicator
D. REMaining time indicator
E. PLAYING TIME display
F. PROGRAM indicator
G. SCAN indicator
H. SHUFFLE PLAY indicator
J. A « B PLAY indicator
K. REPEAT indicator
L. REPEAT 1 indicator
M. PAUSE indicator
Page Three
Destiny CD PLAYER
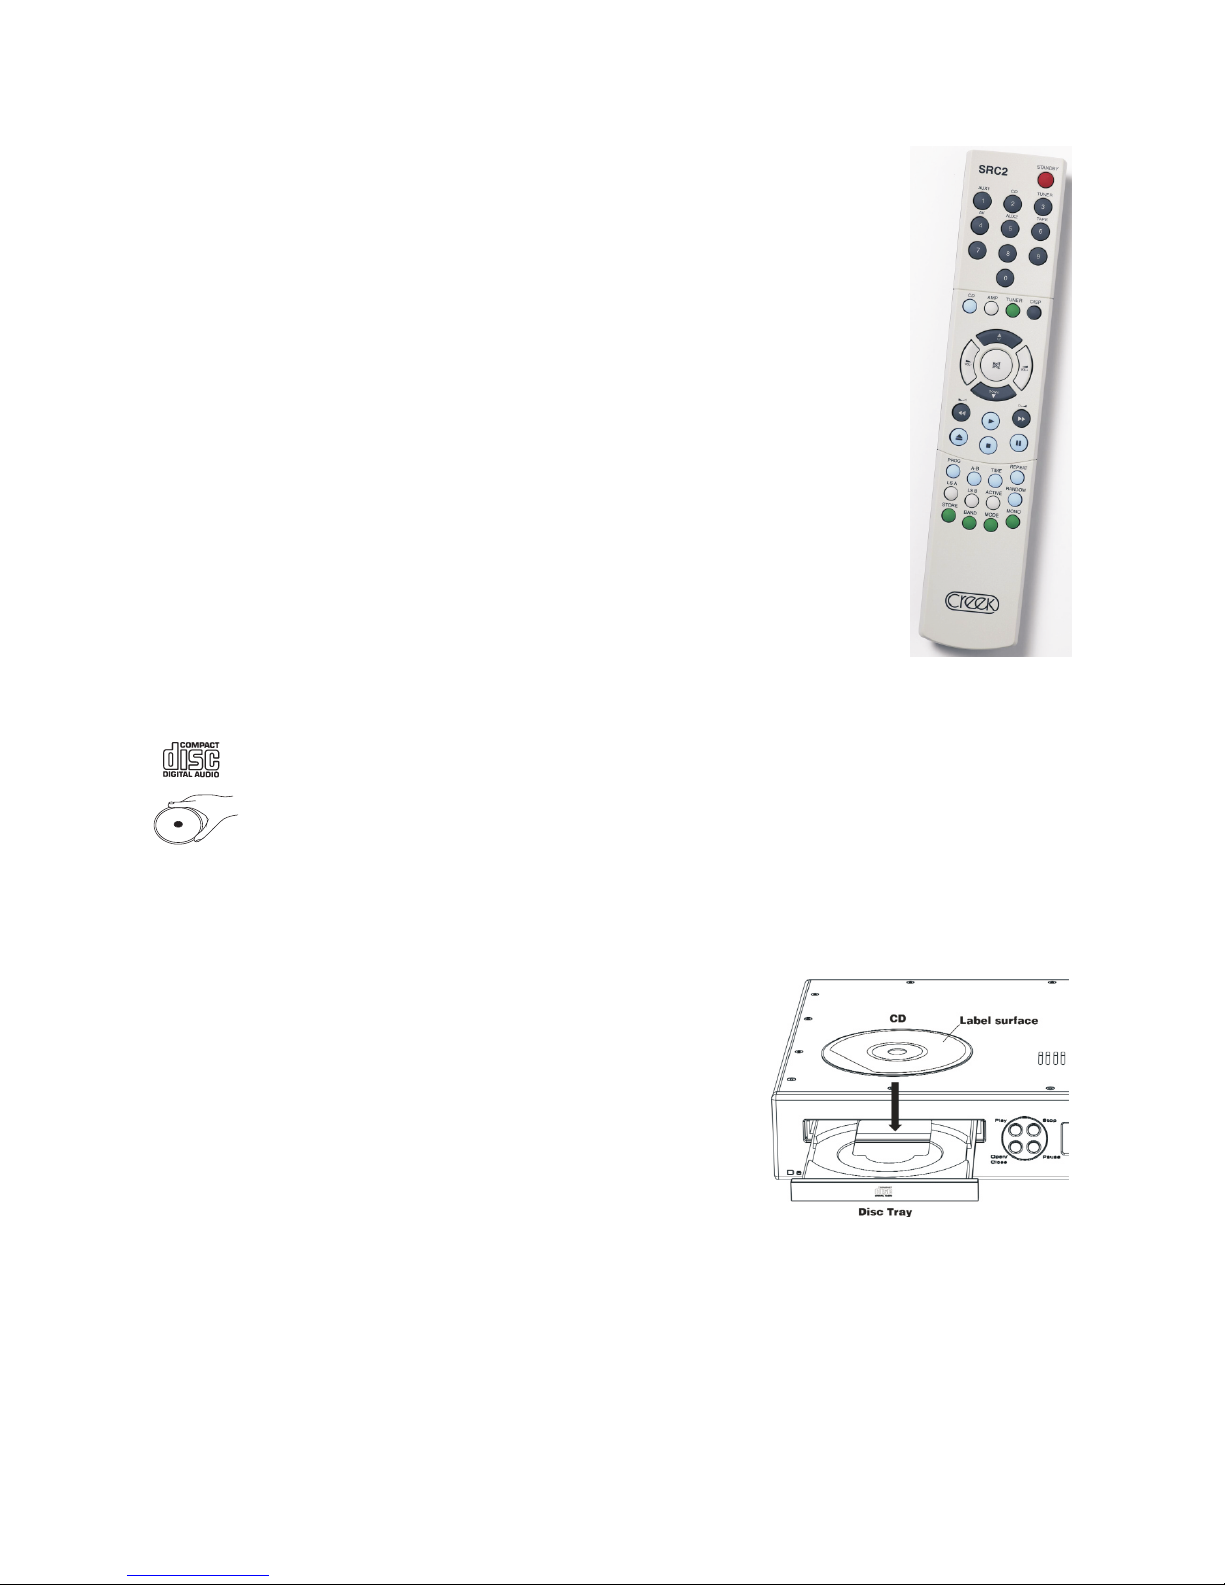
REMOTE CONTROL
The SRC2 is a System Remote Control Handset is designed to operate the Creek Destiny Integrated and Power
amplifier, CD player and Tuner. However, it can operate the older remote controlled Creek products and the new
Classic range also. It allows the user to operate the volume control, input and speaker selection, active or passive
pre-amp selection, mute and display brightness.
The coloured buttons allow the user to find the features dedicated to that device more easily. Use any of the blue
buttons to operate the CD player. Use any of the ivory buttons to operate the amplifier and any green buttons to
operate the tuner.
To extend the capability of the handset, the buttons coloured dark grey can be used for multiple functions. This can
be achieved by first pressing the product button just above the circle of buttons in the middle, CD, Amp, and Tuner.
The remote will then be programmed to make the dark grey buttons work for that device only, until another product
button is pressed.
So, if you want to select a specific track on the CD player, press the Blue CD button, then the numeric button at the
top. It isn’t necessary to press CD again if you want to select another CD track.
However, if you want to select a specific amplifier input, press the Ivory Amp button and then the numeric button at
the top which is marked with the required input label above, i.e. Aux1, CD, Tuner, AV, Aux2 and Tape. It isn’t
necessary to pressAmp again if you want to select anotherAmp input.
If you require the Tuner to go to a specific pre-set station, press the Green Tuner button and then the desired pre-set
number button. It isn’t necessary to press Tuner again if you want to select another Tuner pre-set. Up and Down
refers to CD Track, Amplifier input, and Tuner pre-set. Disp refers to Display brightness for each product
Scan forward and back also refers to CD and Tuner plus any future Creek amplifiers that might have a remote
balance control.
Standby shuts down every device in range that can go into Standby– Some Creek products do not have this feature.
Please check the appropriate manual. Waking-up from standby requires a button to be pressed for each product, i.e.
wake up CD – press any CD button, except the CD product button, because that only programs the remote
internally.
HANDLING DISCS
The Destiny CD player has been designed to play compact discs bearing the illustrated logo. DVD discs cannot be played.
Always place the CD in the disc tray with the label facing up. CD’s can only be played on one side.To remove a CD from its
storage case, press down on the centre of the case and lift the disc out, holding it carefully by the edges. Fingerprints and dust
should be carefully wiped off the CD’s signal surface (glossy side) with a soft, dry cloth. Wipe the disc in a straight motion from
the inside out. Small dust particles and stains will have absolutely no effect on reproduction quality. Never use chemicals such
as record sprays, antistatic sprays or fluids, benzine or thinners to clean a compact disc as such chemicals would irreparably
damage the surface.
Store the discs in their cases when not in use to avoid serious scratches which could cause the laser pickup to skip. Do not expose the discs to
direct sunlight, high humidity, or high temperatures for extended periods. Long exposure to high temperatures can warp the discs. Do not stick
paper or write anything with a ballpoint pen on the disc surface.
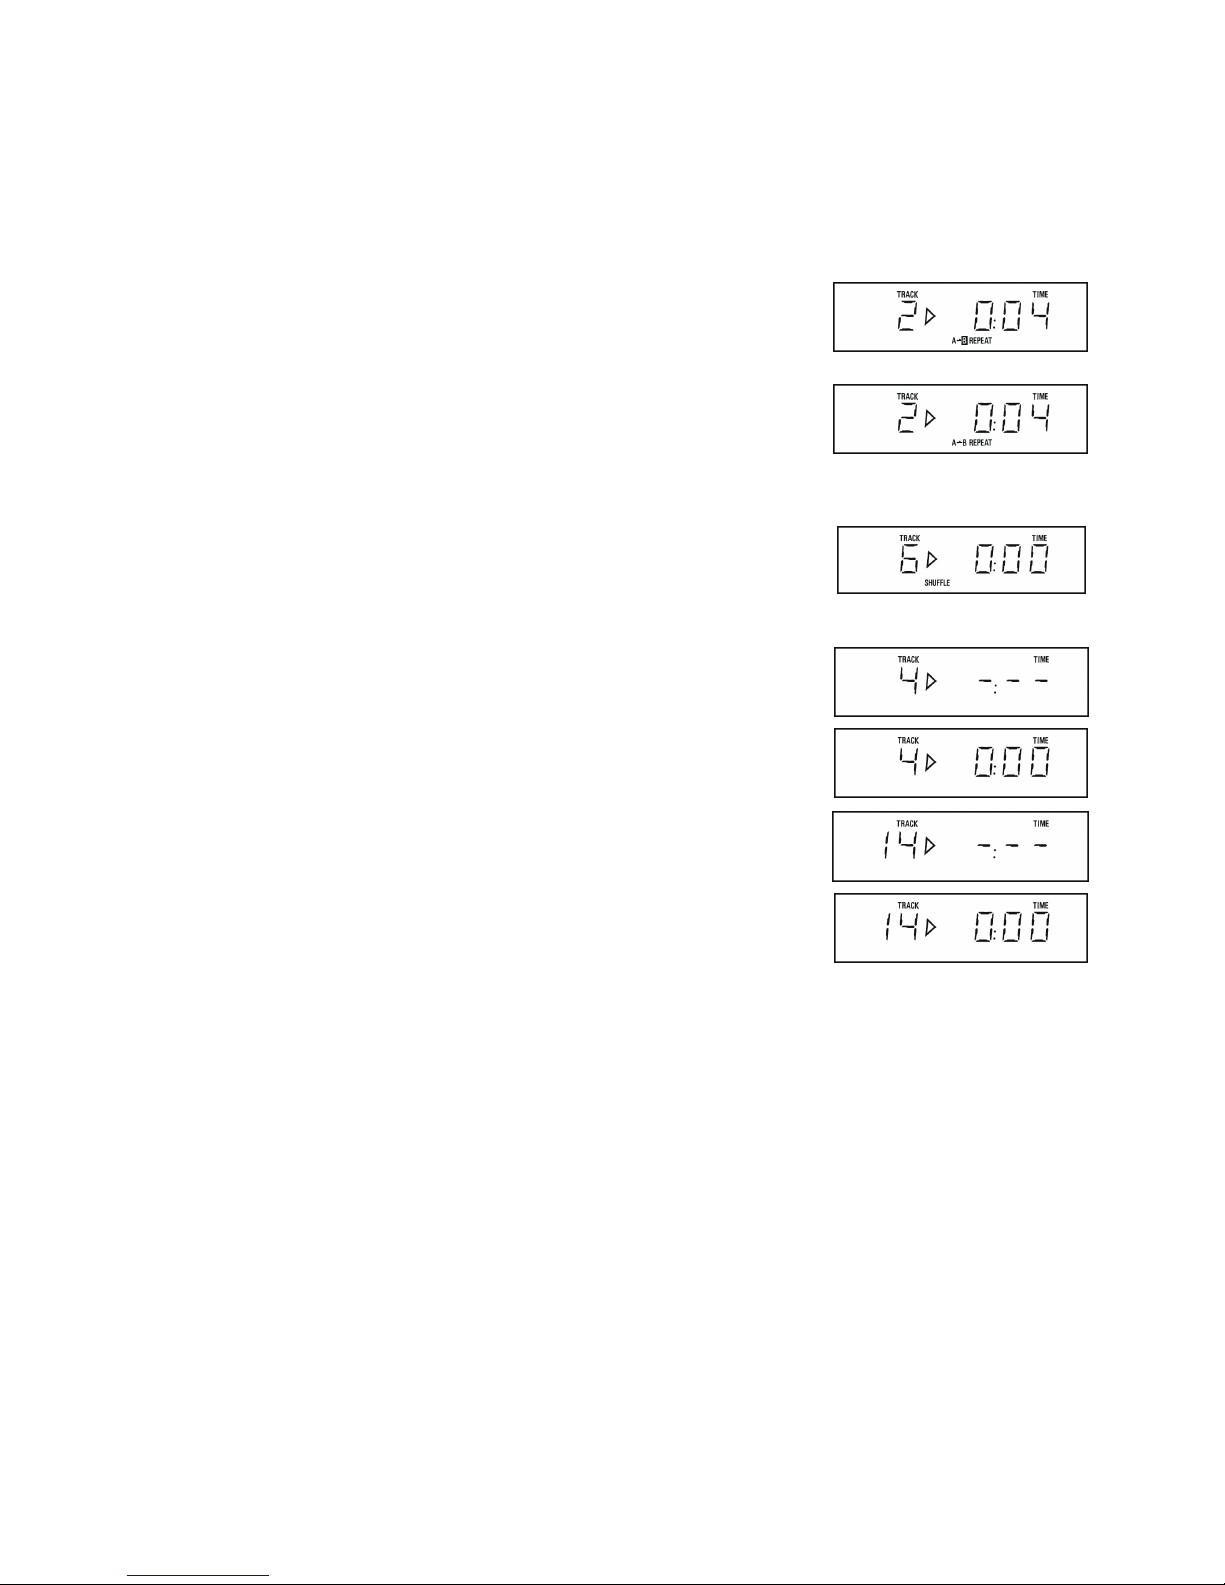
LOADING DISCS
Switch the power on at the back of the Destiny CD Player. Press any button on the front panel
or remote handset to return from Standby.Press the OPEN/CLOSE button on the front or
DISC on the handset. The disc tray will open. If the disc tray gets jammed while opening, it will
stop and close automatically. When the disc tray has opened fully, take a normal size (12cm)
disc from its case and place it carefully in the tray with the label facing up. To play an 8cm
single, place it in the inner groove of the tray with the label facing up.
NOTE:Only load one disc at a time. Handle the disc carefully to avoid leaving fingerprints on
the surface. To close the disc tray, press the OPEN/CLOSE button (DISC button on the
remote) again or gently push the tray in.
When the tray is fully closed, with a correctly loaded disc, the disc will start spinning
automatically and the TOC (table of contents) will be read. The disc will then stop and the TOC
will be displayed - i.e. the total number of tracks on the disc and the total playing time of the
disc. The CD player is now ready to play. NOTE: If after you load the disc you press the PLAY
button to close the tray, the disc will automatically start playing from the beginning of track one.
REMOVING THE DISC
The disc tray can be opened at any time by pressing the OPEN/CLOSE button. Remove the disc only after the tray has fully opened.
CAUTION
Do not put anything except a compact disc into the tray. Foreign objects can damage the mechanism.
DVD’s will not play.
Do not force the tray by hand during the opening and closing operations.
To avoid dirt and dust entering the mechanism, keep the disc tray closed when the CD player is not in use.
Never load two discs into the tray.
Page Four

Destiny CD Player
CONTROL AND OPERATION
This section of the manual describes the CD player’s controls in the order in which you would normally use them. Follow the instructions
step by step and you will easily master the operation of the unit.
POWER
The mains On/Off switch is located on the rear panel next to the power cord. 1 is on and 0 is off. Switching on the power from the rear panel
automatically places the CD player in Standby mode. To wake it up press any button on the front panel or any CD function button on the remote
handset. The LED indicator will alternate from yellow colour in Standby mode to green when ready to play.
DISPLAY
Display brightness can be adjusted from the front panel by pressing the DISPLAY button or from the SRC2 remote handset by pressing the
display button sequentially to select the desired level.. There are four display brightness levels - Off, 1, 2 or full brightness.
NORMAL DISC PLAY
Before playing a disc, check the player’s power cable and output cable connections.
STANDBY
When switching on from standby, with no disc in the tray, the display will show no diSC
PLAY
Having switched on the power and taken the player out of Standby, press the OPEN/CLOSE or DISC
button to open the disc tray. The OPEN sign will be displayed. Insert the disc in the disc tray.
Press the OPEN/CLOSE or DISC button again to close the disc tray. When there is a disc in the tray, the
track display will show diSC until the T.O.C. has been read.
N.B. If you get a message diSC on the display when the disc tray is fully closed and this remains for more than 25 seconds, this means that
the disc is improperly loaded (most likely upside down). To check, open the disc tray again and reload the disc correctly. If the disc tray gets
jammed while closing, the tray will stop and open automatically. If this happens check the disc tray and reload the disc correctly. When the disc is
loaded correctly the player will spin the disc to read the T.O.C. (Table of Contents).
This will tell the player how many tracks are recorded on the disc and how long they are. Depending on the
number of tracks and the method of recording the information, the T.O.C. read can vary from 3 to 10
seconds or more. Until this has been achieved, no other function will work. When the T.O.C. is correctly
read, the player will display this information ..... This confirms that there are 25 tracks on the disc and the
total playing time is 72 minutes and 07 seconds. The player is set to play when required.
Press the PLAY button. The PLAY usymbol will appear on the display. The disc will start playing from
the beginning of the first track. The track number 1 will be displayed together with the PLAY usymbol and
the elapsed time of the track being played.
PAUSE AND/OR STOP
To PAUSE, press the PAUSE button. The disc will stop playing at the current play position and PAUSE will
be displayed. To resume disc play, press the PAUSE button again, or press uPLAY. PAUSE will
disappear.
To STOP playing, press the STOP button. The disc will stop playing, the PLAY usymbol will disappear
and the track indicator will show the total number of tracks. The time indicator will display the total playing
time.
TO LISTEN TO A DESIRED TRACK
You may also go straight to a specific track by using one of the SKIP buttons. Press the SKIP FORWARD
or SKIP BACK button to select the desired track. For example, if you choose track 4, the track number of
the selected track will be shown on the track display. In this case the disc will start playing the selected
track when the PLAY button uis pressed. The numeric keys on the remote handset allow direct access to
the desired track.
To skip to the next track, press the skip button on the front panel, or on the remote handset once. Disc play
will start with track 5. The CD player will skip ahead to the next track each time the button is pressed.
Continuously pressing this button makes the CD player skip ahead, track by track, until the desired track
is reached. The CD player can be advanced to the last track in this way. When the last track is reached, the
player will return to track 1.
TO CHECK DISC AND REMAINING TRACK TIME
During normal disc play when the TIME button on the remote control handset is pressed, the REM symbol
will light up and the remaining playing time of the track will be displayed.Pressing the TIME button twice
will show the remaining playing time of the disc, the REM and TOTAL symbols will be displayed. When the
TIME button is pressed for the third time, the time indicator will return to the elapsed time of the track being
played.
Page Five

Destiny CD PLAYER
CONTROL AND OPERATION CONT’D
TO SEARCH QUICKLY FOR A PARTICULAR POINT ON A TRACK
During PLAY mode press and hold the fast forward or fast back buttons.When either of these buttons is pressed, the sound will be muted to
approximately one quarter of the normal volume level for the duration of the fast-forward or fast-back operation.
During PAUSE mode pressing either the fast forward or fast back button will release the pause mode and the search will continue normally with
a muted sound.
During this quick search operation, the player will search slowly for the first few seconds and then switch to searching fast.
FAST SEARCH (REMOTE CONTROL ONLY)
Using the remote control only, the fast search can be enabled by pressing the FAST button before pressing the fast forward or fast back buttons.
PROGRAMMED DISC PLAY (REMOTE CONTROL ONLY)
This feature allows you to play tracks in your preferred sequence. It is not possible to programme the CD player while the disc is playing. Press
the STOP button first, then enter a program. To program a desired sequence of tracks follow these steps:
Select your desired first track buy using the numeric buttons on your remote handset or the buttons marked forward or back.
Press the PROG button on the remote handset.
The MEMORY symbol will illuminate and the track number will be displayed. The first selected track is now stored in the memory.
Select the next track in the same manner and press PROG again, the second choice is now stored in the memory. Repeat these steps until all
desired tracks are stored.
TO PLAY TRACK 5, TRACK 8 AND TRACK 3 IN SEQUENCE
Enter the first choice by selecting track 5 in the manner described above. Press the PROG button to
store the first choice. Track 5 is now stored and the EDIT symbol will be displayed.
The time display will toggle between P: 1 and the playing time of the selection.
Enter the second choice. Press the PROG button to store the second choice. Track 2 is also stored.
Enter the third choice - track 8 - in the same way. Press the PROG button to store this third choice.
Press the PLAY button. The first programmed track will start playing and the PROGRAM symbol is
displayed.
LISTENING TO A PROGRAMMED SEQUENCE
Press the PLAY button. The PLAY symbol uwill be displayed. The disc will start playing the first programmed track. NOTE: A maximum
of 16 tracks only can be stored in the PROGRAM memory.After the programmed sequence has finished playing, the track display and the
time display will show the number of tracks played and the total playing time.
CHANGING THE PROGRAM
Press the STOP button if the disc is playing. You can then modify the program by entering new track numbers.
CLEARING THE MEMORY
Press the STOP button twice if the disc is playing. Then press the OPEN/CLOSE button on the front of the CD player twice or the DISC
button on the remote handset twice. NOTE: The memory will also be cleared if the power is switched off on the rear panel.
REPEAT DISC PLAY
Use the REPEAT button to repeat a track, all tracks on the disc, or a programmed sequence of tracks.
REPEAT ONE TRACK
Make sure that the PROGRAM function has not been selected. Press the REPEAT button once and
the REPEAT 1 message will appear. Select the desired track and the track number will appear on the
track display. Press the PLAY button. The PLAY symbol uwill be displayed and the selected track will
start playing.
At the end of the track the CD player will automatically return to the beginning. The track will continue to repeat until the STOP button is
pressed. Alternatively to cancel REPEAT 1, press the REPEAT button twice to toggle past REPEAT ALL and back to normal PLAY mode.
REPEAT ALL TRACKS ON THE DISC
Press the REPEAT button twice and the REPEAT ALL message will appear. Press the PLAY
button and the disc will start playing. The PLAY symbol utogether with REPEAT will be displayed.
NOTE: You can select REPEAT ALL mode while the disc is playing.
At the end of the track the CD player will automatically return to the beginning. The track will continue to repeat until the STOP button is
pressed. If the REPEAT button is pressed again, the REPEAT message will disappear and normal play will resume.
Page Six
Destiny CD Player
REPEAT A PROGRAMMED SEQUENCE OF TRACKS
Enter a program and then press the REPEAT button twice. The REPEAT message will appear. Next press PLAY, the PLAY symbol uwill be
displayed and the programmed sequence will start playing. All programmed tracks will continue playing in order until the STOP button is
pressed.
If the REPEAT button is pressed once more, the REPEAT message will disappear and Program mode will resume.
A « B DISC PLAY (REMOTE CONTROL ONLY)
This function is used to repeatedly play a portion of the disc from Point A to Point B.Press the PLAY
button. Go to the starting point of the selection by using the forward or back buttons and press the A - B
button.
The REPEAT An B message will appear with the letter B flashing, and point A will be stored in the
memory.
Press the A- B button again at the end point of your choice. The letter B will stop flashing and point B will
be stored in the memory. The segment between An B will be played repeatedly.
To clear REPEAT An B press the A - B button.
RANDOM OR SHUFFLE PLAY
Use this feature to play tracks on a disc in a random order.Press the Random button on the front panel.
This function is also available from the SRC2 remote handset. Press the PLAY button. A track will be
randomly selected and the disc will start playing.
Press RANDOM during Play and the remaining tracks will be shuffled.
NUMERIC KEYS ON THE REMOTE CONTROL
To save time, tracks can be chosen by pressing any numeric key.
For tracks 1 to 10. If you want to listen to track 4 for example, press the no. 4 button. The track indicator
will show 4. Press PLAY - the PLAY symbol uwill appear and track 4 will start playing.
NOTE: You can select a desired track while the disc is playing. For example, if you want to listen to track
4, just press the No. 4 button and track 4 will start playing.
For more than 10 tracks. If you want to listen to track 14, press button 1 plus button 4 within 2 seconds.
The track indicator will show track 14.
If the Destiny CD Player is already running, track 14 will start playing automatically. If not, press PLAY
uand track 14 will start playing.
u
TROUBLESHOOTING GUIDE
If you have followed the instructions, and are having difficulty operating your compact disc player, please use the simple guide below to help you
solve the problem. Here we have listed the most common hiccups experienced by the users, which we hope will be of some help. Locate the
symptom in table and then check the corresponding possible cause and corrective action to remedy the problem.
Symptom
No power when the rear panel Poor power plug connection at theAC outlet or IEC Insert the power plug firmly into the
power switch is ON. inlet. fuse in the mains plug or IEC inlet has blown. AC outlet. Replace the fuse in the
mains plug or IEC inlet.
Disc play does not read T.O.C. The disc is loaded upside down. The disc is dirty Reload the disc with the label side up
or scratched.ADVD or SACD is being used. Clean the disc. Replace the DVD with
a CD.
No sound. Improper output cable connections. Improper Connect the output cable properly.
amplifier operation.Amplifier is muted. Make sure that the amplifier controls
are set properly.
Sound skips. Damaged, faulty or dirty disc. The CD player is Clean or replace with a new disc.
subject to vibrations or physical shock. Change the location of the player
Programmed sequence will not play. The CD player is in the normal disc play mode. Press the STOP button and then
programme the tracks.
Humming noise. Loose cable connections. Local interference. Press plugs in firmly. Move CD player
to new location.
Remote handset will not function. Batteries low. Replace the batteries.
No display information. Display off. Press display button once.
Page Seven

Creek Audio Limited
12 Avebury Court, Mark Road,
Hemel Hempstead HP2 7TA England
Telephone: +44 (0) 1442 260146 Fax: +44 (0) 870 622 0846
Creek products, designed and engineered in the United Kingdom, are distributed
in more than 40 countries worldwide. For details visit the Creek Audio website.
Table of contents
Other Creek Audio CD Player manuals

Creek Audio
Creek Audio CD50 mk2 User manual

Creek Audio
Creek Audio CD43 User manual

Creek Audio
Creek Audio EVO User manual

Creek Audio
Creek Audio EVOLUTION 50CD User manual

Creek Audio
Creek Audio EVOLUTION 50CD User manual

Creek Audio
Creek Audio Destiny 2 User manual

Creek Audio
Creek Audio CD43 mk 2 User manual

Creek Audio
Creek Audio CD50 User manual

Creek Audio
Creek Audio 4040 User manual

Creek Audio
Creek Audio VOYAGE CD User manual


