5925 Heisley Road • Mentor, OH 44060-1833
Call Toll-free: 877-CRES COR (273-7267) • Fax: 800-822-0393 • www.crescor.com
Rethermalizer FL-CO151027
Rev. 1 (1/16) Page 5 of 12
OPERATING INSTRUCTIONS (continued)
COOKING WITH PRE-SET RECIPES:
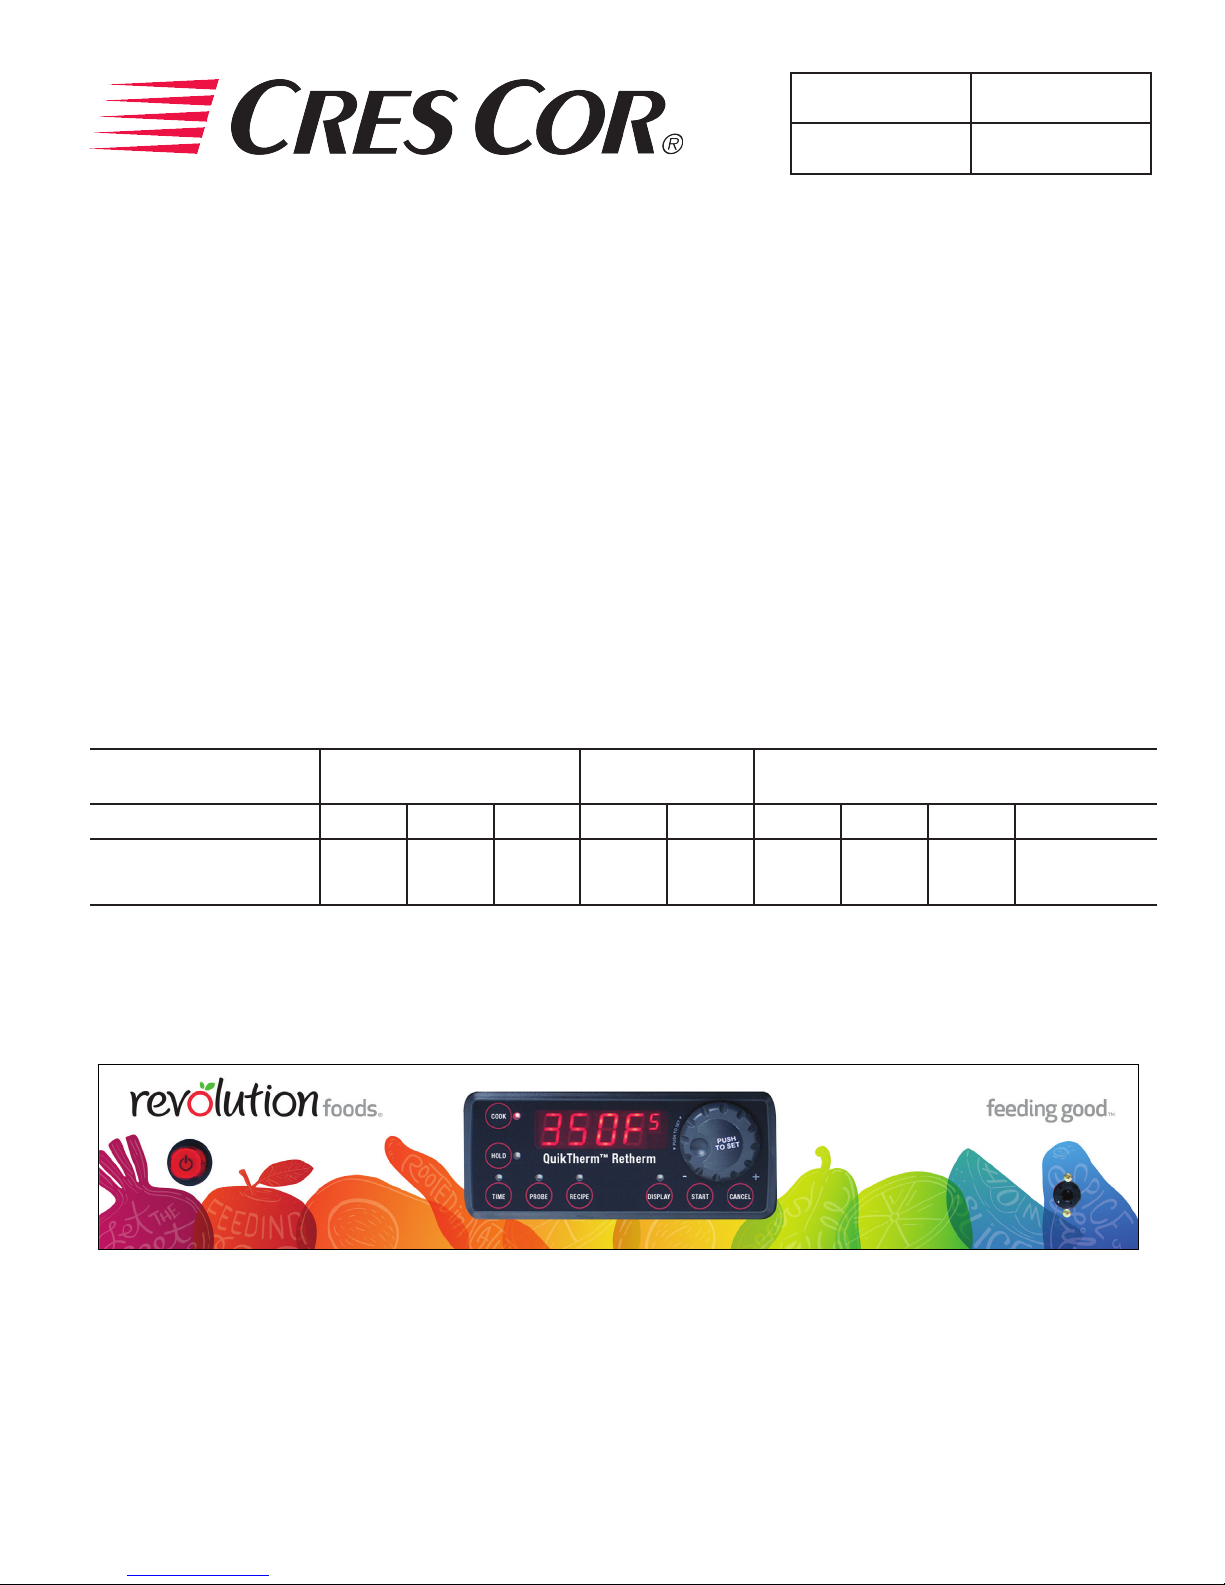
1. Push Orange Power On button. Left side of control
panel. Display will read “LOtPr” and the Retherm
unit will be in HOLD mode.
2. Push the “RECIPE” button to select Preset Recipe
process. Button will ash.
3. Turn the SET knob to select a recipe as: “rcP01” or
“rcP02” or “rcP03” or “rcP04” or “rcP05”. Push the
SET knob to select and start the preset process.
Unit will display “PrEHt”.
4. Control will next ash “PUSH StArt” and alarm
sounds. Load foods into the oven and close doors.
5. Push the “START” button to start the Retherm/Cook
process. Display will change between the set COOK
temperature and the countdown of the timer as pre-
programmed.
6. When timer reaches display of “00:00”, it will change
between the set HOLD temperature and a count-up
running time. Alarm will sound. Retherm unit will
display how long foods have been on hold.
COOKING WITH TIME AND TEMPERATURE:
1. Push Orange Power On button. Left side of control
panel. Display will read “LOtPr” and the Retherm
unit will be in the HOLD mode.
2. Push “COOK” button on display panel to program a
Retherm temperature. Button will ash.
3. Turn the set knob to the required temperature. Push
the set knob to accept the temperature setting.
4. Display will move to the “HOLD” button. Button will
ash until programmed.
5. Turn the set knob to the required temperature. Push the
set knob to accept the temperature setting.
6. Display will automatically move to the “TIME” button
(if no food probe is plugged into the probe jack).
7. Turn the set knob to the required time. Push the set
knob to accept the time setting.
8. Control will go to “PrEHt” and start heating to the set
COOK temperature.
9. Control will next ash “PUSH StArt” and alarm
sounds. Load foods into the oven and close door.
10. Push the “START” button to begin the Retherm/Cook
process. Display will change between the set COOK
temperature and the countdown of the timer.
11. When timer reaches display of “00:00”, it will change
between the set HOLD temperature and a count-up
running time. Alarm will sound. Unit will display how
long foods have been on hold.