manuals.online logo
Brands
  1. Home
  2. •
  3. Brands
  4. •
  5. Crestron
  6. •
  7. Wireless Access Point
  8. •
  9. Crestron CEN-WAP-1500 User manual

Crestron CEN-WAP-1500 User manual

Other Crestron Wireless Access Point manuals

Crestron One-Gang 802.11a/b/g Wireless Access Point... How to use

Crestron

Crestron One-Gang 802.11a/b/g Wireless Access Point... How to use

Crestron One-Gang 802.11a/b/g Wireless Access Point... User manual

Crestron

Crestron One-Gang 802.11a/b/g Wireless Access Point... User manual

Crestron CEN-WAP-ABG How to use

Crestron

Crestron CEN-WAP-ABG How to use

Crestron CEN-WAP-ABG-CM User manual

Crestron

Crestron CEN-WAP-ABG-CM User manual

Popular Wireless Access Point manuals by other brands

TRENDnet TPL-410AP user guide

TRENDnet

TRENDnet TPL-410AP user guide

EnGenius EWS377-FIT quick start guide

EnGenius

EnGenius EWS377-FIT quick start guide

D-Link DWL-6700AP Quick installation guide

D-Link

D-Link DWL-6700AP Quick installation guide

Aerohive Networks Aerohive AP121 Hardware reference guide

Aerohive Networks

Aerohive Networks Aerohive AP121 Hardware reference guide

Vonets VAP11G Step-by-step guide

Vonets

Vonets VAP11G Step-by-step guide

Ubiquiti UniFi AP AC Outdoor quick start guide

Ubiquiti

Ubiquiti UniFi AP AC Outdoor quick start guide

Monoprice MW301A user guide

Monoprice

Monoprice MW301A user guide

D-Link DWL-2700AP - AirPremier Outdoor Wireless Access... user manual

D-Link

D-Link DWL-2700AP - AirPremier Outdoor Wireless Access... user manual

D-Link DWL-2100AP - AirPlus Xtreme G Quick installation guide

D-Link

D-Link DWL-2100AP - AirPlus Xtreme G Quick installation guide

TP-Link Auranet EAP225 Quick installation guide

TP-Link

TP-Link Auranet EAP225 Quick installation guide

D-Link DWL-2100AP - AirPlus Xtreme G Quick installation guide

D-Link

D-Link DWL-2100AP - AirPlus Xtreme G Quick installation guide

Ubiquiti NanoStation NSM2 quick start guide

Ubiquiti

Ubiquiti NanoStation NSM2 quick start guide

Aruba IAP-335 user guide

Aruba

Aruba IAP-335 user guide

Advantek Networks AWN-AP-54MR user manual

Advantek Networks

Advantek Networks AWN-AP-54MR user manual

IP-COM AP355 user guide

IP-COM

IP-COM AP355 user guide

Buffalo AirStation WLA-L11G user manual

Buffalo

Buffalo AirStation WLA-L11G user manual

EnGenius EnStationACv2 user manual

EnGenius

EnGenius EnStationACv2 user manual

D-Link DAP-3662 Quick installation guide

D-Link

D-Link DAP-3662 Quick installation guide

manuals.online logo
manuals.online logoBrands
  • About & Mission
  • Contact us
  • Privacy Policy
  • Terms and Conditions

Copyright 2025 Manuals.Online. All Rights Reserved.

1
quickstart guide
CEN-WAP-1500
www.crestron.com
888.273.7876 201.767.3400
Specifications subject to
change without notice.
CEN-WAP-1500
QUICKSTART DOC. 7642C (2040574) 10.14
High-Powered Dual-Band Wireless Access Point
Health and Safety Recommendations
Warnings for the Use of Wireless Devices: Please observe all
warning notices with regard to the usage of wireless devices.
Potentially Hazardous Atmospheres: Observe restrictions on the
use of radio devices in fuel depots, chemical plants, etc., and areas
where the air contains chemicals or particles (such as grain, dust,
or metal powders).
Safety in Hospitals: Wireless devices transmit radio frequency
energy and may affect medical electrical equipment. When
installed adjacent to other equipment, it is advised to verify that the
adjacent equipment is not adversely affected by the access point.
Prior to installation, read all warning and safety information that
follows.
Warnings and Safety Information
• Verify that the electrical circuits have appropriate grounding and
overload protection.
• Attach only approved power cords to the device.
• Verify there is adequate ventilation around the device and that
ambient temperatures meet equipment operation specifications.
• The CEN-WAP-1500 is designed for indoor use only. DO NOT
place this outdoors.
• DO NOT install in or near hot or humid places, such as a kitchen
or bathroom. Take care to minimize exposure to excessive heat or
moisture.
• Small parts and plastic bags used for packaging may be harmful
to small children. KEEP All ACCESSORIES OUT OF THE REACH
OF CHILDREN!
• The CEN-WAP-1500 may become hot when in use for extended
time periods. This is normal and is not a malfunction. DO NOT
install where it is exposed to paper, cloth, or other flammable
materials.
!
!
1
The Crestron® CEN-WAP-1500 high-powered access point is designed
for optimal performance as well as for simple and efficient installation
and setup. The device can be mounted on a ceiling or wall or placed
on a flat surface such as a desk.
Since the signal generated by the CEN-WAP-1500 is omnidirectional,
the unit should be mounted in the center of the desired coverage area.
The orientation of the unit is less important than the mounting location.
CAUTION: The CEN-WAP-1500 must be used with the supplied
PoE injector. The device does not operate with other PoE injectors.
Introduction
2NOTE: The circular mounting bracket is required in all installation
positions to allow for adequate airflow.
Ceiling and Wall Mounting
The CEN-WAP-1500 comes with a circular mounting bracket to mount
it to the wall or ceiling.
1. Use the circular mounting bracket as a template to mark the
mounting holes on the wall or ceiling.
2. Use the supplied drywall anchors and screws to attach the circular
mounting bracket to the wall or ceiling.
3. Place the CEN-WAP-1500 over the circular mounting bracket and
twist clockwise until secured.
Mounting Circular Mounting Bracket to the Ceiling
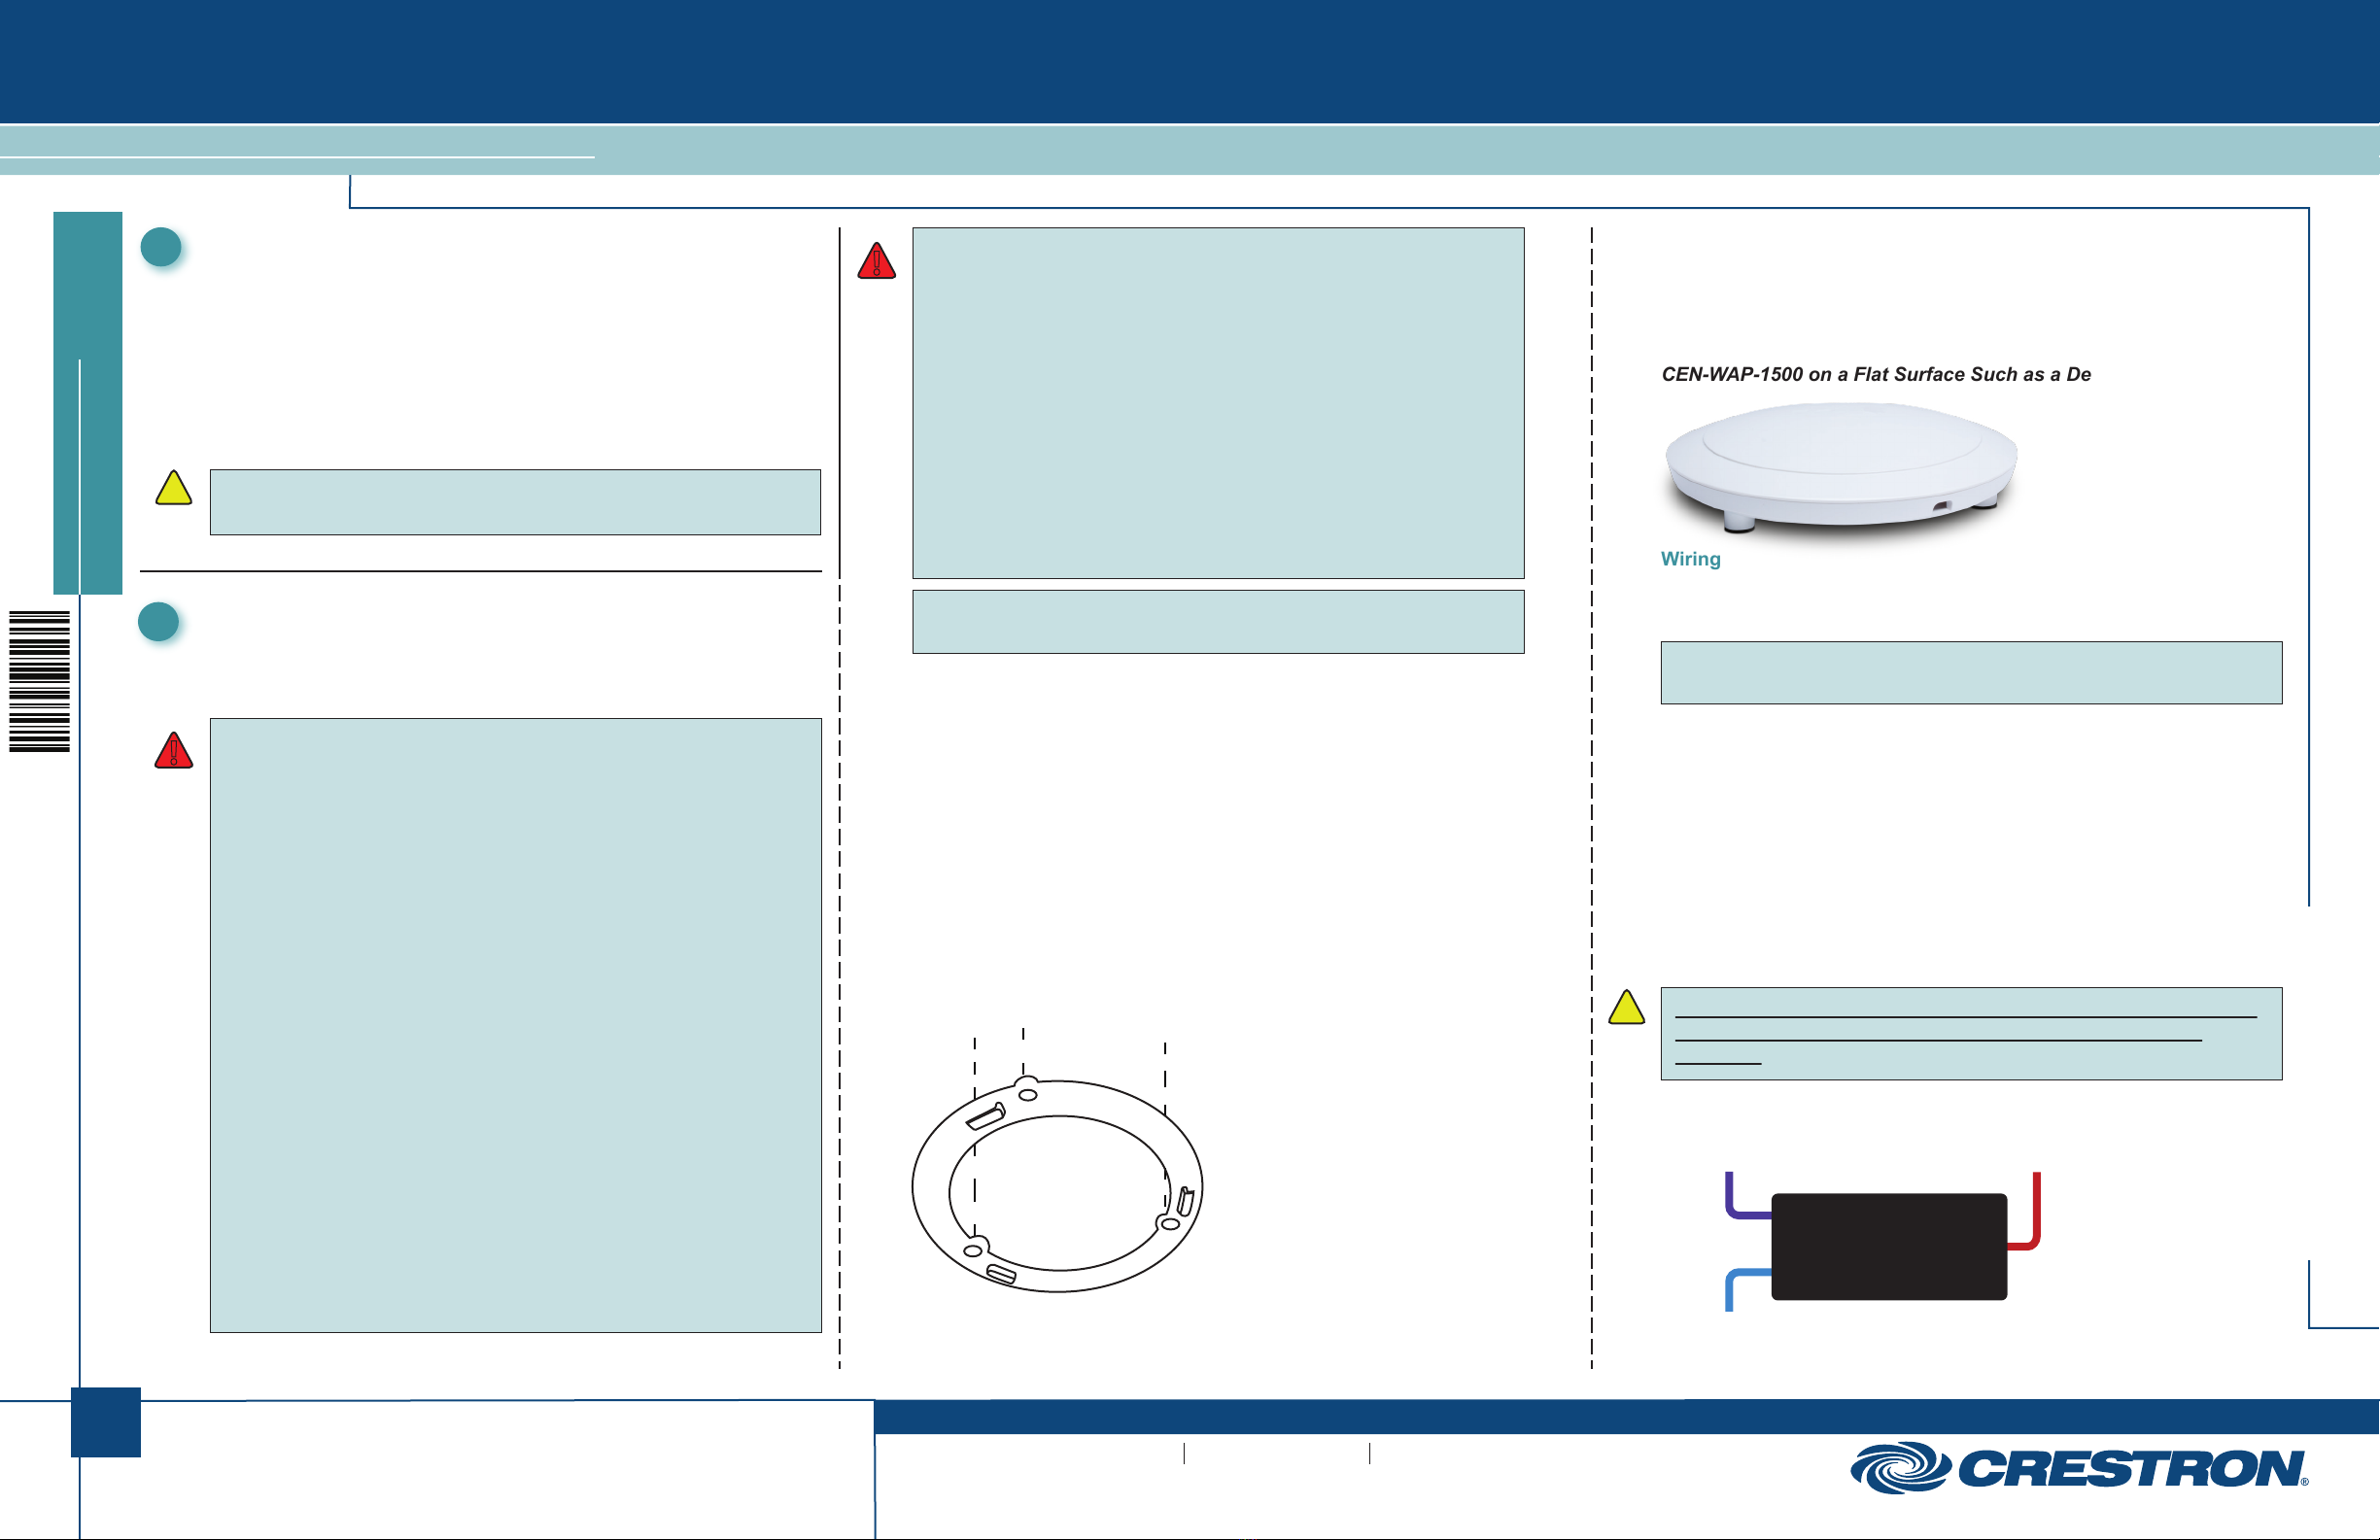
Flat Surface Installation
Place the device over the circular mounting bracket and twist clockwise
until secured. Attach the included rubber footpads to the circular
mounting bracket and place the CEN-WAP-1500 on any flat surface.
CEN-WAP-1500 on a Flat Surface Such as a Desktop
Wiring
Make the following connections to wire the CEN-WAP-1500:
NOTE: Prior to wiring, remove the label that covers the DATA IN and
DATA & PWR OUT ports.
• Connect an Ethernet cable from the router or switch to the DATA IN
port of the included PoE injector.
• Connect an Ethernet cable from the DATA & PWR OUT port of the
included PoE injector to the PoE port on the CEN-WAP-1500.
• Connect the included ac cord to the power input of the included
injector and then to the ac outlet.
The PoE injector combines power and data then transmits it to the
CEN-WAP-1500.
CAUTION: The CEN-WAP-1500 must be used with the supplied
PoE injector. The device does not operate with other PoE
injectors.
PoE Injector Connections
Installation
PoE
Injector
From Power
Supply
From Router
or Switch
To
CEN-WAP-1500
DATA &
PWR OUT
DATA IN
For regulatory compliance information, refer to Doc. 7643.
!
!
2
quickstart guide
CEN-WAP-1500
www.crestron.com
888.273.7876 201.767.3400
Specifications subject to
change without notice.
CEN-WAP-1500
QUICKSTART DOC. 7642C (2040574) 10.14
High-Powered Dual-Band Wireless Access Point
Wiring (Continued)
CEN-WAP-1500 Connections
The specific patents that cover Crestron products are listed at patents.crestron.com.
Crestron, the Crestron logo, and Crestron Toolbox are either trademarks or registered trademarks of
Crestron Electronics, Inc. in the United States and/or other countries. WPA and WPA2 are either
trademarks or registered trademarks of Wi-Fi Alliance in the United States and/or other countries. Other
trademarks, registered trademarks, and trade names may be used in this document to refer to either the
entities claiming the marks and names or their products. Crestron disclaims any proprietary interest in the
marks and names of others. Crestron is not responsible for errors in typography or photography.
This document was written by the Technical Publications department at Crestron.
©2014 Crestron Electronics, Inc.
3
Use Crestron Toolbox™ to discover the CEN-WAP-1500. From the Tools
menu, select Device Discovery Tool. The CEN-WAP-1500 must be
placed on a network with a DHCP server for the Device Discovery Tool to
find the device. The CEN-WAP-1500 home page opens.
The default username and password is admin. For security, the
password should be changed during configuration.
The CEN-WAP-1500 security defaults to WEP. To provide adequate
security, the CEN-WAP-1500 should be configured to use WPA™ or
WPA2™security.
Refer to the on-screen help for assistance when configuring the
CEN-WAP-1500.
NOTE: IEEE 802.1q VLAN tagging is supported on the
CEN-WAP-1500. This feature is disabled by default and can be
enabled during configuration. If the network is not configured to
maintain tagging for VLAN 1 traffic prior to enabling this feature, the
ability to manage the CEN-WAP-1500 is lost.
Configuration
4
To connect a device to the wireless network, select the wireless
network and then enter the password set up during configuration. The
default SSID for the 2.4 Ghz network is Crestron; the default SSID
for the 5 GHz network is Crestron_5. The default WEP key for the 2.4
and 5 GHz networks is 1122334455. It is recommended to change the
default password, or, preferably, change the security from WEP to
WPA or WPA2 security during configuration.
To connect a device to the wired network, use an Ethernet cable to
connect the device to the LAN port on the CEN-WAP-1500.
Connect a Client Device
5
The Power, 2.4GHz, and 5GHz LEDs illuminate to indicate device
function. Refer to the image and table below for LED location and
functionality.
The PoE and LAN LEDs illuminate to indicate communications
status. Refer to the image and table below for LED location and
functionality.
LEDs
The PoE injector’s LED illuminates to indicate it is receiving power.
From PoE
Injector
To Additional Wired
Network Devices
For regulatory compliance information, refer to Doc. 7643.
NAME STATUS FUNCTION
Power On Indicates that the device is on
2.4GHz On Indicates that the device is broadcasting
a 2.4GHz network
5GHz On Indicates that the device is broadcasting
a 5GHz network
NAME STATUS FUNCTION
PoE(Power and
Data Input)
Yellow Connected device is
10/100 Mbps
Green Connected device is 1000 Mbps
LAN(Data Out) Flashing
Yellow or
Green
Indicates that data packets are
being passed