Cronyx Tau-PCI-E3 User manual

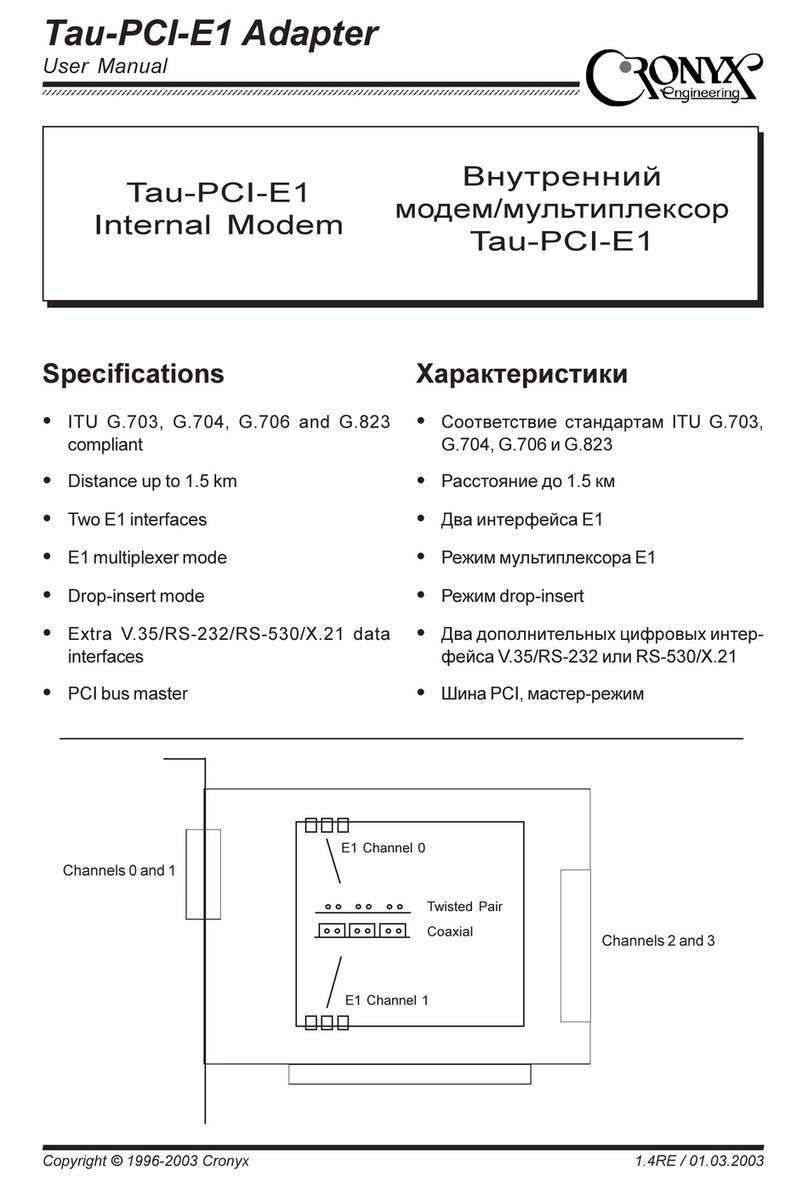
Tau-PCI-E3 Adapter
User Manual
August 2004
12345678901234567890123456789012123456789012345678901234567890121234567890123456789012345678901212345678901
12345678901234567890123456789012123456789012345678901234567890121234567890123456789012345678901212345678901
Specifications
•Distance up to 440 m
•One interface G.703.8
34.368 Mbps (E3)
•Full duplex synchronous mode
•Built-in BER tester
•PCI bus, master mode
Contents
Technical Specifications
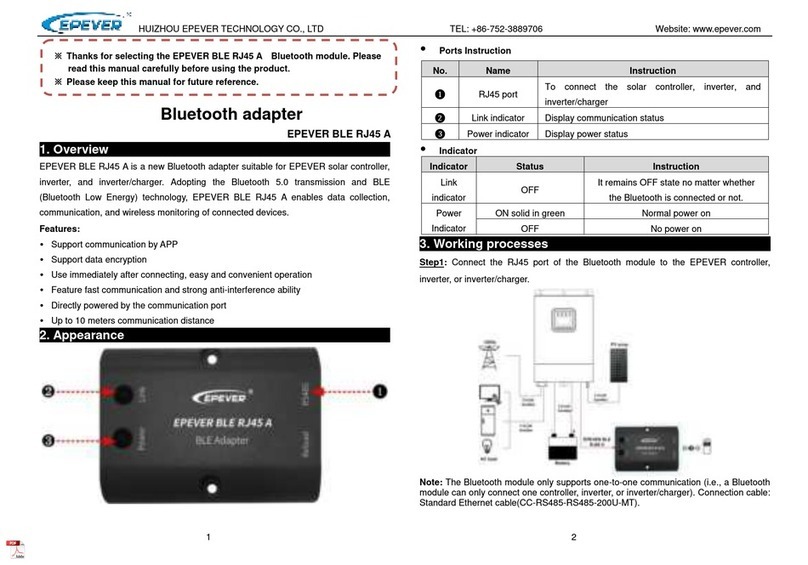
Description
Models
Check list
Adapter Installation
G.703 Line Protection
Adapter Testing
Software Installation
Driver installation in FreeBSD and Linux
operating systems
Channels configuration in FreeBSD
Channels configuration in Linux
Version 1.2
Adapter
Tau-PCI-E3
Receipt
Transmission

TAU-PCI-E3 ADAPTER
123456789012345678901234567890121234567890123456789012345678901212345678901234567890123456789012123456789012345678901234567890121234567890123456
123456789012345678901234567890121234567890123456789012345678901212345678901234567890123456789012123456789012345678901234567890121234567890123456
Copyright © 2003-2004 Cronyx Engineering.2
Technical Specifications
Bus type ...................................................................... PCI 33 MHz/32 áèò
Synchronous protocol .................................................. HDLC
Supported protocols .................................................... PPP, Cisco/HDLC, Frame Relay
Operating systems ....................................................... Linux, FreeBSD, Windows 2000/XP
Card dimensions .......................................................... Height 107 mm, width 140 mm
G703 Interface
Data rate ..................................................................... 34.368 Mbps
Line code .................................................................... HDB3
Line impedance ........................................................... 75 Ohm (coaxial)
Receive signal attenuation range ................................... from 0 to -15 dB (up to 440 m)
BER-tester .................................................................. 2e23-1 pseudorandom bit sequence
Error detection ............................................................ Code violation

TAU-PCI-E3 ADAPTER
1234567890123456789012345678901212345678901234567890123456789012123456789012345678901234567890121234567890123456789012345678901212345678901234567
1234567890123456789012345678901212345678901234567890123456789012123456789012345678901234567890121234567890123456789012345678901212345678901234567
Copyright © 2003-2004 Cronyx Engineering. 3
Adapter Installation
Make sure that your computer power supply unit
has adequate power reserve for an additional card
installation.
• Make sure that computer is turned off!
• Remove the chassis cover, find free PCI slot and
remove the corresponding bracker on the rear
side of the chassis.
• Insert the multiplexer into the slot as far as it goes
and screw it to the chassis rear side.
• Put the chassis cover back in place.
• Connect the communication equipment using
appropriate cables (not included into the delivery
set).
G.703 Line Protection
The data lines can be subject to pulse interference
from electrostatic and lightning discharges or other
sources. If you use long lines extending beyond one
building it is recommended to use special protection
devices (Communication Line Surge Suppressors),
which shall be located in close vicinity to a computer.
Adapter Testing
• Boot up the computer from the diskette labeled
as "Diag (Boot)" DIAG utility will be started
automatically after boot up, it will search for the
adaptors installed.
• Select “General Test” from “Test” menu. The main
adapter data circuits will be checked (bus test)
and then the internal testing of all channels will
be started.
The testing shall be error-free (a few CRC errors
are allowed in the beginning of the test due to
synchronization tuning).
• To check the external signal circuits, go to
“Channel” menu, select appropriate channel
number (line “Select Channel”…), connect an
external contactor to the selected channel slot
Description
Tau-PCI-E3 family multiplexers are designed to be
used in Intel-compatible computers with PCI bus for
the computer direct connection to G.703.8 (E3)
communications channels.
Tau-PCI-E3 multiplexer implements HDLC
synchronous protocol. The data is transferred over
the direct memory access channel in the master
mode, which ensures efficient utilization of the
computer input/output bus.
The adapter is supplied with Linux, FreeBSD and
MS Windows 2000 drivers. The Driver
Development Kit is available for special-purpose
software developers. The latest software versions
are available at www.cronyx.ru.
Models
The multiplexer is manufactured in several versions:
• Tau-PCI-E3 - one E3 channel
(34.368 Mbps, 75 Ohm cable up to 440 m)
• Tau-PCI-E3 - one E3 channel
(44.736 Mbps, 75 Ohm cable up to 440 m)
• Tau-PCI-STS1 - one STS-1 channel
(51.84 Mbps, 75 Ohm cable up to 440 m)
Check List
The complete package consists of:
• Tau-PCI-E3 adapter card
• Two diskettes or a CD with software
• User manual
Note: the interface cables are not included into the
package and shall be purchased separately.

Cronyx Engineering. Marshala Sokolovskogo str. 4 Phone/Fax: +7 (095) 742-1771
Moscow, Russia 123060 WWW: www.cronyx.ru
ÊÁ Êðîíèêñ óë. Ìàðøàëà Ñîêîëîâñêîãî 4 FTP: ftp.cronyx.ru
TAU-PCI-E3 ADAPTER
123456789012345678901234567890121234567890123456789012345678901212345678901234567890123456789012123456789012345678901234567890121234567890123456
123456789012345678901234567890121234567890123456789012345678901212345678901234567890123456789012123456789012345678901234567890121234567890123456
Copyright © 2003-2004 Cronyx Engineering
is started, e.g. from /etc/rc file and is not modified
thereafter. Full sconfig utility description is included
into the supplied software package, see "man
sconfig".
Channels configuration in
Linux OS
Sconfig utility is used to set the Tau-PCI adapter
channels modes in Linux OS. Use the samples
supplied in the distribution kit to create the command
file that sets the channels operation modes when the
operating system is started. The sconfig help can be
retrieved using the command:
sconfig help
and start the test with external loopback (External
Loopback line).
• In case the connected communication equipment
supports the loopback mode it can be used
instead of the short-circuit to check the cable.
For this purpose switch the external equipment
to the loopback mode and start the channel
testing with external loopback (“Channel” menu,
“External Loopback” line).
• The synchronization mode, rate, test data type
etc. can be changed from “Setup” menu. Use
“Channel”, “Adapter” and “Test” menus to test
individual channel, all channels of one adapter
(for multi-channel adapters) or all adapters
simultaneously.
Software Installation
The first diskette supplied with the adapter is
bootable and it is used to test the adapter. The second
floppy disk contains the Linux and FreeBSD drivers.
Driver installation in FreeBSD
and Linux OS
FreeBSD and Linux drivers are recorded on the
second diskette. Readme.txt file contains the full list
of drivers. You can use "mread" utility (mtools
package) to read the files from the diskette. Use
"tar" utility to extract the files. For example:
mread a:linx30.tgz .
tar xvzf linx30.rgz
Install the extracted driver following the instructions
in readme file (or instal-r.txt).
Channels configuration in
FreeBSD OS
Sconfig utility is used to set the channels modes.
Usually the modes are set when the operating system
Table of contents
Other Cronyx Adapter manuals
Popular Adapter manuals by other brands
ZyXEL Communications
ZyXEL Communications PLA6457 user guide
Lindy
Lindy TosLink user manual
Supermicro
Supermicro AOC-ATG-i4SG user guide

Next Level Racing
Next Level Racing 160 ELITE Series instruction manual
Titanium
Titanium TT-PSU-IP20-025W quick start guide
Johnson Controls
Johnson Controls Tyco HSM3WiFi quick start guide
