manuals.online logo
Brands
  1. Home
  2. •
  3. Brands
  4. •
  5. Crosley
  6. •
  7. Washer
  8. •
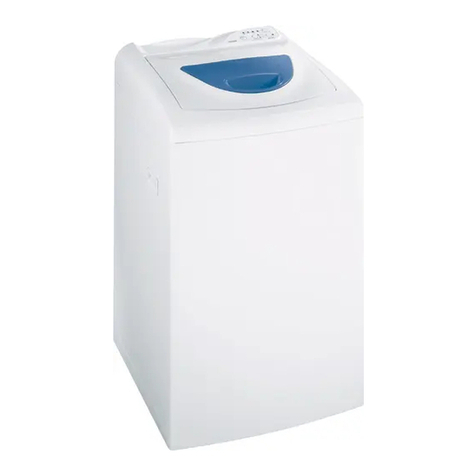
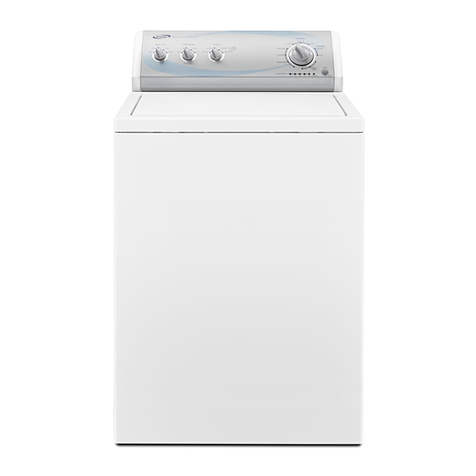
  9. Crosley CAWC529JQ1 User manual

Crosley CAWC529JQ1 User manual

Other manuals for CAWC529JQ1

1

Other Crosley Washer manuals

Crosley 8578242 User manual

Crosley

Crosley 8578242 User manual

Crosley BTF2140ES0 User manual

Crosley

Crosley BTF2140ES0 User manual

Crosley CB-8500GW User manual

Crosley

Crosley CB-8500GW User manual

Crosley BYCW6292W0 User manual

Crosley

Crosley BYCW6292W0 User manual

Crosley YTW4514PNDG Original instructions

Crosley

Crosley YTW4514PNDG Original instructions

Crosley CFWH4084GW User manual

Crosley

Crosley CFWH4084GW User manual

Crosley CAH-1 User manual

Crosley

Crosley CAH-1 User manual

Crosley CFW4000FW1 User manual

Crosley

Crosley CFW4000FW1 User manual

Crosley 8212638RP User manual

Crosley

Crosley 8212638RP User manual

Crosley CAW9444DW1 User manual

Crosley

Crosley CAW9444DW1 User manual

Crosley Conservator 3953964 User manual

Crosley

Crosley Conservator 3953964 User manual

Crosley CAWS966RQ1 User manual

Crosley

Crosley CAWS966RQ1 User manual

Crosley CAWB527MQ2 User manual

Crosley

Crosley CAWB527MQ2 User manual

Crosley CFW4500KW0 User manual

Crosley

Crosley CFW4500KW0 User manual

Crosley Conservator CAWX629JQ1 User manual

Crosley

Crosley Conservator CAWX629JQ1 User manual

Crosley CAWC529JQ1 User manual

Crosley

Crosley CAWC529JQ1 User manual

Crosley CFW-8000GBL User manual

Crosley

Crosley CFW-8000GBL User manual

Crosley CW5500W User manual

Crosley

Crosley CW5500W User manual

Crosley 134860400 User manual

Crosley

Crosley 134860400 User manual

Crosley CSWS16445WQ0 User manual

Crosley

Crosley CSWS16445WQ0 User manual

Crosley YFW450 Original instructions

Crosley

Crosley YFW450 Original instructions

Crosley CAW12444XW2 User manual

Crosley

Crosley CAW12444XW2 User manual

Crosley CFW7500KB0 User manual

Crosley

Crosley CFW7500KB0 User manual

Crosley CFW7700LR0 Owner's manual

Crosley

Crosley CFW7700LR0 Owner's manual

Popular Washer manuals by other brands

Zanussi ZWF 14080 W user manual

Zanussi

Zanussi ZWF 14080 W user manual

Zanussi FV 825 N Instruction booklet

Zanussi

Zanussi FV 825 N Instruction booklet

LG WM8000HVA Specifications

LG

LG WM8000HVA Specifications

Whirlpool 3RGSC9400 Use and care guide

Whirlpool

Whirlpool 3RGSC9400 Use and care guide

Zanussi TJ 1284 H instruction manual

Zanussi

Zanussi TJ 1284 H instruction manual

AEG KO-LAVAMAT 74740 User information

AEG

AEG KO-LAVAMAT 74740 User information

Beko WSRE7512PRA user manual

Beko

Beko WSRE7512PRA user manual

Whirlpool LA5OOOXP Use and care guide

Whirlpool

Whirlpool LA5OOOXP Use and care guide

Miele PW 6207 operating instructions

Miele

Miele PW 6207 operating instructions

GE GE Profile WWSE3160AAA Specifications

GE

GE GE Profile WWSE3160AAA Specifications

Bush WMNB712EB instruction manual

Bush

Bush WMNB712EB instruction manual

ALLIANCE UW60AV Information manual

ALLIANCE

ALLIANCE UW60AV Information manual

Bosch WAN280H3 User manual and installation instructions

Bosch

Bosch WAN280H3 User manual and installation instructions

Maytag MAT15MNAW installation instructions

Maytag

Maytag MAT15MNAW installation instructions

LG T2109VSAL owner's manual

LG

LG T2109VSAL owner's manual

Indesit IWC 61481 Instructions for use

Indesit

Indesit IWC 61481 Instructions for use

Electrolux EWF12843 user manual

Electrolux

Electrolux EWF12843 user manual

Indesit WIN 70 Instructions for use

Indesit

Indesit WIN 70 Instructions for use

manuals.online logo
manuals.online logoBrands
  • About & Mission
  • Contact us
  • Privacy Policy
  • Terms and Conditions

Copyright 2025 Manuals.Online. All Rights Reserved.

itl
!(iii
Use Care
A Note to You ........................................... 2
Washer Safety .......................................... 3
Parts and Features .................................. 4
Washer InstaHat{on .................................. 5
Using Your Washer .................................. 7
Starting your washer ............................. 7
Loading ................................................. 8
Selecting a cycle and time .................... 9
Drain and spin ....................................... 9
Using the liquid chlorine
bleach dispenser ................................. 10
Using the liquid fabric
softener dispenser ............................... 10
Manual clean lint filter ......................... 11
Understanding normal washer sounds..11
Understanding what happens in
each cycle ........................................... 12
Caring For Your Washer ....................... 13
Troubleshooting .................................... 14
Assistance or Service ........................... 17
Warranty ................................................. 20
For assistance or service,
call the Consumer Assistance Center:
(CROSLEY)
www.crosley.com
3967364
ank youforbuying]aCROSLEappliance.
To ensure that you enjoy years of trouble4ree operation, we developed this Use and Care Guide. It is full of
valuable information about how to operate and maintain your appliance properly and safely. Please read it
carefully.
Also, please complete and mail the Product Registration Card provided with your appliance. The card helps
us notify you about any new information on your appliance.
Whenever you call to request service for your
appliance, you need to know your complete model
number and serial number. You can find this
information on the model and sedal number plate (see
the diagram in the "Parts and Features" section).
Please also record the purchase date of your
appliance and your dealer's name, address, and
telephone number.
Model Number
Serial Number
Purchase Date
Dealer Name
Dealer Address
Dealer Phone
Keep this book and the samos s|ip together in a safe p|ace for future reference° It is important for
you to save your sales receipt showing the date of purchase° Proof of purchase will assure
you of in-warranty service.
Yoursafetyandthesafety0fothersisveryimportant.
We have provided many important safety messages in this manual and on your appliance. Always read and
obey all safety messages.
This is the safety alert symbol.
This symbol alerts you to hazards that can kill or hurt you and others.
All safety messages will be preceded by the safety alert symbol and the word "DANGER" or
"WARNING." These words mean:
You wilm be killed or seriously injured if you don't
foltow instructions.
You can be kilted or seriously injured if you don't
follow instructions.
All safety messages will identify the hazard, tell you how to reduce the chance of injury, and tell you what can
happen if the instructions are not followed.
iMPORTANT SAFETY iNSTRUCTiONS
WARNING: To reduce the risk of fire, electnc shock, or injury to persons when using the
washer, follow basic precautions, including the following:
Read all instructions before using the ,Do not allow children to play on or in the
washer.
,Do not wash articles that have been
previously cleaned in, washed in, soaked
in, or spotted with gasoline, dry cleaning
solvents, other flammable, or explosive
substances as they give off vapors that
could ignite or explode.
•Do not add gasoline, dry cleaning
solvents, or other flammable, or explosive
substances to the wash water. These
substances give off vapors that could
ignite or explode.
,Under certain conditions, hydrogen gas
may be produced in a hot water system
that has not been used for 2 weeks or
more. HYDROGEN GAS IS EXPLOSIVE.
If the hot water system has not been
used for such a period, before using the
washing machine, turn on all hot water
faucets and let the water flow from each
for several minutes. This will release any
accumulated hydrogen gas. As the gas is
flammable, do not smoke or use an open
flame during this time.
washer. Close supervision of children is
necessary when the washer is used near
children.
•Before the washer is removed from service
or discarded, remove the lid.
Do not reach into the washer if the basket
or agitator is moving.
•Do not install or store the washer where it
will be exposed to the weather.
•Do not tamper with controls.
•Do not repair or replace any part of the
washer or attempt any servicing unless
specifically recommended in this Use and
Care Guide or in published user-repair
instructions that you understand and have
the skills to carry out.
•See Installation Instructions for grounding
requirements.
SAVE THESE iNSTRUCTiONS
Liquid chlorine
bleach dispenser
(p, I0) ..................
Liquid fabric
softener dispenser
(p. 10)
Mode[ and serial
number plate
/
/
f
Water level selector
.... (p. 7)
Temperature selector
.... (p. 7)
.... Cycle selector
....... ....... knob
........... (p. 8)
............Start/Pause button
(p. 8)
\\
.............................................. Cycle status lights
(p. 8)
Manual clean
]Jnt filter
(attached to bottom of
fabric softener
dispenser - not
shown)
(p. 11)
To erder Stand Kits:
• Washer Stand Kit for permanent installation,
secured to the wail:
- #49971, White
- #49978, Almond
NOTE: The wail must be strong enough to support
the washer's weight. (Do not use in mobile homes.)
Electrical Shock Hazard
Plug into a grounded 3 prong outlet.
Do not remove ground prong.
Do not use an adapter.
Do not use an extension cord.
Failure to follow these instructions can result
in death, fire, or electrical shock.
A 120-volt, 60=Hz., AC-only, 15-or 20-ampere fused
electrical supply is required. Time-delay fuse or circuit
breaker is recommended.
GROUNDING INSTRUCTIONS
For your personal safety, this washer must be
grounded. Check with a qualified electrician or
serviceman if you are in doubt as to whether the
appliance is properly grounded. Do not modify the
plug provided with the appliance - if it will not fit the
outlet, have a proper outlet installed by a qualified
electrician.
NOTE: Make sure the lid is closed before
moving the washer.
• Use the hose connector provided with the washer
for a one=faucet connection.
o Set the Temperature Selector to WarmlWarm or
to WarmlCold.
o Attach the hose connector to the faucet adapter by
pulling down on the locking collar while lifting up
on the connector until it snaps into place.
• Slowly turn the water faucet on all the way.
o Pull the electrical power cord from the storage
area in the back of the washer. Plug the power
cord into a 3 prong grounded outlet.
Water temperature adjustment:
Adjust water temperature as follows:
• Wash Water: Adjust faucets for wash water
temperature prior to the fill for wash.
• Rinse Water: Adjust faucets for temperature prior
to fill for rinse.
NOTE: Always use cold rinse water for permanent
press fabrics.
Faucet adapter
Hose connector
!!i!i!!ii'_!i,i!_I!]ii!!iiiii]iiii'i_]iii_!iii_i!ii!!!!i]!iii!iii!!_!'ii_!!]]'iIi_ii:!!!! !!! !!!! i!!! i
1)()!l[!l'ii!i_il!!!i_!iL!!ii!()!itI!!!"iii::;,ii!ii_:_i!i,,,iiii,(]!!!i"iiil'_¸()i]iii"_ii_:,_,tii!i!,C1'_!!,_ii!i]ii',,,t,_ii::i_:,)i::i__i,_,,,,ii,
To disconnect washer:
• Unplug the electrical power cord and put it back in
its storage area.
• Turn the water faucet off.
o Press the red water flow button to release the
water pressure.
• Move the locking collar down and put the hose
connector down to disengage from the faucet
adapter.
o Drain water from the hoses through the hose
connector.
Water flow button
....Locking collar
Hose connector
o Hang the hoses on the storage rack.
IMPORTANT: Service Kit #3430190 must be
purchased when using a portable model on a
two-faucet connection.
NOTE: Make sure the lid is closed before
moving the washer.
If you have two separate water connections, your
washer can be connected to both the hot and cold
water faucets. For more information about a se_'_ce
kit, contact your authorized dealer.
To connect the washer:
o Insert one new, flat washer into each end of the
water inlet hoses. Check that washers are firmly
seated in the couplings.
• Connect the hot and cold water inlet hoses to the
hot and cold faucets.
• Secure the drain hose to the sink or standpipe.
o Slowly turn the water faucets on all the way.
• Plug the power cord into a 3 prong grounded
outlet.
To disconnect the washer:
• Unplug power cord and return it to the storage
area.
o Turn water faucets off.
o Disconnect the drain and water supply hoses.
Hang them on the storage rack.
Coupling Washer
Fire Hazard
Never place items in the washer that are
dampened with gasoline or other
flammable fluids.
No washer can completely remove oil.
Do not dry anything that has ever had any
type of oil on it Onc_uding cooking oils).
Doing so can result in death, explosion,
or fire.
1. Measure detergent and pour it into the washer.
if desired, add powdered or liquid color=safe
bleach.
2. Drop a sorted load of clothes loosely into your
washer.
o Load evenly to maintain washer balance.
o Mix large and small items. See the
"Loading" section.
3. (OPTIONAL STEP) If desired, add measured
liquid chloNne bleach to the bleach dispenser.
See "Using the liquid chlorine bleach dispenser"
later in this section.
4. (OPTIONAL STEP) If desired, pour measured
liquid fabric softener into the liquid fabric
softener dispenser. See "Using the liquid fabric
softener dispenser" later in this section.
5. Close the washer lid.
6. Set the Water Level selector to the correct
setting for your wash load and the type of
fabric being washed.
o Choose a water level that allows the load to
move freely. See "Loading" later in this
section.
• To change the setting after the water has
started filling, turn the selector to a different
setting.
7. Set the Temperature selector to the correct
setting for the type of
........co_,_,o,, fabrics and soils being
"0 s_ washed_
COLD WARM _O_A_;_
WARM SETTINC
TEMPERATUR[
WASH
• Use the warmest water safe for fabric.
• Follow garment label instructions.
NOT." 111°F (44°C) or above.
= Whites and pastels.
= Heavy and greasy soils.
WARM: 90 to 110°F (32 to 43°C).
= Bright colors.
= Moderate to light soils.
COLD: 70 to 90°F (21 to 32°C).
= Colors that bleed or fade.
= Light soils.
For portable use:
• Set the Temperature selector to Warm/Warm.
• To select a different wash or rinse water
temperature, adjust the faucet prior to the wash
or rinse water fill.
!i!illi !iiii!', iiiiiii iii!!!iiiii'i iii ii!iiiil'ii' 'ii!ii:' il¸ ! !!!!!i
8. Turn the Cycle Selector knob to the desired
wash cycle. See "Selecting a
cycle and time" later in this
section.
mPush the Start/Pause button to start the
washer.
NOTE: The Cycle Selector
knob will NOT rotate as the
cycle progresses.
• The Cycle Status lights
indicate the operation being
was.• performed within the cycle.
_Ns_• o When the cycle is com-
sPiN• plete, all Cycle Status lights
will be Off.
NOTE: To change a cycle selection after the
cycle has started, turn the Cycle Selector
knob to Off, then select a new cycle.
Stoppin_]lrestartin_]yourwasher
o To pause the washer at any time, push the
Start/Pause button. The Cycle Status lights will
flash while the washer cycle is paused. If left in
pause, the cycle will terminate after 2 hours.
• To restart the washer, close the lid (if necessary)
and push the Start/Pause button.
o To cancel cycle, turn Cycle Selector knob to Off.
Cycle Status lights will turn off.
NOTE: When lid is opened during a cycle, all
machine operation will stop. Cycle will resume
when lid is closed.
Loadin_su_]_estions
For these suggested fullosized loads, set the Water Level selector to the highest setting.
COMPACT WASHERS
Heavy Work Clothes Knits
3 work shirts 2 slacks
2 pair pants 2 shirts
-or-
3dresses
Towems DeHcates
9 bath towels 1 camisole
Mixed Load
1 pair slacks
2 pillowcases
2 shirts
1 Tzshirt
Permanent Press
6 shirts
-- or -
2 double sheets
=or =
6 bath towels
3 hand towels
6 wash cloths
2
2
2
1
1
slips
panties
bras
nightie
half slip
2 pillowcases
-- or -
2 single sheets
2 pillowcases
Thissectionillustratesanddescribesthewash
cyclesyoucanselectwiththeCycleSelectorknob.
Usethisinformationtohelpyoumakethebestcycle
selectionsforyourwashloads.Eachcycleis
designedfordifferenttypesoffabricsandsoilleveJs.
oRefertopage12tohelpyouunderstandwhat
happensduringawashcycle.
NOTE:DuringSpin,thewasherwillcycleOnandOff.
Thisisnormal.
PERMANENT
PRESS OFF NORMAL
_ECULA_10 .__ 10RECULAR
DELICATES 8 30 SOAK
DRAIN &
SPIN
NemaRegular@de
This cycle features high agitation and Jonger spin
speeds to shorten drying time. Use this 10-minute
cycle for cleaning sturdily-constructed cotton and
linen fabrics.
Pe anentPressRegular@de
This cycle features high agitations, a cool-down
rinse and low spin speeds to reduce wrinkJing. Use
this 10-minute cycJe to clean permanent press and
some synthetic fabrics that are moderately soiled.
De[icatesCyde
This cycle features a reduced agitation speed for
gentle soiJ removal, and low spin speeds to reduce
wrinkling. Use this 8-minute cycle to cJean delicate
items and washable knits that are lightly to
moderately soiJed.
SeakCycle
The Soak cycJe features brief periods of agitation and
soak time. Use this 30-minute cycle to remove heavy
soils and stains that need pretreatment. Use warm
water when soaking laundry. (Hot water can set stains.)
Use the amount of detergent or presoak additive
recommended by manufacturer.
• When soaking with color safe bJeach, you may
extend the soak cycle for up to 2 hours by lifting the
lid.
o When using liquid chJorine bJeach, never extend the
soak cycJe. ProJonged soaking with liquid chlorine
bleach may damage clothes.
o When soaking with detergent alone, soak for at least
5 minutes.
• When the Soak cycle ends, add detergent and set a
new wash cycle.
NOTE: During the agitation and soak time, the wash
Cycle Status light wiJJbe on.
The Drain and Spin cycle helps shorten drying times
for some heavy fabrics or speciaJ-care items by
removing excess water.
1. For a drain and spin, turn the Cycle Selector knob
to the Drain and Spin setting.
2. Push the Start/Pause button. The washer drains,
then spins.
iiiiiiii!ii i!ii!i!!i:ii:il¸i !!!iiiiiiiiiiiiii!!!!!ii!!:iii:iiiiiiiiiiii ii !!!!iii!i iiii! iii i
Always measure liquid chlorine bleach. Do not
guess. Never use more than 1 cup (250 mL) for a
full load. Use less with lower Water Level settings.
Follow manufacturer's directions for safe use. Use a
cup with a pouring spout to avoid spilling.
1. Load the washer.
2. Pour measured liquid chlorine bleach carefully
into the dispenser. Do not Jet bleach splash,
drip, or run down into washer basket. Undiluted
bleach will damage any fabric it touches.
3. Start the washer. Bleach will be diluted and
dispensed automatically during wash part of
cycle.
NOTE: Do not use this dispenser to add powdered
chlorine or color safe bleach to your wash load. The
dispenser is for liquid chlorine bleach use only.
,
2.
,
Add detergent and load clothes into the basket.
Pour liquid fabric softener into the dispenser using
the amount recommended on the package. Avoid
dripping or spilling any fabric softener on the load.
Dilute fabric softener with warm water.
Fill dispenser with warm water until liquid reaches
the cross bar in the opening.
Start the washer. Diluted fabric softener will be
added to the load during the rinse cycle.
NOTE: Do not stop the washer before the rinse part
of the cycle begins. Staining can occur.
deanintheliquidf ric suflenerdispenser
Flush dispenser periodically with warm water, as
illustrated.
• To remove the dispenser, grasp the top of the
dispenser with both hands. Squeeze and push
upward with thumbs to remove.
o Clean dispenser by holding under water faucet.
Replace after cleaning.
NOTE: Do not wash clothes with this dispenser
removed. Do not add detergent or bleach to
dispenser. The dispenser is for liquid fabric
softener use only.
10