7
OPERATING INSTRUCTIONS
Read and understand the operating and safety manual
for this pump prior to use.
NEVER operate the pump in an explosive atmosphere.
NEVER operate the pump in wet or damp locations.
DO NOT expose to rain.
Hydraulic fluid under pressure can easily puncture skin
causing serious injury.
ALWAYS wear approved safety glasses when operating or
servicing this pump.
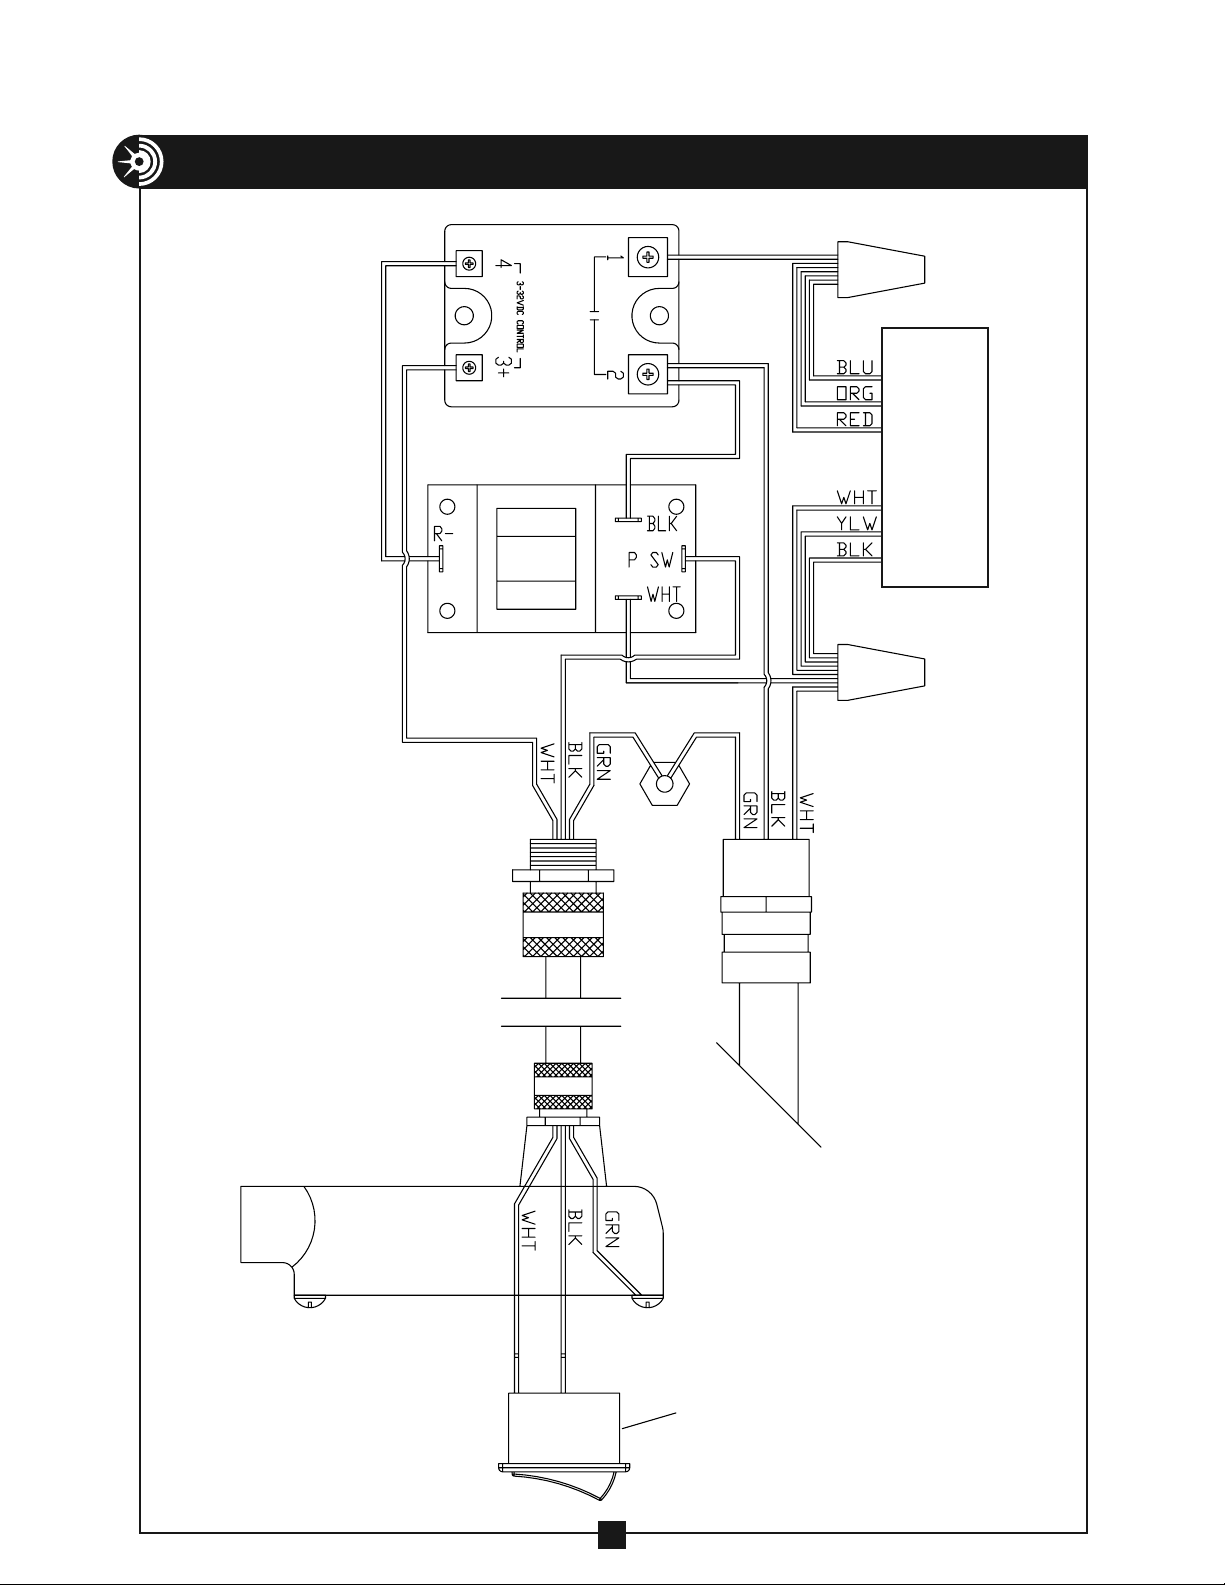
ATTENTION: This pump is shipped from the factory with an unvented fill plug
to prevent leakage. Prior to use, remove the unvented fill plug and
install the vent plug provided. Failure to install the vent plug will
result in poor performance.
IMPORTANT: Starting the motor without the cylinder properly attached to
the pump will cause the pump to immediately build an internal
pressure of 10,000 P.S.I. To depressurize the hydraulic system,
first unplug the power cord then rotate the valve lever to the open
position and allow the hydraulic cylinder to fully retract. Slowly
disconnect the hydraulic hose.
1. Ensure the unvented fill plug that was used during shipping has been removed
and the vented fill plug provided has been installed.
2. Check the oil level in the reservoir. Add approved hydraulic oil if necessary.
(See “Adding Hydraulic Oil” section on page 10).
3. Rotate the pump valve lever to the open position.
4. Ensure that the hose and couplings are clean and free of debris prior to
assembly.
5. Attach the hydraulic hose to the coupling assembly on the hydraulic cylinder
and the coupling on the hydraulic pump. Hand tighten all connections firmly.
DO NOT use tools.
6. Plug the pump into the correct power supply.
To advance the hydraulic cylinder
1. Rotate the pump valve lever to the closed position.
2. Depress the jog switch on the pendant assembly.
To retract the hydraulic cylinder
Rotate the pump valve lever to the open position to release the pressure
Removing the hydraulic cylinder
Prior to removing the hydraulic cylinder that is connected to the pump, the system
must be depressurized.
1. Unplug the power cord.
2. Rotate the pump valve lever to the open position and allow the hydraulic
cylinder to fully retract.
3. Slowly disconnect the hydraulic hose.
DANGER
WARNING
DANGER
WARNING