D-Link DHP-310AV User manual
Version 4.0 | 08/27/2012
2D-Link DHP-310AV User Manual
D-Link reserves the right to revise this publication and to make changes in the content hereof without obligation to notify any
person or organization of such revisions or changes.
Manual Revisions
Trademarks
D-Link and the D-Link logo are trademarks or registered trademarks of D-Link Corporation or its subsidiaries in the United
States or other countries. All other company or product names mentioned herein are trademarks or registered trademarks of
their respective companies.
Copyright © 2012 by D-Link Systems, Inc.
All rights reserved. This publication may not be reproduced, in whole or in part, without prior expressed written permission
from D-Link Systems, Inc.
Revision Date Description
1.2 August 27, 2012 • Text Modication
Preface

3D-Link DHP-310AV User Manual
Table of Contents
Preface .........................................................................................2
Manual Revisions .......................................................................... 2
Trademarks ..................................................................................... 2
Product Overview ......................................................................4
Package Contents .........................................................................4
System Requirements .................................................................4
Introduction ................................................................................... 5
Features ............................................................................................ 5
Hardware Overview ..................................................................... 6
LEDs ........................................................................................... 6
Connection ............................................................................. 7
Simple Connect Button ...................................................... 8
Hardware Installation ...............................................................9
Push Button Security .................................................................10
Conguration .......................................................................... 13
Using the Setup Wizard ............................................................13
Conguration ...............................................................................14
Security ..........................................................................................13
Installation Considerations .................................................. 18
PowerLine Installation Considerations ...............................18
Troubleshooting ..................................................................... 20
Technical Specications ........................................................ 21
Table of Contents
4D-Link DHP-310AV User Manual
Section 1 - Product Overview
DHP- 310AV
• D-Link DHP-310AV PowerLine AV Mini Adapter
• Ethernet Cable
• CD-ROM with User Manual and Utility
• Quick Install Guide
DHP-311AV
• D-Link DHP-310AV PowerLine AV Mini Adapter X2
• Ethernet Cable X2
• CD-ROM with User Manual and Utility
• Quick Install Guide
System Requirements
• Windows® 7, Windows Vista®, XP (with Service Pack 3)
• Ethernet interface (10/100/1000 Mbps)
• PC with 1.5GHz Processor
• 1 GB Memory
Product Overview
Package Contents

5D-Link DHP-310AV User Manual
Section 1 - Product Overview
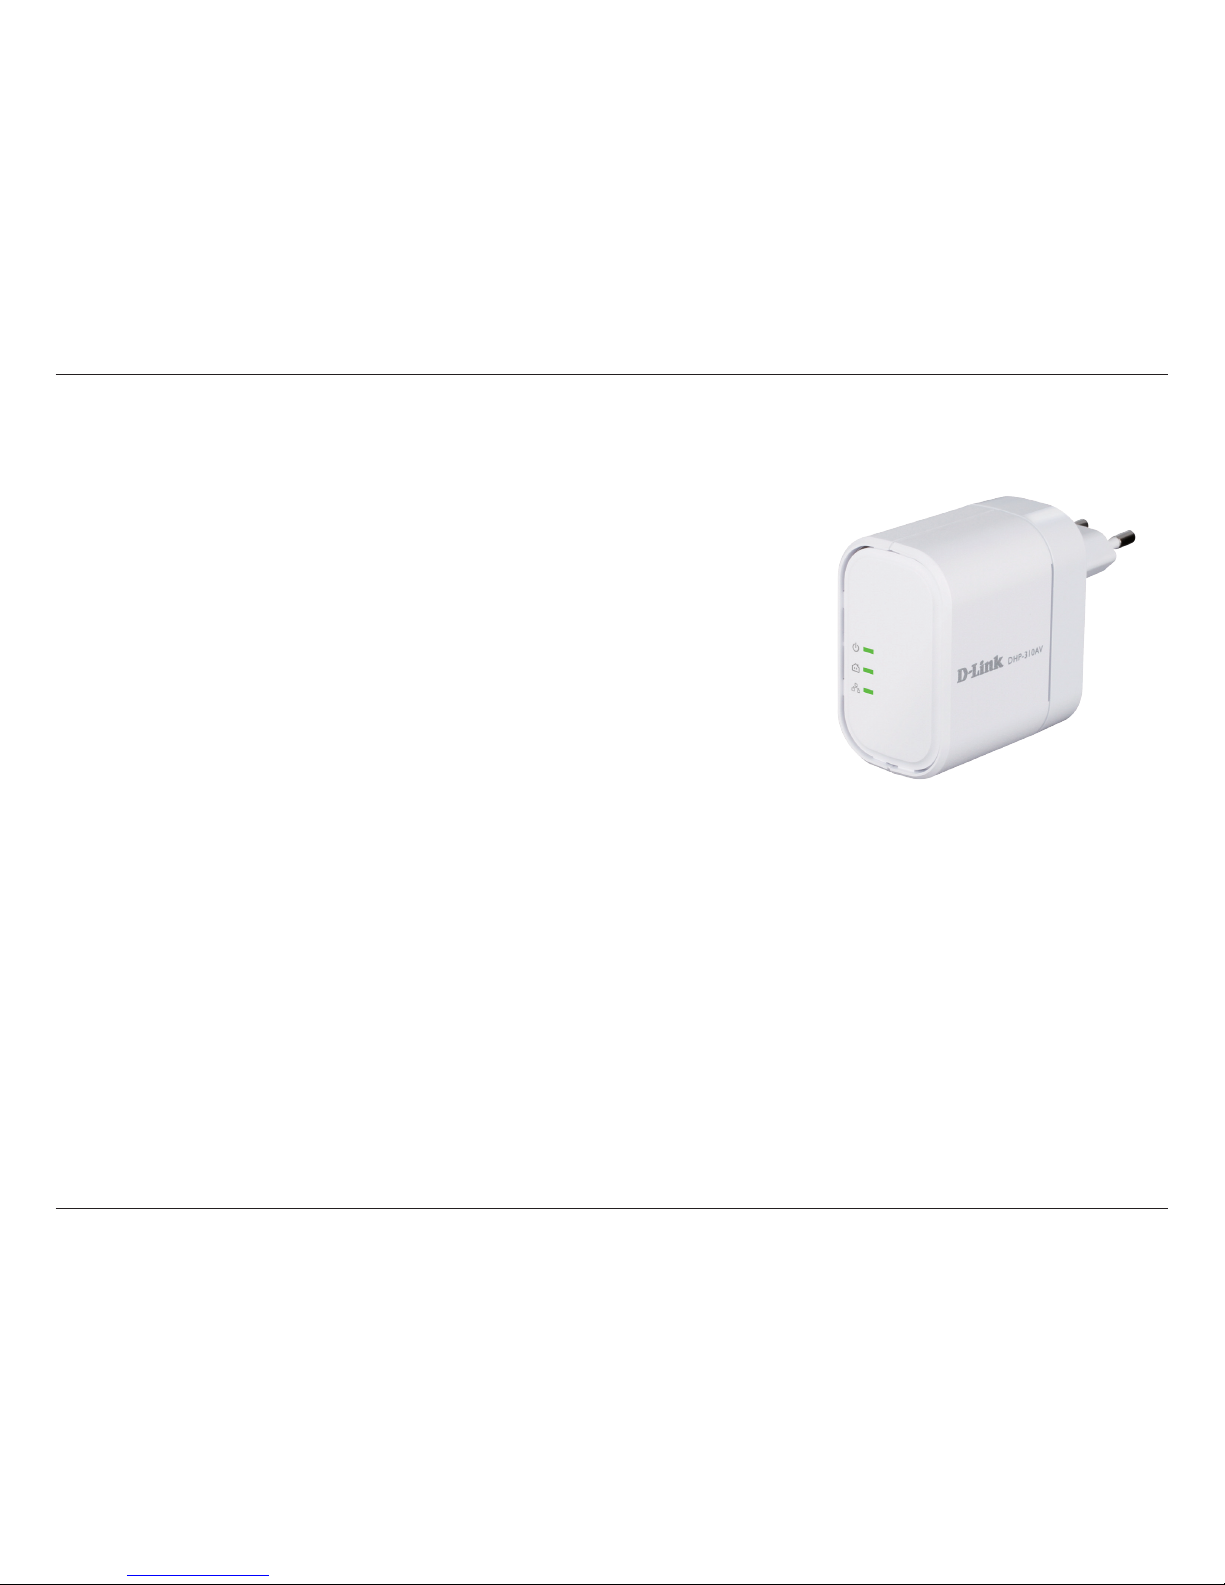
Introduction
D-Link announces a fast, 200Mbps* PowerLine AV Mini Adapter which allows you to connect your home computers, networking
devices and gaming devices through the most pervasive medium in your house - the electric powerLines - and share Internet
connections, printers, transfer les, play games, and more.
Features
• Provides Ethernet to PowerLine Connection
• Fast Data Transfer Rate of Up to 200Mbps*
• One Ethernet port
• Plug & Play, Easy Installation
• Push Button Security
* Maximum throughput based on theoretical transmission PHY rate. Actual date throughput will vary. Network conditions and environmental factors, including volume of trac
and network overhead, may lower actual data throughput rate. Interference from devices that emit electrical noise, such as vacuum cleaners and hair dryers, may adversely aect
the performance of this product. This product may interfere with devices such as lighting systems that have a dimmer switch, short wave radios, or other powerLine devices that
do not follow the HomePlug AV and IEEE1901 standard.
6D-Link DHP-310AV User Manual
Section 1 - Product Overview
Hardware Overview
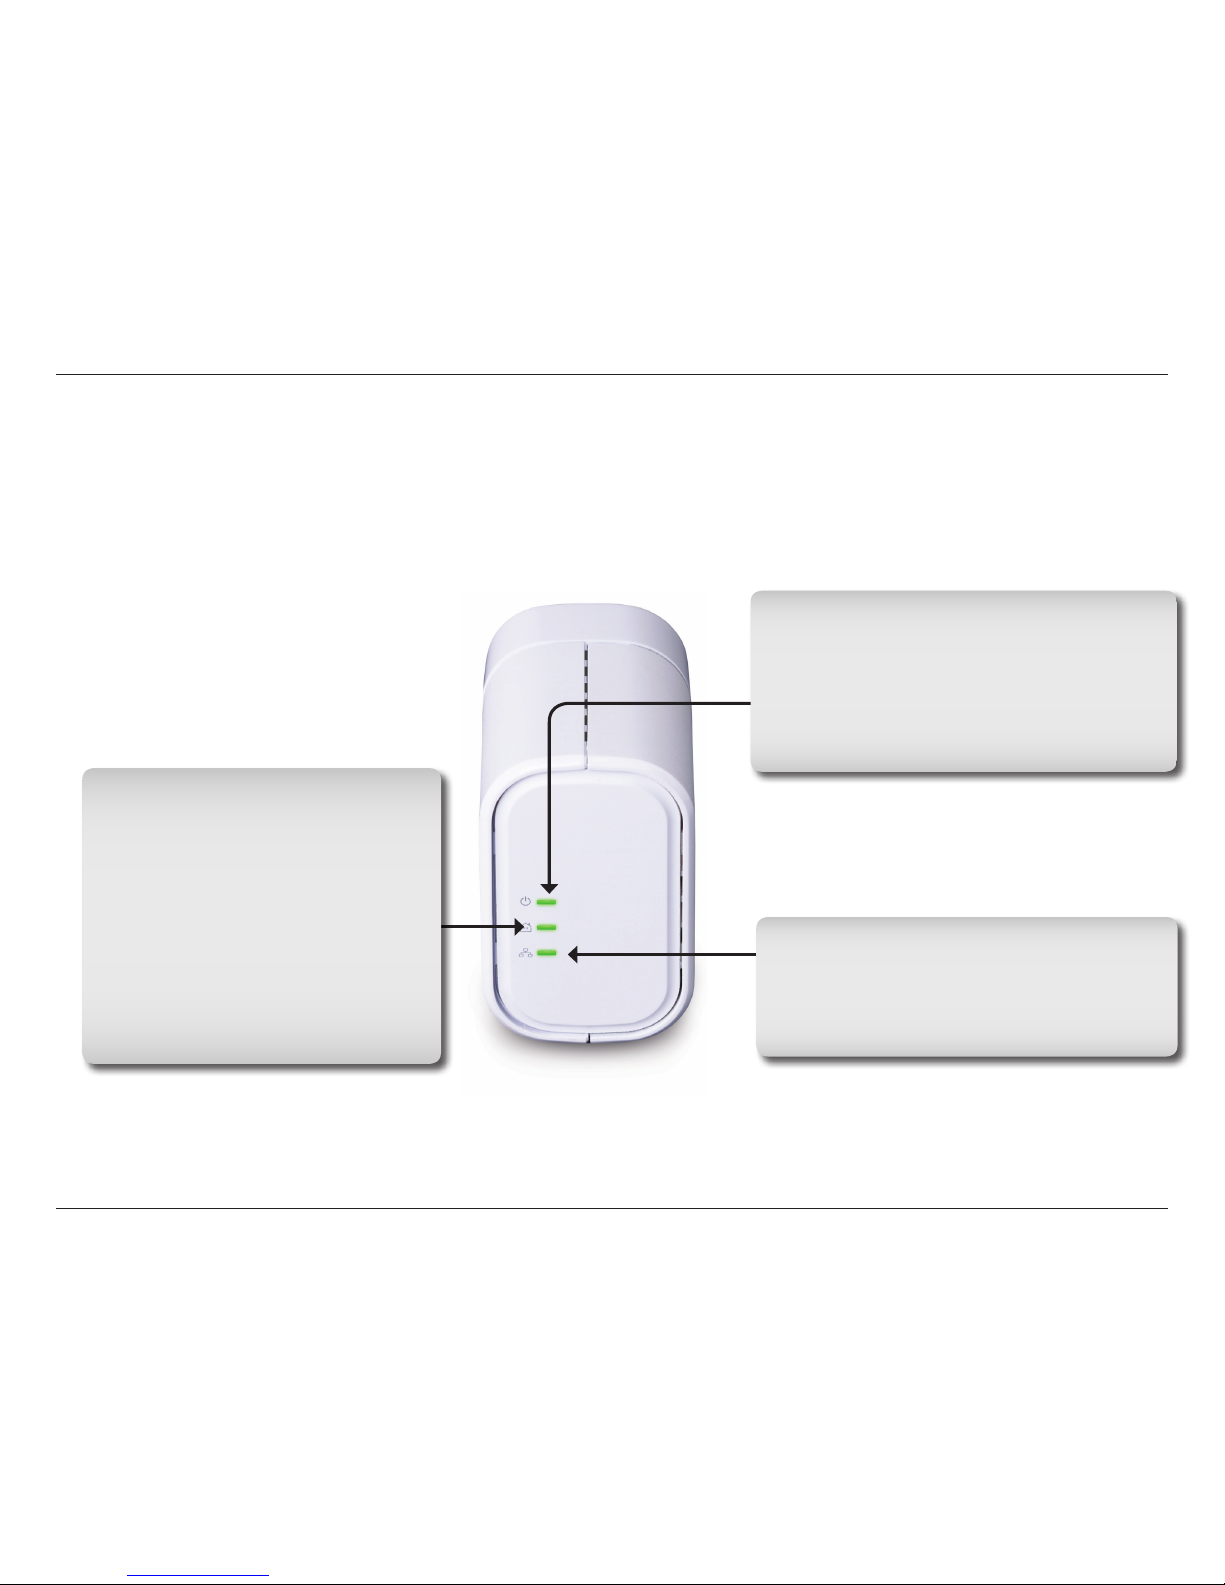
LEDs
Power LED
• Solid. Indicates that the device is receiving electrical
power.
• Blinking. Indicates that the device is setting itself up
after reset or when the security button was pressed
• O. The device is not receiving electrical power.
Ethernet LED
• Solid. The Ethernet port is linked but there is no
data trac.
• Blinking. The device is transmitting data.
• O. There is no Ethernet connection.
PowerLine LED
• Solid. The device is connected to a
PowerLine network.
• Blinking. The device is transmitting data.
• O. The device has not found any other
compatible PowerLine devices using the
same encryption key.
The color indicates the PowerLine link rate:
• Green. The PowerLine link rate is best.
• Amber.The PowerLine link rate is better.
• Red. The PowerLine link rate is good.
7D-Link DHP-310AV User Manual
Section 1 - Product Overview
Hardware Overview
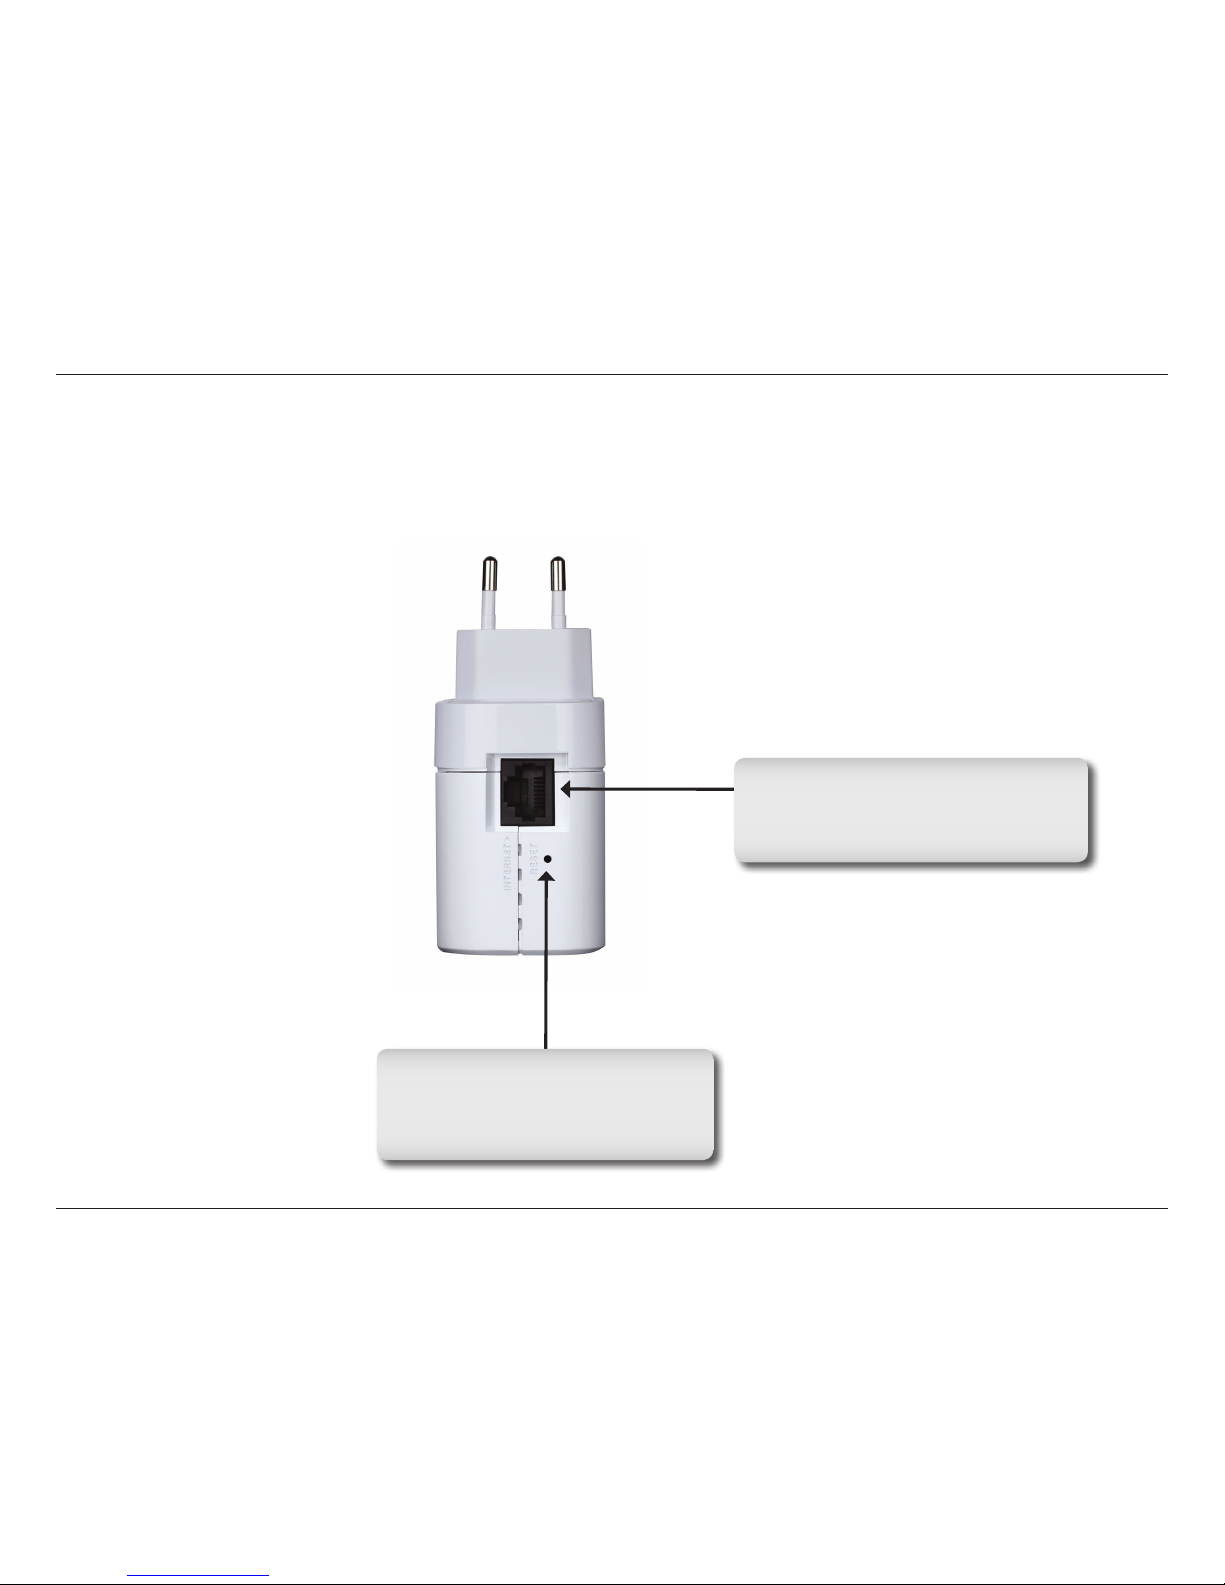
Connection
Reset Button
Press and hold the button for 1
second to reset to factory default.
Ethernet Port
Connect the CAT5 Ethernet cable to
the DHP-310AV Ethernet port.
8D-Link DHP-310AV User Manual
Section 1 - Product Overview
Hardware Overview
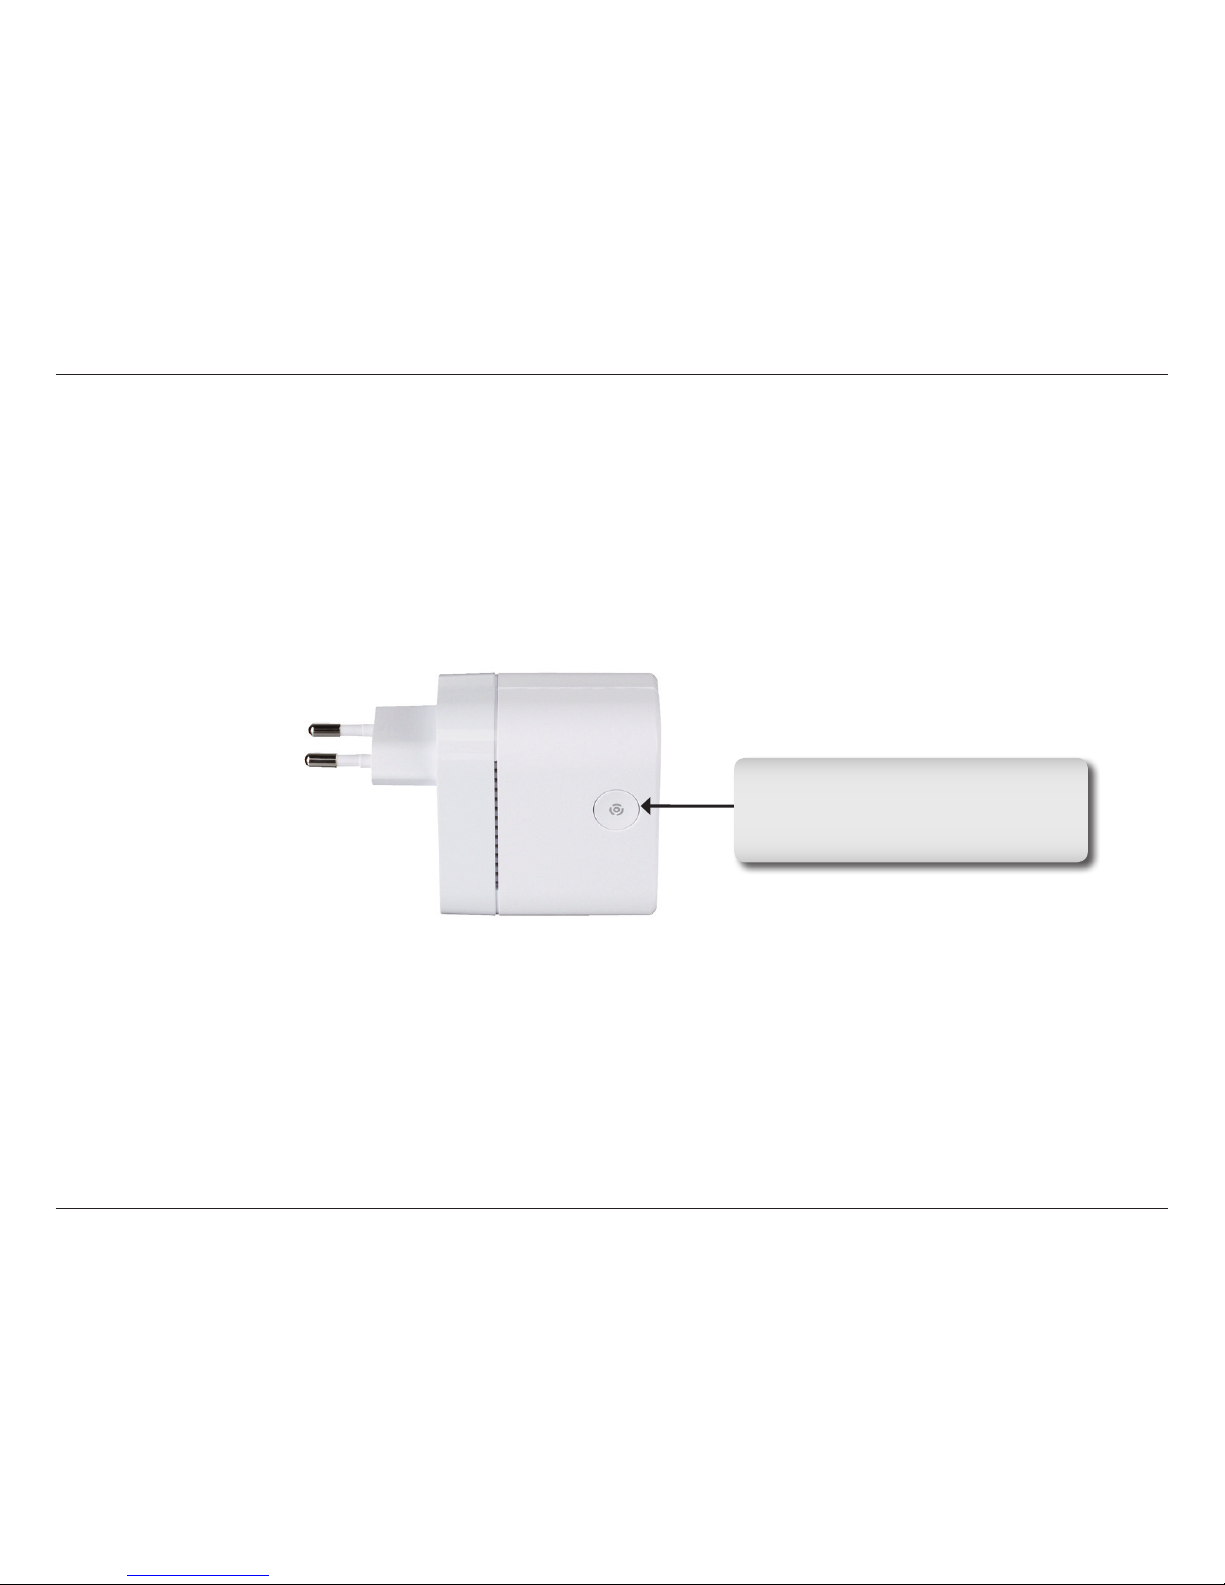
Simple Connect Button
Simple Connect Button
Press to secure your network. Refer
to page 10 for more information.
9D-Link DHP-310AV User Manual
Section 2 - Installation
DHP-310AV
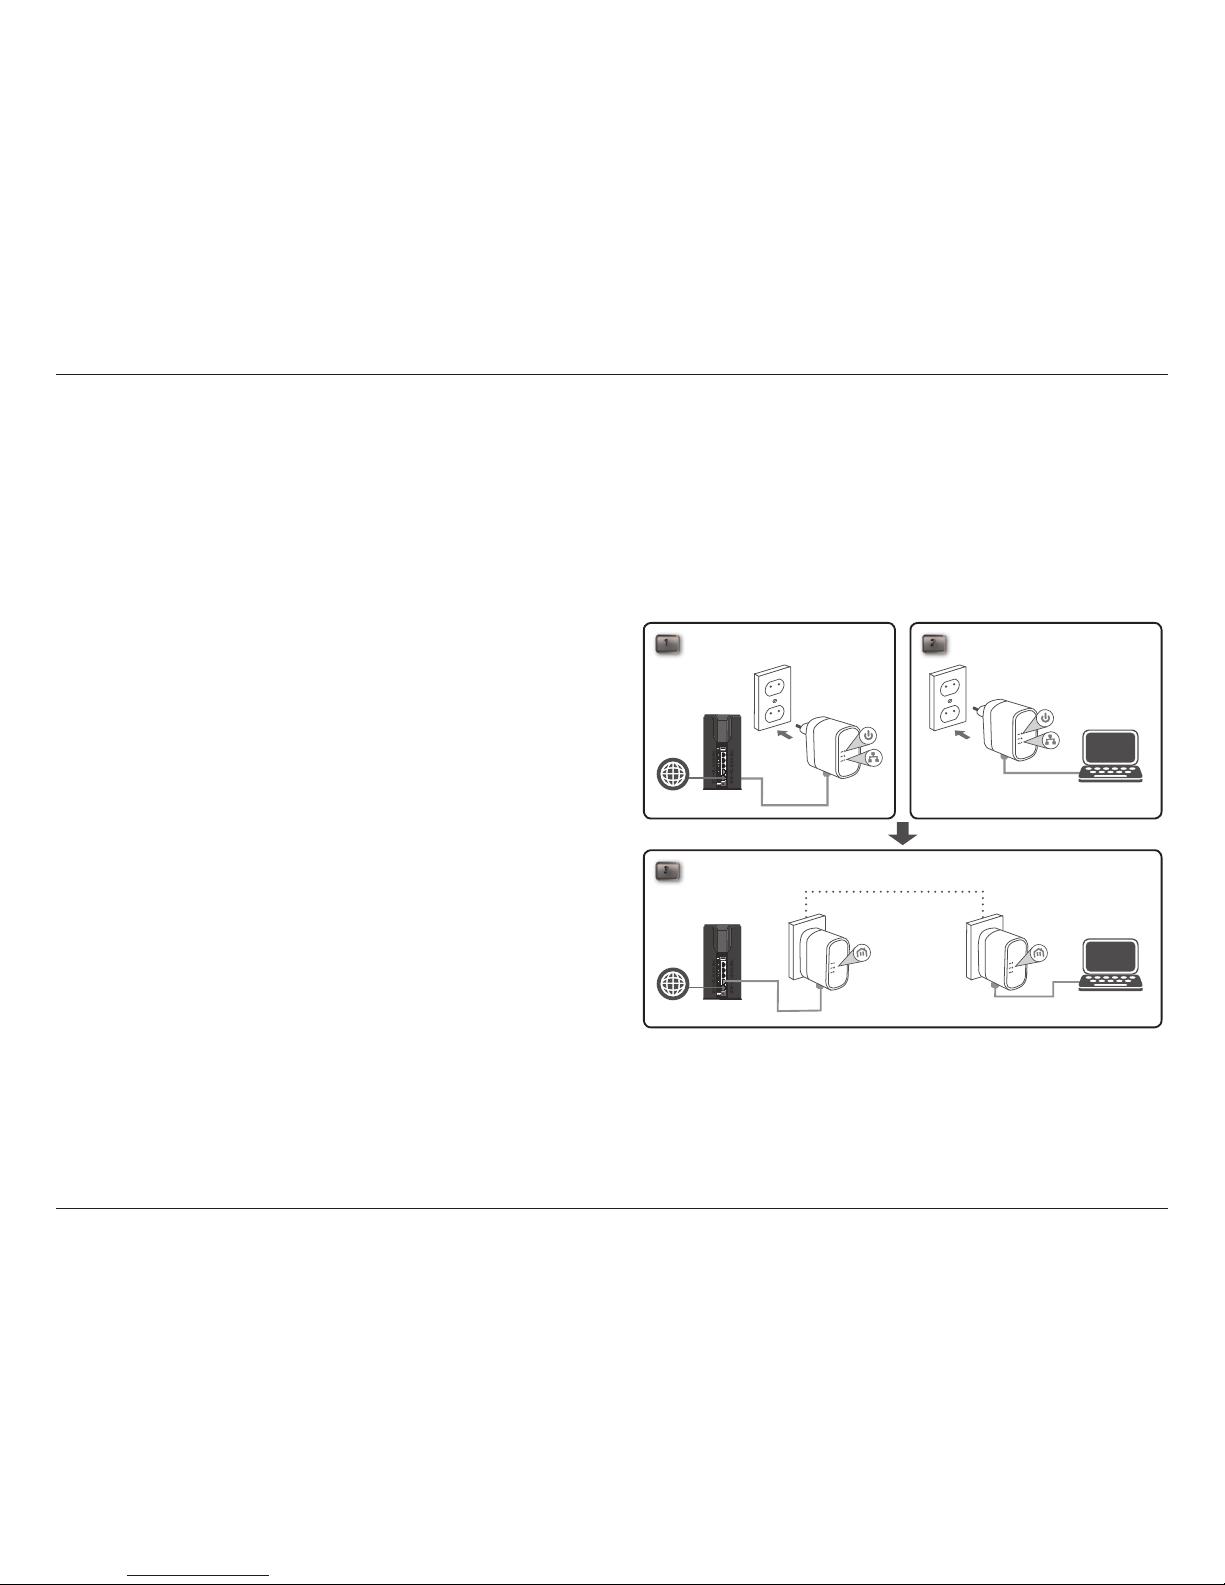
Hardware Installation
Power
Plug in the DHP-310AV into an AC wall outlet or power strip.
Note: Power source is conrmed when the Power LED on the DHP-310AV is illuminated.
Connect the Ethernet Cable
Connect the included Ethernet cable to the network
cable connector located on the DHP-310AV and attach
the other end of the Ethernet cable to the network or PC.
Network Connectivity is conrmed when the Ethernet
LED on the DHP-310AV are illuminated.
3ROOM A ROOM B
DHP-310AVDHP-310AV
RouterInternet
NB
1 2
ROOM A ROOM B
DHP-310AV
RouterInternet
NB

10D-Link DHP-310AV User Manual
Section 2 - Installation
Understanding PowerLine AV Mini Adapter Security
The PowerLine AV Mini Adapters on the same network must use an identical encryption key. The default encryption key of each
PowerLine AV Mini Adapter is HomePlug AV. All PowerLine AV Mini Adapters with default encryption key can communicate
with each other.
It’s recommended to create a private encryption key for network security purpose. The private encryption key allows you to
protect your network from unauthorized access via the PowerLine network. To create a private encryption key instead of the
default encryption key, please follow below steps:
1. All Adapters
Plug in all the adapters to be congured and make sure each device’s encryption key is set to HomePlug AV (default value). If
the encryption key is not set to the default value, press the reset button for 1 second for resetting it to the default value.
2. First Adapter
Press Simple connect button of the rst adapter for no more than three seconds.
The Power LED will start blinking after you release the button. The adapter will create a private, randomly generated encryption
key that each PowerLine AV Mini Adapter will use.
3. Second Adapter
Push Button Security
Other manuals for DHP-310AV
4
Table of contents
Other D-Link Amplifier manuals


