9
IMPORTANT!
Mix only enough fuel for your immediate needs! If fuel must be stored longer than 30-days,is should
first be treated with a stabilizer or equivalent product!
FILLING THE FUEL TANK
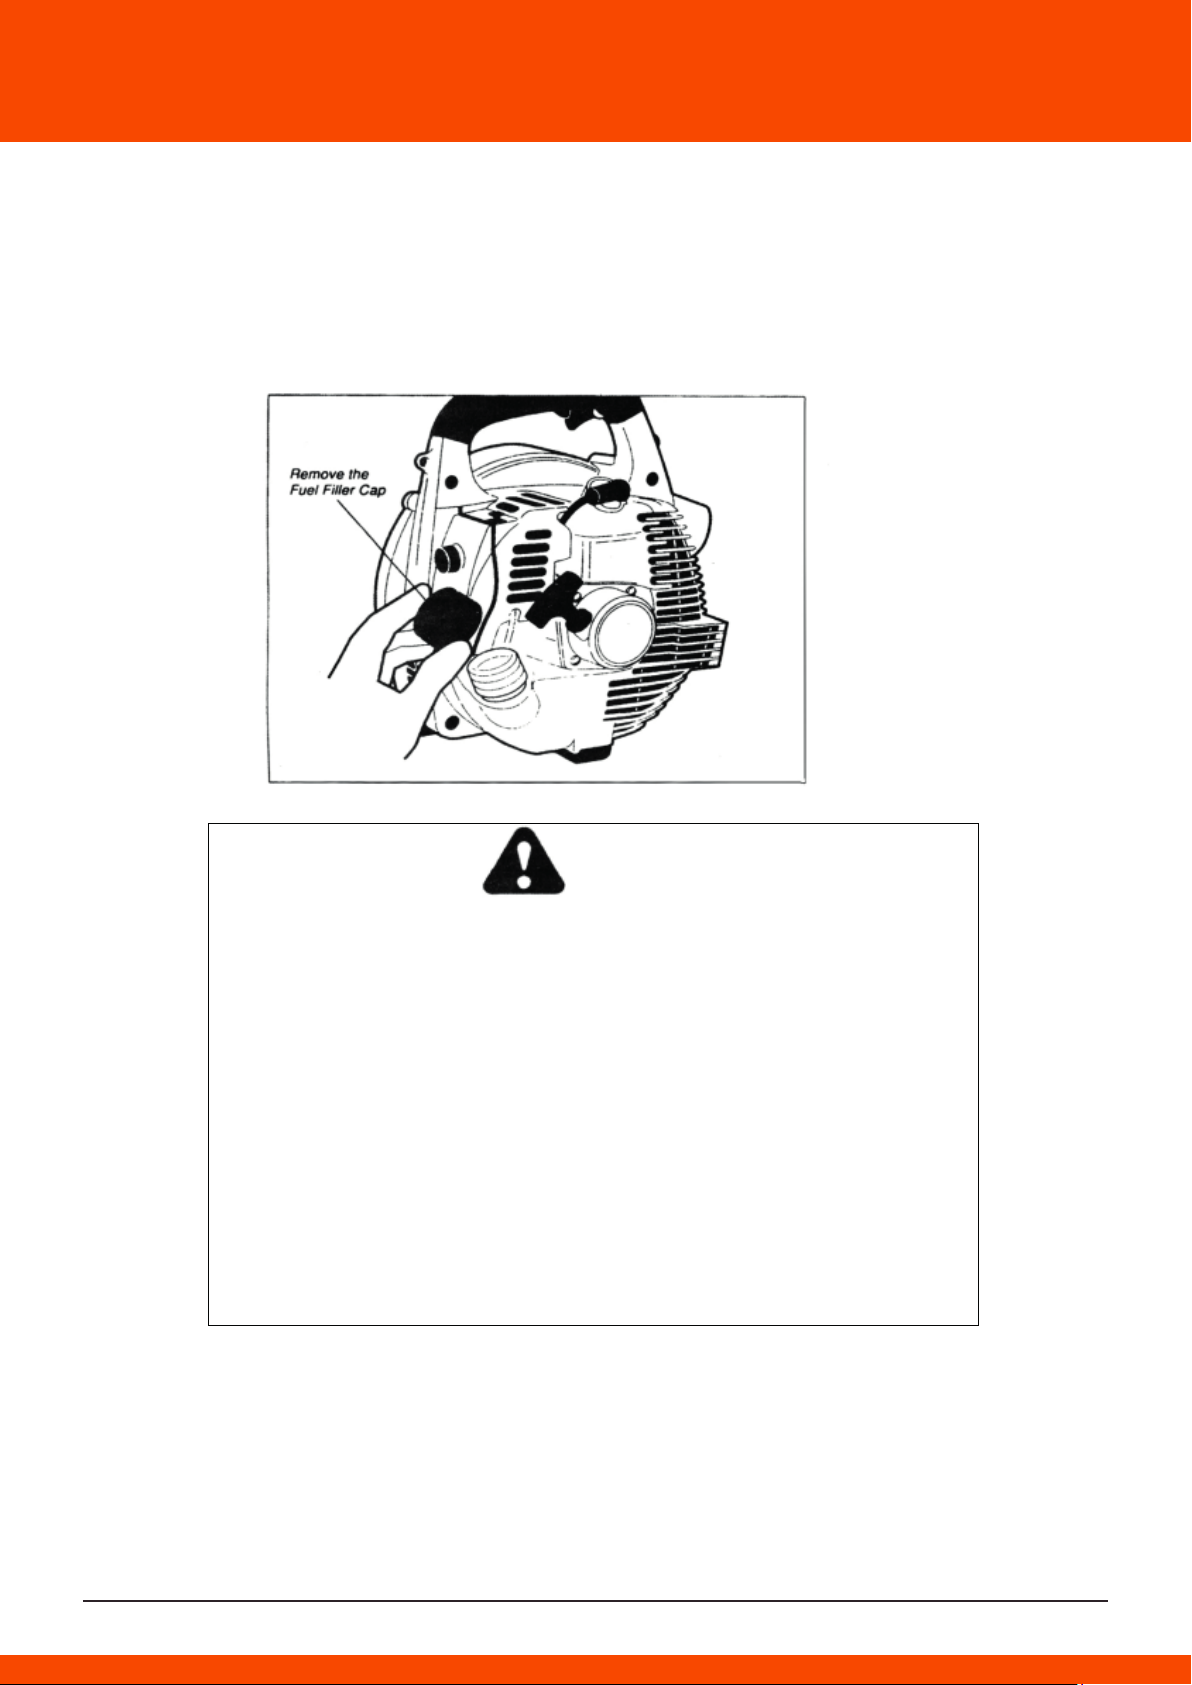
1. Place the blower upright on the ground or on a sturdy work surface,and wipe any debris from
around the fuel cap.
2. Remove the fuel cap.
3. Fill the tank with clean,fresh fuel.
4. Replace the cap,and wipe away any spilled fuel before starting the blower
WARNING!
Danger from rotang impeller! The impeller will rotate whenever the blower is
operated! Never operate this blower unless the intake cover and blower tubes
are properly installed and in good working order!
Danger from thrown dust or debris!Always wear eyeprotecon when operang
this machine! Never direct the blower stream toward people or animals.
Never operate this blower unless all controls are properly installed and in goo
working order.
WARMING!
The recoil starter can be damaged by abuse!
Never pull the starter cord to its full length!
Always engage the starter before cranking the engine!
Always rewind the starter cord slowly!
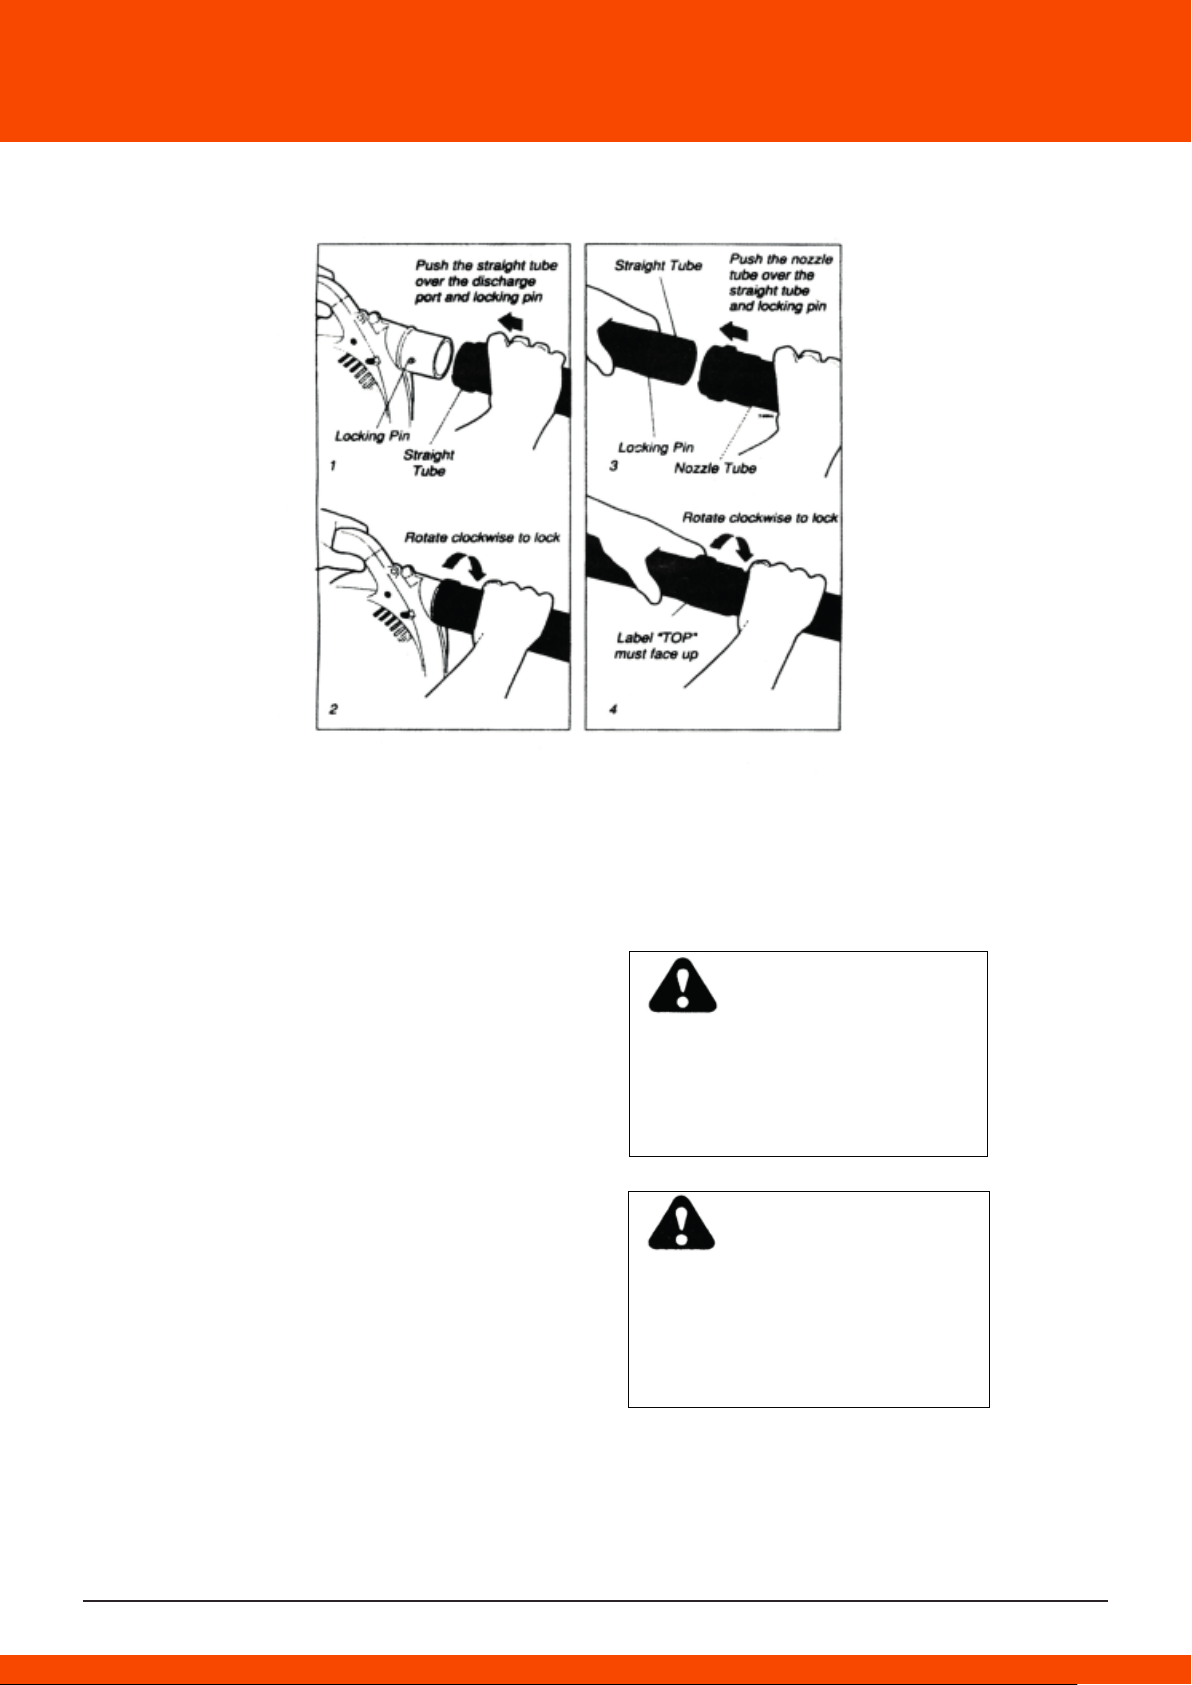
Never operate the blower if blower tubes are missing or damaged!
4. STARTING THE BLOWER
IMPORTANT!
A two-position “ON-OFF” switch located on the Left
of the blower handle grip controls the engine
Ignition.
Starting Procedure
1. Prime the fuel system by repeatedly depressing the
fuel primer bulb until no air bubbles are visible in the fuel
discharge line.
2. Cold Engine Only.Choke the engine by pulling the choke
control to the fully extended position(choke is closed).
3. Place the blower on the ground,and hold the blower handle
firmly with your right hand.
4. Pull the starter cord slowly until you feel the starter engage,
then...
5. start the blower by pulling the starter cord upward rapidly.
If necessary,repeat Step 5 two or three times until the engine starts.
When the engine starts
IMPORTANT!
For maximum blower performance and operating life,allow the engine to warm before use.
1. Run the engine at idle speed until operating temperature is reached(2 to 3 minutes).
2. As the engine warms open the choke gradually by slowly pushing the choke control in to the fully
retracted position.
3. The blower should now be ready for use.
If the engine does not start
Repeat the appropriate starting procedures for “hot” or “cold” engine.If the engine still will not
start,follow the “Starting a Flooded Engine” procedure(below).
Starting a flooded engine
1. Disconnect the spark plug lead,and use the spark
plug wrench to remove the plug in a counterclock
-wise direction.
2. If the spark plug is fouled or is soaked with fuel,
clean or replace the plug as required.
3. Clear excess fuel from the combustion chamber by
cranking the engine several times while the spark plug is removed.
4. Install the spark plug and firmly tighten it with the
Spark plug wrench.If a torque wrench is available,
Torque the spark plug to 148-165 inch-pounds.Recon nect
the spark plug lead.
5. Repeat the starting procedures for “warm engine”.
6. If the engine still fails to fire or start,refer to the troubleshooting flowchart
at the end of this manual.
ADJUSTING ENGINE IDLE SPEED
1. Start the engine by following the procedures described on the preceding pages.
2. Run the engine at idle speed until operating temperature is reached(2-3 minutes).
3. Use a screwdirver to
adjust the engine idle speed to (2800- 3000)r/min.
- Turn the idle screw clockwise to increase engine idle speed.
- Turn the idle screw counterclockwise to decrease engine idle speed.
IMPORTANT!
Blower tubes and intake cover must be installed while adjusting engine idle! Engine idle speed will
also be affected if either the intake cover or blower tubes are blocked,
damaged or incorrectly installed!
STOPPING THE ENGINE
1. Cool the engine by allowing it to run at idle for 2 to 3 minutes.
2. Stop the engine by pulling the ignition switch.
IMPORTANT!
If the engine continues to run while pulling the ignition Switch,stop the engine by pulling the choke
control out to the fully closed position.
A clean and unrestricted airflow is essential to your blower’s engine performance and durability!
Before attempting any carburetor adjustments,inspect and clean the engine air cleaner as described
on page 9 of this manual.
5. USING THE BLOWER
In the hands of an experienced operator, the EB-260 can effeciently move a wide varity of debris
ranging from grass clippings to gravel.As a general rule,try to operate your EB-260 at the lowest
throttle settings necessary to get the job done:
THINK SAFETY!
- Use low throttle settings when clearing lightweight materials from around lawns or shrubbery.
- Use medium to higher throttle settings to move lightweight grass or leaves from parking lots or
walkways.
- Use full throttle when moving heavy loads such as dirt or snow.
IMPORTANT!
Blower noise increases at higher throttle settings! Always use the lowest throttle setting required to
get the job done!
ROUTINE MAINTENANCE
Daily Maintenance
- Remove dirt and debris from the blower exterior.
- Inspect the engine,tank,and hoses for possible fuel leaks,and repair as necessary.
- Inspect the engine cooling fins for accumlations of dirt or debris,and clean as necessary.
- Inspect the entire blower for damage,loose or missing components or fastenings,and repair as
necessary.
WARNING!
Before performing any maintenance On this blower,stop the engine and disconnect the spark plug
wire!
CAUTION!
Dirty or damaged cooling system components may allow the engine to overheat,possibly causing
serious engine damage!
CAUTION!
Operating the blower with loose, missing,or damaged components could allow the engine to overs-
peed,possibly causing serious engine damage!
EVERY 10 HOURS(more frequently in dusy conditions)
1.Loosen the air cleaner cover retaining screw and remove
the cover and filter element.
2. Inspect the element. If the element is distorted or damaged,
replace it with a new one.
3. Wash the element in clean fuel,and squeeze or blow dry.
Wash the air cleaner cover in clea fuel, and wipe or blow dry.
4.Install the element and cover,and then tighten the cover
retaining screw.
EVERY 10/15 HOURS
1. Use the spark plug wrench to remove the spark
plug(turn counter-clockwise to remove).
2. Clean and adjust the spark plug gap to 0.6-0.7mm.
Replace any damaged or visibly worn plug with a champion
RCJ6Y or equivalent.
3. Install the spark plug finger-tight in the cylinder head,
then tighten it firmly with the spark plug wrench.If a torque
wrench is available,torque the spark plug to 148-165 inch pounds.