manuals.online logo
Brands
  1. Home
  2. •
  3. Brands
  4. •
  5. Daewoo
  6. •
  7. LCD TV
  8. •
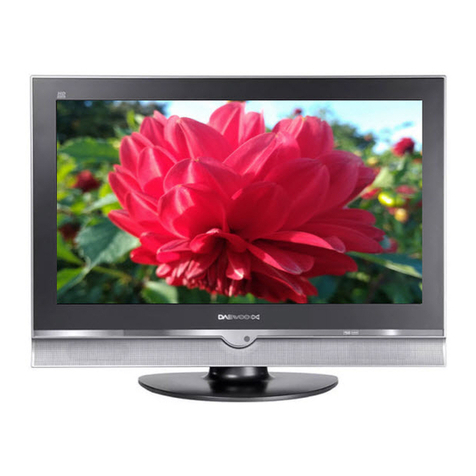
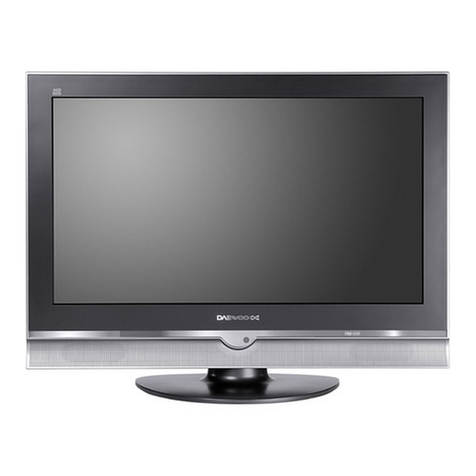
  9. Daewoo DLM Series User manual

Daewoo DLM Series User manual

LCD TELEVISION
INSTRUCTION MANUAL
DLM-26C3(AMBS/SMBS/LMBS/AMR/LMR/SMR)
DLM-32C1(AMBS/SMBS/LMBS/AMR/LMR/SMR)
DLM-3212(AMBS/SMBS/LMBS/AMR/LMR/SMR)
DLM-32C3(AMBS/SMBS/LMBS/AMR/LMR/SMR)
DLM-37C3(LMB)
DLM-37C3(LMBS)
DLM-42C1(LMR)
DLM-42C4(LMR)
Caution
2
WARNING : TO REDUCE THE RISK OF FIRE OR ELECTRIC SHOCK HAZARD, DO NOT EXPOSE
THIS APPLIANCE TO RAIN OR MOISTURE.
CAU ION :
TO PREVENT ELECTRIC SHOCK, MATCH WIDE BLADE OF PLUG TO WIDE SLOT, FULLY INSERT.
CAU ION
RISK OF ELEC RIC SHOCK
DO NO OPEN
CAU ION : O REDUCE HE RISK OF ELEC RIC SHOCK,
DO NO REMOVE COVER (OR BACK).
NO USER-SERVICEABLE PAR S INSIDE.
REFER SERVICING O QUALIFIED SERVICE PERSONNEL.
The l ghtn ng flash w th arrowhead symbol, w th n an equ lateral
tr angle, s ntended to alert the user to the presence of un nsulat-
ed “dangerous voltage” w th n the product’s enclosure that may
be of suff c ent magn tude to const tute a r sk electr c shock.
The exclamat on po nt w th n an equ lateral tr angle s ntended to
alert the user to the presence of mportant operat ng and serv c-
ng nstruct ons n the l terature accompany ng the appl ance.
Important
Safeguards
3
Please read the follow ng safeguards for your TV and reta n for future reference.
Always follow all warn ngs and nstruct ons marked on the telev s on.
1. Read, Retain and Follow All Instructions
Read all safety and operat ng nstruct ons before operat ng the TV. Reta n them safely
for future reference. Follow all operat ons and nstruct ons accord ngly.
2. Heed Warnings
Adhere to all warn ngs on the appl ance and n the operat ng nstruct ons.
3. Cleaning
Unplug the TV from the wall outlet before clean ng. Do not use l qu d, abras ve, or aerosol cleaners.
Cleaners can permanently damage the cab net and screen. Use a l ghtly dampened cloth for
clean ng.
4. Attachments and Equipment
Never add any attachment and/or equ pment w thout approval of the manufacturer as such add t ons may
result n the r sk of f re, electr c shock or other personal njury.
5. Water and Moisture
The apparatus shall not be exposed to dr pp ng or splash ng and that no objects f lled w th l qu ds,
such as vases, shall be placed on the apparatus.
6. Setting
Do not place th s TV on an unstable cart, stand or table. Plac ng the TV on an unstable base can
cause the TV to fall, result ng n ser ous personal njur es as well as damage to the TV. Use only a
cart, stand, bracket or table recommended by the manufacturer or salesperson.
7. Ventilation
Slots and open ngs n the cab net are prov ded for vent lat on and to ensure rel able operat on of the TV and to
protect t from overheat ng. Do not cover the vent lat ons open ngs n the cab net and never place the set n a conf ned
space such as bu lt- n cab net unless proper vent lat on s prov ded. Leave a m n mum 10 cm gap all around the un t.
8. Power Source
Th s TV should be operated only from the type of power source nd cated on the mark ng label. If you are not
sure of the type of power suppl ed to your home, consult your appl ance dealer or local power company.
9. Grounding or Polarization
Th s TV s equ pped w th a polar zed alternat ng current l ne plug (a plug hav ng one blade w der than the other). Th s
plug w ll f t nto the power outlet only one way. Th s s a safety feature. If you are unable to nsert the plug fully nto
the outlet, try revers ng the plug. If the plug should st ll fa l to f t, contact your electr c an to replace your obsolete
outlet. Do not defeat the safety purpose of the polar zed plug. A warn ng that an apparatus w th CLASS I construct on
shall be connected to a MAINS socket outlet w th a protect ve earth ng connect on.
10. Power-Cord Protection
Power-supply cords should be routed so that they are not l kely to be walked on or p nched by tems placed
upon or aga nst them, pay ng part cular attent on to cords at plugs, wall outlets, and the po nt
where they ex t from the TV.
MAINS plug s used as the d sconnect dev ce, the d sconnect dev ce shall rema n read ly operable.
11. Lightning
For added protect on for th s TV dur ng a l ghtn ng storm, or when t s left unattended and unused for long
per ods of t me, unplug t from the wall outlet and d sconnect the antenna or cable system. Th s w ll prevent
damage to the TV due to l ghtn ng and power-l ne surges.
12. Wall or Ceiling Mounting
When mount ng the product on a wall or ce l ng, be sure to nstall the product us ng the des gnated
mount ng tool accord ng to the method recommended by the manufacturer.
Important
Safeguards
4
13. Power Lines
An outs de antenna system should not be located n the v c n ty of overhead power l nes or other electr c l ght
or power c rcu ts, or where t can fall nto such power l nes or c rcu ts. When nstall ng an outs de antenna
system, extreme care should be taken to keep from touch ng such power l nes or c rcu ts as contact w th
them m ght be fatal.
14. Overloading
Do not overload wall outlets and extens on cords as th s can result n a r sk of f re or electr c shock.
15. Object and Liquid Entry
Never push objects of any k nd nto th s TV through open ngs as they may touch dangerous voltage po nts or
short-out parts that could result n f re or electr c shock. Never sp ll l qu d of any k nd on or nto the TV.
16. Outdoor Antenna Grounding
If an outs de antenna or cable system s connected to the TV, be
sure the antenna or cable system s grounded so as to prov de
some protect on aga nst voltage surges and bu lt-up stat c charges.
Sect on 810 of the Nat onal Electr c Code, ANSI /NFPA No. 70-1984,
prov des nformat on w th respect to proper ground ng of the mast
and support ng structure, ground ng of the lead n w re to an antenna
d scharge un t, s ze of ground ng conductors, locat on of
antenna d scharge un t, connect on to ground ng electrodes, and
requ rements for the ground ng electrode.
17. Servicing
Do not attempt to serv ce th s TV yourself as open ng or remov ng covers may expose you to dangerous
voltage or other hazards. Refer all serv c ng to qual f ed serv ce personnel.
18. Damage Requiring Service
Unplug the TV from the wall outlet and refer serv c ng to qual f ed serv ce personnel under the follow ng
cond t ons:
(a) When the power-supply cord or plug s damaged.
(b) If l qu d has been sp lled, or objects have fallen nto the TV.
(c) If the TV has been exposed to ra n or water.
(d) If the TV does not operate normally by follow ng the operat ng nstruct ons. Adjust only those controls
that are covered by the operat ng nstruct ons as an mproper adjustment of other controls may result n
damage and w ll often requ re extens ve work by a qual f ed techn c an to restore the TV to ts normal operat on.
(e) If the TV has been dropped or the cab net has been damaged.
(f) When the TV exh b ts a d st nct change n performance - th s nd cates a need for serv ce.
19. Replacement Parts
When replacement parts are requ red, be sure the serv ce techn c an has used replacement parts spec f ed
by the manufacturer or have the same character st cs as the or g nal part. Unauthor zed subst tut ons may
result n f re, electr c shock or other hazards.
20. Safety Check
Upon complet on of any serv ce or repa r to the TV, ask the serv ce techn c an to perform safety checks to
determ ne that the TV s n safe operat ng cond t on.
21. Heat
The product should be s tuated away from heat sources such as rad ators, heat reg sters, stoves, or
other products ( nclud ng ampl f ers) that produce heat.
ANTENNA
LEAD IN WIRE
ANTENNA
DISCHARGE UNIT
(NEC SECTION 810-20)
GROUNDING
CONDUCTORS
(NEC SECTION 810-21)
GROUND CLAMPS
POWER SERVICE GROUNDING
ELECTRODE SYSTEM
(NEC ART 250, PART H)
GROUND CLAMP
ELECTRIC
SERVICE
EQUIPMENT
NEC — NATIONAL ELECTRICAL CODE
EXAMPLE OF ANTENNA GROUNDING
Warning
5
his section must be read carefully and followed by the user prior to the operation of the product.
The manual states mportant nstruct ons for the user's own safety, and the proper operat on of the product.
In case of an accident, please unplug the unit from the outlet immediately.
Hold the plug when unplugging the unit
from the outlet. The cord may cause fire
or electric shock if damaged.
Do not cause the product to lean or put it in
an unstable place since it may cause a
serious injury to a person, as well as damage
to the product if it falls.
Do not put any object that contains water -
such as flowerpot - the unit.
The water may penetrate into the unit, and
be a cause of fire or hazardous electric
shock.
To reduce the risk of electric shock, do
not remo e co er or back. No user -
ser iceable parts inside. Refer to qualified
ser ice personnel for repair.
Do not put on or use the product near water
and moisture-such as in a bathroom,
washbowl, etc. It may be a cause of fire and
electric shock hazards.
To pre ent fire and damages to the product,
unplug the unit from the outlet during
lightning storm, or when it is left unattended
and unused for a long period of time.
Do not let children hang on or climb on
the product since it may be a cause of
serious injury.
Slots and openings in the case are pro ided
for entilation to ensure reliable operation of
the product. Ne er put in any item-such as a
coin, paper, match- through these openings
since it may touch dangerous oltage points
that could result in fire or shock hazard.
Do not put olatile substance-such as
benzene, naphtha- near the product since it
may cause a change in the product's colour.
Do not iew the TV too closely since it
may cause damage in your eyesight.
Do not spill water or drop the remote
controller since it may be a cause of
malfunctioning.
Refer ser icing to qualified ser ice
personnel for cleaning at least once a year
since dust inside the TV set may be a result
or fire and malfunctioning of the product.
Warning
6
The product should be situated away from
any heat source-such as radiators, heat
registers, sto es, or other products that
produce heat.
Do not put on any hea y item on the
power cord since it may result in fire or
hazardous electric shock if the cord is
damaged.
Do not co er the top of the tele ision set.
Ventilation will be pre ented, and it may
be a cause of fire if the product is
internally o erheated.
Unplug the power from the outlet and all the
related connections from the unit to pre ent
electric shock. At least two people must work
together to mo e the TV set when transporting
to pre ent the TV from falling, and
consequently, any serious injury or damage.
Do not touch the power cord with
moisturized or wet hands when plugging
to or unplugging from the outlet since it
may be a cause of electric shock.
Please be ad ised of electric wires and cables
when installing the antenna. It may be a cause of
hazardous electric shock and fire if the antenna
touches or falls on the electric wire; thus, it must be
installed firmly, and far away from the cables.
his section must be read carefully and followed by the user prior to the operation of the product.
The manual states mportant nstruct ons for the user's own safety, and the proper operat on of the product.
Please keep the user's manual n a safe place for future reference.
Do not expose the product to a dusty or
moisturized place since it may be a cause
of malfunctioning.
The screen case of the product
(32C1/42C1) is scratched easily.
When cleaning, use the microfiber sheet
which enclosed.
When a force to gi e it cleans strongly, it
will be scratched and the product's colour
will be changed. If foreign material gets in
the fiber, the product will be scratched.
Shake off the fiber cleanly and use.
able of
Contents
7
Installation and Maintenance
Antenna Connect on 9
V deo Connect on 12
Camcorder & V deo Game Connect on 13
DVD Player Connect on 14
STB Connect on 15
PC Connect on 16
Cable TV Broadcast ng Connect on 18
Connect w th the Dolby D g tal AMP 19
Name of Each Part 20
Basic Guide
Parts of the Remote Controller 22
Method To Use Bas c Menu 24
To Watch TV 25
Sett ng Up TV Stat ons 27
Select on of AV and Mult med a Input S gnal 31
Application Guide
Screen Adjustment 33
POP Mode 37
Sound Adjustment 38
Select on of Language 41
Adjustment of T me 42
Other Funct ons 44
Teletext 45
Troubleshoot ng 46
Standard of Product 48
Supplied
Accessories
8
Make sure that the following accessories are provided with the product.
AC cord
AC cord Instruct on manual
MUTE
PICTURE
P.MODE
STILL
DYNAMICBASS3DPANORAMAP.PR
P.PR
LOCK SLEEP
P.ST ILL P.SWA P P.INPUT
ASPECT
SOUND
POWER
RECALL
PREVPR OK
MULTIMEDIA
MENU
V
O
L
V
O
L
PR
PR
123
456
789
0
X
?
Remote controller Batter es
Cover Bottom
-When you nstall wall mount ng you set
up cover bottom l ke upper p cture.
Cable holder
M crof ber sheet
(32/42C1 ONLY)
1
23
he method of wire arrangement
1. Assemble the cable holder enclosed on the back
of TV. (PICTURE 1)
(ASSEMBLY METHOD: After you push the
"A"(prom nence part of cable holder) n the
hole, rotate the cable holder clockw se as an
angle of 90°. You can separate n reverse order
of assembly.)
2. Open the cable holder. (PICTURE 2)
( you can open the cable holder that press and
push "B" part.)
3. After arrange l nes w th the cable holder, lock the
"B" aga n. (PICTURE 3)
Antenna
Connection
9
Indoor Antenna Connection
1. Connect the feeder cable of the antenna to the comb n ng adapter.
WHEN HE IMAGE IS NO CLEAR : Unclear screen mage and bad recept on may be a cause of wrong
antenna connect on. Be sure to check ts d rect on and place when
nstall ng.
2. Connect the comb n ng adapter to the antenna nput at the left s de of the TV set.
WHEN USING HE COMBINING ADAP ER : You may obta n the comb n ng adapter at your closest
Serv ce Center.
INPUT SERVICE INPUT
COMPONENT
AUDIO PCHDMI
MONITOR OUT
DIGITAL
AUDIO
AV1
VIDEO L - AUDIO - R
L - AUDIO - R
S-VIDEO 1
OPTICAL
Antenna Input
BACK OF THE TV SET
Antenna
Connection
10
Antenna socket at the left s de of the TV set
ANT/CABLE
ANT/CABLE
C V Antenna Connection
Such commun ty TV Antenna nstallat on may be found n most of co-op apartments.
When a coaxial cable is used : Plug the coax al cable to the antenna socket, and f x t f rmly by turn ng t to
the r ght.
When a feeder cable is used : Plug the coax al cable to the antenna socket, and f x t f rmly by turn ng t to
the r ght.
Antenna socket at the left s de of the TV set
Antenna
Connection
11
Outdoor Antenna Connection
Outdoor Antenna connect on-such as VHF or/and UHF-may be necessary for nstallat on at pr vate houses
Single Antenna Connection
Separate Antenna Connection.
INPUT SERVICE INPUT
COMPONENT
AUDIO PCHDMI
MONITOR OUT
DIGITAL
AUDIO
AV1
VIDEO L - AUDIO - R
L - AUDIO - R
S-VIDEO 1
OPTICAL
VHF Antenna
UHF Antenna
ANT/CABLE
BACK OF THE TV SET
ANT/CABLE
Video
Connection
12
INPUT SERVICE INPUT
COMPONENT
AUDIO PCHDMI
MONITOR OUT
DIGITAL
AUDIO
AV1
VIDEO L - AUDIO - R
MONITOR OUT
L - AUDIO - R
L - AUDIO - R
S-VIDEO 1
OPTICAL
POWER CH VOL MENU
PLAY INPUT REW PLAY F.FWD STOP/
EJECT
STAND
-BY
AV1
VIDEO
INPUT SERVICE
COMPONENT
AUDIO PCHDMI
MONITOR OUT
DIGITAL
AUDIO
AV1
VIDEO L - AUDIO - R
L - AU
S-VIDEO 1
OPTICAL
1. Prepare the RCA cable for p cture / sound.
2. Connect the RCA to Mon tor out term nal of 1’st TV set.
3. Connect the RCA to AV1 or AV2 nput term nal of 2’st TV set.
4. Turn on the TV sets.
Note : If S-v deo and RCA jack are connected the same t me, The TV set w ll only detect the S-V deo mode.
• If your AV dev ce has both V deo OUT term nal and S-V deo OUT term nal, the S-V deo connect on s
recommended for better p cture qual ty.
Note :
• Mon tor out works only CVBS s gnal. (RF, AV1/S-V deo1, AV2/S-V deo2)
Connecting with an External Source
Connecting with the Monitor Out.
You may connect an S-V deo nput to enjoy clearer and br ghter p cture mages. You can make the
connect on w th the AV1,AV2 nputs.
BACK OF THE TV SET
BACK OF THE TV SET
Camcorder & Video
Game Connection
13
Note : If S-v deo and RCA jack are connected at the same t me, the TV set only detects the S-V deo mode.
* If your AV dev ce has both V deo OUT term nal and S-V deo OUT term nal, the S-V deo connect on s
recommended for better p cture qual ty.
Watching the Camcorder Recording on V
1. Prepare the S-v deo and RCA connector.
2. These connectors connect to S-V deo1, S-V deo2 or AV1, AV2 as shown n the p cture below.
3. Turn on the TV set and camcorder/v deo game.
4.
Select AV1,2 / S-V deo1,2 mode, us ng the ””
button of the Remote controller or “” button of the
TV set.
INPUT SERVICE INPUT
COMPONENT
AUDIO PCHDMI
MONITOR OUT
DIGITAL
AUDIO
AV1
VIDEO L - AUDIO - R
L - AUDIO - R
S-VIDEO 1
OPTICAL
Video game
BACK OF THE TV SET
DVD Player
connection
14
INPUT SERVICE INPUT
COMPONENT
AUDIO PCHDMI
MONITOR OUT
DIGITAL
AUDIO
AV1
VIDEO L - AUDIO - R
L - AUDIO - R
S-VIDEO 1
OPTICAL
INPUT SERVICE INPUT
COMPONENT
AUDIO PCHDMI
MONITOR OUT
DIGITAL
AUDIO
AV1
VIDEO L - AUDIO - R
L - AUDIO - R
S-VIDEO 1
OPTICAL
BACK OF THE TV SET
BACK OF THE TV SET
Note :
• When you connect w th the component v deo, please check the colour of the cable between the DVD and
TV set.
Note :
If S-v deo and RCA jack are connected at the same t me, the TV set w ll only detect the S-V deo mode.
• If your AV dev ce has both V deo OUT term nal and S-V deo OUT term nal, the S-V deo connect on s
recommended for better p cture qual ty.
When connecting with a component cable
When connecting with a S-VHS cable and RCA cable
S B(Set op Box)
Connection
15
INPUT SERVICE INPUT
COMPONENT
AUDIO PCHDMI
MONITOR OUT
DIGITAL
AUDIO
AV1
VIDEO L - AUDIO - R
L - AUDIO - R
S-VIDEO 1
OPTICAL
Set Top Box
BACK OF THE TV SET
INPUT SERVICE INPUT
COMPONENT
AUDIO PCHDMI
MONITOR OUT
DIGITAL
AUDIO
AV1
VIDEO L - AUDIO - R
L - AUDIO - R
S-VIDEO 1
OPTICAL
Set Top Box
BACK OF THE TV SET
When connecting with a HDMI cable
When connecting with a component cable
PC
Connection
16
INPUT SERVICE INPUT
COMPONENT
AUDIO PCHDMI
MONITOR OUT
DIGITAL
AUDIO
AV1
VIDEO L - AUDIO - R
L - AUDIO - R
S-VIDEO 1
OPTICAL
1. F rst adjust resolut on of the PC. (640 X 480, 800 X 600, 1024 X 768)
2. Connect between PC and TV set us ng the D-sub and Aud o cable as shown n the p cture below.
3. Turn on the PC and TV set.
4. select PC mode by press ng “MULTIMEDIA” button on the remote control or ” ” button of the TV
set.
INPUT SERVICE INPUT
COMPONENT
AUDIO PCHDMI
MONITOR OUT
DIGITAL
AUDIO
AV1
VIDEO L - AUDIO - R
L - AUDIO - R
S-VIDEO 1
OPTICAL
1. F rst adjust resolut on of the PC. (640 X 480, 800 X 600, 1024 X 768)
2. Connect between PC and TV set us ng the HDMI and Aud o cable as shown n the p cture below.
3. Turn on the PC and TV set.
4.
select HDMI mode by press ng “MULTIMEDIA” button on the remote control or
””
button of the TV
set.
BACK OF THE TV SET
BACK OF THE TV SET
When connecting with PC(D-Sub) cable.
When connecting with a HDMI cable.
Note : If the graph c card of the PC only supports a DVI s gnal, you must connect the Aud o cable as shown n the
p cture upper.
PC
Connection
17
PC CONNEC ION NO ES:
1) The resolut on of the TV set s best at 1024 768(XGA).
2) If there s a [Vert al Frequency] sett ng menu n the [D splay] Menu of the PC, adjust the frequency to 60Hz.
3) If the PC resolut on s too h gh, t may be hard to detect s gnals. Select a su table resolut on.
4) HDMI nput port rece ves only d g tal S gnal.
5) Depend ng on the graph c card when you plug & unplug the HDMI connect on the screen may not d splay
correctly. Restart the computer f th s happens.
6) Depend ng on graph c card, problems l ke no s gnal delected or l ne no ses can happen. If these problems
happen contact the graph c card company for help.
Multi input resolution available in LCD V.
Resolut on V-freq HDMI PC(D-Sub) Component Standard
60Hz O O X
640 X 480 72Hz O O X
75Hz O O X VESA Standard
60Hz O O X VESA Standard
800 X 600 72Hz O O X VESA Standard
75Hz O O X
60Hz O O X VESA Standard
1024 X 768 70Hz O O X VESA Standard
75Hz O O X VESA Standard
720 X 480 60Hz O X O
720 X 576 50Hz O O O
1280 X 720 50Hz O X O
60Hz O O O
1920 X 1080 50Hz O X O
60Hz O O O
720 X 480 60Hz X X O
720 X 576 50Hz X X O
Note : • When you connect w th component, D-Sub, and HDMI, you must check the nput resolut on of external
dev ces.
•1280 X 720 mode s commonly used for Component.
•So f th s mode s used at PC mode, the screen can be enlarged.
Cable V
Broadcasting
Connection
18
Watch ng cable telev s on s only poss ble after you have subscr bed to the local broadcast ng company and
nstalled a cable rece ver.
Cable TV
Broadcasting
Station
INPUT SERVICE INPUT
COMPONENT
AUDIO PCHDMI
MONITOR OUT
DIGITAL
AUDIO
AV1
VIDEO L - AUDIO - R
L - AUDIO - R
S-VIDEO 1
OPTICAL
External Input Connection Source
Antenna Input Connection
Watch ng cable telev s on s only poss ble after you have subscr bed to the local broadcast ng company
and nstalled a cable rece ver. You may make the connect on to any of the Component nput and nput
AV1, AV2.
BACK OF THE TV SET
Connect with the
Dolby Digital AMP
19
INPUT SERVICE INPUT
COMPONENT
AUDIO PCHDMI
MONITOR OUT
DIGITAL
AUDIO
AV1
VIDEO L - AUDIO - R
L - AUDIO - R
S-VIDEO 1
OPTICAL
Surround L Surround R
RL CenterWoofer
Dolby Digital AMP
I
N
P
U
T
Optical output
If you connect the opt cal output to a Dolby d g tal AMP, you can l sten to better sound.
BACK OF THE TV SET
Name of
Each Part
20
MENU
PR
AV2
R-AUDIO-L
VIDEO S-VIDEO
1
2
3
4
5
6
Control Key Buttons.
Buttons : Each t me you press th s button, the TV w ll cycle through:
TV => AV1/S-V doe1 => AV2/S-V deo2 => PC => HDMI => Component 1 =>
Component2 =>TV
MENU Button : Use th s button to enter and ex t the MENU.
Buttons : Use th s buttons to change your TV’s volume or to move the cursor n the menu.
Buttons : Use th s buttons to change channels on your TV or to move the cursor n the menu.
Stand-by / V ON button
Button : Use th s button to change from TV STAND-by mode to TV ON mode.
<LED Indicator> : L ght up red n Stand-By mode and L ghts up green n TV on mode. When TV s
Ch ld Lock mode, LED w ll cycle through red / green n Stand-By mode.
Remote controller signal receiver
The screen conta ns the remote controller s gnal rece v ng w ndow; therefore, po nt the remote controller
towards the screen when us ng t.
PR
Buttons on the TV set have the same funct ons as those of the remote controller.
Front / Side Panel
Front Panel
S de Panel (Left) S de Panel (R ght)

Other manuals for DLM Series

1

This manual suits for next models

35

Other Daewoo LCD TV manuals

Daewoo DLT-32C5 User manual

Daewoo

Daewoo DLT-32C5 User manual

Daewoo DSL-15D3 User manual

Daewoo

Daewoo DSL-15D3 User manual

Daewoo DLV-26C3SMBS User manual

Daewoo

Daewoo DLV-26C3SMBS User manual

Daewoo DLM-42U1 User manual

Daewoo

Daewoo DLM-42U1 User manual

Daewoo DLM-32C3 Series User manual

Daewoo

Daewoo DLM-32C3 Series User manual

Daewoo DLP-3212L User manual

Daewoo

Daewoo DLP-3212L User manual

Daewoo DLP-32C5 User manual

Daewoo

Daewoo DLP-32C5 User manual

Daewoo DLT-19L1T Instruction Manual

Daewoo

Daewoo DLT-19L1T Instruction Manual

Daewoo DLP-2622 User manual

Daewoo

Daewoo DLP-2622 User manual

Daewoo DSL-20D3 User manual

Daewoo

Daewoo DSL-20D3 User manual

Daewoo LV32L1B1LM User manual

Daewoo

Daewoo LV32L1B1LM User manual

Daewoo DLT-26C2, DLT-26C3, DLT-32C1, User manual

Daewoo

Daewoo DLT-26C2, DLT-26C3, DLT-32C1, User manual

Daewoo DLP-20J1 User manual

Daewoo

Daewoo DLP-20J1 User manual

Daewoo LM32L1 Series User manual

Daewoo

Daewoo LM32L1 Series User manual

Daewoo DLX-32D1SMSB User manual

Daewoo

Daewoo DLX-32D1SMSB User manual

Daewoo DLP-20J1 User manual

Daewoo

Daewoo DLP-20J1 User manual

Daewoo DSL26T2WCH User manual

Daewoo

Daewoo DSL26T2WCH User manual

Daewoo DLM-32C5LPB User manual

Daewoo

Daewoo DLM-32C5LPB User manual

Daewoo DLP-26C2 User manual

Daewoo

Daewoo DLP-26C2 User manual

Daewoo DLV-42U1GMB User manual

Daewoo

Daewoo DLV-42U1GMB User manual

Daewoo LA37L1B1LM User manual

Daewoo

Daewoo LA37L1B1LM User manual

Daewoo DLP-17D3 User manual

Daewoo

Daewoo DLP-17D3 User manual

Daewoo DLV-22T1 User manual

Daewoo

Daewoo DLV-22T1 User manual

Daewoo DLT-19W4 User manual

Daewoo

Daewoo DLT-19W4 User manual

Popular LCD TV manuals by other brands

SOYO Dymond DYLT032A user manual

SOYO

SOYO Dymond DYLT032A user manual

HP LT3200 Illustrated parts & service map

HP

HP LT3200 Illustrated parts & service map

Haier LET32T1000HF instruction manual

Haier

Haier LET32T1000HF instruction manual

LG 43NANO75UPA owner's manual

LG

LG 43NANO75UPA owner's manual

Sony BRAVIA KDL-46EX720 Specifications

Sony

Sony BRAVIA KDL-46EX720 Specifications

Philips 42HF7443/10 user manual

Philips

Philips 42HF7443/10 user manual

Polaroid FLU-1514SA user guide

Polaroid

Polaroid FLU-1514SA user guide

Sharp LC-42D63T Service manual

Sharp

Sharp LC-42D63T Service manual

Hitachi UT42X902 - 42" LCD Flat Panel Display Specifications

Hitachi

Hitachi UT42X902 - 42" LCD Flat Panel Display Specifications

Sylvania LC220SS2 quick start guide

Sylvania

Sylvania LC220SS2 quick start guide

HANNspree 48,3cm (19") Liquid Crystal Display... user manual

HANNspree

HANNspree 48,3cm (19") Liquid Crystal Display... user manual

LG 42LD560 Service manual

LG

LG 42LD560 Service manual

ViewSonic N3250wb-1G Service manual

ViewSonic

ViewSonic N3250wb-1G Service manual

TCL L26HDF12TA user guide

TCL

TCL L26HDF12TA user guide

Philips 26PFL5403D Specifications

Philips

Philips 26PFL5403D Specifications

Toshiba 42ZV635D Service manual

Toshiba

Toshiba 42ZV635D Service manual

LG 42LP1D Specifications

LG

LG 42LP1D Specifications

Sharp LC-32LD145E Service manual

Sharp

Sharp LC-32LD145E Service manual

manuals.online logo
manuals.online logoBrands
  • About & Mission
  • Contact us
  • Privacy Policy
  • Terms and Conditions

Copyright 2025 Manuals.Online. All Rights Reserved.