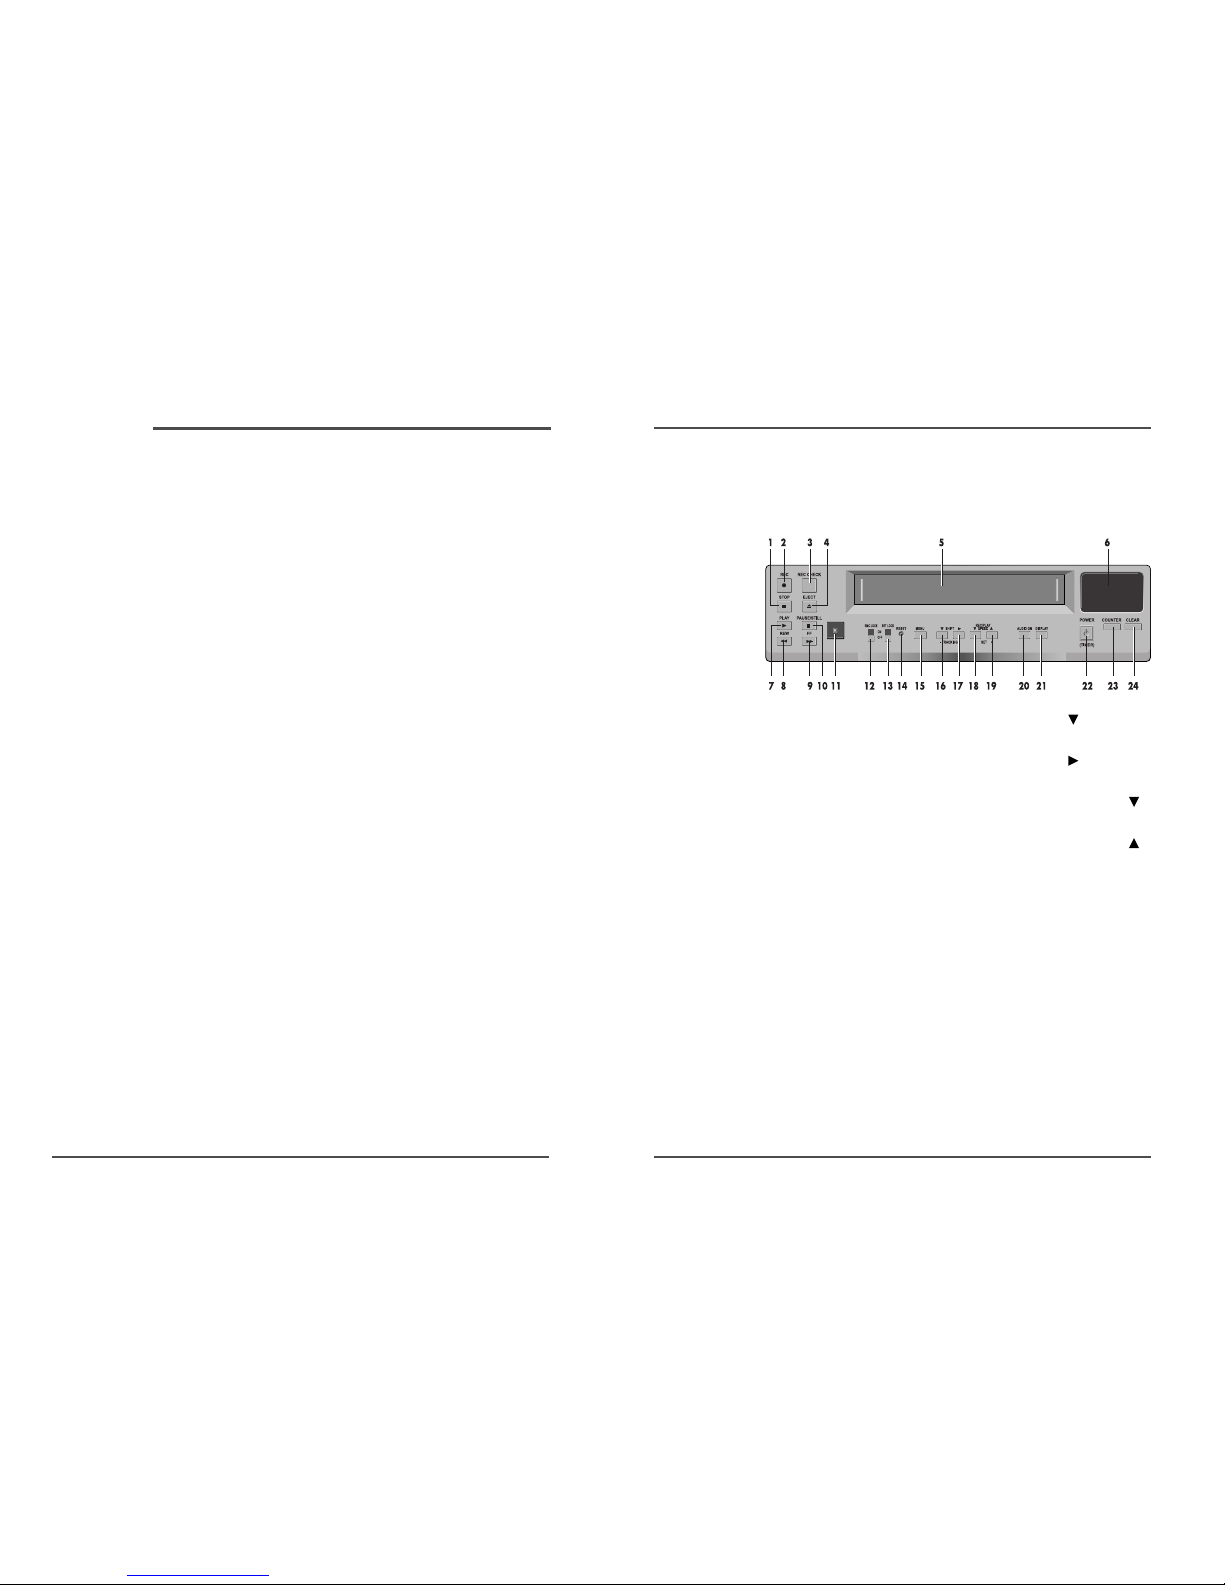
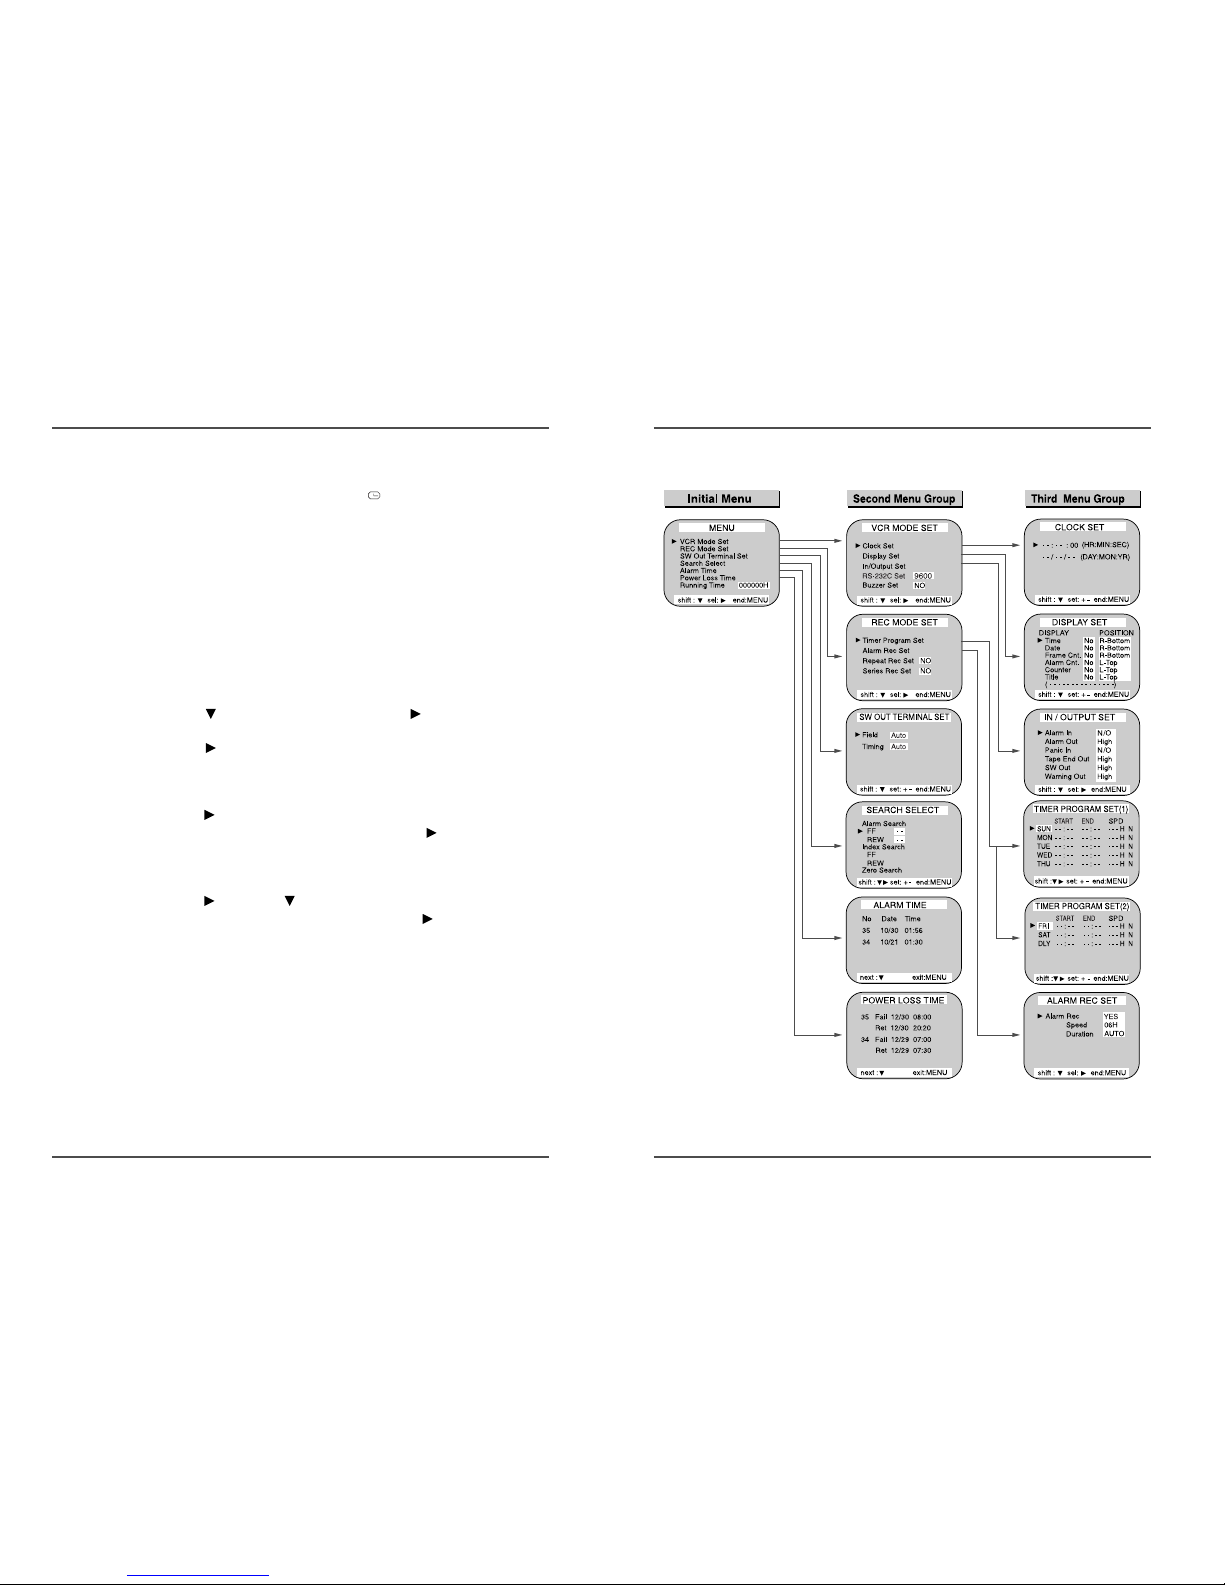
7
Time Lapse Video Cassette Recorder
6
Time Lapse Video Cassette Recorder
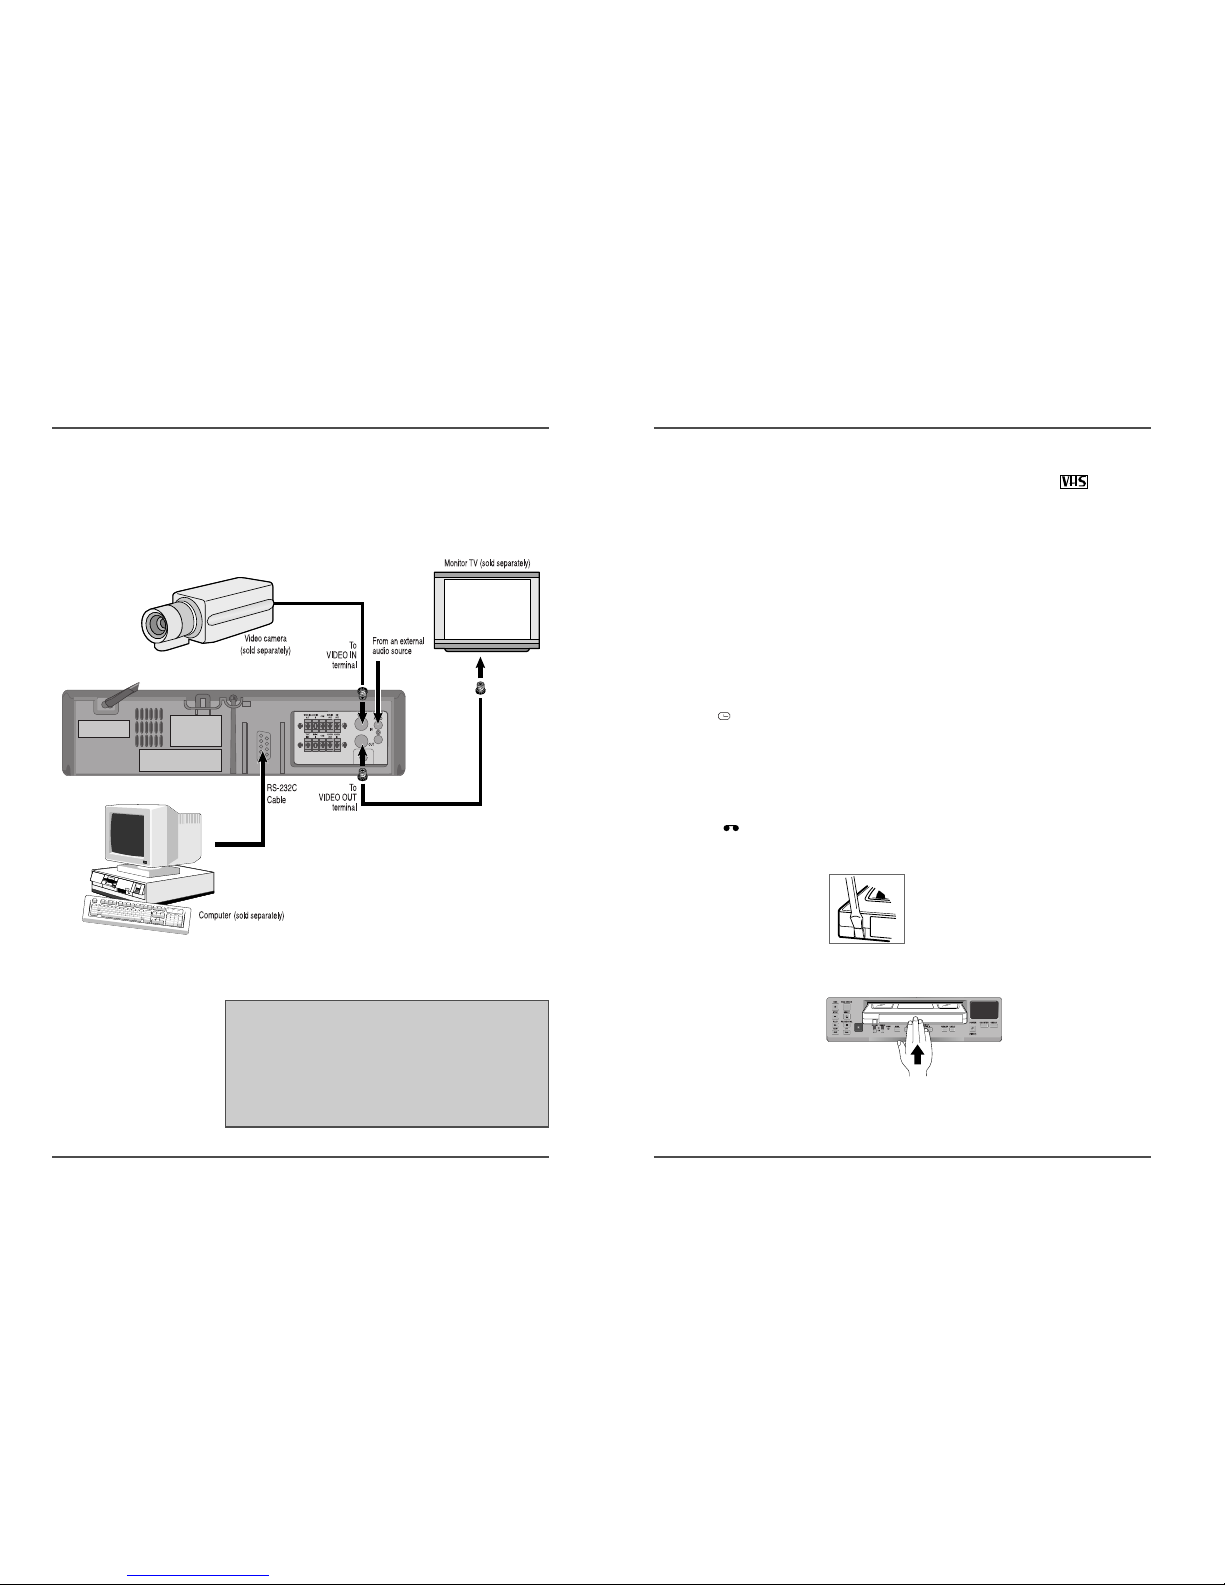
Connections
Connect the video camera and monitor TV as shown in
the figure below.
NOTE : Make sure to turn the power off on all devices
before making the connections.
Power Cord Installation
Insert the plug of the power cord into an outlet.
Video Cassettes Tapes
Use only video cassette tapes bearing the logo.
This VCR was primarily designed for use with E-180
cassette tapes. It is recommended to use E-180 VHS or E-
240 VHS video cassette tapes for optimal performance.
Handling Cassette Tapes
Cassette tapes should always be stored vertically in their
cases, away from high temperatures, magnetic fields,
direct sunlight, dirt, dust and locations subject to mold
formation.
Do not tamper with the cassette mechanism.
Never touch the tape with your fingers.
Protect cassette tapes from shocks or strong vibrations.
To Protect your recordings
After having recorded a tape, if you wish to keep the
recording, use a flathead screwdriver to break off the
erasure-prevention tab on the cassette.
To record again on a tape without erasure-prevention tab,
cover the hole with adhesive tape.
Erasure-prevention tab
To prevent accidental erasure, remove the
tab after recording.
To record again, cover the hole with vinyl
tape.
Loading
Place the cassette, label
side up, in the loading
slot. Gently push the
center of the cassette
until it is loaded
automatically.
Unloading
In STOP mode, press the EJECT button. The cassette is
automatically ejected.
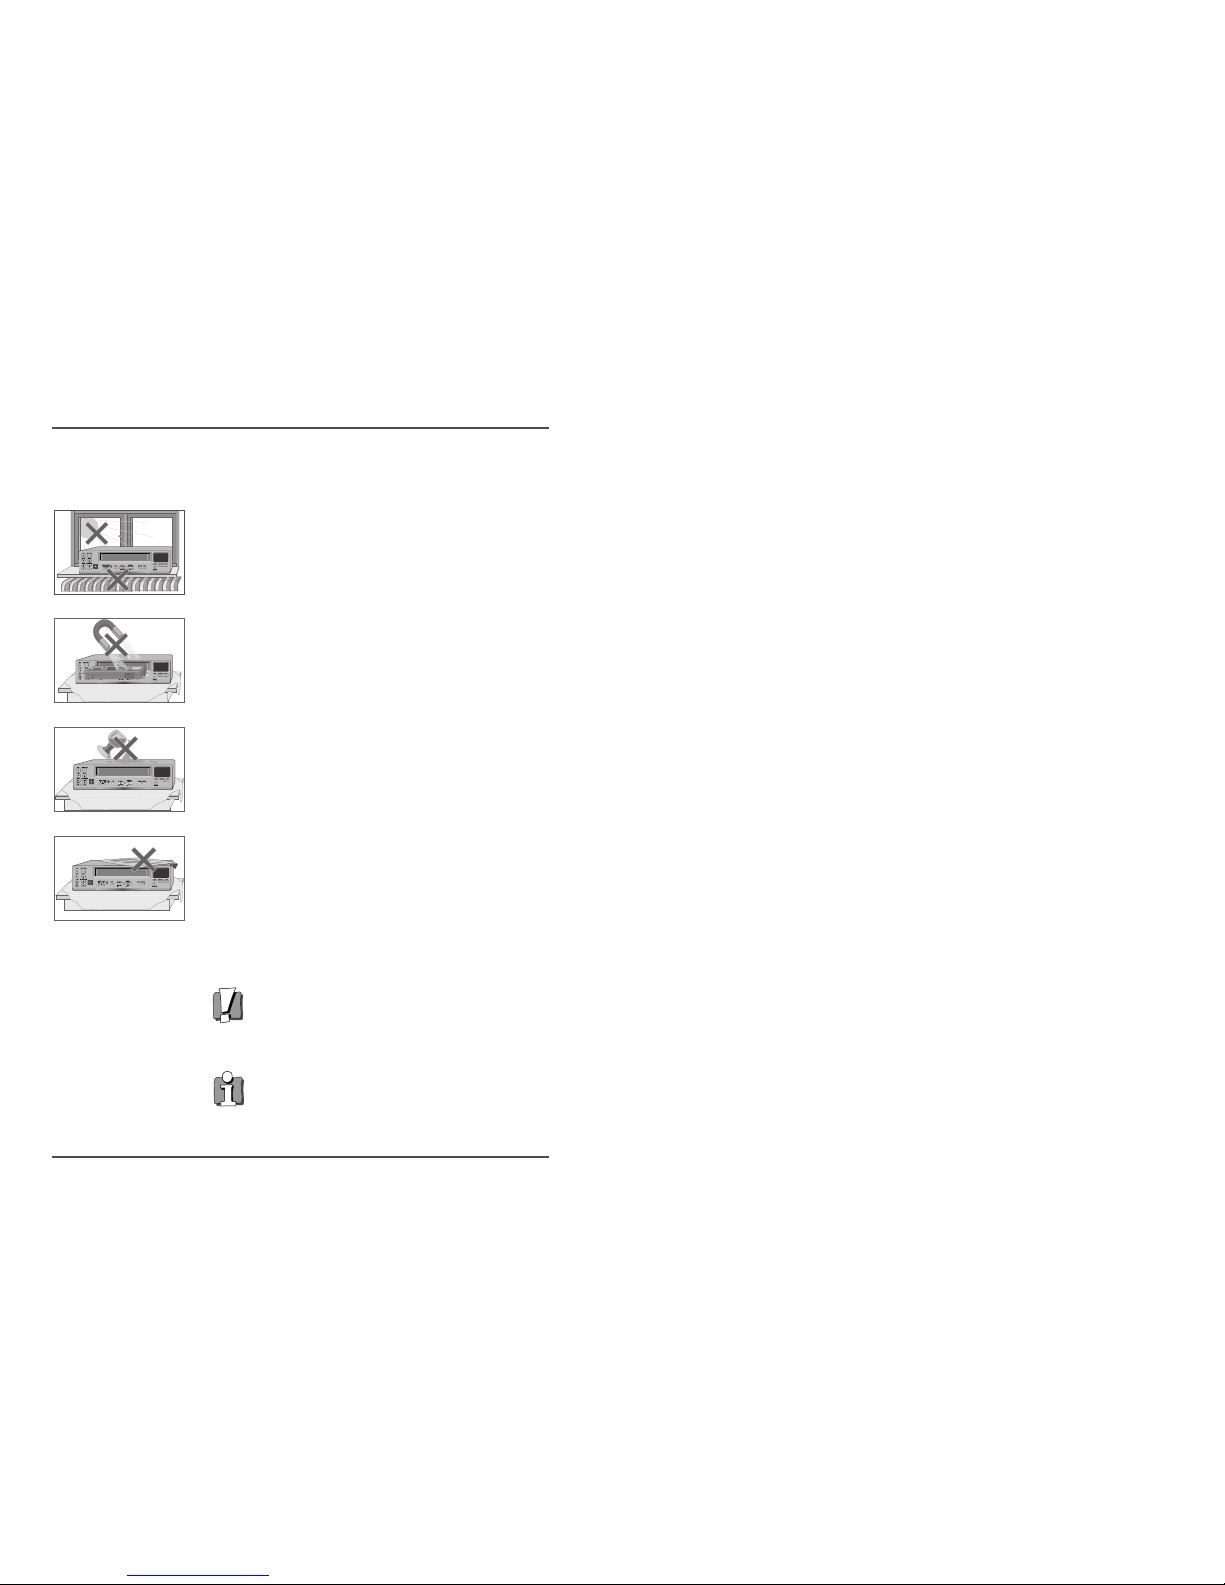
✔
• If you try to record on a
cassette without the erasure-
prevention tab, the VCR will
eject the cassette.
• If the TIMER button is
pressed when a cassette
without the erasure-
prevention tab is loaded,
the VCR will eject the
cassette, the timer recording
indicator ( ) will start
flashing and a buzzer will
sound if “YES” is set in the
menu for buzzer.
✔
• When the cassette is
loaded, the cassette
indicator “ “ will light
on the display panel.
• The counter display will
switch to the reset counter
“0H 00M 00S” display on
the monitor screen. (“0H
00M” on the display
panel.)
✔
• Do not insert any object in
the cassette loading slot, as
that may cause injury and
damage to the VCR.
• If your hand gets stuck in
the cassette loading slot,
unplug the power cord and
consult the dealer where the
unit was bought. Do not
forcibly pull the hand out as
that may cause severe
injuries.
• For more details,please refer to the manuals
accompanying all other devices. If the connections are not made
properly, it may cause a fire or damage the equipment.
• For RS-232C connection with computer and
its operation, refer to the additional RS-232C serial
communication manual.