Daewoo DWC-ED1432 User manual

INSTRUCTION MANUAL
DWC-ED1432
Washing Machine Instruction Manual
■Economic wash system
Using artificial intelligence, the washer uses minimum energy and water by selecting optimal water level and
washing time.
■Low noise system
The washer minimizes the washing and spinning noises by sensing the amount of laundry.
■Child-Lock
The Child-Lock system has been used to prevent children from pressing any button to change the program
during operation.
■Self-Cleaning Course of Drum
Enable to Self-Cleaning of Drum.
■Digital Condensing Dry System
Condensing Dry System with saving energy
DWC-ED1432(영)_CUTA(MALTA향).indd 1 2017-08-10 오후 3:10:58

E-2 E-3
E-2 E-3
Parts and featuresContents
A NOTE TO YOU
Thank you for buying a DAEWOO appliance.
DAEWOO washers are easy to use, save time, and help you manage your home better.
This manual contains valuable information about how to operate and maintain your washer properly
and safely.
Please read it carefully.
Parts and features ...............................................................................................................3
Washer & dryer safety ........................................................................................................4
InstallatIon InstructIons ..................................................................................................7
Inlet hose connectIon..........................................................................................................8
electrIcal requIrements....................................................................................................9
oPeratIng your Washer.....................................................................................................10
the functIons of the control Panel...........................................................................12
WashIng Procedure and Program selectIon ..........................................................13
maIntenance ............................................................................................................................31
hoW to clean the fIlter.....................................................................................................32
remoVIng staIns .....................................................................................................................33
trouBle shootIng .................................................................................................................34
sPecIfIcatIon ...........................................................................................................................35
WIrIng dIagram .......................................................................................................................35
DWC-ED1432(영)_CUTA(MALTA향).indd 2 2017-08-10 오후 3:10:58

E-2 E-3
E-2 E-3
El
Parts and featuresContents
Accessories
NOTE
The drawings in the book may vary from your washer model.
They are designed to show the different features of all models coverd by this book.
Your model may not include all features.
The parts and features of your washer are illustrated on the page.
Become familiar with all parts and features before using your washer.
INLET HOSE
DETERGENT CASE
DOOR
COVER PUMP
POWER CORD
CONTROL PANEL
HOSE DRAIN
Hose drain Inlet hose Manual Cap holder
(4EA)
Spanner
(Option)
DWC-ED1432(영)_CUTA(MALTA향).indd 3 2017-08-10 오후 3:10:59

E-4 E-5
E-4 E-5
Washer & Dryer safety
(cont.)
Washer & Dryer safety
Save these instructions
Your safety is important to us.
To reduce the risk of fire, electrical shock, or injury when using your washer adhere to the
following basic precautions.
Read all instructions before using your washer
• Flammable fluids (dry-cleaning
solvents, kerosene, gasoline, etc.)
should not be used or stored in or
near your washer.
Do not add flammable fluids to your
wash water.These substances give
off vapors that can create a fire
hazard or explosion.
• After starting a cycle, do not reach
into the washer until all motions stop.
• Do not tamper with the controls.
• Children of less than 3 years should
be kept away unless continuously
supervised.
• If the supply cord is damaged, it must
be replaced by the manufacturer, or
its service agent or a similarly
qualified person in order to avoid a
hazard.
• If the appliance is supplied from a
cord extension set or electrical
portable outlet device it should be
positioned so that it is not subjected
to splashing or ingress of moisture.
• The lint trap has to be cleaned
frequently, if applicable.
• The tumble dryer is not to be used if
industrial chemicals have been used
for cleaning.
• Lint must not to be allowed to
accumulate around the tumble dryer.
Please ...
• Have only a qualified person install,
repair, or replace parts on washer.
• Maintain washer properly.
• Protect washer from the weather and
keep it where the temperature will not
fall below freezing.
• Do not install the washer at a place of
extremely high humidity. It could
cause an electric shock or a short
circuit.
• Connect washer to the correct outlet,
electrical supply, water supply, and
drain supply.
DWC-ED1432(영)_CUTA(MALTA향).indd 4 2017-08-10 오후 3:10:59

E-4 E-5
E-4 E-5
El
Washer & Dryer safety
(cont.)
Washer & Dryer safety
Understanding your responsibilities
• Do not use chlorine bleach and ammonia or acid(such as vinegar or rust remover)
in the same wash. Hazardous fumes can form.
• Unplug power supply cord before attempting to service your washer.
• Do not wash fiberglass material.
Small particles can stick to fabrics washed in following loads and cause skin
irritation.
• Do not spray water on the control panel of the washer.
It could cause fire or an electric shock.
• In case of the dual valve model, if you connect only one water inlet valve, there can
be water leakage from unconnected water inlet valve.
• This appliance must be grounded.
• To avoid electrical shock, use a metal pipe for the ground connection.
• Do not dry unwashed items in the tumble dryer.
• Items that have been soiled with substances such as cooking oil, acetone, alcohol,
petrol, kerosene, spot removers, turpentine, waxes and wax removers should be
washed in hot water with an extra amount of detergent before being dried in the
tumble dryer.
• Items such as foam rubber (latex foam), shower caps, waterproof textiles, rubber
backed articles and clothes or pillows fitted with foam rubber pads should not be
dried in the tumble dryer.
• The appliance is not to be used by persons (including children) with reduced
physical, sensory or mental capabilities, or lack of experience and knowledge,
unless they have been given supervision or instruction.
• Children shall not play with the appliance.
• Cleaning and user maintenance shall not be made by children without supervision.
• If you want to obtain user manual, please visit our Store, Our Dealer and
Authorized Service Center.
• Fabric softeners, or similar products, should be used as specified by the fabric
softener instructions.
• The final part of a tumble dryer cycle occurs without heat (cool down cycle) to
ensure that the items are left at a temperature that ensures that the items will not
be damaged.
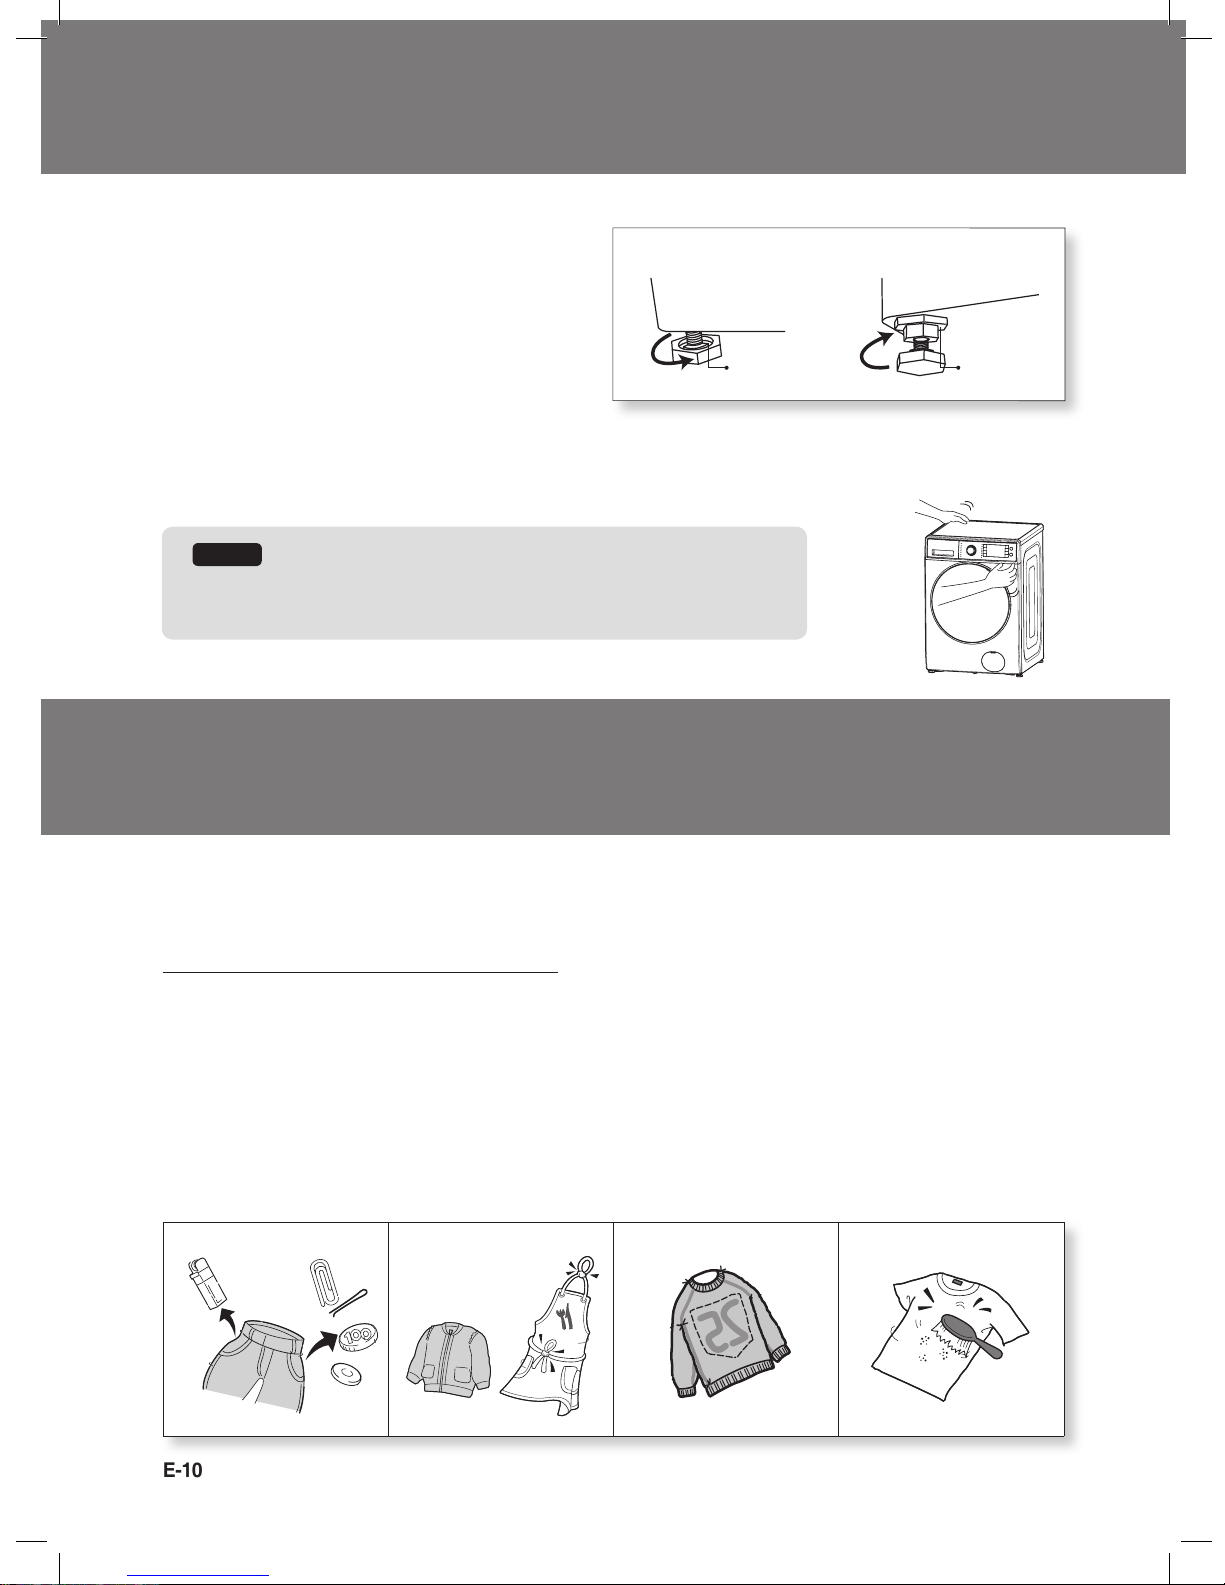
• Remove all objects from pockets such as lighters and matches.
• The appliance must not be installed behind a lockable door, a sliding door or a door
with a hinge on the opposite side to that of the tumble dryer, in such a way that a
full opening of the tumble dryer door is restricted.
DWC-ED1432(영)_CUTA(MALTA향).indd 5 2017-08-10 오후 3:10:59

E-6 E-7
E-6 E-7
Washer & Dryer safety
(cont.)
Caution, risk of fire and burn
Oil-affected items can ignite spontaneously, especially when exposed to
heat sources such as in a tumble dryer. The items become warm, causing
an oxidation reaction in the oil. Oxidation creates heat. If the heat cannot
escape, the items can become hot enough to catch fire. Piling, stacking or
storing oil-affected items can prevent heat from escaping and so create a
fire hazard.
If it is unavoidable that fabrics that contain vegetable or cooking oil or
have been contaminated by hair care products be placed in a tumble
dryer they should first be washed in hot water with extra detergent - this
will reduce, but not eliminate, the hazard.
WARNING: Never stop a tumble dryer before the end of the drying cycle
unless all items are quickly removed and spread out so that
the heat is dissipated.
DWC-ED1432(영)_CUTA(MALTA향).indd 6 2017-08-10 오후 3:11:00

E-6 E-7
E-6 E-7
Installation instructions
Removing transit bolts
Location of washer
• Check location where the washer will be installed. Make sure you have everything necessary for correct
installation.
• Do not place or store your washer below 0°C (32°F) to avoid any damage from freezing.
• Do not place or store laundry products on top of washer at any times
• Install the washer on the horizontal solid floor.
If the washer is installed on an unsuitable floor, it could make
considerable noise, vibrate severely and cause a malfunction. If the
washer is not level, adjust leg up or down for horizontal installation.
• Carpet does not obstruct the openings for washing machines with
ventilation openings in the base.
• Leave some space (right & left : 2cm, rear : 10cm).
• In case of built-in installation, the distance between top of the washer and
bottom of upper plate should be at least 3mm.
1. Before operating the washer, remove the transit
bolts(4ea) along with the rubber.
• If the bolts are not removed, it may cause
heavy vibration, noise and malfunction.
2. Unscrew the 4 bolts with the 10mm hex wrench
or spanner or cross-tip screwdriver. Keep the
4 bolts for a later time.
• When the appliance is transported, transit bolts
will be re-used.
3. Close the holes with the cap holders supplied.
Laundry
Tub
Washer
approx.
2cm
Drain Hose
DWC-ED1432(영)_CUTA(MALTA향).indd 7 2017-08-10 오후 3:11:00

E-8 E-9
E-8 E-9
Inlet hose connection
The new hose-sets supplied with the appliance are to be used and old hose-sets should not be reused.
In using only one water tap or in case of only one water inlet valve, connect the inlet hose to the cold water
inlet valve.
Option : Be careful not to confuse hot water inlet and cold water inlet.
For Ordinary Tap
1Pull down the collar of the inlet
hose to separate it from the
water tap adapter.
2Loosen the four screws properly
in order to fit into water tap.
3 Fit the water tap adapter into
the water tap and tighten the
four screws evenly while
pushing up the adapter so that
the rubber packing can stick to
the water tap tightly.
4Remove the tape, and screw
connector B into connect A
tightly.
5Connect the inlet hose to the
water tap adapter by pulling
down the collar of the hose end.
6Connect the inlet hose adapter
of the hose to the water inlet of
the washer by turning it
clockwise to be fixed tightly.
Raccorclement B
Raccorclement A
Connector
Connector
Rubber
Packing
Hose
Connector
Rubber
Packing
Hose
Connector
inlet
TAPE
Connector
Raccorclement B
Raccorclement A
Connector
Connector
Rubber
Packing
Hose
Connector
Rubber
Packing
Hose
Connector
inlet
TAPE
Connector
Raccorclement B
Raccorclement A
Connector
Connector
Rubber
Packing
Hose
Connector
Rubber
Packing
Hose
Connector
inlet
TAPE
Connector
Raccorclement B
Raccorclement A
Connector
Connector
Rubber
Packing
Hose
Connector
Rubber
Packing
Hose
Connector
inlet
TAPE
Connector
Raccorclement B
Raccorclement A
Connector
Connector
Rubber
Packing
Hose
Connector
Rubber
Packing
Hose
Connector
inlet
TAPE
Connector
Raccorclement B
Raccorclement A
Connector
Connector
Rubber
Packing
Hose
Connector
Rubber
Packing
Hose
Connector
inlet
TAPE
Connector
• Please check the rubber packing
present inside the inlet hose
adapter of the hose.
For Screw-Shaped Tap
1Connect the inlet hose to the
water tap by screwing the
connector tightly.
2Connect the connector- inlet
supplied if necessary.
3Connect the inlet hose adapter
to the water inlet of a washer
and turn it to be fixed.
Raccorclement B
Raccorclement A
Connector
Connector
Rubber
Packing
Hose
Connector
Rubber
Packing
Hose
Connector
inlet
TAPE
Connector
Raccorclement B
Raccorclement A
Connector
Connector
Rubber
Packing
Hose
Connector
Rubber
Packing
Hose
Connector
inlet
TAPE
Connector
Raccorclement B
Raccorclement A
Connector
Connector
Rubber
Packing
Hose
Connector
Rubber
Packing
Hose
Connector
inlet
TAPE
Connector
*Check the packing in the inlet
Accouplement A
Accouplement B
DWC-ED1432(영)_CUTA(MALTA향).indd 8 2017-08-10 오후 3:11:01

E-8 E-9
E-8 E-9
Electrical requirements
Drain system
• Never forget to install drain hose before operating your washer.
• Open the packing box, and there is a drain hose inside the drum.
• Connect the drain hose to the drain outlet at the back side of the washer.
•
Top of laundry tub must be at least 60cm high and no higher than 100cm from bottom of washer.
• When installing the drain hose to tub(sink), secure it tightly with a string.
• Proper securing of the drain hose will protect the floor from damage due to water leakage.
• When the drain hose is too long, do not force it back into the washer. This will cause abnormal noise.
Level adjustment
1If the washer is installed on an unsuitable
floor, it could make considerable noise,
vibrate and cause a malfunction.
Electrical shock hazard
Failure to follow these instructions could result in death or serious injury.
• Electrical earth is required on this washer
• If it does not fit the outlet, have a proper outlet
installed by a qualified electrician.
• Don’t earth to a gas pipe.
• Don’t change the power supply cord plug.
• Check with a qualified electrician if you are not
sure the washer is properly earthed.
WARNING
Recommended earthing method
For your personal safety, this washer must be earthed.
This washer is equipped with a power supply cord ‘A’ having a earthing plug ‘B’.
To minimize possible shock hazard, the cord must be plugged into a mating
earthing-type wall receptacle ‘C’.
If a mating wall receptacle is not available, it is the personal responsibility
and obligation of the customer to have the proper earthed wall receptacle
installed by a qualified electrician.
C
B
A
DWC-ED1432(영)_CUTA(MALTA향).indd 9 2017-08-10 오후 3:11:02

E-10 E-11
E-10 E-11
Electrical requirements
(cont.)
Operating your washer
2Adjust the level of washer using adjustable legs.
• Please check if there is any gap between the
four adjustable legs and the floor.
• Adjust the level of washer by turning adjustable
legs. And make it sure that there
is no swaying of washer.
• After the adjustment is finished, turn the fixing
nuts up tightly so that the washer
maintains the adjustment.
3 Make it sure that the washer does not sway when you press down the four corners of the washer’s top
plate.
To obtain the best washing results, you must operate your washer properly.
This section gives you this important information.
Preparing clothes for washing
• Remove pins, buckles, coins and other hard objects from clothings, pockets, etc before putting the wash into
the washing machine. Failing which can cause malfunction or damages to the drum assembly, pump and
others.
•
Close zippers, snaps, and hooks to avoid snagging other items.
Remove pin, buckles, and other hard objects to avoid scratching the washer interior.
• Empty pockets and pull them inside out.
• Turn down cuffs and turn synthetic knits inside out to avoid pilling.
• Tie strings and sashes to avoid tangling.
• Treat spots and stains. (See “Removing stains” on page 33)
NOTE
There should be no swaying of washer and all the adjustable legs
should stick to the floor closely.
Fixing Nut
adjustable leg
DWC-ED1432(영)_CUTA(MALTA향).indd 10 2017-08-10 오후 3:11:03

E-10 E-11
E-10 E-11
Operating your washer
(cont.)
Operating your washer
Sorting
• Separate heavily soiled items from lightly soiled ones, even if they would normally be washed together.
• Separate dark colors from light colors, colorfast items from non-colorfast item.
Loading
• Drop items into washer loosely. Items should move easily through wash water for best cleaning and wrinkle-
free results.
• Load washer properly and select correct load size setting.
Overloading and selecting a setting too small for the wash load can :
- Cause poor cleaning
- Increase wrinkling
- Create excessive lint
- Wear out items faster (because of pilling)
• Mix large and small items in each load. Load evenly to maintain washer balance.
An unbalanced load can make the washer vibrate during spin.
• Reduce wash time when using a small load size setting. Load with only a few small items needs less
wash time.
• Use a large load size setting to reduce wrinkling with permanent press clothes and some synthetic knits.
These items should have more room to move in the water than heavy items. (towels, jeans)
Adding detergent
Soil (Heavy, Normal, Light) Separate clothes according to amount of soil.
Color (White, Lights, Darks) Separate white clothes from colored clothes.
Lint (Lint producers,Collectors) Wash lint producers and lint collectors separately.
Detergent case Adding fabric softener
• If desired, add measured liquid fabric softener
to the softener inlet.
• Pour liquid fabric softener into the dispenser using
the amount recommended on the package.
• Do not exceed the maximum fill line.
Overfilling can cause early dispensing of the fabric
softener which could stain clothes.
• Do not open the detergent case when water is
supplied.
• Avoid pouring fabric softener directly on the clothes.
• Please use only the powder detergent for the front loader washing machine.
• Please use the proper amount of detergent in conformity with the instruction of the detergent
manufacturer.
• A use of a large amount of detergent more than the recommended amount can cause many soapsuds
and the overload to the motor.
In addition to, this will deteriorate the washing and rinse performance.
Main wash
Pre wash
Fabric softener
DWC-ED1432(영)_CUTA(MALTA향).indd 11 2017-08-10 오후 3:11:03

E-12 E-13
E-12 E-13
The functions of the control panel
Press this switch to turn the power on or off.
Operation and temporary stop is repeated as it is pressed.
When you want to change program in operating;
press the “Start/Pause” button →Select the program that you want to change →
press the “Start/Pause” button again.
You can select the course you want, and each lamp is turned on when that course
is selected.
For the more detailed information, please refer to the page 15~30.
It can be used to adjust temperature of water according to types of the load to be
washed.
As the button is pressed, temperature of water is selected by
Cold → 20°C → 40°C → 60°C → 95°C
By pressing the spin button, the spin speed can be chosen.
If press "spin button" spin RPM change.
You can select the course you want, and each lamp is turned on when that course
is selected.
As the button is pressed, the wash course is selected by
Prewash →Soak →Wash
You can select the course you want, and each lamp is turned on when that course
is selected.
As the button is pressed, the wash course is selected by
Cupboard →Very →Iron →Low →Time
To pre-engage time for washing.
As the button is pressed, the delayed time is longer.
* CHILD LOCK
Push the Time Delay button for 3 sec to set Child Lock.
During the Child Lock, can not touch any button during operation.
* SUPER EXPRESS
Reduce the laundry time and the number of rinsing. Recommend 3~4kg mild dirty laundry.
* MUTE
Push the Clean jet or Super Express button for 3 sec to set Mute.
During the Mute, can not sound any button.
Using the program used recently.
By selecting Rinse+ function, the number of rinsing is increased.
■ DWC-ED1432
DWC-ED1432(영)_CUTA(MALTA향).indd 12 2017-08-10 오후 3:11:05

E-12 E-13
E-12 E-13
Washing procedure and program selection
1. Cotton is automatically selected upon power on
• Press the Power button to start.
• Press the Start/Hold button
• Initial condition
- Program : Cotton
- Wash : main wash
- Rinse : 2 times
- Spin : 800
- Water temperature : 40°C
2. MANUAL SELECTING
• Press the Power button to start
• Select the conditions which you want to use by turning the program dial and pressing each button.
• Press the Start/Pause button.
3. Reserved washing
• Reservation can be made from 1 hour to 19 hours.
example) To make reservation to start washing in 8 hours.
- Procedure to press the button.
* Each pressing of the button advances time delay by one hour.
• Now the reservation is made.
• If you want to check the selected program, press the “Start/Pause” button again.
• Preparing washing before starting “Time Delay”;
- Turn on the water tap
- Load laundry and close the door
- Place the detergent and fabric softener in the detergent case.
• To cancel the time delay, press the Power button.
• Except
- Cotton Dry, Synthetics Dry, Quick Wash & Dry
select the
program
or manual
DWC-ED1432(영)_CUTA(MALTA향).indd 13 2017-08-10 오후 3:11:06

E-14 E-15
E-14 E-15
Washing procedure and program selection (cont.)
Program Fabric
Type
Proper
Temp.
Maximum
Load
Cotton
First check if laundry is machine washable
(white cotton, linen towel and sheets) Cold~95˚C
Refer to
rating label
Colorfast garments
(shirts, night dresses,pajamas and lightly
soiled white cottons underwear)
Refer to
rating label
Synthetics Polyamide,Acrylic,Polyester Cold~60˚C Less than 3kg
Hand Wash Delicate laundry easily damaged Cold~20˚C Less than 3kg
Wool Machine washable woolens with pure
new wool only Cold~40˚C Less than 3kg
Dark Wash To protect other laundry except
laundry which kind of dark Cold~40˚C Less than 3kg
Intensive Heavy soiled clothes
(blue-jean, climbing clothes, ruck sack) Cold~95˚C Refer to
rating label
Drum Clean To clean Drum Cold~95°C Less than 3kg
Rinse+Spin Conduct Rinse and spin only Cold Refer to
rating label
Cotton
ECO
First check if laundry is machine washable
(white cotton, linen towel and sheets)
40˚C~60˚C Refer to
rating label
Colorfast garments
(shirts, night dresses, pajamas and lightly
soiled white cottons underwear)
Sports Wear Lightly soiled fast and thin laundry Cold~40˚C Less than 3kg
Quick Wash Colored laundry which is lightly
soiled fast Cold Less than 1kg
Kids Care Kids Clothes Cold~95˚C Less than 3kg
Cotton Dry Cotton and Dry -Refer to
rating label
Synthetics Dry Synthetics and Dry -Less than 3kg
Air Refresh To remove some bad smell from clothes -Less than 3kg
Quick Wash & Dry Quick wash and Dry Cold Less than 1kg
• Pre Wash : If the laundry is heavily soiled, “Pre Wash” program is recommended.
Pre Wash is available in Cotton and Synthetic programs.
• Rinse+ : Used to introduce an additional rinse, which may assist in removing traces of detergent residue.
4. FUNCTION
• Recommended programs according to the laundry type
DWC-ED1432(영)_CUTA(MALTA향).indd 14 2017-08-10 오후 3:11:06

E-14 E-15
E-14 E-15
Washing procedure and program selection (cont.)
NOTE
• If you want to change the setting during operation, press the Start/Pause button to hold the operation and press
the button you want.
• ‘Cold’, ‘20’ °C, ‘40’ °C, ‘60’ °C and ‘95’ °C washing temperatures are selectable with Cotton program.
• ‘Prewash’, ‘Rinse+’ wash options are selectable with Cotton program.
CAUTION
• If you select washing temperature ‘95’ °C, some cold water is supplied before the drain of main wash.
This is to protect the user from the hazard of burn injury by lowering the temperature of hot wash water instead
of directly draining it. Therefore this is not a malfuction.
(Be careful with the draining water, since it can be still hot although the temperature is lowered.)
1
Put the laundry in the drum. Put detergent and softener into the detergent case.
Then close the door.
• Put detergent into the main wash and prewash compartments in the detergent case.
Softener should be below the ‘MAX’ level.
• Put detergent into the prewash compartment only if you want to add prewash.
• When you want to use bleach, put it into the main wash compartment with
detergent.
2
Press the Power button.
• The LED shows only ‘- --’ and all Program Lights turn on.
3
Select the ‘Cotton/normal’ program using program selection dial.
• If you press Start/Pause button after power button without selecting program, the
‘Cotton/normal’ program is selected as default program.
• Washing temperature ‘40’ °C, spin ‘800’ rpm are selected automatically.
• If you want to change washing temperature, the spin velocity or add wash options
(Rinse+, Pre-Wash), press each button.
4
Press Start/Pause button.
• The Door is locked. By sensing the weight of laundry and supplying wash water,
The appliance starts washing.
* COTTON PROGRAM
DWC-ED1432(영)_CUTA(MALTA향).indd 15 2017-08-10 오후 3:11:06

E-16 E-17
E-16 E-17
Washing procedure and program selection (cont.)
NOTE
• If you want to change the setting during operation, press the Start/Pause button to hold the operation and press
the button you want.
• Only ‘Cold’, ‘20’ °C, ‘40’ °C, ‘60’ °C washing temperatures are selectable with Synthetics program.
• ‘Prewash’, ‘Rinse+’ wash options are selectable with Synthetics program.
• The appropriate amount of laundry for Synthetics program is below 3kg.
1
Put the laundry in the drum. Put detergent and softener into the detergent case.
Then close the door.
• Put detergent into the main wash and prewash compartments in the detergent case.
Softener should be below the ‘MAX’ level.
• Put detergent into the prewash compartment only if you want to add prewash.
• When you want to use bleach, put it into the main wash compartment with
detergent.
2
Press the Power button.
• The LED shows only ‘- --’ and all Program Lights turn on.
3
Select the ‘Synthetic’ program using program selection dial.
• Washing temperature ‘40’ °C, spin ‘800’ rpm are selected automatically.
• If you want to change washing temperature, the spin velocity or add wash options
(Prewash, Rinse+), press each button.
4
Press Start/Pause button.
• The Door is locked. By sensing the weight of laundry and supplying wash water,
The appliance starts washing.
* SYNTHETICS PROGRAM
DWC-ED1432(영)_CUTA(MALTA향).indd 16 2017-08-10 오후 3:11:06

E-16 E-17
E-16 E-17
Washing procedure and program selection (cont.)
NOTE
• Only 'cold / 20°C' washing temperature is selectable with Handwash program.
• The appropriate amount of laundry for Delicate program is below 3kg.
1
Put the laundry in the drum. Put detergent and softener into the detergent case.
Then close the door.
• Put detergent into the main wash compartments in the detergent case.
Softener should be below the ‘MAX’ level.
• When you want to use bleach, put it into the main wash compartment with
detergent.
2
Press the Power button.
• The LED shows only ‘- --’ and all Program Lights turn on.
3
Select the ‘Handwash’ program using program selection dial.
• Washing temperature ‘Cold’, spin ‘400’ rpm are selected automatically.
4
Press Start/Pause button.
• The Door is locked. By sensing the weight of laundry and supplying wash water,
The appliance starts washing.
* HANDWASH PROGRAM
DWC-ED1432(영)_CUTA(MALTA향).indd 17 2017-08-10 오후 3:11:06

E-18 E-19
E-18 E-19
Washing procedure and program selection (cont.)
NOTE
• If you want to change the setting during operation, press the Start/Pause button to hold the operation and press
the button you want.
• Only ‘Cold’, ‘20’°C’, ‘40’°C’ washing temperatures is selectable with Wool program.
• The rpm of spin velocity is not selectable with Wool program is order to protect damage on laundry.
• The appropriate amount of laundry for Wool program is below 3.0kg.
• Use only special detergent for wool.
(Since special neutral detergent for wool creates a lot of bubbles, use appropriate amount).
1
Put the laundry in the drum. Put detergent and softener into the detergent case.
Then close the door.
• Put detergent into the main wash compartment in the detergent case.
Softener should be below the ‘MAX’ level.
• When you want to use bleach, put it into the main wash compartment with
detergent.
2
Press the Power button.
• The LED shows only ‘- --’ and all Program Lights turn on.
3
Select the ‘Wool’ program using program selection dial.
• Washing temperature ‘20’ °C, spin ‘400’ rpm are selected automatically.
4
Press Start/Pause button.
• The Door is locked. By sensing the weight of laundry and supplying wash water,
The appliance starts washing.
* WOOL PROGRAM
DWC-ED1432(영)_CUTA(MALTA향).indd 18 2017-08-10 오후 3:11:06

E-18 E-19
E-18 E-19
Washing procedure and program selection (cont.)
NOTE
• If you want to change the setting during operation, press the Start/Pause button to hold the operation and press
the button you want.
• Only ‘Cold’, ‘20’°C’, ‘40’°C’ washing temperatures is selectable with Dark wash program.
• The appropriate amount of laundry for Dark wash program is below 3.0kg.
1
Put the laundry in the drum. Put detergent and softener into the detergent case.
Then close the door.
• Put detergent into the main wash compartment in the detergent case.
Softener should be below the ‘MAX’ level.
• When you want to use bleach, put it into the main wash compartment with
detergent.
2
Press the Power button.
• The LED shows only ‘- --’ and all Program Lights turn on.
3
Select the ‘Dark wash program using program selection dial.
• Washing temperature ‘Cold’, spin ‘400’ rpm are selected automatically.
4
Press Start/Pause button.
• The Door is locked. By sensing the weight of laundry and supplying wash water,
The appliance starts washing.
* DARK WASH PROGRAM
DWC-ED1432(영)_CUTA(MALTA향).indd 19 2017-08-10 오후 3:11:06

E-20 E-21
E-20 E-21
Washing procedure and program selection (cont.)
NOTE
• If you want to change the setting during operation, press the Start/Pause button to hold the operation and press
the button you want.
• All washing temperatures are selectable with Intensive program.
• ‘Prewash’, ‘Rinse+’ wash options are selectable with Intensive program.
CAUTION
• If you select washing temperature ‘95’ °C, some cold water is supplied before the drain of main wash.
This is to protect the user from the hazard of burn injury by lowering the temperature of hot wash water instead
of directly draining it. Therefore this is not a malfuction.
(Be careful with the draining water, since it can be still hot although the temperature is lowered.)
1
Put the laundry in the drum. Put detergent and softener into the detergent case.
Then close the door.
• Put detergent into the main wash and prewash compartments in the detergent case.
Softener should be below the ‘MAX’ level.
• Put detergent into the prewash compartment only if you want to add prewash.
• When you want to use bleach, put it into the main wash compartment with
detergent.
2
Press the Power button.
• The LED shows only ‘- --’ and all Program Lights turn on.
3
Select the ‘Intensive’ program using program selection dial.
• Washing temperature ‘40’ °C, spin ‘800’ rpm are selected automatically.
• If you want to change washing temperature, the spin velocity or add wash options
(Prewash, Rinse+), press each button.
4
Press Start/Pause button.
• The Door is locked. By sensing the weight of laundry and supplying wash water,
The appliance starts washing.
* INTENSIVE PROGRAM
DWC-ED1432(영)_CUTA(MALTA향).indd 20 2017-08-10 오후 3:11:06
Table of contents
Other Daewoo Washer manuals

Daewoo
Daewoo DWC-LD141X User manual

Daewoo
Daewoo DWF-H361ASA User manual

Daewoo
Daewoo DWD-WD1352WC User manual

Daewoo
Daewoo DWF-800MP User manual

Daewoo
Daewoo DWF-800 User manual

Daewoo
Daewoo DWD-FD1451 User manual

Daewoo
Daewoo WM812T1WU4RS User manual

Daewoo
Daewoo DW-5010 User manual

Daewoo
Daewoo DWF-200SL User manual

Daewoo
Daewoo DWD-WD1353WC User manual

Daewoo
Daewoo DWF-262PW User manual

Daewoo
Daewoo DWC-LD141 Series User manual

Daewoo
Daewoo DWF-200M(V) User manual

Daewoo
Daewoo DWF-1089 User manual

Daewoo
Daewoo DWF-750 User manual

Daewoo
Daewoo DWM-7010 User manual

Daewoo
Daewoo mini User manual

Daewoo
Daewoo DWD-FT1011 User manual

Daewoo
Daewoo DWC-UD121DC User manual

Daewoo
Daewoo DWD-UD123X User manual