III
Table of Contents
Foreword.................................................................................................................................................... I
Important Safeguards and Warnings..................................................................................................... II
1 Initialization............................................................................................................................................ 1
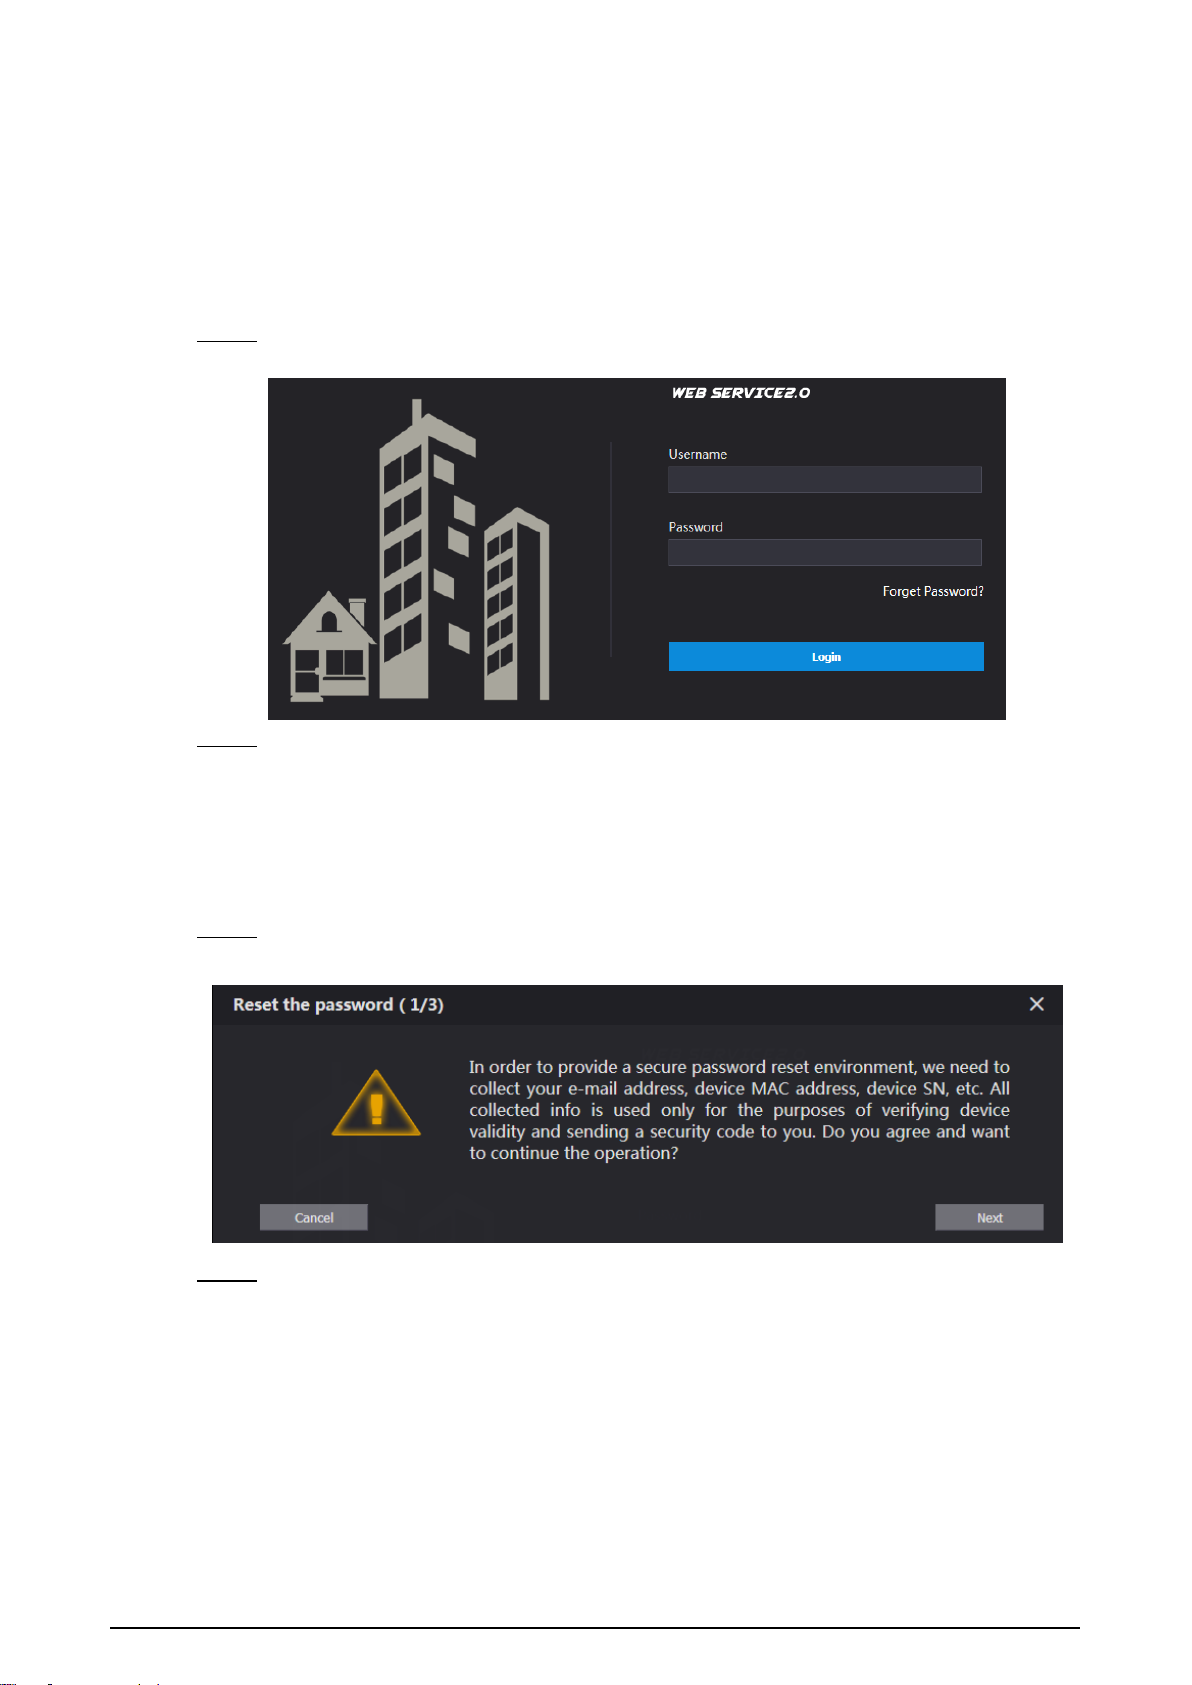
2 Login Interface....................................................................................................................................... 2
Login.............................................................................................................................................. 22.1 Resetting Password...................................................................................................................... 22.2
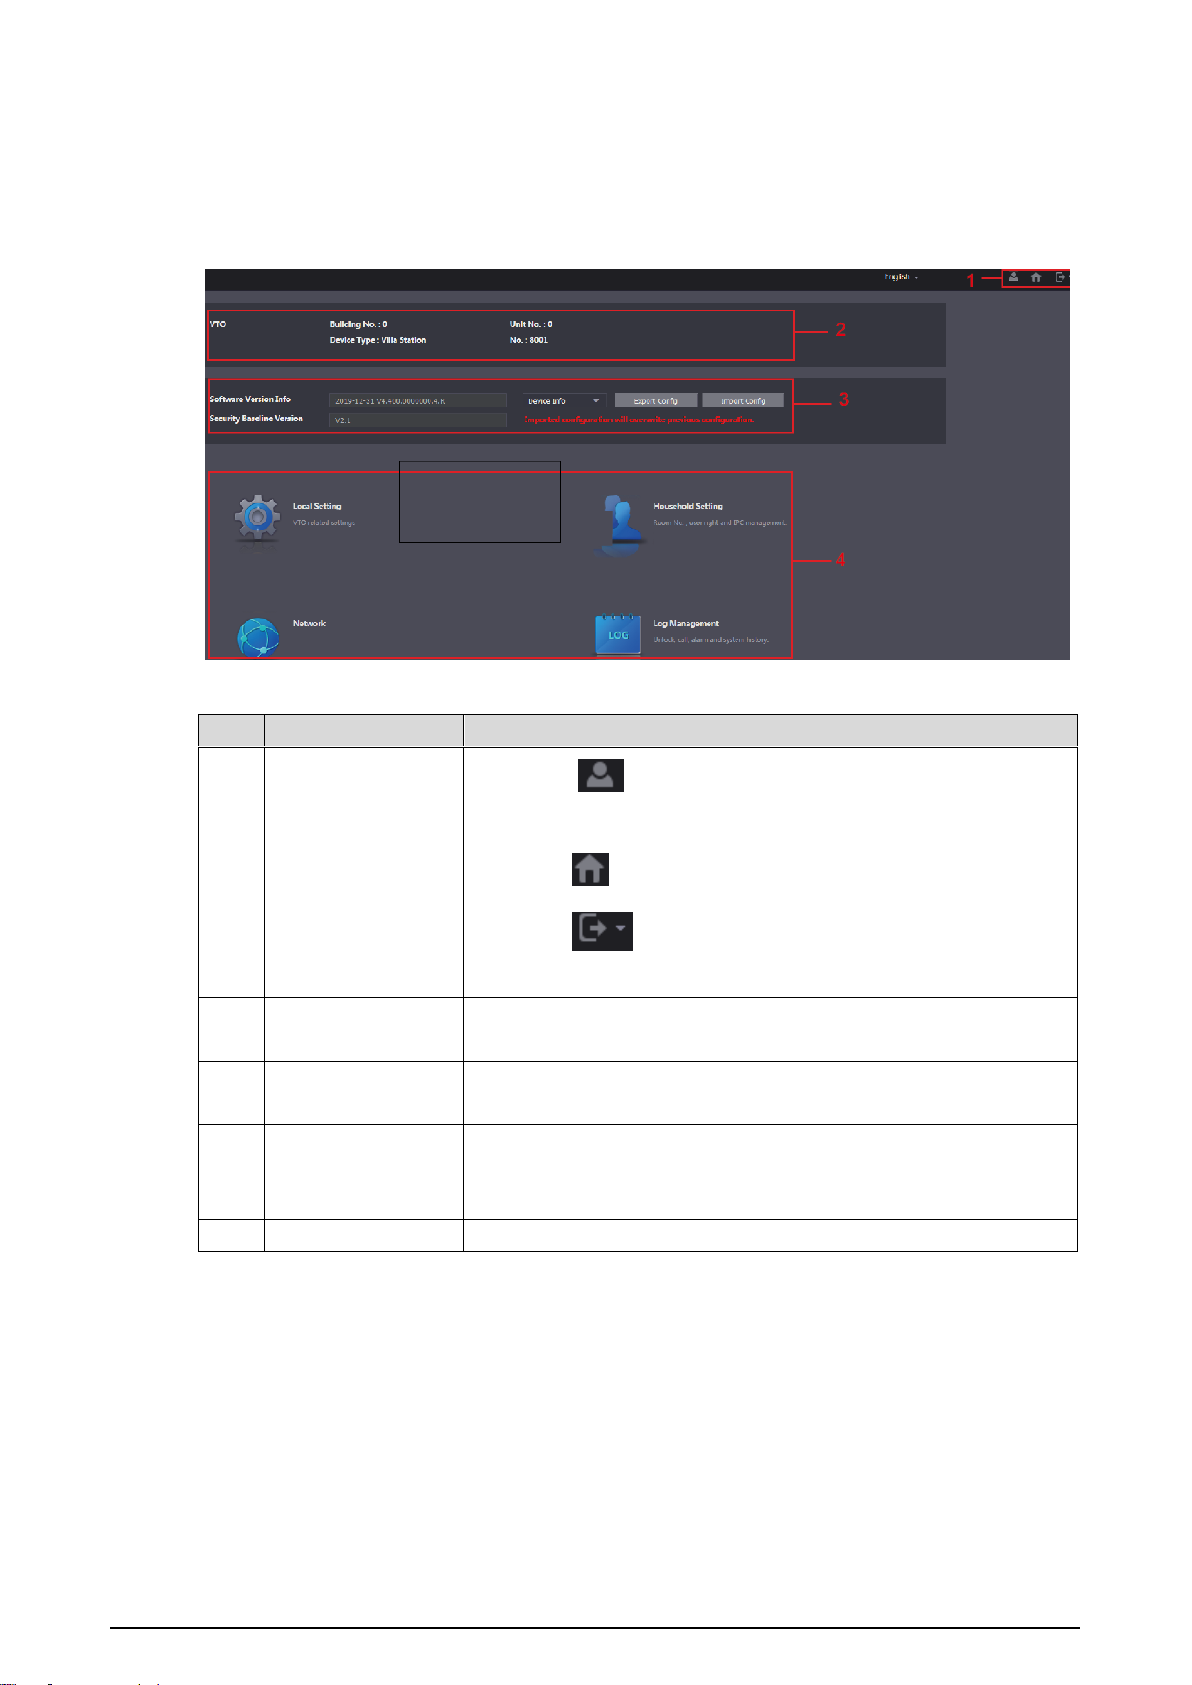
3 Main Interface ........................................................................................................................................ 4
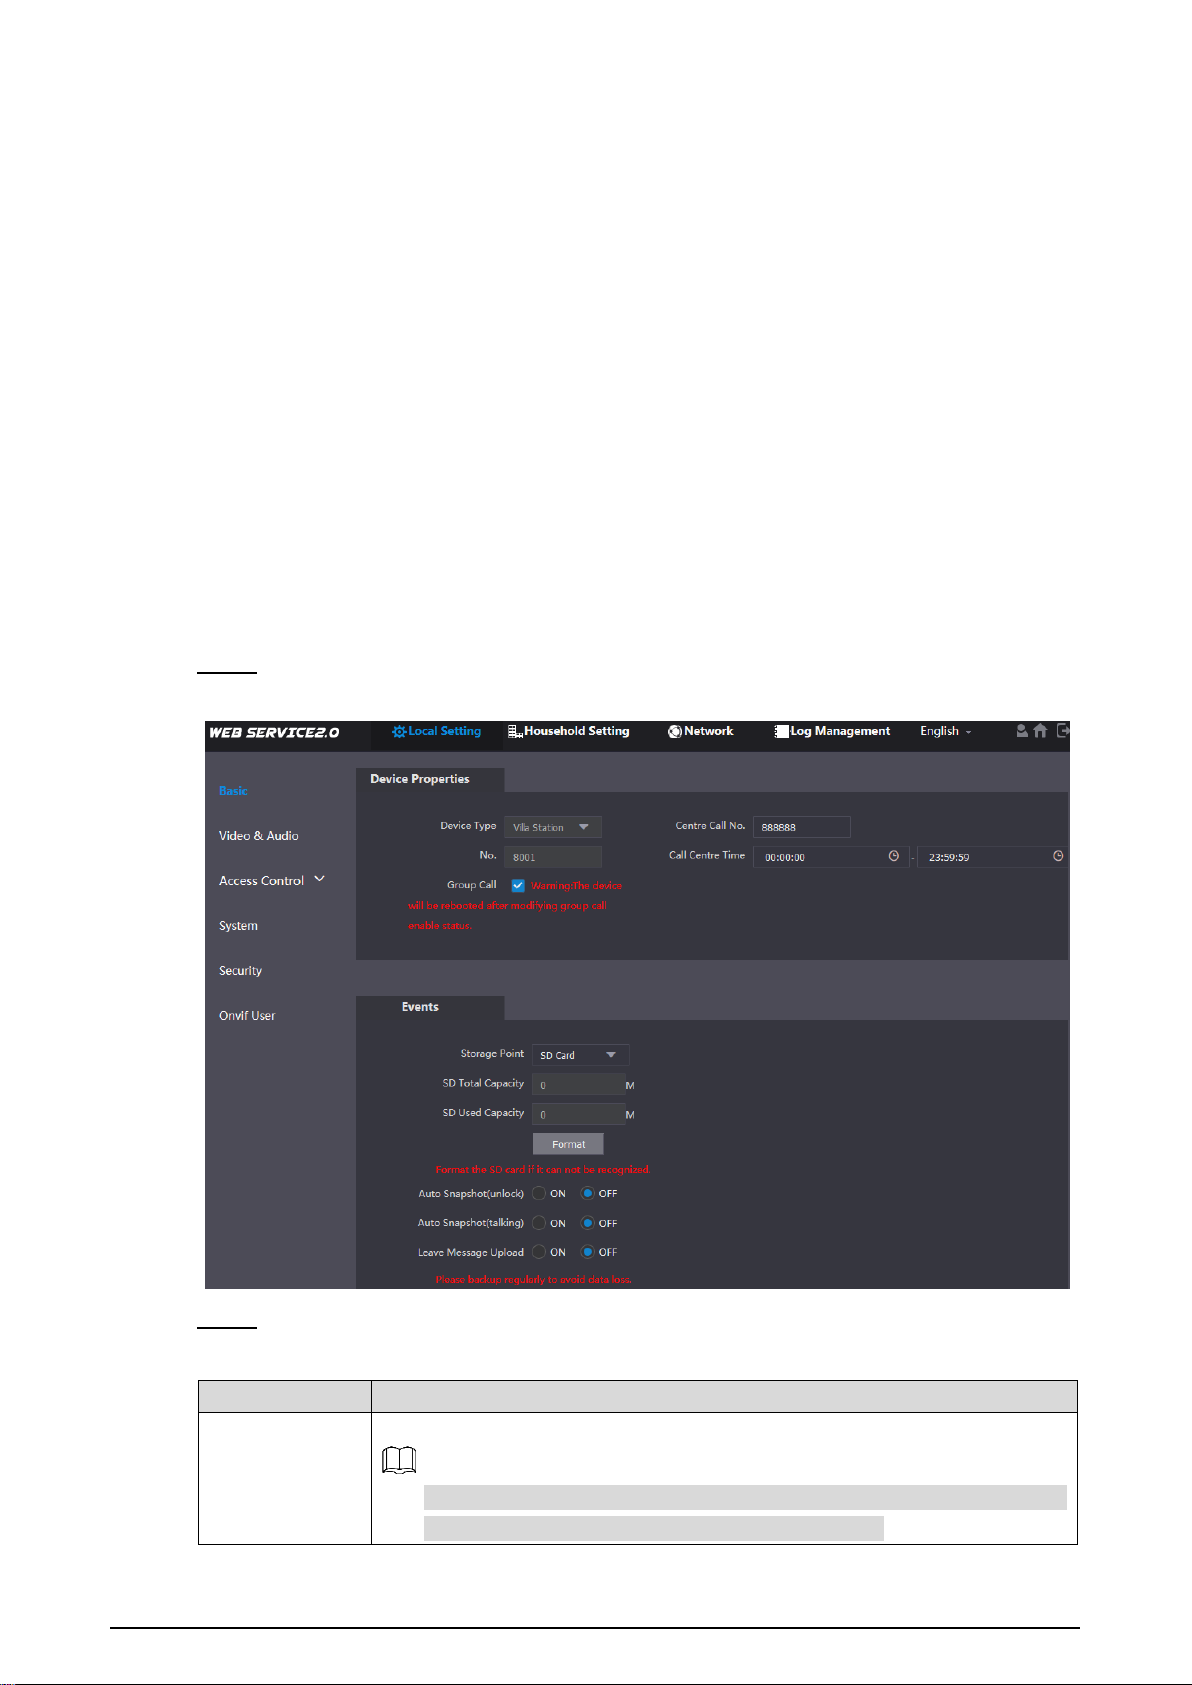
4 Local Setting.......................................................................................................................................... 5
Basic.............................................................................................................................................. 54.1 4.1.1 Device Properties & Events................................................................................................ 5
4.1.2 Façade Layout (Only for VTO3211D)................................................................................. 6
Video & Audio................................................................................................................................ 74.2 Access Control.............................................................................................................................. 94.3 4.3.1 Local ................................................................................................................................... 9
4.3.2 RS-485.............................................................................................................................. 10
System ........................................................................................................................................ 104.4 Security........................................................................................................................................114.5 Onvif User................................................................................................................................... 124.6
5 Household Setting............................................................................................................................... 13
VTO No. Management................................................................................................................ 135.1 5.1.1 Adding VTO....................................................................................................................... 13
5.1.2 Modifying VTO Information............................................................................................... 14
5.1.3 Deleting VTO .................................................................................................................... 15
Room No. Management.............................................................................................................. 155.2 5.2.1 Adding Room Number ...................................................................................................... 15
5.2.2 Modifying Room Number.................................................................................................. 17
5.2.3 Issuing Access Card......................................................................................................... 17
VTS Management....................................................................................................................... 185.3 Status.......................................................................................................................................... 195.4
6 Network Setting................................................................................................................................... 20
Basic............................................................................................................................................ 206.1 6.1.1 TCP/IP .............................................................................................................................. 20
6.1.2 Port ................................................................................................................................... 20
6.1.3 HTTPS.............................................................................................................................. 21
6.1.4 P2P................................................................................................................................... 21
SIP Server................................................................................................................................... 216.2 Firewall........................................................................................................................................ 226.3
7 Log Management................................................................................................................................. 24
Call.............................................................................................................................................. 247.1 Alarm........................................................................................................................................... 247.2 Unlock ......................................................................................................................................... 247.3 Log .............................................................................................................................................. 257.4 Cybersecurity Recommendations ................................................................................... 26Appendix 1