DALBO DINCO CLASSIC 300 User manual

DINCO
CLASSIC
GB
300/380/470
Serial no: 3400-xxxx


DALBO DINCO CLASSIC
Type 300/380 cm
Congratulations on your new DINCO CLASSIC cultivator. For safety reasons and for optimal use
of the machine, please read the following instructions carefully before putting the machine
into operation.
© Copyright 1995. All rights reserved DALBO
Items which are important as regards safety are preceded by a
Tighten up all nuts and bolts after a few hours of use.
Do not operate unless seated on the tractor, or with people on or in the immediate
vicinity of the machine.
Do not allow children to operate the machine.
When driving on public road, the DINCO CLASSIC must be fixed in transport position.
The driver is responsible for compliance with the existing Road Traffic Act concerning
lights and marking.
Your DINCO CLASSIC has:
Serial number:
Type description:
Month of manufacture:
Net weight (kg.):
On applications concerning spare parts or service please state serial number. At the back of
this manual you will find a list of spare parts to help you get an overview of the components of
the machine.
EU-CONFORMITY DECLARATION
DALBO A/S
DK-7183 Randbøl
hereby declares that the above mentioned machine has been manufactured in conformity
with the provisions of the 2006/42/EC-directive, which replaces the 98/37/EC-directive and
the 91/368/EEC-, 93/44/EEC- and 93/68/EEC-amendments concerning the harmonisation of
Member States’ legislation on machinery concerning safety and health requirements for the
construction and manufacture of machinery.
DALBO A/S
Carsten Jensen, CEO
CE


DINCO CLASSIC
Table of Contents
TABLE OF CONTENTS ..................................................................................................................................................... 5
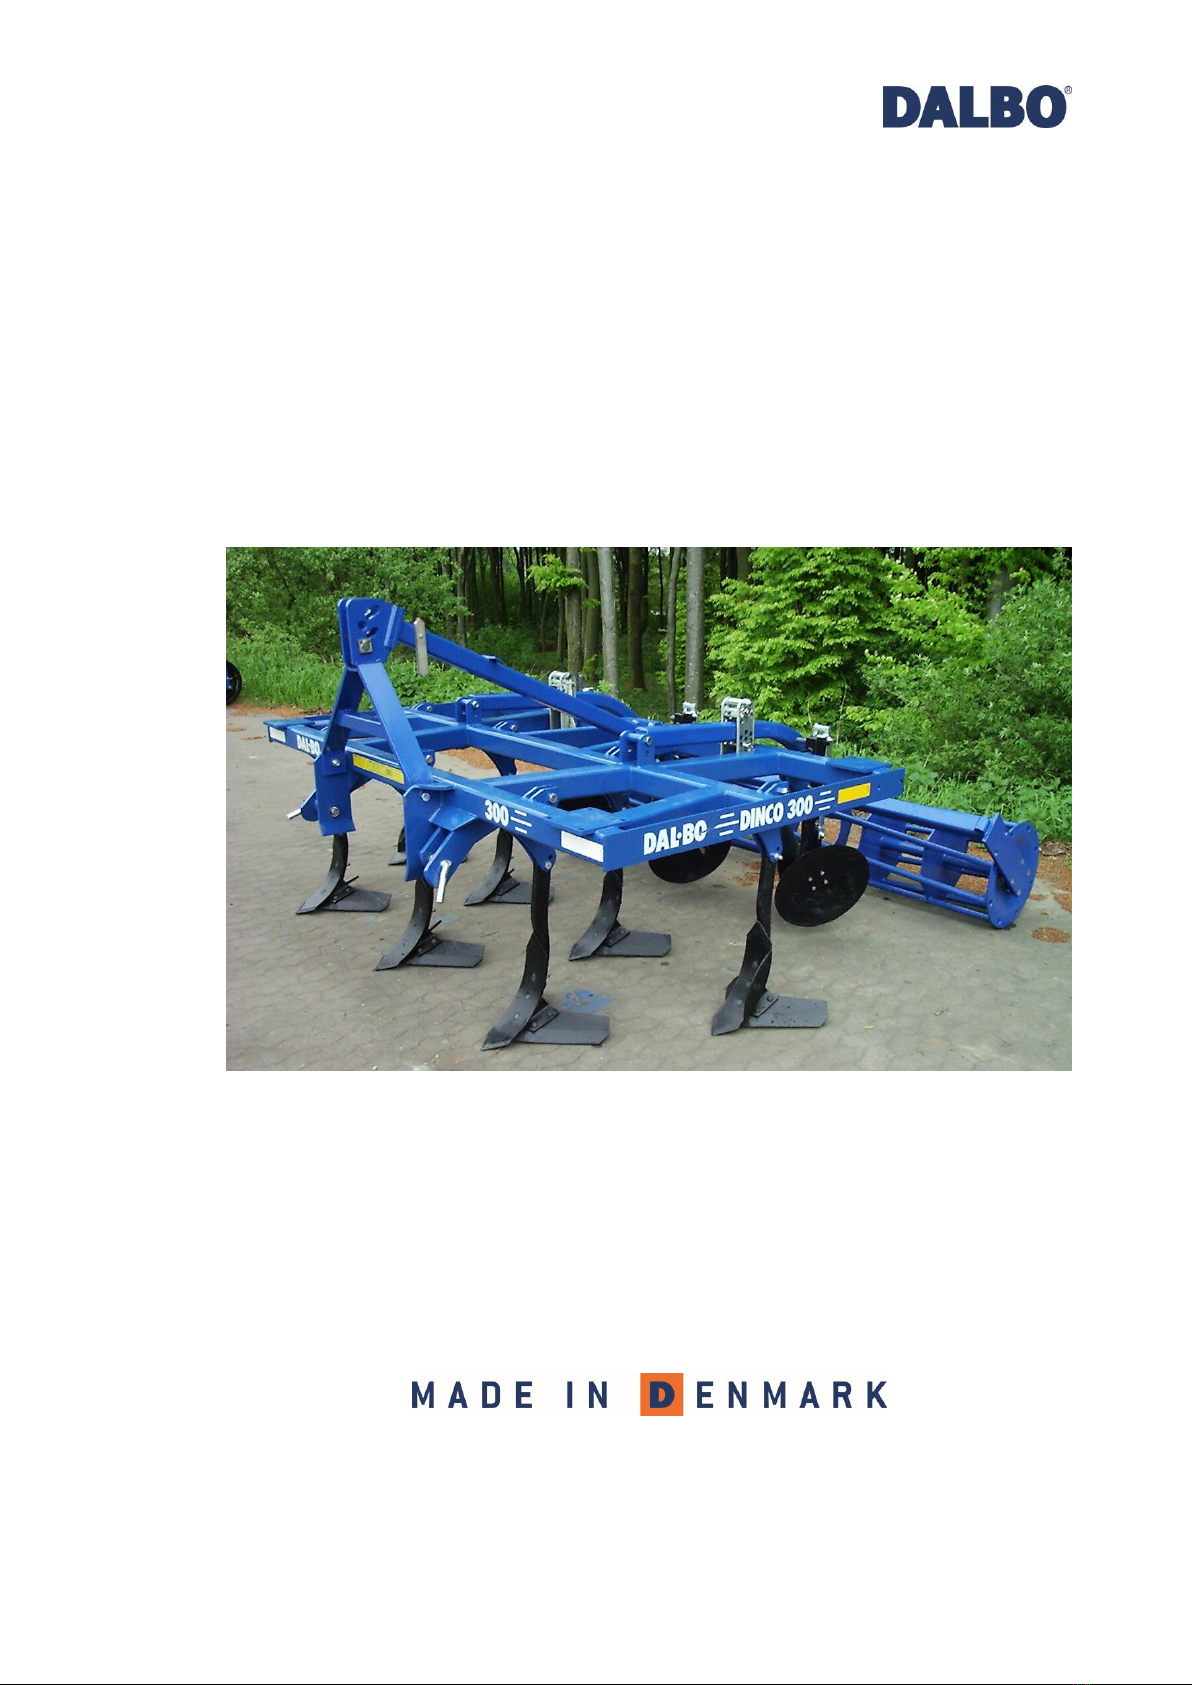
EMPLOYMENT ............................................................................................................................................................... 6
ADVANTAGES OF USING DINCO CLASSIC ......................................................................................................................................... 6
SAFETY .......................................................................................................................................................................... 7
CONNECTING AND DISCONNECTING .............................................................................................................................. 8
CONNECTING .................................................................................................................................................................................. 8
DISCONNECTING ............................................................................................................................................................................. 8
HANDLING WITHOUT THREE-POINT HITCHES ....................................................................................................................................... 8
ADJUSTMENT................................................................................................................................................................. 9
ADJUSTMENT OF DEPTH................................................................................................................................................................... 9
Deeper tillage...................................................................................................................................................................... 9
Level tillage......................................................................................................................................................................... 9
Depth adjustment of discs............................................................................................................................................... 9
THE ANGLE OF THE TINE.................................................................................................................................................................10
Safety bolt .........................................................................................................................................................................10
DRIVING AND OPERATING............................................................................................................................................11
WORKING DEPTH ..........................................................................................................................................................................11
SPEED .........................................................................................................................................................................................12
POWER ........................................................................................................................................................................................12
MAINTENANCE.............................................................................................................................................................13
LUBRICATION................................................................................................................................................................................13
SAFETY ........................................................................................................................................................................................13
WEARING PARTS...........................................................................................................................................................................13
OTHER THINGS..............................................................................................................................................................................14
Cleaning and checking....................................................................................................................................................14
ACCESSORIES..............................................................................................................................................................15
CRUMBLER...................................................................................................................................................................................15
MOUNTING OF ACCESSORIES...........................................................................................................................................................15
T-rings.................................................................................................................................................................................15
Cage roller..........................................................................................................................................................................15
DRIVING AND ADJUSTING................................................................................................................................................................16
SIDE DISCS ...................................................................................................................................................................................16
Mounting............................................................................................................................................................................16
REPLACEMENT AND REPAIR........................................................................................................................................17
REPLACING WEARING PARTS...........................................................................................................................................................17
REPLACING BEARINGS ...................................................................................................................................................................18
T-ring roller ........................................................................................................................................................................18
REPLACING SCRAPERS...................................................................................................................................................................19
REPLACING REAR ROLLER..............................................................................................................................................................19
REPLACING DISC BEARINGS ............................................................................................................................................................19
SCRAPPING .................................................................................................................................................................20
SPARE PARTS ..............................................................................................................................................................21

Page 6
Employment
DINCO CLASSIC is a light cultivator, which has been designed to work down stubble
and crop residues. Owing to the large ground clearance and the distance between the
tines great amounts of crop residues can be worked down.
DINCO CLASSIC has been designed to obtain complete cutting by which the growth of
both crop and weeds is stopped. The shape of the tines causes the top soil and crop
residues to be thrown in the air and mixed into a homogeneous mass.
DINCO CLASSIC consists of a harrow with two rows of tines to which an arm with
inclined discs has been mounted to level the tracks after the cultivating tines. At the
very back you will find the rear roller, which is used to control the working depth and
to crush clods and level the surface. The rear roller comes as a cage roller or with 60
cm t-rings.
As extras a 400-mm. crumbler can be fitted behind the compulsory rear roller.
Moreover, a seed drill can be fitted to the DINCO CLASSIC for direct sowing of catch
crops.
Advantages of using DINCO CLASSIC
The advantages of DINCO CLASSIC are:
•Exact adjustment of working depth between 4-20 cm.
•No supporting wheels causing compaction in the field.
•Complete cutting thus making less drives in the field necessary.
•Homogeneous mixing of crop residues.
•Keeps the soil moist.
DINCO CLASSIC is particularly suitable for working in the topsoil where the majority of
plant transformation takes place. For that reason DINCO CLASSIC is an effective tool in
a minimum tillage-strategy as DINCO CLASSIC with only one drive provides a complete
cutting of the field and a homogeneous mixing of crop residues and microorganisms
in the soil. To keep the soil moist and thereby optimise the microclimate for the
organisms, packing completes the working of the soil.

DINCO CLASSIC
Page 7
Safety
DINCO CLASSIC is only to be used in ordinary fieldwork. DINCO CLASSIC should not be
used in deforestation or the breaking up of old roads, paving stones or the like. If in
doubt, please contact your DINCO CLASSIC Classic-agent or DALBO.
DINCO CLASSIC is not to be used as a crane, a pile driver, a hydraulic press or the like.
When operating the DINCO CLASSIC you must be seated on the tractor.
Persons are not to stay on the DINCO CLASSIC while driving.
When using DINCO CLASSIC on stony soil some noise may be experienced. However,
the level of noise is far below the danger level for the tractor driver.
Dust formation may arise when driving under very dry conditions. It is therefore
recommended that doors and windows of the tractor are kept closed while driving or
that a dust mask is used.

Page 8
Connecting and disconnecting
DINCO CLASSIC is constructed according to the DS/ISO 730-1 category II and III. If the
lift construction on the tractor is not designed for this, please contact your DALBO
agent.
Connecting
First mount the lift arm with the lift pins. Then mount the toplink. Adjust the toplink so
that the frame is in a horizontal position.
Please remember to secure the lift arms and the levelling bar connections with split
pins.
Disconnecting
Disconnecting is done in reverse order than connecting.
Handling without three-point hitches
If moving DINCO CLASSIC without the use of three-point hitches, it is recommended to
use straps in the main frame to keep DINCO CLASSIC in balance.
Total weight of the DINCO CLASSIC (kg.)
300 cm
380
Kg
1010
1290

DINCO CLASSIC
Page 9
Adjustment
DINCO CLASSIC has been adjusted from the manufacturer. A fine adjustment is,
however, always necessary before putting the machine into use. Several possible
adjustments make your DINCO CLASSIC more versatile thus making the optimal
utilisation of the machine possible.
Adjustment of depth
Cultivation depth is controlled by the rear roller in the form of a cage roller or a t-ring
rear roller.
The working depth of the tines is adjusted with pins in the hole plate (A). The upper
pin (B) determines the working depth while the lower pin (C) is a supporting pin,
which carries the rear roller when the implement is lifted.
When changing working depth it may be necessary to readjust the toplink, as the
frame should always be level during operation.
Fig. 1
Deeper tillage
Deeper tillage can be obtained by lifting the implement from the ground so the lift
arm (D) does not press against the upper pin (B). In that way the pin can be removed
from the hole plate and be placed in a higher hole. The lower pin (C) is similarly moved
up so that the support is as close to the lift arm (D) as possible.
When DINCO CLASSIC has been adjusted to deeper tillage it may be necessary to drive
the tines in the soil for a while (or support the rear roller) in order to add pressure to
the rear roller. After this the lower pin (C) can easily be fitted in to the hole closest to
the lift arm (D).
Level tillage
More level tillage can be obtained by moving the pins down. By this the cultivating
frame and thereby the tines are lifted to a more level tillage. It may be necessary to
drive the cultivating tines in the soil in order to loosen the lower pin (C, fig. 1). After
having placed the lower pin (C) in a lower hole DINCO CLASSIC must be lifted and the
upper pin (B) placed as close to the lift arm (D) as possible.
Depth adjustment of discs
A
B
C
D

Page 10
The correct adjustment of the discs leaves the field level with no visible traces of the
harrow tines. Fine adjustment of the discs is done with the spindle (A) and not until
actually in the field. Discs must be adjusted to work the topsoil, so that a suitable
quantity of earth is thrown back after the harrow tine.
Fig. 2
The angle of the tine
Adjusting the penetration angle in two different positions (A, B) makes it possible to
have a soil-searching tine all the time.
Fig. 3
On dry and hard soil use the most soil-searching/aggressive adjustment (A, fig. 3). On
light and moist soil use the front hole (B). Due to wear and tractive force the
penetration angle should not be larger than necessary to obtain a satisfactory
outcome.
Safety bolt
Fig. 4
The safety bolt (A) must be a
16x80 4.6, because it must break
if the tine is overloaded.
A
A
B
A

DINCO CLASSIC
Page 11
Driving and operating
The right operation is important to obtain the optimal utilisation of your DINCO
CLASSIC Classic. This applies to fieldwork as well as security.
Each day before work is started check that no nuts or bolts are loose and that all
splits pins are intact.
When turning or reversing DINCO CLASSIC should be lifted.
No extra weight should be mounted on the DINCO CLASSIC, as the implement is not
designed for it.
During transport any side discs should be folded.
The shares give a heavy cultivation. Despite the heavy cultivation the field should be
left even and with no banks of any kind. This requires a correct adjustment of the
implement (see ”Adjustment” page 6).
Working depth
DINCO CLASSIC can be adjusted to very light tillage in a depth of 4 to 5 cm. This is
possible only because the shape of the tine leaves the field level and completely cut.
Fig. 5
DINCO CLASSIC should be adjusted so that the rear roller carries it. The handle for the
tractor lift must be lowered completely when driving in the field so that the lift is
floating and can move with the terrain. The cultivation depth will thus be controlled by
the rear roller in the back and by the toplink in the front.
When changing the working depth a readjustment of the discs is necessary. The
discs are designed to work in the topsoil, however, they do not perform any real
tillage except levelling out the field after the tines, so that a suitable quantity of earth
is thrown back after the harrow tine.

Page 12
On the models for the German market side discs for levelling the outside of the
outermost tine are standard equipment whereas models for other markets are
equipped with covering discs on the outermost tines. Side discs are therefore
considered extras on markets other than the German (see ”Accessories, Side discs”).
Speed
To obtain optimal tillage a working speed of 6-7 mph (10-12 kph) is recommended.
However, one should always drive according to conditions.
Please note that wear is heavily increased when speed is increased. Shares may be
lost or damaged when driving to fast under unfavourable conditions.
When driving at high speed - especially under dry conditions - wear on the tines will
increase considerably.
Power
DINCO CLASSIC is a power-demanding implement and it is recommended to have a
tractor with a sufficient power surplus so that working speed can be maintained
when driving uphill. In this way the field gets a uniform treatment which may be
important later on.
Vejledende effektforbrug i HK/KW
Arbejdsbredde
300 cm
380 cm
Effekt
120/88
140/103
Power requirements depend on type of soil, terrain, working depth and speed

DINCO CLASSIC
Page 13
Maintenance
Proper maintenance lengthens the life span of the DINCO CLASSIC and thus secures
optimal utilisation of the implement. For that reason grease nipples have been placed
where the most wear happens.
All nuts and bolts should be tightened up after the first day. Pins and bolts should
be checked to avoid damage.
Lubrication
•(A) Roller bearings (50-hour-lubrication interval)
•(B) Disc bearings (50-hour-lubrication interval)
•(C) Spindle (lubricate as required)
Fig. 6
Safety
It is very dangerous to stay under DINCO CLASSIC when it is lifted without proper
support. At the same time the tractor should be properly braked and the engine
switched off.
All bolted connections should be checked often and tightened when needed.
After working with oil, hands should be carefully cleaned. Oil stained clothes should
be removed immediately as it may cause damage to the skin.
Wearing Parts
The points on DINCO CLASSIC are reversible and should be turned before the shank, to
which the points have been clamped, starts to wear down (see ”Replacement and
repairs”). Points with covering shield on the outermost tines should be changed from
right to left when turning the points so that the covering discs are placed on the
outside.
Wings should be changed when they are worn down to the extent that the work result
is no longer satisfactory or before the shank starts to wear down.
B
C
A

Page 14
Other things
Avoid spilling oil on the ground. Should it happen anyway, gather it together and
deliver it for destruction.
When parked under damp conditions for a longer period piston rods should be
lubricated in oil or fat to avoid corrosion.
Cleaning and checking
When the season is over, the machine should be cleaned for dirt and moist attracting
material. This facilitates later services and repairs.

DINCO CLASSIC
Page 15
Accessories
Various forms of accessories for DINCO CLASSIC exist, e.g. crumblers and side discs.
Other accessories are lights and seeddrills.
Crumbler
The crumbler is mounted behind the rear roller and gives an extra working of the field.
The crumbler is designed as a roller with a smaller diameter than the rear roller, which
means a faster rotation and thereby a more effective crushing of clods. At the same
time the crumbler packs the topsoil to preserve the moistness of the soil.
Mounting of accessories
Depending on the type of rear roller (cage roller or t-rings) two different bearings for
the crumbler exists.
Fig. 7
T-rings
The crumbler for the t-ring roller is mounted with 4 16x50 mm. bolts, which are fitted
in the flanges (A, fig. 7) at the very back of the bearings for the rear roller. The
adjustment bolts (A, fig. 8) should be screwed in completely to facilitate the
mounting. Fine adjustment of the crumbler is done on the basis that the adjustment
bolts have been screwed in completely.
Fig. 8
Cage roller
As cage rollers come with no scrapers, bracket (B, fig. 8) should be mounted before
the crumbler can be mounted.
1. Mount the adjustment bolt (A) and screw it all the way in.
2. Mount the rotation stand (C, fig. 8) on the bearing (B, fig. 8), please remember
the washer and split pin.
A
A
B
C
D

Page 16
3. Bolt the rotation stand to the bearing of the rear roller (D, fig. 8).
4. Mount the flange bearings loosely on the crumbler shaft
5. Roll the crumbler in between the bearings (B, fig. 8).
6. Bolt the flange bearings to the bearing.
7. Secure the pointed screws with Locktite and tighten them.
Driving and adjusting
The crumbler is not designed to carry DINCO CLASSIC. Its only job is to crush, cultivate
and level after DINCO CLASSIC as the working depth is determined by the rear roller.
The crumbler should be working in the topsoil. The pressure is adjusted by the bolts
(A, fig. 8). If the bolts are loosened the pressure of the crumbler on the ground will
increase and if the bolts are tightened the pressure will decrease.
Side discs
Fig. 9
To level the soil outside the outermost
tines side discs can be mounted. The
side discs are inclined discs on arms,
which can be swung outside the outer
tines. Side discs are most relevant in
connection with sowing of catch crops
with DINCO CLASSIC seed drill.
During transport side discs must be locked in transport position. It is important that
the plate is fixed with the pin in transport position to prevent the discs from swinging
out when driving (se fig. 10, B).
Mounting
The plate for the side discs is fixed with two bolts (A) through the frame. Mount the
shank with the discs on the arm so that the hollow side of the discs turn inwards.
Fig. 10
A
B

DINCO CLASSIC
Page 17
Replacement and repair
All repairs and maintenance in connection with DINCO CLASSIC should be done while
DINCO CLASSIC stands properly on the ground and thus rests securely on the ground.
It is very dangerous to stay under DINCO CLASSIC when it is lifted without being
properly supported. At the same time the tractor should be properly braked and the
engine switched off.
Replacing wearing parts
Support the DINCO CLASSIC to avoid the danger of being trapped underneath and to
avoid the machine falling.
Fig. 11
The point (A) are reversible and bolted with three bolts. The points should be turned
before the shank to which points and wings (B) are clamped start to wear down.
When turning points, reuse the old bolts, but when changing points new bolts should
be used. If dirt or the like is present it should be removed.
•12x70 mm carriage bolt St. 10,9 for fastening point.
•12x35 mm carriage bolt St. 10,9 for fastening wings.
Wings should be changed when they are worn down to the extent that the work result
is no longer satisfactory or before the shank start to wear down.
A
B

Page 18
Replacing bearings
When DINCO CLASSIC is lowered the rear roller is supported so that the arms (A) rests
on the lower pin (B).
1. Remove the bolts in each side of the flange bearings (C).
2. The cage roller/t-ring roller can be rolled away.
3. Loosen the pointed screws in each bearing and the bearing can be removed from
the shaft.
4. Mount new bearings loosely on the shaft. Roll the cage roller/t-ring roller back in
between the bearing plates. Bolt the bearings onto the these.
5. Secure the pointed screws with Locktite and tighten well.
Fig. 12
T-ring roller
The t-ring roller has been designed with a centre bearing to support the shaft.
1. Remove the centre bearing in the middle together with the flange bearings.
2. When the bearings are free, lift DINCO CLASSIC. The t-rings and shaft are now free.
3. Loosen the pointed screws and remove the flange bearings.
4. Remove the t-rings in one side of the center bearings to change the bearing.
5. Having changed the center bearing mount the rings. Mount in reverse order.
Secure the pointed screws with Locktite.
Removing rings from the shaft can be quite hard. Try cleaning the area between the
rings and the shaft with a high pressure cleaner to remove dirt and corrosion that
may be present.
Fig. 13
B
C
A
A

DINCO CLASSIC
Page 19
Replacing scrapers
1. Screw the adjustment bolts (A, fig. 8) all the way in.
2. Remove the bolts, which fasten the rotation, stand (C, fig. 8) and splitpin and
washer can be removed.
3. Mount the old rotation stand on the new scraper and mount in reverse order.
Replacing rear roller
When replacing the cage roller or t-rings follow the same procedure as when replacing
bearings. Old bearings can be used, however, new ones are recommended.
Fig. 14
Replacing disc bearings
Disc bearings are changed together with the shank as one unit.
1. Remove the bolts that fasten the shank stand to the frame, the discs and spindle
are now disengaged from the frame.
2. Remove the bolts that fastens the shank and the spindle and the telescopic
piece can be dismantled.
3. Mount a new shank with bearings and assemble in reverse order.

Page 20
Scrapping
Support DINCO CLASSIC on strong trestles so that the tines are free of the ground.
Make sure that there is no danger of falling or getting trapped under the implement. A
crane or the like should be used to dismantle the parts from the frame.
After working with oil, hands should be carefully cleaned. Oil stained clothes should
be removed immediately as it may cause damage to the skin.
Support the rear roller or take a hitch on it to keep it in balance. Remove the bolts in
the bearings and roll away the rear roller. Whereupon the arms with the bearing
plates for the rear roller, the toplink connections, tines and shanks can be removed.
The cultivator may be used as recycled iron.
This manual suits for next models
1
Table of contents
Popular Tiller manuals by other brands

Land Pride
Land Pride CA2572 Specifications & Capacities

Cobra
Cobra SA32E owner's manual

Land Pride
Land Pride RTA2064 Specifications & Capacities

EarthQuake
EarthQuake VICTORY 29409 owner's manual

EarthQuake
EarthQuake 3365 Series Operator's manual original operating instructions

Tanaka
Tanaka TMC-200 owner's manual