3.1 Get started
Your IO headphones are shipped with adequate baery charge
for initial use so they can be switched on and enjoyed immediately.
Even though your IO headphones will have baery charge
when first switched on, it is recommended that you
connect them to a charger using the USB cable supplied.
A standard USB mobile phone charger or a computer
USB socket that incorporates an appropriate power
supply can be used. When connected to a charger,
the headphone baery indicator will flash amber while
charging and illuminate in solid green when fully charged.
NOTE
Baery charge level is
reported audibly by a
headphone voice prompt
at switch on and when
critically low.
If your headphones are
le switched on with no
audio source playing, with
no mini-jack connection,
and with noise cancelling
disengaged (IO-6 only),
they will switch o
automatically aer
10 minutes.
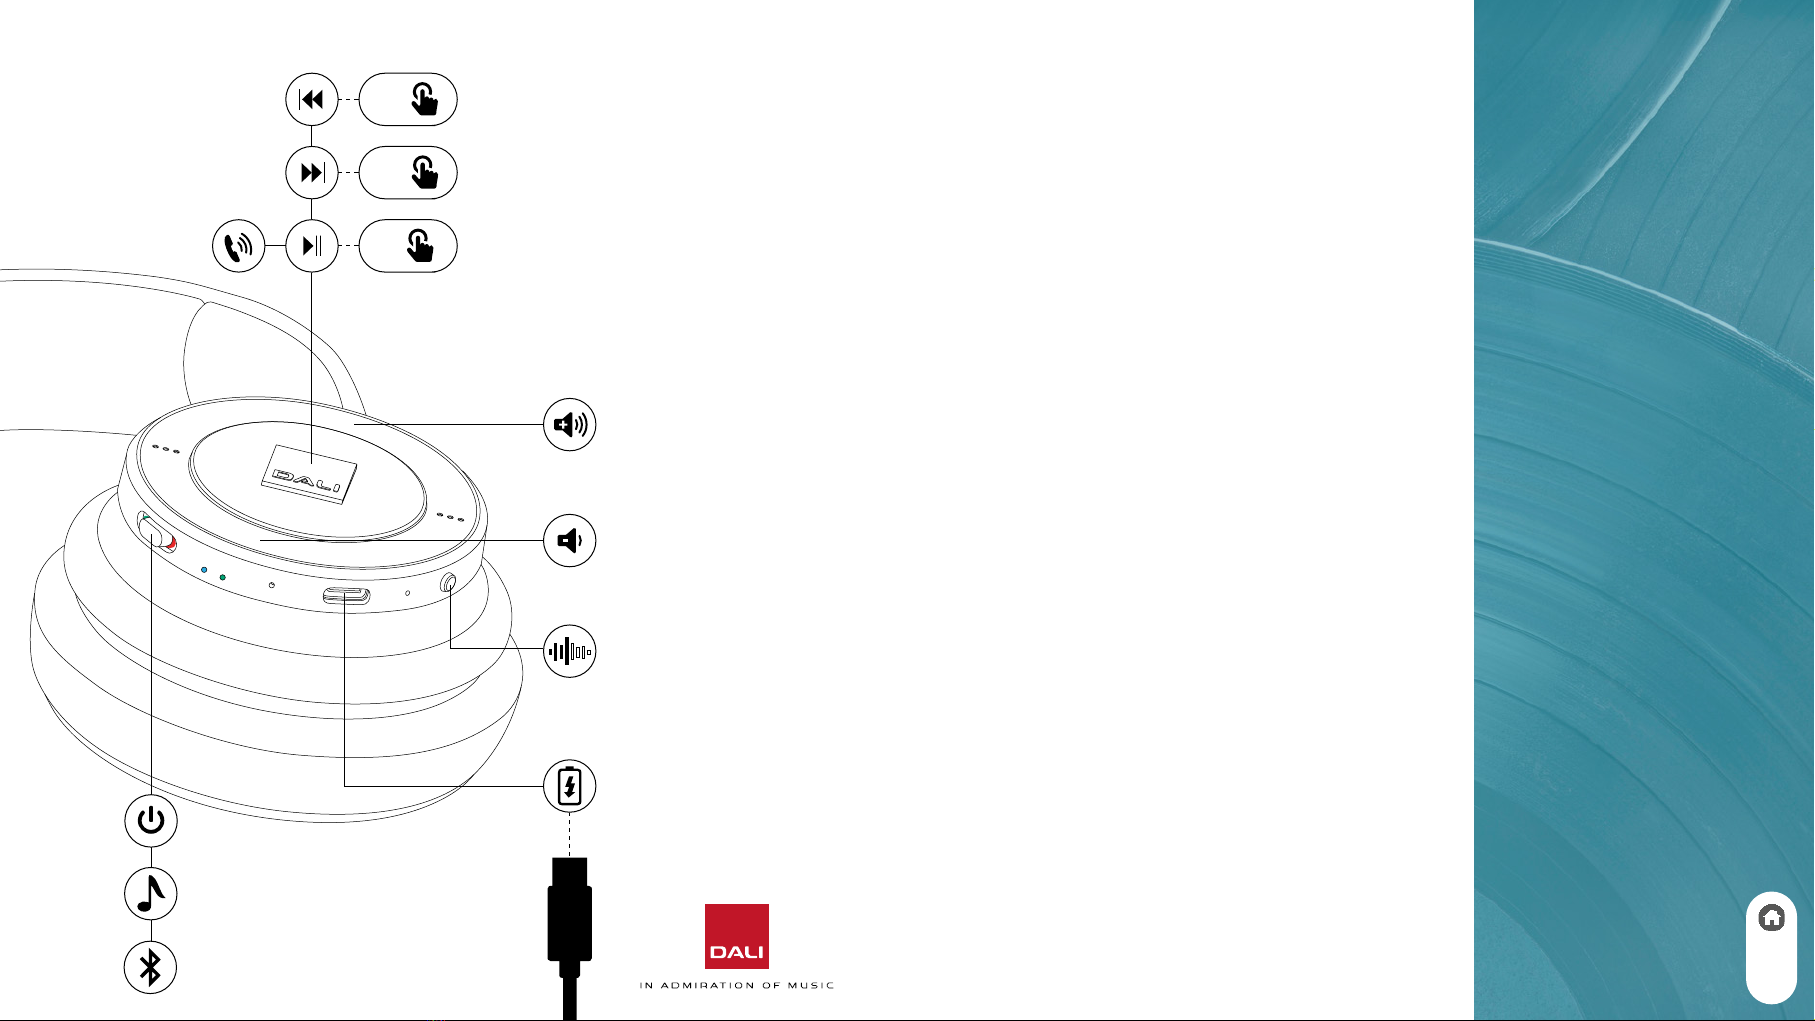
3. USING YOUR DALI IO HEADPHONES
To switch on your IO headphones slide the power switch
to the ON position so that the green indicator is visible.
When switched on and disconnected from a baery
charger, the remaining baery charge level will be
displayed by the baery indicator. The baery indicator
will change colour from green (>50% charge) via orange to
red to indicate decreasing charge. The indicator will flash
red when baery charge is critically low.
5