Dangerous Music Additional Switching System User manual

DAC-ST
DAC-SR
UNISWITCH
ADDITIONAL SWITCHING SYSTEM®
For use with Monitor ST and SR

SAFETY REVIEW
The Exclamation point within an equilateral triangle is intended to alert the user to the presence of important operating and maintenance
(servicing) instructions in the literature accompanying this product
Certain precautions should be taken when using electrical products. Please observe the safety hints by reading the manual and obtaining
qualified help if necessary to adhere to the precautions.
1. Always use a properly grounded power supply cord with this product. Please do not defeat the ground pin on the mains plug. This connection
provides earth to the chassis and signal grounds inside the device for clean and quiet operation.
2. Avoid high temperature operation in equipment racks by providing air circulation. The number one killer of electronic gear is HEAT. Vented
rack panels may look like wasted space to an interior decorator, but they look like beauty to a technician or equipment designer! If the front
panel is hot, it is roasting inside the box.
3. Avoid areas of high magnetic fields. The steel chassis is designed to shield the circuits from EMI and RFI (magnetic and radio interference).
When installing equipment in racks, it is prudent to put power amplifiers and large power supplies at least several rack spaces, if not in a
different rack, away from equipment that deals with low level signals. Separation of high level and low level equipment can pre-empt trouble
caused by heat and EMI.
4. Care should be taken to avoid liquid spills around equipment. If a spill occurs, please shut off the gear and disconnect the mains. A qualified
technician should investigate accidents to prevent further equipment damage or personnel hazards caused by spills.
5. If one is uncomfortable with opening gear and changing jumpers or making adjustments, please seek qualified help if necessary.
6. If adjustments or jumper changes are required, please disconnect the mains plug before opening the top. Dropped screws or tools on a live
circuit board can manifest themselves as burn marks and smoked components. While we feel your pain, (been there) subsequent damage is
not covered by the warranty.
Dangerous Music Incorporated reserves the right to change the specifications or modify the designs of its equipment. Sending in the
registration card is our way of keeping in touch with users of our equipment should this become necessary. Registration information is always
kept confidential and never disclosed to third parties for any reason. Company contact information is on the last page of this manual.
!
!
!
!
!
!
!
The CE sign on this product signifies the fact that the Additional Switching System® has been
tested and verified to conform to the applicable standards of 89/336/EEC.EN55103-1 (emissions)
EN61000-2 (immunity) and EN60065:2002 (safety requirements)
This product uses components of the types and quantities that comply with the EC RoHS
standard 2002/95/EC. A list of suppliers and materials is available from DMI. We tightly control
production to use top quality materials.

| 1
THANK YOU
Thank you for choosing products from the exciting and innovative line of
Dangerous Music recording equipment. Many years of reliable service can
be expected from our gear. This is made possible through careful design,
construction, and component choices by recording industry veterans.
The Dangerous Music DAC-ST, DAC-SR and UNISWITCH are designed to
integrate seamlessly into the Dangerous Music Monitor ST system. There are
many features per square inch (FPSI) packed into these half rack goodies.
This user’s guide will help the engineer realize the full benefits of this system’s
functionality and use.
If you have any suggestions for future modules, feel free to forward them!

2| DANGEROUS MUSIC
TABLE OF CONTENTS
Overview 3
Monitor ST & DAC-ST Front Panel Features & Benefits 4
Monitor ST & DAC-ST Rear Panel Features & Benefits 7
Monitor ST & DAC-ST Connection and Hookup 9
Module Installation 12
Remote Control 17
Specifications 18
Warranty 19
Appendix 20
User Notes 21

ADDITIONAL SWITCHING SYSTEM®| 3
OVERVIEW
The Additional Switching System® begins with the Rack and Power Supply.
Tip: ,It always comes with at least one factory installed module (you wouldn’t want an empty rack, would you?)
[The Dangerous Music Additional Switching System® Rack with one rack spacer and Power Supply pictured above]
Then the selection of one or two modules per rack.
[The Additional Switching System® DAC-ST stereo digital to analog converter / switcher module pictured above]
[The Additional Switching System® DAC-SR surround sound digital to analog converter / switcher module above]
[The Additional Switching System® Uniswitch customizable video switcher module pictured above]

4| DANGEROUS MUSIC
And the final outcome...
[The cornucopian Additional Switching System® loaded with DAC-SR and Uniswitch pictured above]
[The Additional Switching System® loaded with one DAC-ST and blank panel pictured above. Any combo possible.]
Up to two Additional Switching System® racks may be utilized simultaneously, providing a maximum of 4 modules.
Obviously you’ll need to have either a Dangerous Music Monitor ST (stereo) or Monitor ST/SR (surround) to take
advantage of the Additional Switching System®.
So next let’s determine the features and benefits of the DAC-ST utilized in conjunction with the Monitor ST.
MONITOR ST & DAC-ST
Front Panel Features & Benets
The DAC-ST expands your digital connectivity while maintaining the instantaneous control and pristine reference
1
2
3
4
5
6
7

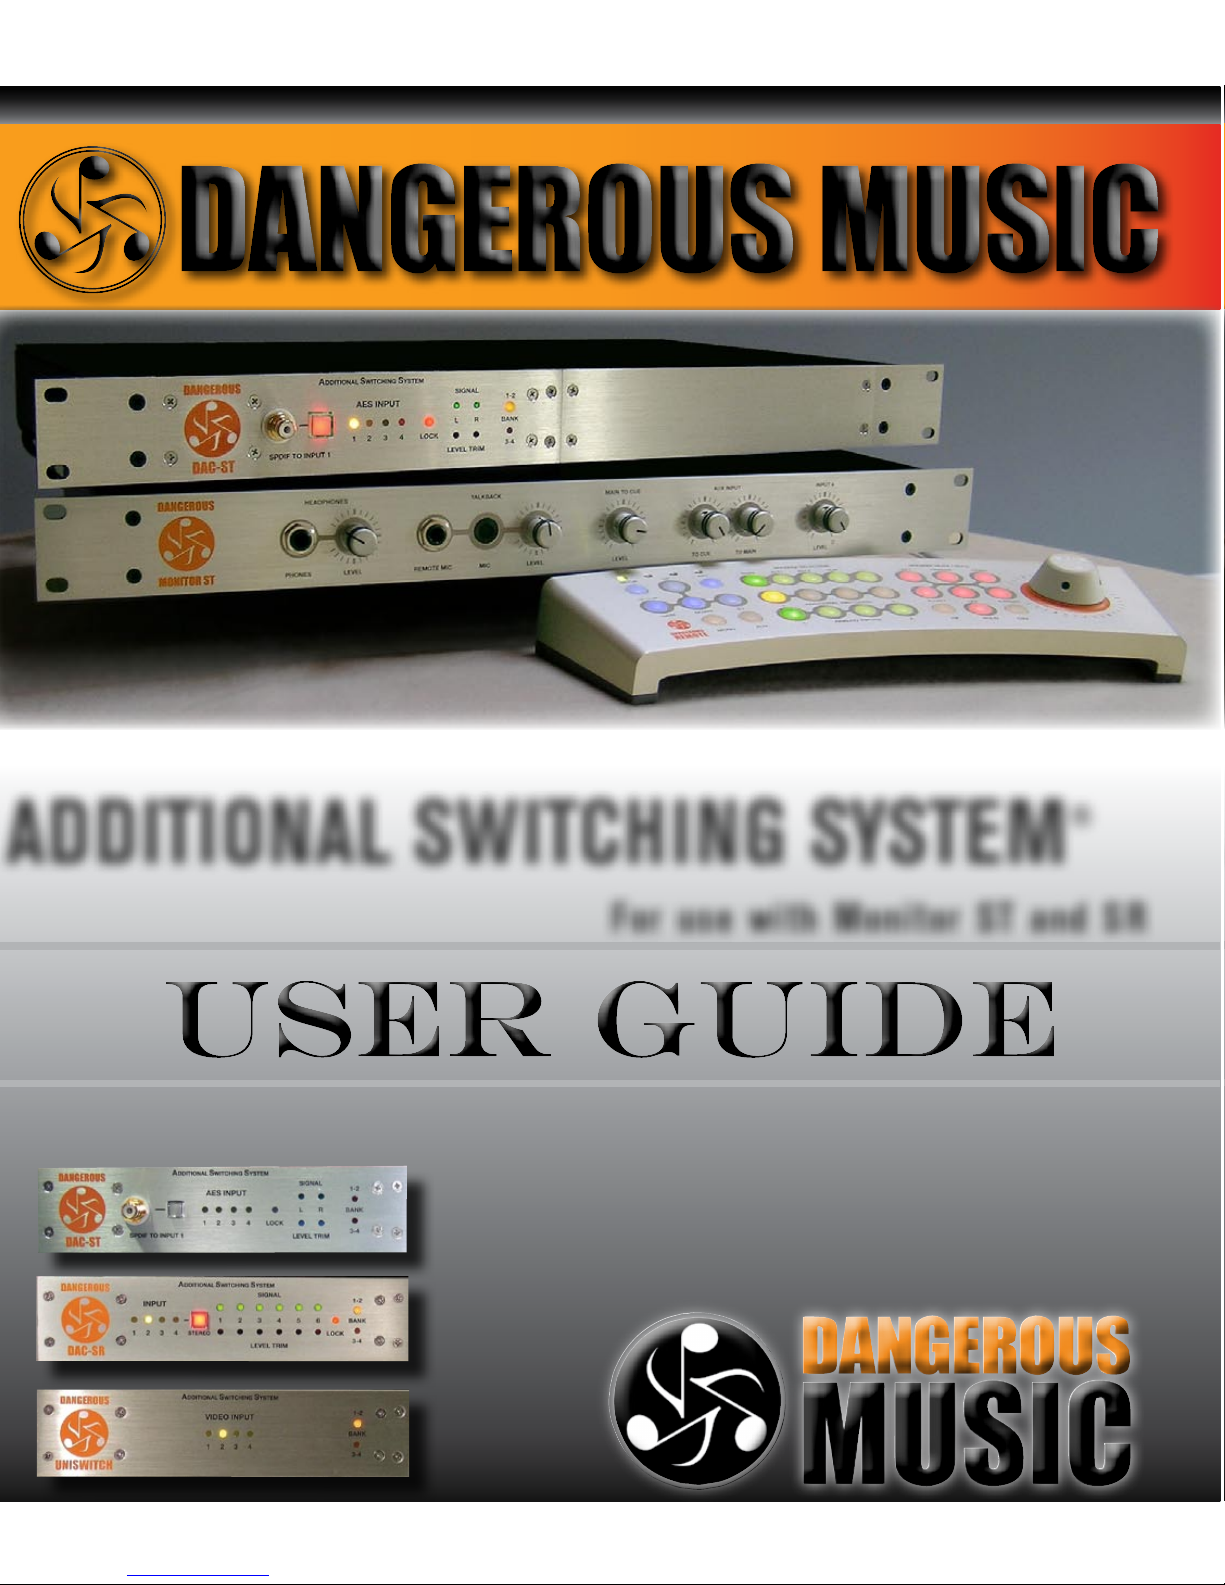
ADDITIONAL SWITCHING SYSTEM®| 5
standards that Dangerous Music is renowned for. The DAC-ST is a stereo D/A converter that allows the engineer
to monitor from and switch between any one of the five digital sources without interruption. The source is selected
from the Dangerous ST Remote and simultaneously routed to the Selected Digital and balanced analog outputs. Only
instantaneous switching between sources allows truly accurate comparisons. (“Am I A/B-ing the mix to the CD, or
to the CD Player’s Converters?”) The DAC-ST solves this conundrum elegantly, while delivering the mastering quality
conversion that you’ve come to expect from Dangerous Music. Bon Appetit.
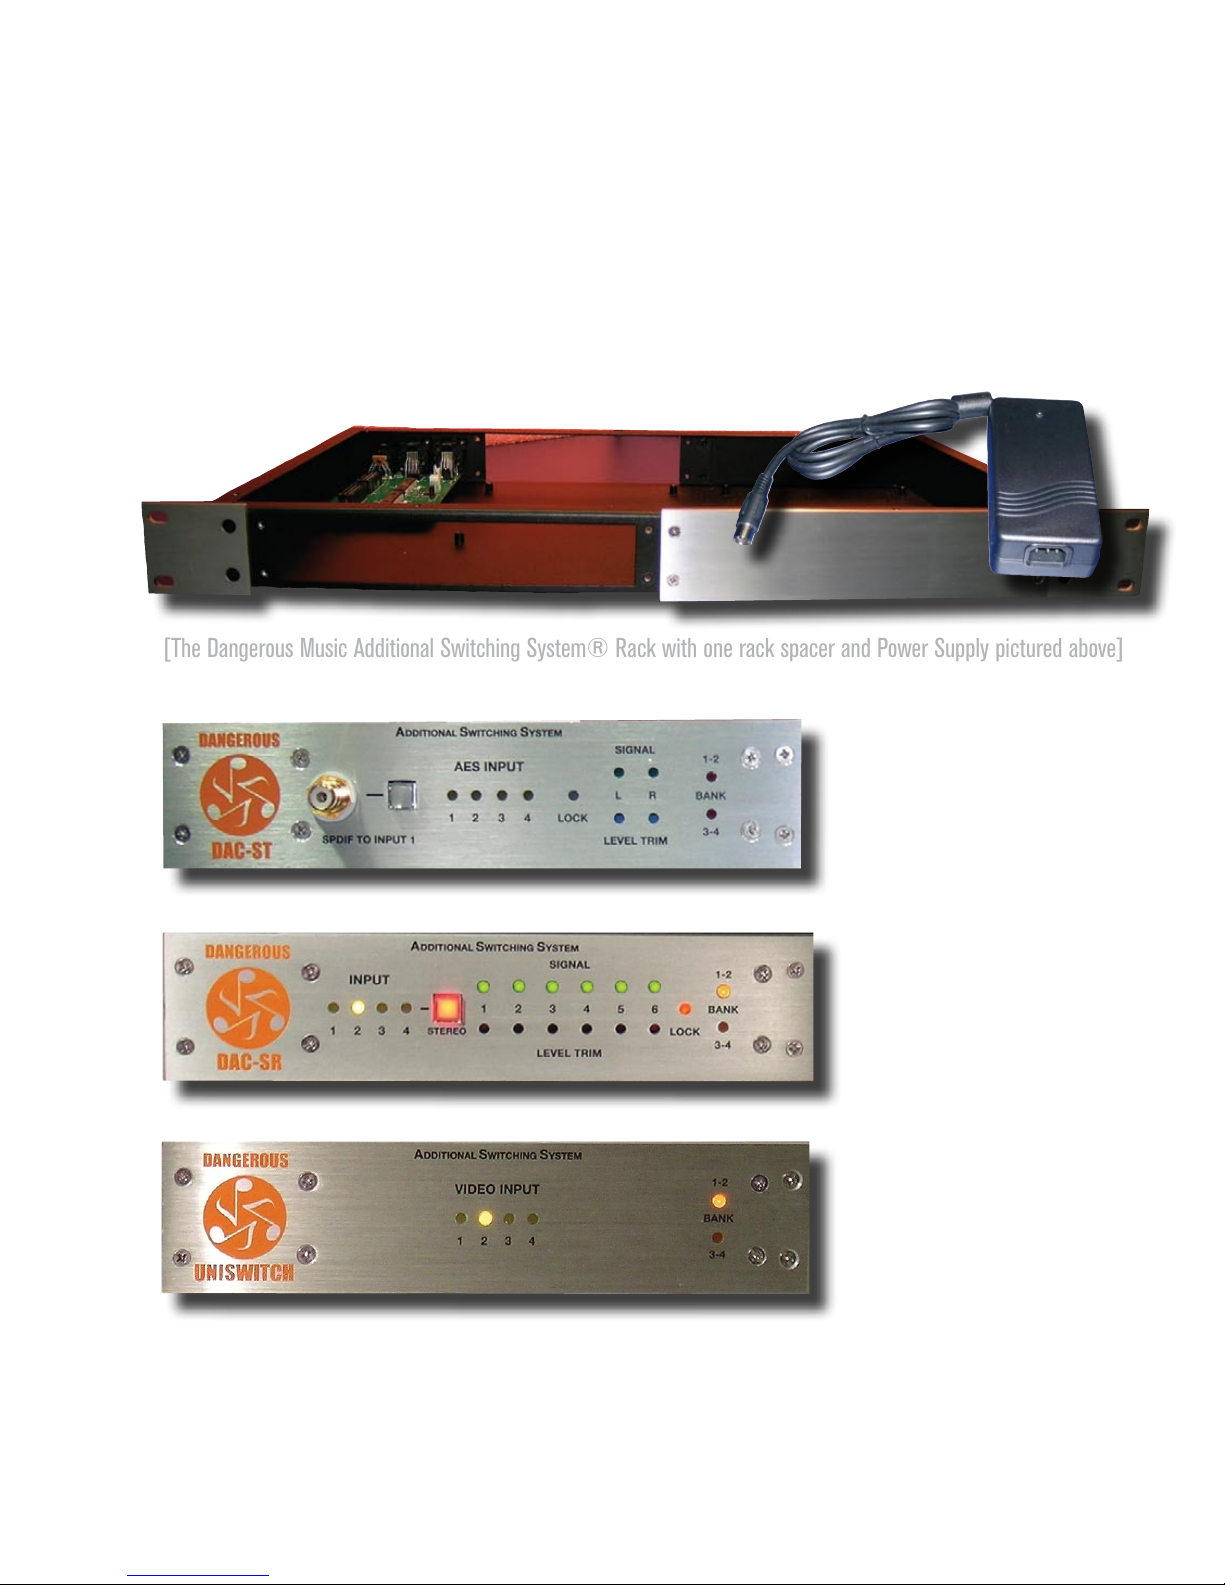
1. S/PDIF RCA Input
Feature: Ultra quick digital access for external S/PDIF devices like a field recorder, cd player, synth or
laptop.
Benefit: Avoid rack diving with a flashlight duct taped about the head.
2. S/PDIF to Input 1 Button
Feature: Upon depressing the switch, SPDIF Digital Input from the RCA jack on the faceplate is routed
to Input One. The default is Digital Input one, accessible via DB25 connector on the rear of the
unit.
Benefit: No patchbay required! Like a 5th input.
Tip: ,The rear Digital Inputs may be utilized for AES or S/PDIF in any combination. No transformer is
required. Simply purchase a snake wired in accordance with the pinout diagrams in the appendix
of this manual (preferably Mogami Cable of course). How is this black magic possible? The S/
PDIF standard is 500 millivolts peak to peak and the AES standard is 5 volts peak to peak. The
DAC-ST is happy receiving anywhere from 300 millivolts to 5 volts, well within tolerances, so you
can keep on mixing the music, while we tame the Danger.
3. Digital Input Selected LEDs
Feature: Visual confirmation that a specific digital source has been selected by the Monitor ST Remote.
Yellow LED on = source selected. Yellow LED off = source not selected.
Benefit: Avoid putting post-its on all your gear to remember the combinations-- what? I already forgot...
Operation: The input source is selected from the Monitor ST Remote using the “Additional Switching”
buttons.
4. AES LED Lock Indicator
Feature: LED lights to confirm that the D/A has locked to the selected digital input. The D/A has an

6| DANGEROUS MUSIC
instantaneous lock range of 32 kHz-192 kHz.
Benefit: Get an hour of your life back by confirming that the audible “snat” is not a digital sync issue
from the DAC-ST. “Sheesh, is the source bad? A/D out of sync? The cable shorted? The input
connector bunk? How do I get this duct tape out of my hair?”
Operation: The input source is selected from the Monitor ST Remote using the “Additional Switching”
buttons. The Lock LED is tethered to the Monitor ST Remote’s selections.
Tip: ,Green LED on = active source plugged in
Red LED on = nothing plugged in
5. Analog LED Signal Present Indicators
Feature: Visual confirmation that analog audio is present on the left and right rear XLR(M) outputs.
Benefit: Avoid an hour of troubleshooting to determine whether signal is present. “Holy Smokes, is the
source bad? The cable shorted? The input jack sour? Is that where I put my beer?”
6. Level Trim Controls
Feature: Calibrate the analog signal levels from +12dBu to +26dBu full scale.
Benefit: Monitoring at different levels completely skews your audio judgment. Calibrate all your gear
identically.
Tip: ,The DAC-ST comes aligned from the factory with an output level of +22dBfs (-18 dBfs = +4
dBu).
7. Bank LED Input Indicators
Feature: Visual confirmation of which bus the module is occupying.
Benefit: Instantly determine which module is being controlled from the Monitor ST remote.
Operation: On the Monitor ST Remote, first use the “UP” and “DOWN” buttons to select the appropriate
bank. The Remote’s LEDs will verify which bank is active. Then choose the input by using the
“Additional Switching” 1-4 buttons. That’s how the Additional Switching remote buttons can
control up to 4 devices. (More than just black magic). See the following photo op for visual
alacrity.

ADDITIONAL SWITCHING SYSTEM®| 7
[Half of the Monitor ST Remote pictured above]
MONITOR ST & DAC-ST
Rear Panel Features & Benets
Next we’ll review how to hook these bad boys and girls up to play nice together
[The rear of the A.S.S.® DAC-ST stereo digital to analog converter / switcher module pictured above]
1
2
3

8| DANGEROUS MUSIC
1. Digital In/Thru
Feature: The rear panel of DAC-ST sports a 25 pin D-Sub connector (commonly called a DB25) wired to the
Tascam AES digital standard. Remember, this connector can be wired for AES or S/PDIF or any
combination of the two. The pinout wiring diagram resides in the appendix of this manual (vs. your
appendix, in case it was removed).
Benefit: This is a 4 channel digital input and through. Now you can (A) switch between sources while
monitoring with the same converter and (B) pass the signal forward to it’s next destination.
“So What?” (A) Here’s why this is mad cool. Monitoring all your digital sources through the same
converter levels the playing field.
Example: “What’s all that extra top end on the CD pressing?” Might just be “crunch” generated from the
D/A converter. “Why can’t I pinpoint the ride cymbal?” Jitter from that cheap CD player could
be smearing the image.
Tip: ,Dangerous Music is so concerned about the inviolability of your audio, that the DAC-ST will
actually clean up jitter from squalid incoming sources and pass it through with defined edges. The
instantaneous lock range is 32 kHz to 192 kHz.
“So What?” (B) Passing the signal forward opens up a myriad of possibilities.
Example:•MonitorthemainmixfromProTools.Passthisontoexternalhardware.
•Comparetheeffectedversion.PassthroughbackintoProToolsandeffectwithplug-ins.
•Compareagainsttheoriginalandhardwareeffectedversions.Passthroughtoanexternal
recorder.
•Comparetheoutputofthenalrecorderwithalltheaforementionedsources.Nowmake
accurate, critical decisions based on true comparisons. Pass through to a digital meter or see tip
below.
2. Selected Digital Out
Feature: Connect a digital meter here.
Benefit: Every time you change DAC-ST sources, the digital meter will follow the audio currently being
monitored.
Tip: ,Connect to an external recorder to create multiple versions for comparative listening.
3. Analog Out (stereo)

ADDITIONAL SWITCHING SYSTEM®| 9
Feature: Connect to an input on the Monitor ST. Level adjustments are made with the “Level Trims
Controls.” The DAC-ST comes aligned from the factory with an output level of +22dBfs.
Benefit: Expansion and level matching for your Monitor ST rig. Don’t worry about outgrowing it!
MONITOR ST & DAC-ST
Connection and Hookup
[The rear of the A.S.S.® DAC-ST stereo digital to analog converter / switcher module pictured above]
EXAMPLE M1:
AES DIGITAL I/O SNAKE
[AES TD DB25-XLR(F) & XLR(M)]
EXAMPLE M4:
ANALOG SNAKE
[ANALOG DB25-XLR(F)]
EXAMPLE M2:
AES CABLE
[AES XLR(F)-XLR(M)]
EXAMPLE M5:
AES to S/PDIF CABLE
[DIGITAL XLR(M)-RCA]
EXAMPLE M6:
S/PDIF to AES CABLE
[DIGITAL RCA-XLR(F)]
EXAMPLE M3:
MIC CABLE
[ANALOG XLR(F)-XLR(M)]
1
2
3

10 | DANGEROUS MUSIC
(Cables purchased separately)
1. D-Sub to Digital in/out snake:
What: Connects 4 stereo channels of digital i/o.
Example: 110 Ohm, 25-pin D-Sub on one end, eight XLRs on the other (4 female connectors for stereo input
and 4 male connectors for stereo out/thru). See photo M1 for visceral confirmation and Appendix
for wiring diagram.
Tip: ,Remember, this may be wired for AES or S/PDIF or any combination, without transformers. Keeping
digital cables or a snake on hand to flip the connectors makes this easy (see photo M5 and M6).
Tip: ,Buy good cable! It’s the superhighway for audio electrons. Don’t get bogged down in traffic.
2. AES XLR(F)-XLR(M) Cable:
What: Connects to an external digital meter and follows current monitor source.
Example: Use 110 ohm shielded cable. (See photo M2 for visceral confirmation.)
Tip: ,Optionally, connect to an external recorder to create multiple versions for comparative listening.
3. Two XLR(F)-XLR(M) Analog Cables or connect directly XLR(F)-DB25 snake:
What: Connects the two analog XLR outputs from the DAC-ST to the D-Sub connector on the Monitor
ST. These two outputs from the DAC-ST are joining other outputs, that are meeting at the D-Sub.
Example: Use shielded cable or depending on positioning (photo M3), wire directly with analog XLR(F)-
DB25 snake. (See photo M4 for visceral confirmation.)
[The rear of the Monitor-ST stereo monitor control system pictured above]
[The rear of the DAC-ST in Additional Switching Rack® pictured above]
8
7
6
5

ADDITIONAL SWITCHING SYSTEM®| 11
[The rear of the Monitor ST/SR Remote pictured above]
4 & 5. Shielded Ethernet Cable:
What: Ethernet CAT 5e shielded cable connects 4 and 5, bridging the Monitor ST remote and Additional
Switching Rack®.
Example: The remote connects to the Additional Switching Rack® with shielded CAT 5-e cable. It may
safely be up to 100 feet long. Come out of the remote, into the “REMOTE IN” jack.
Tip:,Don’t plug this into a router or computer unless you want to see the chip set blow sky high and
void the warranty! It is not an Ethernet connection. An RJ-45 jack was used because this allows
one to procure cables and extensions without a fuss. Please only use shielded Cat 5-e cable and
connectors.
6 & 7. Shielded Ethernet Cable:
What: Ethernet CAT 5e shielded cable connects 6 and 7, bridging the Additional Switching Rack® and
Monitor ST.
Example: The Additional Switching Rack®“REMOTE THRU” jack hooks up to the Monitor ST/SR
“REMOTE” jack remote with shielded CAT 5-e cable that can be up to 100 feet long.
Tip:,Don’t plug this into a router or computer unless you want to see the chip set blow sky high and
void the warranty! It is not an Ethernet connection. An RJ-45 jack was used because this allows
one to procure cables and extensions without a fuss. Please only use shielded Cat 5-e cable and
connectors.
8. Review from previous section: “3. Two XLR(F)-XLR(M) Analog Cables...”
4

12 | DANGEROUS MUSIC
MODULE INSTALLATION
Tip: ,This is only necessary if you purchase additional modules for a rack you already own.
1
2
3
4
5
6
7
8
9
10

ADDITIONAL SWITCHING SYSTEM®| 13
11
12
13
13
12

14 | DANGEROUS MUSIC
STEP 1. Organize all the loot:
Confirm you have (as numbered in the previous photo ops):
1. DAC-ST board with rear panel
2. DAC-ST front panel
3. Four #6-32 x 3/8” pan head stainless steel machine screws (board to chassis)
4. Four #4-40 x 1/4” flat head stainless steel machine screws (preexisting front panel to chassis)
5. Four #6-32 x 1/4” flat head black stainless machine screws (preexisting rear panel to chassis)
6. Two 12 pin smaller ribbon connectors.
7. One 20 pin larger ribbon connector
8. The A.S.S. Rack
9. Blank panel in front and back
10. Power supply (preexisting from your original Additional Switching System®)
Tip: ,Now is not the time to start drinking. Wait until you have this bad boy assembled to celebrate.
14
12
16
11
15

ADDITIONAL SWITCHING SYSTEM®| 15
STEP 2. Preparation
Ensure that the unit is powered down and NOT plugged into the wall. Go grab a #2 and #1
phillips screwdriver from your tool box.
Discharge any static electricity you may have picked up by touching a metal chair or table
STEP 3. Removing the lid and front and rear blank panels
•Usinga#2phillipsheadscrewdriver(notsupplied),carefullyrstremovethe8blackscrews
securing the lid (14).
•Usinga#1phillipsheadscrewdriver,removethefour#4-40 x 1/4” sliver screws in the blank face
plate (9).
•Usinga#2phillipsheadscrewdriver,removethefour#6-32 x 1/4” black screws in the rear plate
(5).
Tip: ,Put the screws somewhere where they won’t roll into the shag carpet like a recycled Trader Joes
Salsa Cruda container. You’ll need these in a minute.
STEP 4. Installing the board
•Whereyoujustremovedtherearpanel,slidetheboardandrearpanelassembly(1)throughthe
rectangular opening.
•Attachittotherearwiththefour#6-32 x 1/4” black screws removed from rear blank (5).
•Screwboarddown(13)withfour#6-32 x 3/8” machine screws (3).
•AttachtheDAC-STface(2)withthefour#4-40 x 1/4” silver screws removed from the front blank
(4).
STEP 5. Wiring the goods
•Beforeattachingthe20pinlargeribboncable(7),orienttheA.S.S.exactlyasinthepriorphotoop
and note the red edge. Now, connect the ribbon cable to the DAC-ST PCB (11) with the red edge
on the left. Then, join it to the main module PCB (15) with the red edge on the lower half of the
ribbon. Note the gentle fold in the ribbon.
•Beforeattachingthe12pinsmallatribboncables(6)orienttheA.S.S.exactlyasintheprior
photo op. Now, noting the blue end of the ribbon connector, connect them between main (12) and
front PCB’s (16).

16 | DANGEROUS MUSIC
•AttachtheeuroblockconnectorfromtheDAC-STface(2)tothemainmodulePCB(15).
STEP 6. Clean up
•Screwthelidbackonwiththose8blackscrewsyouputintheSalsacontainer.
•You’redone!Doalittlevictorydanceandcrackthatbeernow.
Tip: ,If you are uncomfortable performing the installation yourself, Dangerous can perform it safely for
you at the factory.

ADDITIONAL SWITCHING SYSTEM®| 17
REMOTE CONTROL
The DAC-ST is controlled by the Dangerous ST Remote.
On the Monitor ST Remote, first use the “UP” and “DOWN” buttons to select the appropriate bank.
The Remote’s LEDs will verify which bank is active.
Then choose the input by using the “Additional Switching” 1-4 buttons.
This is how the Additional Switching remote buttons can control up to 4 devices.
See the following photo op for visual alacrity.
Tip:,If you only have one Additional Switching System®, only banks 1-2 will be selectable.
Tip:,Ensure that the input for the DAC-ST is set to stereo and not 5.1.
[Half of the Monitor ST Remote pictured above]

18 | DANGEROUS MUSIC
SPECIFICATIONS
Frequency response.................................................................................................... 1Hz – 100 kHz within 0.2dB
Clock Range................................................................................................................. 32kHz-192kHz
THD+Noise................................................................................................................... 0.002%
IMD60 4:1.................................................................................................................... 0.003%
Low Pass Filter............................................................................................................ 57Hz, 3 pole Bessel/Chebyshev hybrid
Interchannel crosstalk................................................................................................ -95dB
Dynamic range............................................................................................................. 110dB
Maximum level............................................................................................................. +25dBu
Nominal operating level.............................................................................................. +4dBu
Power consumption..................................................................................................... 30 watts
This manual suits for next models
3
Table of contents
Other Dangerous Music Music Equipment manuals
Popular Music Equipment manuals by other brands

Behringer
Behringer V-AMPIRE LX1200H user manual

Friend-Chip
Friend-Chip DMX16 user manual

Dynacord
Dynacord D-LITE - brochure

Keith McMillen Instruments
Keith McMillen Instruments SoftStep Reference manual

Euphonix
Euphonix CO-600 Install and operation notes

Pittsburgh
Pittsburgh SYSTEM 10.1 Manual and patch guide