Functions
NAMES AND FUNCTIONS
Below is a description of the functions of the controls.
1) POWER (Power ON/OFF-Switch): When the POWER-switch is pressed the POWER turns on.
2) Disc Holder: Place the disc in the holder. Press the OPEN/CLOSE-button to open and close the disc
holder.
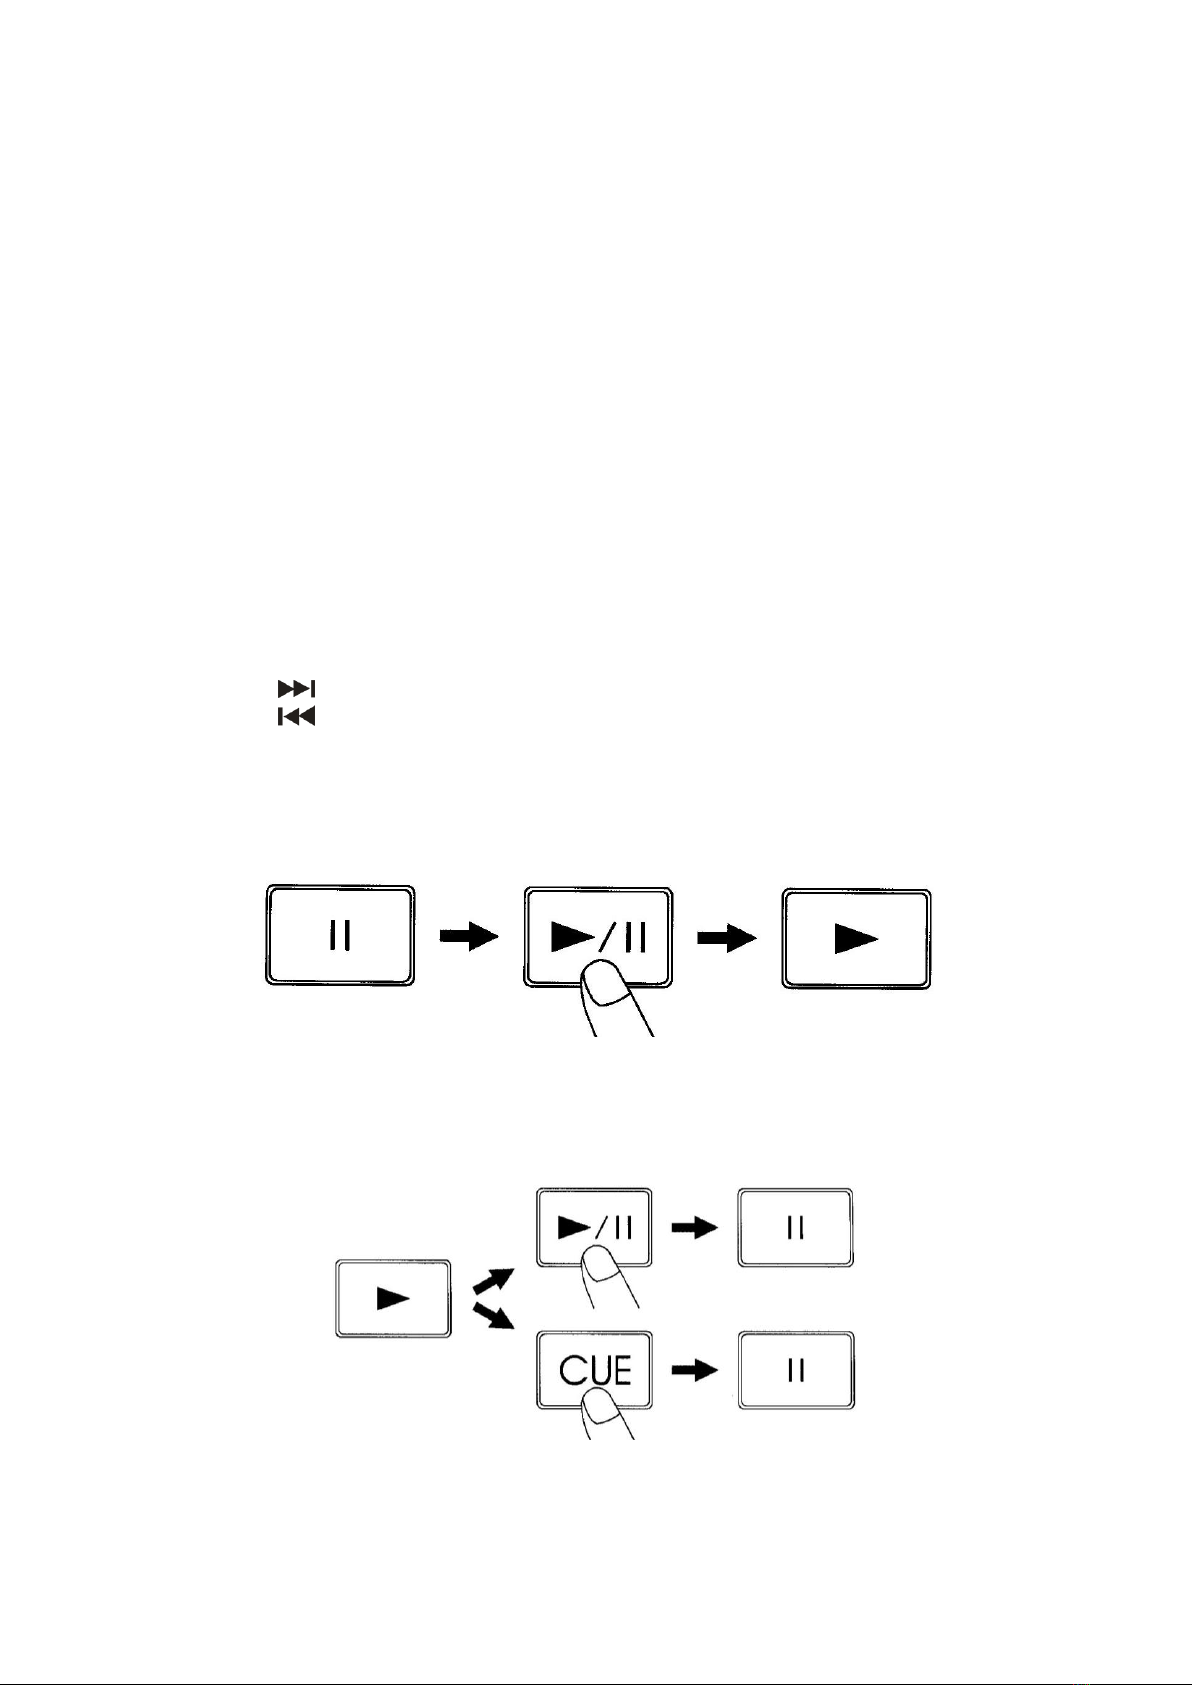
3) B. SKIP : Use this button to go back to the beginning of the current track or select a previous track
for playing.
4) F.SKIP : Use this button to skip to the next track.
5) +10 (Track + 10 Button): Use the button to skip ahead 10 tracks.
6) CUE (Cue-Button): Press the CUE button during playback to return to the position at which the CUE-
point is made.
7) TIME (Time button): Press this button to switch the TIME-Display between the elapsed time and
remaining time. The selected mode is indicated by the ELAPSED, REMAIN and TOTAL REMAIN
indicator on the LCD.
8) PROGRAM (Program-button): Press the Program-Button, the player will enter the program mode and
stop the CD playback.
- You can program a maximum of 20 tracks.
- Use the skip buttons to choose the track you want to listen to, then press the PROG button to
enter your choice.
- Repeat this operation to select all the tracks you want to listen to.
9) SEL (CONT. / SINGLE BUTTON)
Press this button to switch between the SINGLE and CONTINUOUS play mode.
The selected mode is indicated on the LCD. In SINGLE mode, the unit stops the reading after each
track. In CONTINUOUS mode, the unit reads all tracks and then stops.
10) REPEAT: Use this button to repeat one track or all tracks of the CD.
11) REMOTE SENSOR: This sensor receives the information of the remote control. Don’t place any object or
sticker in front of the sensor.
12) LCD
13) OPEN/CLOSE (Open/Close-button): Press this button to open and close the disc holder.
The disc holder cannot be opened during playback, so stop playback before pressing the button.
14) PITCH Level control : If you push the Pitch button (20), you can adjust the pitch with this pitch control
and the CD speed changes.
15) CUE LEVEL CONTROL: Adjust the Cue volume.
16) MASTER LEVEL: Adjust the master level output.
17)PLAY/PAUSE-button: Use this button to start playback. Press once to start playback, twice to set the
pause mode, and thrice to resume playback.
18) REV BUTTON: Press this button to play the CD fast backwards. Each time when this button is pressed,
the fast backward speed will change a level. Finally it will return to the normal playback speed.
19) FWD BUTTON: ress this button to play the CD fast forwardd. Each time when this button is pressed, the
fast forward speed will change a level. Finally it will return to the normal playback speed.
20) PITCH BUTTON: If you push this button, you can adjust adjustement the pitch with the Pitch Level
control (14).
21) Phones: Use to connect for audio monitoring with phones.
22) LINE OUT: The audio for each CD player is an output for these jacks. Connect to the line input of the
mixer.
23) REC OUT: Unbalanced RCA connectors controlled by the master fader.
24) POWER SUPPLY SWITCH 115V/230V: Use this swicth to choose the desired voltage.
25) Fuse
26) AC CORD: Use this cable to connect the AC mains power to the unit.