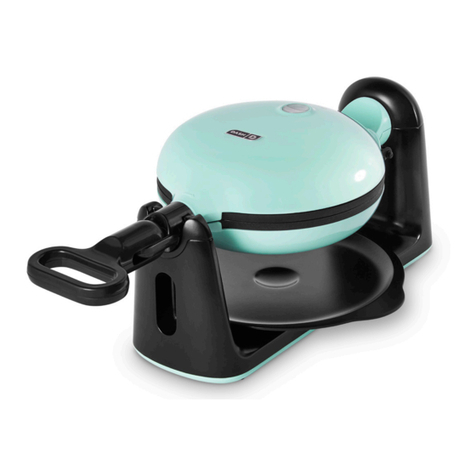
Dash DBWM600 User manual

#DBWM600
Instruction Manual |Recipe Guide
r
e
c
i
p
e
s
i
n
s
i
d
e
!
Flip Belgian
Waffle Maker

Important Safeguards....................................................................4-7
Parts & Features................................................................................. 8
Using Your Flip Belgian Wafe Maker .......................................9-14
Cleaning & Maintenance ......................................................... 15-16
Troubleshooting........................................................................ 18-19
Recipes....................................................................................... 21-31
Notes..... ........................................................................................... 32
Customer Support .......................................................................... 34
Warranty........................................................................................... 35
FLIP BELGIAN
Waffle Maker
t
h
e
d
a
s
h
t
e
a
m
!

∙ 4 ∙ ∙ 5 ∙
• Read all instructions.
• Remove all bags and packaging from
appliance before use.
• Never leave appliance unattended
when in use.
• Make sure the appliance is cleaned
thoroughly before using.
• Do not use appliance for other than
intended use. For household use
only. Do not use outdoors.
• WARNING: Hot surfaces! Never
touch the Cooking Surface or Cover
while appliance is in use. Always lift
and lower the Cover by the Handle.
• DO NOT lift the Cover so that your
arm is over the Cooking Surface as it
is hot and may cause injury. Lift from
the side.
• To prevent the risk of re, electric
shock, or personal injury, do not put
cord, plug, or appliance in or near
water or other liquids.
• The Flip Belgian Wafe Maker is NOT
dishwasher safe.
• Never use abrasive cleaning agents
to clean your appliance as this may
damage the Wafe Maker and its
nonstick Cooking Surface.
• Do not operate this appliance with
a damaged cord, damaged plug,
after the appliance malfunctions,
is dropped, or damaged in any
manner. Return appliance to the
nearest authorized service facility for
examination, repair or adjustment.
• DO NOT use the Wafe Maker near
water or other liquids, with wet
hands, or while standing on a
wet surface.
• For maintenance other than cleaning,
please contact StoreBound directly at
1-800-898-6970 from
9AM – 9PM EST Monday – Friday or
• Do not use metal utensils on the
Cooking Surface as this will damage
the nonstick surface.
• This appliance is not intended for
use by persons (including children)
with reduced physical, sensory,
or mental capabilities, or lack of
experience and knowledge unless
they are provided with supervision
and instruction concerning use of the
appliance by a person responsible
for their safety.
• Do not place appliance on or near a
hot gas burner, hot electric burner,
or in a heated oven.
• Be cautious when moving an
appliance containing hot oils or
other hot liquids.
• Refrain from using attachments
that are not recommended by the
appliance manufacturer, as this
may result in re, electric shock, or
personal injury.
• Allow the Wafe Maker to cool
completely before moving, cleaning,
or storing.
• Close supervision is necessary when
any appliance is used by or
near children.
• Do not let the cord touch hot
surfaces or hang over the edge
of tables or counters.
• Always be sure to unplug the
appliance from outlet prior to
moving, cleaning, storage, and
when not in use.
• StoreBound shall not accept liability
for damages caused by improper
use of the appliance.
• Improper use of the Wafe Maker
can result in property damage or
even in personal injury.
• This appliance has a polarized plug
(one blade is wider than the other).
To reduce the risk of electric shock,
this plug will t in a polarized outlet
only one way. If the plug does not
completely t in the outlet, reverse
the plug. If it still does not t, contact
a qualied electrician. Do not
attempt to modify the plug in
any way.
• A short power supply cord is to
be provided to reduce the risk
resulting from becoming entangled
in or tripping over a longer cord.
An extension cord may be used
if care is exercised in its use. If an
extension cord is used, the marked
electrical rating of the extension
cord should be at least as great as
the electrical rating of the appliance.
If the appliance is of the grounded
type, the extension cord should
be a grounding 3-wire cord. The
extension cord should be arranged
so that it will not drape over the
countertop or tabletop where it can
be pulled on by children or tripped
over unintentionally.
IMPORTANT SAFEGUARDS IMPORTANT SAFEGUARDS
IMPORTANT SAFEGUARDS: PLEASE
READ AND SAVE THIS INSTRUCTION
AND CARE MANUAL.
When using electrical appliances, basic safety precautions should be followed, including:
∙ 4 ∙ ∙ 5 ∙
IMPORTANT SAFEGUARDS: PLEASE
READ AND SAVE THIS INSTRUCTION
AND CARE MANUAL.
HOUSEHOLD USE ONLY
IMPORTANT SAFEGUARDS
∙ 4 ∙ ∙ 5 ∙
• Read all instructions.
• Remove all bags and packaging from
appliance before use.
• Never leave appliance unattended
when in use.
• Make sure the appliance is cleaned
thoroughly before using.
• Do not use appliance for other than
intended use. For household use
only. Do not use outdoors.
• WARNING: Hot surfaces! Never
touch the Cooking Surface or Cover
while appliance is in use. Always lift
and lower the Cover by the Handle.
• DO NOT lift the Cover so that your
arm is over the Cooking Surface as it
is hot and may cause injury. Lift from
the side.
• To prevent the risk of re, electric
shock, or personal injury, do not put
cord, plug, or appliance in or near
water or other liquids.
• The Flip Belgian Wafe Maker is NOT
dishwasher safe.
• Never use abrasive cleaning agents
to clean your appliance as this may
damage the Wafe Maker and its
nonstick Cooking Surface.
• Do not operate this appliance with
a damaged cord, damaged plug,
after the appliance malfunctions,
is dropped, or damaged in any
manner. Return appliance to the
nearest authorized service facility for
examination, repair or adjustment.
• DO NOT use the Wafe Maker near
water or other liquids, with wet
hands, or while standing on a
wet surface.
• For maintenance other than cleaning,
please contact StoreBound directly at
1-800-898-6970 from
9AM – 9PM EST Monday – Friday or
• Do not use metal utensils on the
Cooking Surface as this will damage
the nonstick surface.
• This appliance is not intended for
use by persons (including children)
with reduced physical, sensory,
or mental capabilities, or lack of
experience and knowledge unless
they are provided with supervision
and instruction concerning use of the
appliance by a person responsible
for their safety.
• Do not place appliance on or near a
hot gas burner, hot electric burner,
or in a heated oven.
• Be cautious when moving an
appliance containing hot oils or
other hot liquids.
• Refrain from using attachments
that are not recommended by the
appliance manufacturer, as this
may result in re, electric shock, or
personal injury.
• Allow the Wafe Maker to cool
completely before moving, cleaning,
or storing.
• Close supervision is necessary when
any appliance is used by or
near children.
• Do not let the cord touch hot
surfaces or hang over the edge
of tables or counters.
• Always be sure to unplug the
appliance from outlet prior to
moving, cleaning, storage, and
when not in use.
• StoreBound shall not accept liability
for damages caused by improper
use of the appliance.
• Improper use of the Wafe Maker
can result in property damage or
even in personal injury.
• This appliance has a polarized plug
(one blade is wider than the other).
To reduce the risk of electric shock,
this plug will t in a polarized outlet
only one way. If the plug does not
completely t in the outlet, reverse
the plug. If it still does not t, contact
a qualied electrician. Do not
attempt to modify the plug in
any way.
• A short power supply cord is to
be provided to reduce the risk
resulting from becoming entangled
in or tripping over a longer cord.
An extension cord may be used
if care is exercised in its use. If an
extension cord is used, the marked
electrical rating of the extension
cord should be at least as great as
the electrical rating of the appliance.
If the appliance is of the grounded
type, the extension cord should
be a grounding 3-wire cord. The
extension cord should be arranged
so that it will not drape over the
countertop or tabletop where it can
be pulled on by children or tripped
over unintentionally.
IMPORTANT SAFEGUARDS IMPORTANT SAFEGUARDS
IMPORTANT SAFEGUARDS: PLEASE
READ AND SAVE THIS INSTRUCTION
AND CARE MANUAL.
When using electrical appliances, basic safety precautions should be followed, including:
∙ 4 ∙ ∙ 5 ∙
IMPORTANT SAFEGUARDS: PLEASE
READ AND SAVE THIS INSTRUCTION
AND CARE MANUAL.
HOUSEHOLD USE ONLY
IMPORTANT SAFEGUARDS
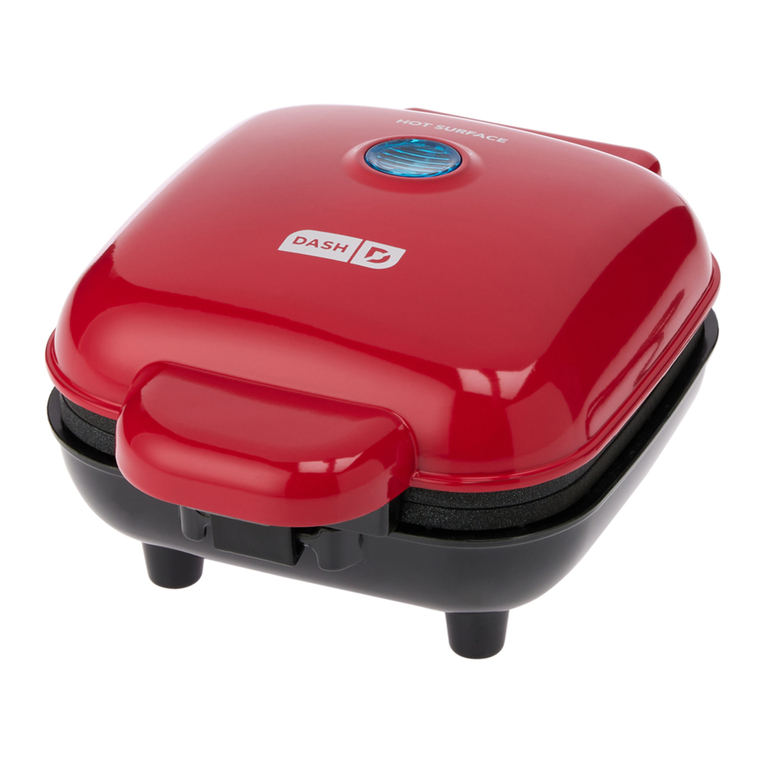
∙ 8 ∙
Indicator Light
Cover
Base with Drip
Tray Storage
Drip Tray
Locking
Handle
Cooking Surfaces
Indicator Light
(Reverse side)
Cord Storage
parts & Features
∙ 9 ∙
DO NOT lift the Cover
so that your arm is
over the Cooking
Surface as it is hot and
may cause injury.
Always lift and lower
the Cover by the
Handle. Lift from the
side.
Never touch the
Cooking Surface or
Cover while appliance
is in use.
Before rst use, remove all packaging material and thoroughly
clean your Flip Belgian Wafe Maker.
WARNING: Do not leave the Wafe Maker perpendicular to the base during
cooking. The Wafe Maker must remain parallel with the Base or batter will leak.
using your Waffle Maker

PAGE TITLE
∙ 10 ∙
using your Waffle Maker using your Waffle Maker
1 2 3
Place the appliance on a stable
and dry surface. Remove the
Drip Tray from Storage and
slide it into the grooves on the
bottom of the Wafe Maker.
Plug the cord into a power
outlet. The blue half of the
Indicator Light will illuminate,
signaling that the Wafe Maker
is turned on and heating up.
Once the Cooking Surface
reaches the optimal cooking
temperature, the white half
of the Indicator Light will turn
on. Now, you’re ready to get
cooking!
∙ 10 ∙
4Carefully lift the Cover by the
Handle and use a non-aerosol
oil sprayer or silicone basting
brush to apply oil to the
cooking surface.
TIP: Some aerosol cooking
sprays contain additives that
can cause nonstick surfaces
to become sticky and hard to
clean over time.
∙ 11 ∙

∙ 13 ∙
PAGE TITLE
∙ 12 ∙
67When the wafe has nished
cooking, the white Indicator
Light will turn on.
using your Waffle Maker using your Waffle Maker
∙ 12 ∙ ∙ 13 ∙
Use the Handle to ip the wafe
maker.
NOTE: Do not leave the Wafe
Maker perpendicular to the
base during cooking. The Wafe
Maker must remain parallel with
the Base or batter will leak.
NOTE: Do not lock the Handle
while cooking.
5Place or pour batter onto the
Cooking Surface and close
the Cover.
For best results, use cup of
batter.
8Flip the Wafe Maker back
over and carefully remove
the wafe from the Cooking
Surface with a heat-resistant
nylon or silicone cooking
utensil.
NOTE: Do not use metal utensils to remove or place food on
the Cooking Surface as this will damage the nonstick surface.
!

PAGE TITLE
using your Waffle Maker cleaning & maintenance
∙ 14 ∙ ∙ 15 ∙
In order to keep your Flip Belgian Wafe Maker in pristine working order,
thoroughly clean the appliance after each use. This will prevent the build-
up of food or oil.
• Unplug your Wafe Maker and allow it to cool completely before
moving, cleaning or storing.
• Do not submerge appliance in water or any other liquid and do not
place it under running water.
• Using a damp, soapy cloth, wipe down the Cooking Surface, Cover,
Handle and Base as needed. Thoroughly rinse the cloth and wipe again.
• If there is food burned onto the Cooking Surface, pour on a little cooking
oil and let sit for 5 to 10 minutes. Scrub the Cooking Surface with a
sponge or soft bristled brush to dislodge food. Use a damp, soapy cloth
to wipe down the Cooking Surface. Thoroughly rinse the cloth and wipe
again. If any food remains, pour on cooking oil and let sit for a few hours,
then scrub and wipe clean.
• Never use abrasive cleaning agents to clean your appliance as this
may damage the Wafe Maker and its nonstick Cooking Surface.
• The Drip Tray is dishwasher safe and can also be washed in warm, soapy
water.
9When you have nished
cooking, unplug your
Wafe Maker and allow it
to cool before moving or
cleaning.

∙ 16 ∙ ∙ 17 ∙
cleaning & maintenance
• To compactly store your Wafe Maker, rotate the handle so that the
Wafe Maker is turned on its side, fold the Locking Handle inward, and
wrap the cord in the Cord Storage.
NOTE: the Wafe Maker has a at bottom that allows it to be stored
vertically, giving you more storage options.

∙ 18 ∙
While Dash products are durable, you may encounter one or more of the problems
listed below. If the issue is either not solved by the solutions recommended below or not
included on this page, please contact our Customer Support Team at 1-800-898-6970 or
troubleshooting
ISSUE SOLUTION
There is no On/Off Button. How
do I turn the Wafe Maker off
and on?
To turn on, simply plug in the power cord. The
blue half of the Indicator Light illuminates to
show that your Wafe Maker is on. When you’re
done cooking, simply unplug the Wafe Maker
to turn it off.
How do I know when the
Wafe Maker is heated
and ready to use?
When the Wafe Maker reaches the optimal
temperature, the white half of the Indicator
Light illuminates. That means you’re ready to
get cooking!
When using my Wafe Maker,
the Cover gets very hot. Is this
normal?
Yes, this is completely normal. When using your
Wafe Maker, always lift and lower the Cover
by the Handle. To prevent personal injury, DO
NOT lift so that your arm is over the Cooking
Surface as it is hot and may cause injury. Lift
from the side.
∙ 19 ∙
troubleshooting
ISSUE SOLUTION
After using my Wafe Maker a few
times, food is starting to stick to the
surface. What is happening?
There is probably a build-up of burnt food
residue on the Cooking Surface. This is normal,
especially when cooking with sugar. Allow the
appliance to cool fully. Pour on a little cooking
oil and let sit for 5–10 minutes. Scrub Surface
with a sponge or soft bristled brush to dislodge
food. Use a damp, soapy cloth to wipe down
the Cooking Surface. Rinse the cloth and wipe
again. If food remains, pour on cooking oil
and let sit for a few hours, then scrub and wipe
clean.
The Indicator Lights will not turn on
and the Cooking Surface is failing
to heat.
1. Ensure that the power cord is plugged
into the power outlet.
2. Check to make sure the power outlet is
operating correctly.
3. Determine if a power failure has occurred
in your home, apartment or building.

20
RECIPE
GUIDE
Follow us!
@bydash | recipes, videos, & inspiration
@unprocessyourfood | veg & vegan-friendly meals

3½ cups our
1 packet dry yeast
cup milk (lukewarm)
8 oz softened butter (2 sticks)
2 eggs
½ tsp salt
8 oz pearl sugar
1 tsp vanilla (optional)
cinnamon (optional)
belgian sugar
waffles
Directions:
1. 1. Dissolve the dry yeast in the lukewarm milk.
2. 2. Add the our to a medium bowl, then gradually mix in the remaining
ingredients, except for the sugar pearls. Form the mixture into a dough, then let
the dough rise until it doubles in size (around 30 minutes).
3. 3. After the dough has risen, add the pearl sugar and divide the dough into 6
even patties.
4. 4. Spray or grease the Wafe Maker with oil. Add one patty to the middle of the
Wafe Maker and cook until crispy. Repeat with the remaining patties and serve.
Ingredients:
∙ 22 ∙
Yield: 6 wafes
∙ 23 ∙
C
h
e
f
T
i
p
!
If you can’t nd
pearl sugar,
gently breaking
sugar cubes is a
ne substitute.

cup all-purpose our
2 tbsp sugar
¼ cup unsweetened
cocoa powder
2 tbsp melted butter
1 cup buttermilk
½ tsp baking powder
¼ tsp baking soda
1 large egg
½ cup chocolate chips
chocolate
waffles
Directions:
1. In a medium bowl, sift together the our, sugar, cocoa powder, baking powder,
and baking soda.
2. Whisk the egg, butter, and buttermilk in a separate bowl. Mix the wet ingredients
with the dry. Gently fold in the chocolate chips.
3. Spray or grease the Wafe Maker with oil. Pour cup of the batter into the
Wafe Maker and cook until crispy. Repeat until all of the batter is used.
4. Serve the wafes with vanilla ice cream, strawberries, and powdered sugar.
Ingredients:
∙ 24 ∙
Yield: 8-10 wafes
C
h
e
f
T
i
p
!
For best results,
pour cup of
batter into the
center of the
Cooking Surface.

∙ 26 ∙
2 cups all-purpose our
1 tbsp baking powder
cup milk
½ tsp salt
½ cup cold butter, cut into
small chunks
pepperoni and shredded
mozzarella cheese (or
preferred llings)
waffle
biscuit pizza
Ingredients:
∙ 27 ∙
Yield: 10-12 wafes
Directions:
1. Sift together the our, baking powder, and salt. Add the butter and use a pastry
cutter or fork to cut butter into the our until it is a coarse crumb.
2. Stir in the milk.
3. Roll your dough out on a oured surface so that it is ½ inch thick. Cut out as
many 3 inch circles as possible. Alternatively, you can use premade biscuit dough
instead of making dough from scratch. Slice each premade biscuit in half so that
they are about ½ thick and then proceed with directions.
4. Cut dough circles horizontally just enough so that you can stuff the biscuit with
the pepperoni and mozzarella. After you have put in your llings, seal the biscuit
by pinching the edges of the dough. Cook them in the Wafe Maker until golden
and crispy. Serve with a side of marinara sauce for dipping.

CINNAMON ROLL
waffles
Classic Wafe Recipe Ingredients
1¼ tsp cinnamon
½ tsp vanilla extract
Cream Cheese Icing
2 tbsp butter, melted
2 tbsp cream cheese, softened
½ cup powdered sugar
¼ tsp vanilla extract
2-3 tbsp milk
Directions:
1. Make the Classic Wafes batter. Stir in the cinnamon and ½ teaspoon of
vanilla extract. Pour cup of the batter into the Wafe Maker and cook until
golden brown. Repeat with the remaining batter.
2. In a medium bowl, mix the butter and cream cheese until well-combined.
Stir in the powdered sugar, vanilla extract, and milk.
3. Drizzle the icing over the wafes and serve warm.
Ingredients:
∙ 28 ∙
Yield: 8-10 wafes
recipes ∙ 29
Other manuals for DBWM600
1
Table of contents
Other Dash Waffle Maker manuals

Dash
Dash DNMWM400 Technical specifications

Dash
Dash Gingerbread Technical specifications

Dash
Dash Multi Mini Waffle Maker Technical specifications

Dash
Dash DMW001 User manual

Dash
Dash DMW001 User manual

Dash
Dash Americana User manual

Dash
Dash STAR DMWR001NM Technical specifications

Dash
Dash DWSM200 User manual

Dash
Dash DMWEG001 Technical specifications

Dash
Dash StaR User manual