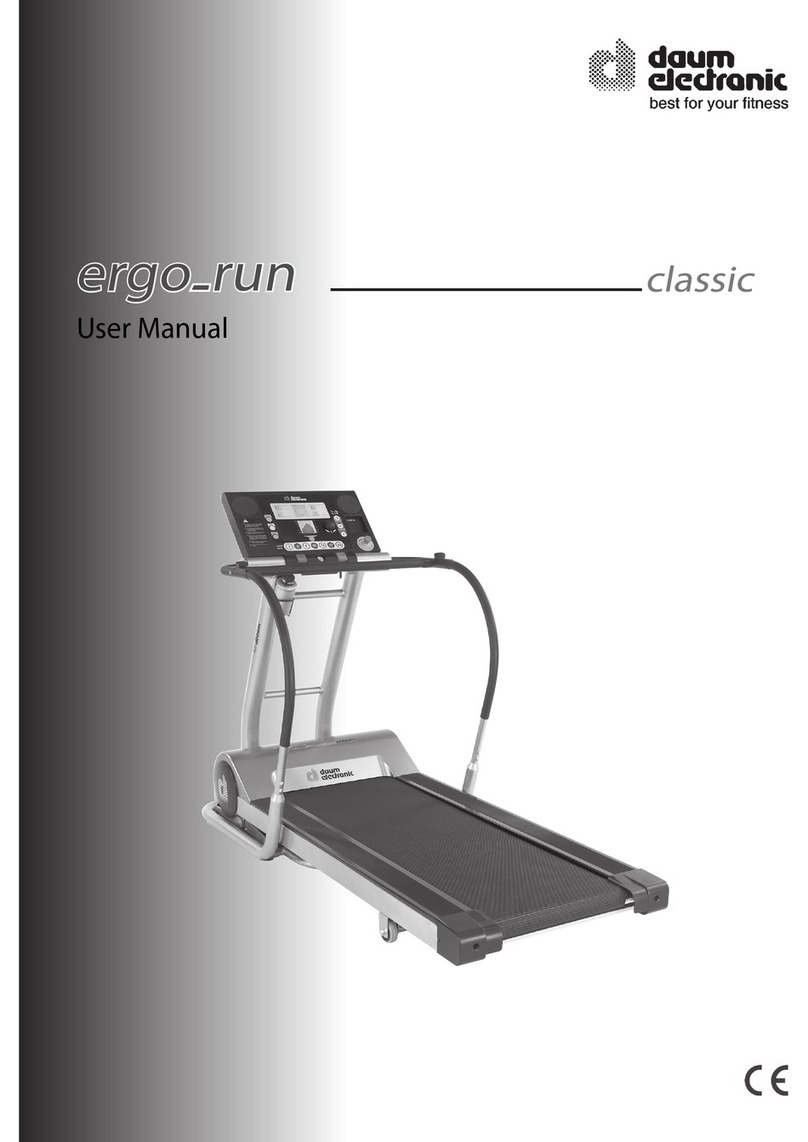
Daum electronic Premium 8 User manual

User Manual

Miscelleaneous
2
Table of Contents
Keywords Glossary / Info Texts
Please refer to the information concerning each operation status stored in the
dashboard. Use the Info-key to display this information.
The keywords glossary provides additional information and explanations.
The keywords glossary and the info-texts are an essential part of this user
manual!
This treadmill ergometer is specially designed for health and endurance training.
High quality manufacturing, an easy to read dashboard, and ease of use and of
maintenance contribute to make this appliance an ideal training device for sport
and fitness training. We would also stress that the complete equipment list and
the convincing performance range appeal to athletes and fitness conscious
persons of every age group.
Introduction
Designed and manufactured in conformity with the DIN EN 957 1/-6 Class
SA/HA standard, the ergo_run is suited for a therapeutic utilisation (It does not
meet the requirements for medical diagnosis usage in medical clinics).
The operating principle of the treadmill ergometer is based on a moving surface,
whose variable inclination can be definitely set. This physiological load can be
expressed in finite values.
The ergo_run adjusts itself to the users personal requirements.
The training intensity is controlled by adjusting the speed or the inclination, or
both parameters combined, under constant control of the heart rate frequency.
The ergo_run premium8 is thus more than just a Home Trainer, since it can
be used for sportive and therapeutic objectives.
Miscellaneous
- Introduction ................................................................................................... 2
- Keywords Glossary / Info Texts .................................................................... 2
- Data Interface ............................................................................................... 2
Safety Notes
- Using the Device in Compliance with the Recommendations ...................... 3
- The user ........................................................................................................ 3
- Emergency step off ....................................................................................... 3
- User Safety ................................................................................................... 4
- Notes From the Manufacturer to the User .................................................... 4
- Accessories ................................................................................................... 4
- Software ........................................................................................................ 4
- Documentation .............................................................................................. 4
- Other Notes .................................................................................................. 4
- Unauthorised use ......................................................................................... 4
- Connecting the device .................................................................................. 4
- Information About Personal Safety ............................................................... 5
- Training Conditions ....................................................................................... 5
Setting Up
- Control Elements and Connections .............................................................. 6
- Switching On / Off ......................................................................................... 7
- EMERGENCY STOP switch ......................................................................... 7
- EMERGENCY STOP safety rope ................................................................. 7
- Notes about Pulse Rate Measure ................................................................. 8
The Dashboard
- Top panel - Overview of the control elements .............................................. 9
- Underside - Overview of the connectors ...................................................... 9
Dashboard User Guide
- Switching On ............................................................................................... 10
- Starting Training Without Selecting a Program ........................................... 10
- Setting Personal Data ................................................................................. 10
- Starting Training by Selecting a Program .................................................... 11
- Training Programs ....................................................................................... 11
- Setting Limit Values ............................................................................. 12 - 13
- Reviewing Stored Training Data ................................................................. 13
- Fitness Test and Fitness Mark .................................................................... 14
- Relax Function ..................................................................................... 14 - 15
- Premium programs .............................................................................. 15 - 16
- System Software Update Using the Card ................................................... 17
- Keywords Glossary ..................................................................................... 17
- MP3 Player ................................................................................................. 18
General Notes
- Important Notes .......................................................................................... 19
- Training Hints .............................................................................................. 19
- Environmental Conditions ........................................................................... 19
- Used Symbols ............................................................................................. 19
- Compliance to Standards ............................................................................. 19
Maintenance
- Troubleshooting ............................................................................................ 20
EC Declaration of Conformity......................................................................... 21
Specifications .................................................................................................. 22
Assembly and Installation Guide
- Assembly Notes ........................................................................................... 22
- Package content .......................................................................................... 23
- Tools and Small Parts .................................................................................. 23
- Transport and packaging ............................................................................. 24
- Installing the device ..................................................................................... 24
- Installation steps 1 - 5 ........................................................................... 24 - 26
Service
- Liability ......................................................................................................... 27
- Maintenance and technical safety controls ................................................. 27
- Simple Maintenance and Service Activities ................................................. 27
- Adjusting the running belt ............................................................................ 28
- Applying Silicone Oil Lubricant .................................................................... 28
- Replacement of the Dashboard Battery ...................................................... 28
Tables and Diagrams
- Table of Target Heart Rate / Aerobic Zone .................................................. 29
- Overview Diagram of the Target Heart Rate ............................................... 29
Accessories
- ergo_memo-card2 ....................................................................................... 30
- EMERGENCY STOP safety rope ................................................................ 30
- Ear Clip ........................................................................................................ 30
- Cardio Sensor Chest Strap ......................................................................... 30
- Relax Sensor ............................................................................................... 30
Warranty Conditions ....................................................................................... 31
GNU General Public License ..................................................... 32 - 34
Data-Interface
You can use a personal computer (PC) to control the ergo_run premium8.
A special data cable is needed to this effect, which you can order from daum
electronics gmbh

Safety Notes
3
!
!
Using the Device in Compliance with the Recommendations
The ergometers of the ergo_run premium8 series may be used exclusively for
ergomettry, cardiovascular rehabilitation and for kinesitherapy.
Their use is only allowed in compliance with the instructions of the user manual.
The manufacturer will not be held liable if the ergometer is not used in compliance
with the provided instructions and consequently causes injury to persons or
other severe consequences, as well as material damages.
The CE label covers only the accessories included in the package.
Every user of this device, who is concerned with assembling, maintaining, testing
or troubleshooting it, must read and understand the contents of this user manual
before starting to work on the device.
The quality assurance system used at daum electronic gmbh complies with the
DIN EN ISO 13485:2003 standard.
daum electronic gmbh considers itself to be liable for the safety, reliability and
functionality of the device only if:
- the device is used in compliance with the instructions of the user manual.
The user
Please read the user manual carefully before starting to use the training device.
The user manual should be kept in the direct vicinity of the ergo_run premium8.
It is an integral component of the device.
Start the training by walking slowly for a few minutes to warm-up. Then increase
the running speed. Take your physical and fitness condition into consideration!
You should only run with sport or running shoes and sport garments. Running
with smart shoes or bare foot is not permitted.
Do not jump on to or from the belt while it is running. Do not jump to the front.
Do not stand still on the belt while it is running. To dot turn around on the belt
while it is running. Do not run to the side or rearwards on the belt while it is
running. The speed and inclination must always be set to a value appropriate
to the physical condition of the user. If the belt is stopped (e.g. by pressing the
Stop button or through the Emergency Stop feature, because of a power failure,
etc) and if at this moment the inclination is set to positive value, the weight of
the user combined with the gravity will cause an acceleration of the belt.
During a training the Emergency Stop implements must always be within reach
of the user.
The Emergency Stop implements are only to be used in case of hazard or falling
down risks.
Do never step on the rear return cylinder (running belt extremity); this could set
the belt in motion. Falling risk!
The lateral and rear areas of the running belt and the lifting
mechanism have dangerous nipping points and slots. Users
with long hair, loose garments, jewellery, etc. may not come
close to these nipping points and slots. Including not in the
case of a fall. Never put any clothes, towels, jewellery or similar
items down on the running belt.
Children and animals may not use the treadmill. Care must be taken to keep
children and animals at least 5 m away from the treadmill.
Using the treadmill when under the influence of alcohol, drug and/or narcotics
is not allowed.
Interrupt the training if you feel dizzy or ill, or in the event of pain of any type
and immediately consult a physician.
Inadequate or excessive training and loading through tests
can be dangerous to your health.
!
!
Users with a cardiac pacemaker or any other limitation may only use the treadmill
with an express prescription or authorisation of a physician.
A safety clearance of at least 2 m in length and 1 m width must be kept free
directly behind the treadmill, this area should be padded (e.g. a soft mat).
Inadequate and/or unauthorised use of the treadmill is not allowed and we warn
you expressly against it.
All connection cables (power supply cable, data interface cable, etc) must be
securely installed and routed. You must make sure that no one could stumble
or fall down on them.
All the safety and usage instructions in this user manual must be most carefully
respected. In particular all the instruction about maintenance and technical safety
checks.
In the case of a detected, or even only suspected, fault or defect, the treadmill
must be put out of service for safety reasons, and clear visible sign must be
posted to that effect. This is to prevent it from being used inadvertently. You
should then contact the technical customer service department of daum electronic
gmbh.
Failure to comply with the safety prescriptions can cause
injuries or death.
Oil and other maintenance products, as well as parts of the device and of the
accessories, are not suitable for consumption. Therefore you should keep them
away from the reach of children and animals.
Warning! The manufacturer is not liable for personal physical injuries or material
damages.
Stepping off the belt in emergency situations
In an emergency situation or when you feel you will fall down you must immediately
press the Emergency Stop button. You must hold the lateral handrails and/or
the front handle with both hands. You must immediately lay your feet on the
treadways (stepping areas) on the sides of the belt.
Training and measurement results (e.g. the heart pulse rate) are influenced by
holding the handrails and handles. We recommend that healthy users under
normal training conditions only hold the handrails and handles in emergency
situations or for safety purposes.
.
Important notes, warnings and risk notices are identified with
the symbol to the side. This symbol is there to draw your
attention to important matters that must absolutely be taken
into consideration when performing measurements or
connecting to other devices.
Disconnect the network connector of devices used on a network before cleaning
or disinfecting them.
The safety, reliability and functionality of the device can only be maintained if:
- the installation room complies with the valid installation requirements according
to DIN and VDE and the device is connected to a power supply socket with a
safety (protective) ground wire.
- the installation room complies with the environmental requirements of the
device, and the device is used in conformity with the instructions of the user
manual.
Ask the technical service department of daum electronic gmbh for advice in the
case any liquid penetrates the device.
GB

Safety Notes
4
User Safety
When coupling many devices to a test site care must be taken to avoid any
danger arising from the summation of the leakage currents and to ensure the
potential equalisation is effected through a common current (power) supply (e.g.
a wall socket-outlet). If you have any questions please ask your dealer or the
service department of daum electronic gmbh.
If a socket with multiple outlets is installed after the initial start-up, no other
device may be connected to this socket. (use covers on the multiple sockets)
An electrical shock hazard exists when touching devices that are not separately
grounded.
Defective or faulty devices and accessories may not be used.
The personal computer and all other connected devices (e.g. monitor, printer,
etc) must be installed at least 1.5m away from the training place, because
leakage currents could be generated on the housing (or use separate grounding,
housing leakage current).
Notes From the Manufacturer to the User
The device is not protected against the infiltration of liquids.
Direct contact with humidity or liquids must absolutely be avoided.
Care must be taken to wipe out sweat drops after training (sweat attacks paint
and plastic parts)
Damages caused by sweat are not covered by the warranty
Accessories
The device may only be used with the accessories prescribed and distributed
by daum electronic gmbh.
Every accessory item and every device connected must be manufactured in
conformity with the corresponding standard, e.g. DIN EN 60950 for computer
devices, DIN EN 60601-1 for electromedical devices.
Software
The supplied software may only be copied and archived for safety and functional
reasons. In special cases a request must be addressed in writing to daum
electronic gmbh. Releasing it to non-authorised persons is not allowed. The
ergo-bike run8 may only be used with the internal and external softwares supplied
and authorised by daum electronic gmbh.
Documentation
The documentation supplied is an integral part of the ergo_run premium8 and
may only be copied or distributed with the authorisation of daum electronic
gmbh.
Other Notes
The device is not suited for operation in rooms and / or areas with explosion
risks.
Cellular telephones may not be used in the direct vicinity of the device, otherwise
they may interfere with its functionality.
Wireless telephones may be used.
Electromagnetic interference are primarily characterised by the oscillation of the
displayed load value. If the displayed value varies uncontrollably frequently,
even when the speed is higher than 30 /min, this can be an effect of electromagnetic
compatibility (EMC).
Only cables certified by daum electronic gmbh may be used to connect the
device with other devices.
Forbidden Use
Automatic operations (remote controlled from a computer) is forbidden, when
the health and the physical condition of the user do not allow this usage. Non
compliance to this can lead to injuries and serious health risks or even to death.
Any utilisation with wheels (bicycle, wheelchair, inline skates or wheelskis), as
well as spiked running shoes or other spiked shoes on the standard running
surfaces or belts is forbidden.
If you believe that not authorised persons may have access
to the device, or know of any other reason to lock the treadmill,
then you must lock the treadmill.
Supplying power to the device:
The ergo_run premium8 must be connected to a 230Volt 50 Hz AC socket outlet.
This outlet must be protected by a 16 amperes fuse (C type).
Before connecting the device to the power outlet socket,
proceed with a careful visual examination of the power cord
and its plug to make sure they a free of damage. A damaged
cord and/or plug must immediately be replaced by an authorised
person.
Before connecting the ergo_run premium8 to the power supply compare the
specifications concerning voltage and frequency indicated on the nameplate
with your local power supply specifications. You may not connect the device
before doing this comparison<.
The connection to the power supply socket must be done directly to the wall
socket. The usage of extension cords and/or multiplier socket is not allowed.
Power surges or power failure may cause the device to
malfunction and/or become defective, as well as to a complete
shutdown of the ergo_run premium8. In order to restart the
device in this case you must switch the device OFF by means
of the mains switch and wait for the ON/OFF interval (about
1 - 2 minutes). Then you can restart the device.
!
!
!
!
Information About Personal Safety
The ergo_run ergometer is intended for adults. Children should
only be allowed to train with the ergometer under adult
supervision.
Persons suffering from any of the following diseases should consult their family
physician or a specialist before starting training with the ergo_run.
- Heart disorders like angina pectoris, coronary thrombosis (infarct),
stenosis,and high blood pressure
- Diabetes
- Respiratory disorders like asthma, chronic bronchitis, etc.
- Rheumatism
- Gout
- Or any other disease or illness
You should never train when you feel ill or weak.
Please take the time to become acquainted with all the functions and setting
possibilities of the device before the first training on the treadmill.
Never grab the moving endless belt with the hands. Never leave any object in
the vicinity of the cylinders of the running belt, where it could be pulled in.

Safety Notes
5
The treadmill is equipped with an EMERGENCY STOP
mechanism. Before starting the training the user must attach
the clothes peg of the safety rope to his clothing. Whenever
the safety rope is pulled out the running belt will automatically
stop. The belt will not restart upon reinstalling the safety rope.
The length of the safety rope can be adjusted to fit the user.
Before starting the training please also put on the ear clip or the Cardio sensor
strap, in addition to the safety rope, before starting the program.
Do not hop or jump during the running training.
You can prevent others unauthorised persons from using the treadmill by pulling
the safety rope out.
You should never use the ergo_run to find out your maximum degree of
physical endurance. This can have serious consequences on your health!
Should you change the installation location of the treadmill, you must verify the
operation of the running belt in its new location. It should always stay in the
centre of both shafts.
daum electronic gmbh is not liable for personal physical injury or material
damage.
!
Training Conditions
You should pay attention to providing good training conditions; this includes
choosing the training room and installation place. Makeshift installation places
do not incite to training!
Summary of the Important Safety Hints:
- Read the user manual and the safety hints
- Install on a horizontal and solid floor without unevenness
- Safety clearance of 1 m on each side and 2 m to the rear
- Only persons in good physical and health conditions may use the
device
- Train only with sport clothing and running shoes
- Before starting a training session attach the EMERGENCY STOP safety
rope to the clothing and adjust it to the correct length
- Put on the ear clip or the Cardio sensor strap before starting a training
session
- Begin training at walking speed and only then start running
- Do not jump on to or from the belt
- Do not stand still, turn around or jump while the belt is running
- Be careful with the dangerous nipping point of the running belt
- Use the EMERGENCY STOP when falling
- Interrupt the training if you feel dizzy or ill
- Children may use the treadmill only under adult supervision
- Always pull out the mains plug to repair or clean the device
- When you change the installation location check that the running belt
runs in the centre of both shafts
GB

Setting Up
6
2
3
4
1
5
13
4
6
9
8
12
11
10
7
1Dashboard
2Interfaces and connectors
3Handrails front
4Handrails lateral
5Name plate
6Power switch
7Piston type fuse
8Roller casters
9Emergency Stop Mechanism
10 Lateral treadways with non slipping surface
11 Running area (belt)
12 Rear cylinder cover
13 Level compensation
Control Elements and Connections
35
150
KG
daum electronic GmbH
D-90768 Fürth
ergo-run premium8
230V
~
50/60Hz 2500W
123456789101112
200
SN
L
Made in Germany
z
1011

7
Setting Up
Fig. 1
Fig. 2
ergo_memo-card2
protection
slider
!
!
EMERGENCY STOP Safety Rope
The ergo_run premium8 is equipped with an Emergency Stop Safety Rope. This
rope guarantees that when the user/patient is about to fall or when the user/patient
runs too slowly the running belt will stop automatically.
The patient/user must therefore attach himself or herself to the safety rope
before starting a training session (Fig. 1). The length of the safety rope must be
adjusted in such a way that the Emergency Stop Function is surely executed
when
- the user is about to fall.
- before the user reaches the rear third section of the running belt.
When the Emergency Stop Safety Rope is pulled out, the running belt will resume
its operation when the Start key is pressed (dashboard console) after the safety
rope is reinstalled on the dashboard (Fig. 2).
Switching ON / Off
Please read the safety notes before switching the ergo_run premium8 on.
Insert the ergo_memo-card2 in the dashboard before switching the device on.
Use the green On/Off switch " I " on the front motor cover of the device to switch
it on and off. The switch is illuminated in the ON position.
EMERGENCY STOP switch
The Emergency Stop switch must be unlocked before you can use the ergo_run
premium8. To unlock it turn the red button to the left/right slightly.
On-/Off switch
Only then can you use a computer to save e.g. mp3 files (in the \mp3 folder)
or update files (in the \update folder) on the card.
For safety reasons you must pull (route) the power cord to
the front of the device, otherwise it may be cut (ruptured) by
the elevation control mechanism.
When switched on, the system takes about 1 minute to load the software. The
colour screen displays during this time a software load progress bar.
Wait for the beep signal before using the dashboard.
The interval period between turning OFF and ON the device
must always exceed 1 to 2 minutes. Otherwise the motor
controls may be damaged and/or the fuses may breakdown.
If the memory card is inserted after the device is switched on, then you must
wait for the beep signal. This can take about 5 seconds. (if the card is empty it
will be initialised)
In principle the memory card should be pulled out while you are not training or
only after the beep signal!
The protection slider on the ergo_memo-card2 must point to the bottom when
the card is inserted into the dashboard. This will make it possible to write to the
card.
If the slider points upward the card is locked/write protected.
On / Off power
switch
GB

Setting Up
8
Ear clip
Cardio Sensor-chest
strap correctly put
on
Cardio Sensor-Strap
!
Notes about Pulse Rate Measure
Ear Pulse Rate Measure
Every heart pulse modulates the light passing through the lobe, and can thus
be detected by an infrared sensor in the ear clip, and displayed as heart pulse
rate. The measure of the pulse rate over the ear is much more precise than the
measure over the hand sensor.
Please make sure that the ear clip is correctly put on:
1. Insert the connector into the Cardio socket.
2. You should rub the ear lobe to stimulate blood circulation.
3. Attach the ear clip to the ear lobe (the closest possible to the head). The
contact surfaces must sit entirely on the skin.
The scattering in the display of the pulse rate variability is larger than with the
wireless pulse measure (factor 2).
Note: Strong light sources, like sunlight, halogen projectors, and neon
lamps, and also ear piercing or ear rings, or the intake of beta-blocker
could affect the measurements.
Wirless Pulse Measure
The Cardio sensor chest strap transmits the pulse rate directly to the integrated
wireless Cardio pulse receiver in the device. This pulse measurement method
is the most precise.
Note: Your pulse rate will be correctly evaluated over the whole measuring
range only if you use a non-coded wireless pulse rate transmitter.
To ensure the maximum efficiency of the Cardio sensor strap, you should lightly
humidify the contact surfaces (inner side) of the chest strap before starting the
training.
Note: Using two chest straps simultaneously in the same room,
either of the coded or non-coded type, at about 1.5 meter from
the receiver, can lead to the display of a wrong pulse rate.
Note:
When you train without ergo_memo-card2 you will not have the possibility to
store training results.
When you train without pulse rate measure, the pulse rate will not be displayed!
The user controls the dashboard by means of the control button, the Menu
key, the Info key and the two function keys.
Use the Info key to obtain more information about the individual menu
items.
If the requested information spans many pages, you can leaf through the pages
by turning the control button. Press the Info key to display the keywords glossary
(page 17).

The Dashboard-Console
9
Section Front side of the console
19
6
1
2
3
4
5
7
8
18
12
11
17
15
13
14
9
10
Towel-
holder
Bottle-
holder
16
21
22
26
23
25
24
20 27
19
12. -/+ Inclination
Reduce or increase the inclination
13. Start/Stop
Starts the belt at the speed of 0.5 km/h / Stops the belt smoothly
14. EMERGENCY STOP switch
15. Speed keys
Choice of pre-programmed speeds (km/h)
16. -/+ Speed
Reduce or increase the speed in 0.1 km/h steps
17. Relax connector
Used to connect the Relax sensor
18. -/+ Set Values
Reduce or increase the pulse rate, speed and Watt
The value that can be actually modified will be colour-highlighted in the
training view.
19. Memory Card reader (SD-Card)
Battery replacement
The button cell battery (CR 2032) is located on the underside of the circuit board
of the dashboard. Replace this battery when you notice a loss of time and date
on the system clock. (See the maintenance section)
Top panel
1. Colour screen
2. Volume (up)
3. MP3-Player
4. Volume (down)
5. Function keys
6. Menu
Calls the main menu
7. Info
Display an explanation about every menu option
8. Audio connector
Use to connect a headset
9 Control button
By turning and pressing this button you can select and open menu items
10. EMERGENCY STOP safety rope
Stops the belt when pulled out
11. Cardio connector
Used to connect the ear clip
Underside
20. RS422 interface to the control board
21. Reset key
22. USB-Host
23. USB-Slave
24. Audio connector L/R to external amplifier (Line Out)
25. Network connector (Ethernet)
26. Light-emitting diode (LED) for network connector
27. Battery 3.3 V (hidden by the console)
GB

Dashboard User Guide
10
Start
running
Press the
function key
under End
Press the
Menu key
Turn and
press control
button to
select
Setting
Turn and
press control
button to
select Name
& Addr.
Turn and
press control
button to
select
Personal data
Turn and
press control
button to
select Name
Slider switch
lower position:
write protection
is deactivated.
Please use the ergo_memo-card2 with every training session to store your
personal settings and actual training data. This card is user related. It is not
possible to store the personal settings of a second user on the same card.
Note:
When you train without ergo_memo-card2 you will not have the possibility to
store training results.
When you train without pulse rate measure, the pulse rate will not be displayed!
The user controls the dashboard by means of the control button, the Menu
key, the Info key and two function keys.
Use the info key to obtain more information about the individual menu
items.
If the requested information spans many pages, you can leaf through the pages
by turning the control button. Press the Info key to display the keywords glossary
(page 17).
Note:
We reserve the right to modify the figures!
Insert the ergo_memo-card2 in the card reader before turning the device on.
Setting Personal Data
Before training you should enter your personal data and limit values under menu
item Setting.
User and device data can be set here.
Starting Training Without Selecting a Program
You can start training immediately with this screen displayed.
You can enter all the characters and special characters by turning and pressing
the control button. Use the position Small to switch between capital and small
characters as well as special characters. Use the <- position to delete and
correct your entry

Dashboard User Guide
11
Press control
button
Press control
button
Press control
button
Press control
button
Press control
button
Press control
button
Press the
menu key
Press control
button
Press control
button
Press control
button
Press control
button
Elevation Profile Training Programs (distance programs)
The distance programs are varied and efficient. They aim to improve
endurance and physical condition.
Training Programs
Pulse Rate Training Programs ( Constant Pulse Rate)
With the pulse rate programs the heart pulse rate is controlled and adjusted
automatically by means of the running speed.
Starting Training by Selecting a Program
You can choose from various program types.
Watt Training Programs
With the watt controlled programs the load (which is a function of the users
weight) is controlled over the speed and the inclination.
Speed Training Programs
With the speed controlled programs you will be running at a fixed set speed.
The load is individually adjusted over the inclination.
Use the Info key to obtain more information about the individual menu items.
GB

Dashboard User Guide
12
Press the
Menu key
Turn and
press control
button to
select
Setting
Turn and
press control
button to
select Limit
values
Turn and press
control button
to select
Personal
data
Turn and
press control
button to
select Watt
Turn control
button to
select the watt
limit-value and
press
Confirm
Press the
menu key
Turn and
press control
button to
select
Setting
Turn and press
control button
to select
Personal
data
Turn and press
control button
to select
Dynamic limit
values
Setting Limit Values
In order to protect the user against overloading or physical injuries the training
intensity can be controlled by various adjustable limit values. These should be
set in menu Setting before starting training or before setting the loading values
after a few training units.
Dynamic Limit Values and Static Limit Values can be set.
- Due to their natural variability, dynamic limit values are continually exceeded.
- Static limit values are reached only once per training.
Setting the Dynamic Limit Value for "Watt"
"Watt" limit value reached while training
The field displaying the watt value will be highlighted in Red when the set Watt
limit value is reached or exceeded during training. If the loading is reduced and
thus falls below the limit value the warning is removed.
Setting the Static Limit Value for "Time"
Use the Info key to obtain more information about the individual menu
items
GB

Dashboard User Guide
13
Press control
button
Turn and
press control
button to
Select
Training Unit
Press the
Menu key
Turn and
press control
button to
select
Training Data
Press function
key under
Options
Turn and
press control
button to
Select
Diagram
Turn and
press control
button to
select Time
Turn control
button to select
the time limit-
value and
press the
function key
under Confirm
Press function
key under
Yes
Turn and
press control
button to
select Limit
Values
Turn and
press control
button to
select Static
Limit Values
Reviewing Stored Training Data
Recalling stored training data.
e.g. Individual Trainung
The individual training units can be recalled under several specific performance
diagrams.
"Time" limit value reached while training
When the Time limit value is exceeded during training the system displays a
warning message that must be acknowledged. The training can then either be
terminated or continued.
Use the Info key to obtain more information about the individual menu
items.
GB

Dashboard User Guide
14
Fig. A Fig. B
Turn and press
control button
to select
Individual
Training
Reviewing Fitness Mark
Press the
Menu key
Turn and
press control
button to
select
Training data
Turn and press
control button
to select
Maximal
Values
Press the
function key
under
Options
Press the
function key
under
Fitness Test
Press the
function key
under OK
Fitness mark
evaluated
after 60
seconds
Fitness Test and Fitness Mark
The fitness test can be executed anytime during training. A pulse rate measuring
device (pulse sensor, ear clip, or chest strap) must be connected and functional,
and the training should had already started at least 10 minutes earlier.
The measurement principle is based on the fact that the pulse rate falls faster
within one minute (following a load period) for well-trained users than for less
trained users. Fitness marks from 1 to 6 are assigned. The lower the fitness
mark the better is the training status (fitness) of the user.
When the fitness test is started during training, the present training will be
interrupted and the load will be lowered to minimum value for the device for a
short period of time. During this pause the system measures the drop in pulse
rate within a period of 60 seconds and computes a fitness mark. Afterwards the
training resumes automatically at the interrupted position, and the load in Watt
is raised to its previous value.
e.g. Fitness test during a training
Relax-Function
The relax-function is a biofeedback-process that is measured over the electrical
resistance of the skin. Biofeedback is thus the translation into perceptible signals
of physiological processes occurring in our body whose values are indicated by
means of optical signals.
The ergo_run controls the relaxation process by means of the relax-function,
and highlights the process of stress elimination after a physical fitness training
or other loading.
The displayed relax value drops gradually with increasing relaxation level and
increases with the increase of stress level. You can assist this process by getting
off the device and sit in a relaxed position, or even lay down, close to the ergo_run
and calm down.
Connecting the relax sensor:
1. Attach the relax-sensor tape, with the big contact surface (Fig. A), to the
fingertip of the middle and index fingers on the inner side of the hand (Fig. B).
The Velcro tape should not be tightened too hard.
2. Plug the connector of the relax sensor into the Relax socket on the dashboard.
Use the Info key to obtain more information about the individual menu
items.

Calling the Relax-Function
Dashboard User Guide
15
Turn and
press control
button to
select Relax
Press the
Menu key
Press
the control
button
Turn and
press control
button to
select
Premium
Programs
Press
the control
button
Press the
Menu key
When a program is selected its introduction melody is played. The program
starts automatically after a few seconds delay.
Premium-programs
Premium programs are training programs with multimedia animation.
You will find at least one premium program on our homepage www.daum-
electronic.de (menu option Support > Download<). In the near future more
programs for various training targets will be posted.
Save the premium programs in the folder \data\premiumprogram on the
ergo_memo-card2. Every premium program consists of a file with the extension
....dpp and the corresponding folder.
Starting the premium programs
Select a premium program by turning and pressing the control button.
Each program has an introduction melody.
Use the Info key to obtain more information about the individual menu
items.
A warning message will appear on the screen if you forget to put the relax sensor
on.
GB

Dashboard User Guide
16
EThe program starts and the background melody plays.
Welcome to your Daum premium series training device
We start todays training unit with a gradually increasing load.
The second stage starts as soon as you reach your performance level:
Your pedalling speed will be raised gradually.
Following this warm-up in two stages the training continues in a natural landscape.
And finally ....
Presently your training device is set for a load of 80 watts. And this load will be gradually
raised to 125 watts within the next three minutes.
You should handle this load hands down!
And dont let my talking distract you - keep training!
Our last 10 seconds...
Now you can be really proud of yourself! It was sometimes very tough. Congratulations
good work!
So, you are already through the first level of your warm-up training. We will now gradually
raise the speed of your training:
OK now, lets go up in the mountains!
You can now decide at what speed youll move forward with the plus and minus keys
at the right edge of the screen.
Obviously the faster you go, the higher the load will be for you!
Whenever it gets too difficult for you use the minus key, on the other hand use the plus
key if you feel underworked.
You already have put in a very good performance.
We start now the softer last part, the heart rate training.
The selected heart rate range from 130 to 140 beats per minute is also well appropriate
for fat burning.
..............etc.

Dashboard User Guide
17
Press the
Menu key
Turn and
press control
button to
select
Settings
Turn and
press control
button to
select Update
Using Card
Turn and
press control
button to
select
Update
Press the
function key
under To
Update
Press the
function key
under Start
Update
Press the Info
key
Turn control
button to
select the
keyword
Press the
function key
under
Keywords
Turn and
press control
button to
select Device
Data
System Software Update Using the Card
Since the system software is continuously updated and extended, it is possible
to bring your present version to the latest state by means of a software update.
This update is available directly from daum electronic in the form of an Update-
Card, or as an Update file to download from our Internet site at www.daum-
electronic.de.
Order the Update-Card directly from daum electronic; once the update operation
is complete, you can use this card as an additional ergo_memo-card2 for another
user.
If you prefer to use the possibility to update on Internet you will need a computer
and a SD card reader (available from electronic stores or daum electronic).
Please make sure that the downloaded file UPDATE.tar is saved in the
subfolder /update in the ergo_memo-card2.
Running the Software Update
Keywords Glossary
The ergo_run premium8 contains a glossary of key words for the concepts
related to the utilisation of the dashboard and need a further explanation.
A short description is provided for each one of these keywords.
Viewing the Keywords Glossary
Use the info key to obtain more information about the individual menu
items.
GB

Dashboard User Guide
18
Press the
MP3 key
Turn control
button to
select a title
Press the
following key
to increase the
volume
Press function
key under
Stop
Press the
following key to
decrease the
volume
Press function
key under
Back
Press control
button to start
playing
selected title
!
MP3-Player
Listen to your favourite music while training.
Save mp3 files on the ergo_memo-card2.
To do this you need a USB card reader connected to your computer, then save
the mp3 files in the /mp3 folder on the ergo_memo-card2.
Please note that you should not fill up the card with mp3 files,
otherwise the system will not save any training data on the
card!
Insert the memory card in the dashboard at the front side of the device.
Starting the MP3-Player
Press the mp3 player key, the system will display a list with the music titles
saved on the card.
Select a title by turning the control button.
Press the control button to start playing the selected title.
The system continues with playing all the music titles eventually following the
selected one in the list.
The volume is controlled by means of the 2 dedicated keys.
Press the stop key (left function key) to stop the music.
If you exit the MP3 player while the music is playing by pressing the Back key,
you can continue to listening to your music while training.
Use the Info key to obtain more information about the individual menu
items.

General Notes
19
!
!
Important Notes
Mains Voltage 230 Volt
Because of new regulations the mains voltage must be specified in the form of
a definite value. Consequently, the mains voltage values indicated with a tolerance
from 220 to 240 Volt will be restricted for all the ergometers of daum electronic
to the single mains voltage value of 230 Volt.
Mains Power Supply
In order to avoid all hazards any damages to the connection cable to the mains
power supply or to the On/Off switch must immediately be repaired, or replaced
with new parts, by the manufacturer, the customer service department of the
manufacturer, or similarly qualified service personnel.
Training Hints
The ergo_run makes it possible to define and control the exercise sequence
yourself.
It is thus possible to adapt constantly the training plan to the capacities of the
user. This device is suitable for therapeutic use.It does not meet the requirements
for medical and diagnostic usage (in medical clinics).
Ergometers are designed for endurance, kinesitherapy, and physical condition
training, as well as for strengthening the cardiovascular system and increasing
the muscle mass. The inclusion of the pulse rate in the parameters used to
control the load enables training in the efficient aerobic zone.
Being in the aerobic zone means the muscles loading is at the exact level where
they can be adequately supplied with oxygen without overproduction of lactic
acid (muscles ache). Therefore, the treadmill ergometer is also a great value
for sports medicine and physical education.
The fact that the training effort can be finely measured gives you the possibility
to carry out physical stress tests to get information on your physical condition.
You can thus identify early any cardiovascular problems and, with the help of
a physician, set up a special endurance training-plan to deal with them.
Running is a very efficient training form for fitness. You can carry out a controlled
running training at home without fearing any interference from bad weather. The
treadmill is also appropriate for walking exercises.
Running on a treadmill belt differs from running on normal ground. Therefore,
you should prepare for the running training by walking slowly on the belt.
A steady running pace and appropriate shoes (running shoes) are of great
significance for the efficiency and the benefit of the training with the ergo_run.
The wrong shoes can lead to overloading the joints, tendons
(sinews) and ligaments. Please ask your dealer for advice
when buying your running shoes.
Training Hints
Generally speaking, training twice a week will help retain your physical condition
level. To improve your fitness level you must train at least three or four times
per week.
You should consult a physician before increasing the number of weekly training
units, to avoid overloading yourself.
Enviromental Conditions
Treadmill ergometers are not suited for operation in rooms and / or areas with
explosion risks or in a combustive atmosphere. The devices may not be operated
in the near vicinity of e.g. motors or transformers with big electrical connections
because electric or magnetic fields may disturb or deactivate some functions.
The vicinity of high voltage cables is also to be avoided.
Unless otherwise specified in the accompanying documentation and delivery
documents, all the devices are designed to be used in the usual closed conditions
under the climate conditions considered normal:
Temperature range: -10°C .....+40°C
The devices must therefore be protected against particular humidity effects.
Ventilation opening must not be covered in order to avoid restricting the circulation
of air. Storage temperature range: -20°C .....+50°C
All the devices may be stored for a maximum period of 6 to 9 months without
being connected to an electrical power supply. Beyond this period the rechargeable
batteries may loose their charge as a consequence of the lack of electrical power
supply. If the storage period of the device exceeds this period, it will eventually
need to be reprogrammed.
Used Symbols
The symbols used on the ergo_run premium8 comply with the IEC 417 and IEC
878 standards (table D1/D2).
Follow the Warnings / Danger Notices
Accompanying documents / instructions.
Device of type B
Dangerous electrical voltage
Alternating current
Protective cable connection
Ground
Potential equalisation
Recycling of old electric and electronic devices
read the operating instructions
Compliance to Standards
The ergo_run-premium8 may not be used if the certifications/approval and the
defined safety standards (according to the table of the technical specifications)
do not comply with the local prescriptions. The local country specifications must
be compared with those of the device before using the device and the device
may only be used if they comply with each other.
GB

20
Maintenance
!
Outside Cleaning
Clean the outside surfaces with a wetted soft cloth. Do not use any strong or
corrosive cleaning solution, or one containing solvents, (e.g., alcohol, stain
remover, etc).
Care should be taken to wipe out sweat drops after training (sweat attacks paint
and plastic parts).
Damage caused by sweat is not covered by the warranty.
You can clean the coating of the handrails with a mild detergent, applying
appropriate caution.
Clean the drinking bottle after use out of hygienic reasons. We also recommend
cleaning the bottle before filling it with various drinks, particularly if not used
regularly.
Noises
The lubricant applied by the manufacturer between the running belt and its base
plate must be renewed if the device is used frequently. At the very latest lubricate
the running belt when you hear dry rubbing sound while running.
Fastening Screws
All the fastening screws must be tightened up from time to time. We recommend
tightening them at least after the first 50 km and then once every 500 km.
About the V-belt
The driving surfaces of the drive pulley and the V-belt pulley are covered with
a rubber layer by the manufacturer.
This favours the development of an optimal fitting of the V-belt into the
grooves of the driving pulley during the first 500 to 1000 kilometres.
During the first 500 to 1000 km the belt will loose some excess rubber, which
will appear in the form of black powder deposits. You can remove these deposits
using a small brush or a vacuum cleaner.
In the Case of a Failure.............. What To Do It?
In the event of a failure, please check if:
- The data cables are correctly connected.
- The cable connectors are firmly plugged in.
- The cables were jammed or damaged during the assembly of the console on
the columns.
Contacting your dealer or the service department of the ergo_run
If the cause of the failure could not be identified, you should contact the dealer,
where you bought the device, or daum electronic gmbh.
We need the following information:
1. The device number (this number is on a silver label underneath of the power
ON/OFF switch).
2. The dashboard version number (you can access this number under the menu
item Main Menu - Information - Device info).
3. The proof of purchase and the device reference sheet.
If you wish to obtain more information on your device, please visit our service
and repair hints site on Internet (www.daum-electronic.de).
Should the dashboard operation fail and cannot be restored by mean of normal
keys operations, then the solution would be to press the recessed RESET key
(Page 7/No. 17) underneath the dashboard with a pointed tool (e.g. a pencil or
ball pen).
Please note that the last set of training data and results will
be definitively lost when you press the RESET key.
Other manuals for Premium 8
2
Table of contents
Other Daum electronic Treadmill manuals
