Dawn Vanity AACS-6001 User manual
Vanity Installa on Guide
Model: AACS-6001
Kitchen & Bath Products, Inc.
Please read all instruc ons carefully before star ng the installa on.
IMPORTANT: Recommended for professional installers only. The installer maintains responsibility for installing the product safely.
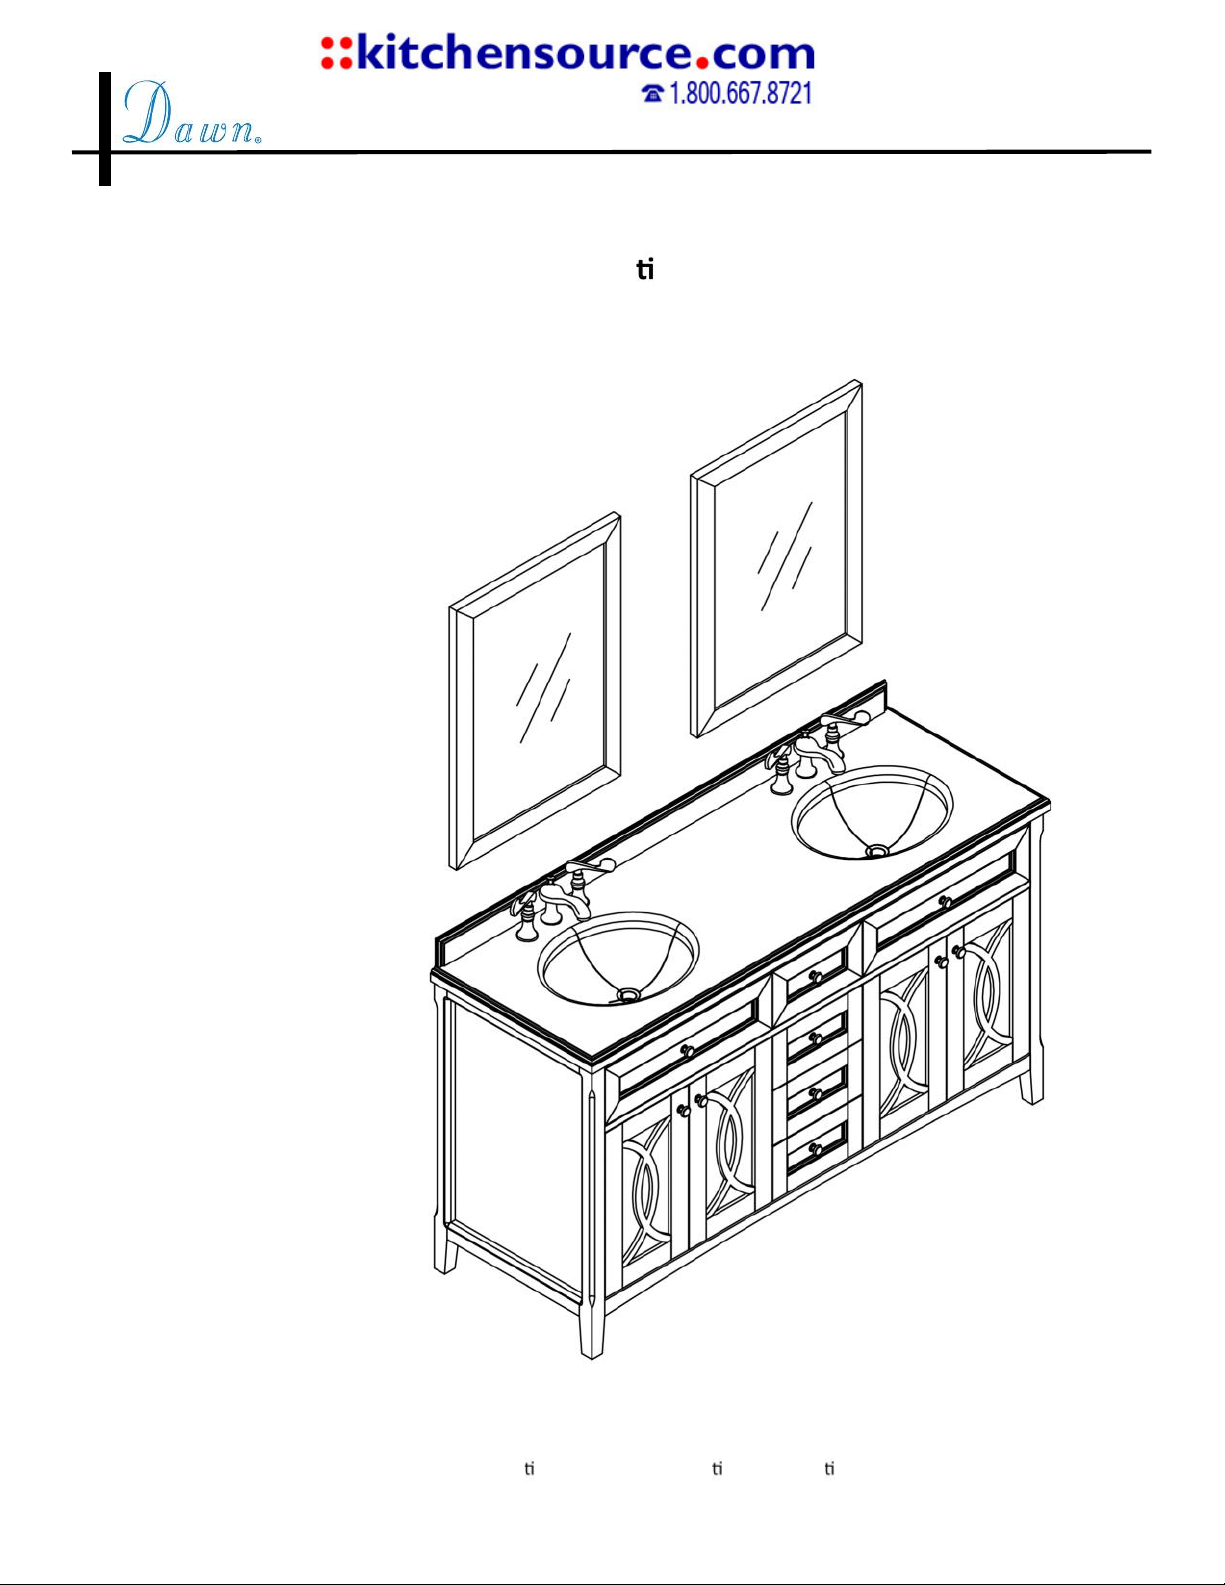
Mirror
AAM2230-01
Cabinet
AACC602134-01
Countertop
AACT602134-01
(Faucet sold separately)

2
INSTALLATION GUIDE AACS-6001
PARTS
DIMENSIONS
*Drawings are for reference only. Please refer to actual product for exact size, shape, color, and parts.
*Dawn reserves the right to make revisions in the design of faucets without no ce for improvement of product performance and quality.
Note: Faucet sold separately
Actual product parts may look different.
Framed Mirror
Faucet Hole
Ceramic Sink
Drawer
Door
Handle
Leg
Drawer Slide
Door Hinge

3
INSTALLATION GUIDE AACS-6001
MATERIALS & TOOLS
Safety Glasses, Pencil, Level, Tape Measure, Stud Finder, Assorted Screwdrivers, Assorted Wrenches,
Drill, Screw Gun, Caulking Gun, Hammer, Screws, Nail Anchors/Molly Screws
BEFORE YOU BEGIN
●Comply with Plumbing Codes
Before installing any Dawn product in your new or remodeled kitchen, you should make sure that you are in compliance with all
local plumbing codes.
●Check Product Condi on
Before installa on, please check the condi on of the product and, if appropriate, its components. If there is any problem with
the product and/or its components, please contact the store you purchased it from for a replacement. As soon as you have in-
spected your product, please return it to its original packaging un l you are ready to install it.
●Handle with Care
To protect its finish and avoid damage before and a er installa on, please handle the product with care. For care and cleaning
ps a er installa on, please refer to the Care and Cleaning Guide in this instruc on guide.
REMOVE & REINSTALL THE DRAWER
To ease installa on, remove drawers from the vanity before beginning.
●Removal
●Reinstalla on
Pull the drawer out un l it stops. From un-
derneath the rails, loosen and remove the
moun ng screws.
Li the front of the drawer and pull the
drawer away from the cabinet.
Fully extend the rails. Align the holes on the underside of
the drawer with the rails and set into place.
From underneath the rails, screw back the moun ng screws.
Lightly li the front of the drawer to ensure the drawer is
locked into place. Slide the drawer in and out of the cabinet
to ensure smooth opera on.
4
INSTALLATION GUIDE AACS-6001
INSTALLATION
IMPORTANT: Recommended for professional installers only. The installer maintains responsibility for installing the product safely.
LEGAL DISCLAIMER:
●This instruc on guide is done as a public service to customers of Dawn Kitchen & Bath Products, Inc. (“Dawn”). For special situa ons or further assistance, please consult professionals.
●All products should be inspected by customers upon receipt and before any installa on. Any defec ve product should be reported immediately and should NOT be installed.
●Requirements may vary for installa on in a granite, marble, stone, or butcher block countertop.
●Installa on by professional installers is highly recommended. Dawn assumes no liability for any damages incurred through the use of informa on provided in this guide.
1. Install the Vanity
●Use a stud finder to locate and mark the wall studs.
●Li and place the vanity cabinet in posi on against the finished wall. Make
sure the top is level and the supply valves clear any drawers in the cabinet.
●Drill pilot holes through the vanity back and the finished wall. For holes not
inline with studs, push or hammer in wall anchors that are made for your
wall surface.
●Secure the cabinet to the finished wall with screws.
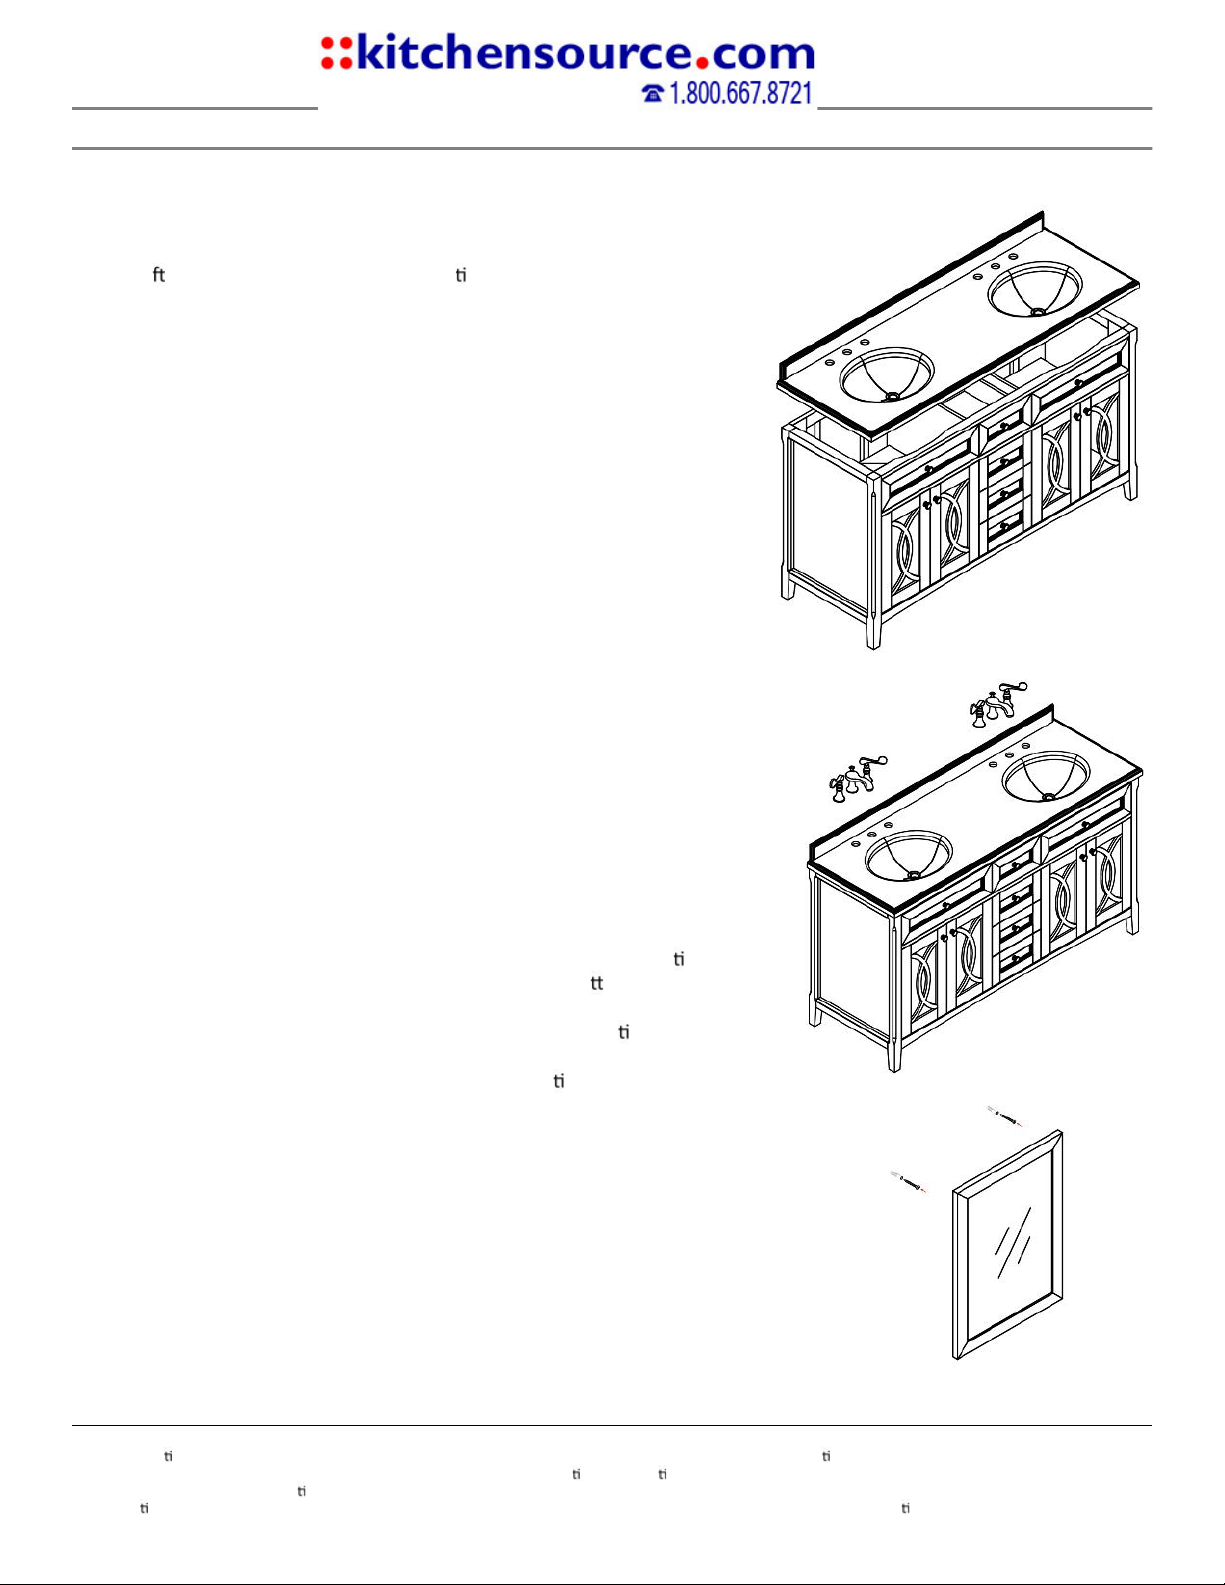
2. Install the Countertop
●Assemble the faucet and the sink drain to the countertop.
●Run a bead of silicone adhesive around the top of the vanity cabinet. Place
the sink countertop on top of the cabinet and press firmly in place. Let the
silicone adhesive cure.
●Connect the water supply lines and the drain.
●Reinstall the cabinet drawer(s).
●Apply a bead of caulk along the back edge against the wall. Clean up any excess.
Allow 24 hours to dry.
●Turn on the water to test for leaks.
3. Install the Mirror
●Examine the type of brackets on the back of the mirror.
●Hold the mirror flush and level against the wall in the desired posi on. Mark the
mirror's placement with a pencil around the top and bo om corners. Set the
mirror aside with care.
●Use a stud finder to locate studs on the wall. Mark the loca on with a pencil.
●Measure the distance from the top of the mirror to the brackets on the back of
the mirror. Use this measurement to mark the posi ons for the screws on the
wall. Make sure the marks are straight with a level.
●Drill pilot holes into the marks for the screws . If the screws will not be mounted
on studs, hammer in wall anchors.
●Insert screws, leaving a short length of screw extending from the wall surface.
Hang the mirror.

5
CARE AND CLEANING
Dawn® Vanity Cabinets
Wood naturally darkens over me or changes slightly in color due to light exposure and may go unno ced from day to day. Howev-
er, over an extended period of me it may become more no ceable, depending on the amount of sunlight exposure. Our warranty
replacement products are not guaranteed to have an exact match. Any imperfec ons such as small surface splits, small dark pits or
dark mineral streaks are natural and will not be considered as defects.
●Do regular rou ne cleaning rather than an occasional aggressive single cleaning.
●Dust frequently with a so cloth and occasionally use a wood cleaner that is not silicone based.
●Do not place in direct sunlight or near windows with direct sunlight exposure.
●Avoid extreme temperature changes and keep away from heater and air condi oning units.
●Do not allow liquids to remain on the wood surfaces for longer than necessary.
●Liquid absorp on will cause wood to warp, bubble, and crack, and your finish may peel.
Dawn® Glass Sinks
Dawn® glass sinks are manufactured to our highest possible standards and regula ons to ensure you receive the utmost quality.
Dawn® tempered glass sinks are made to last because the tempering process makes them stronger than annealed glass. That does
not mean they are indestruc ble, but rather more durable and prac cal for everyday use. We have a few recommenda ons to
make your sink last and maintain its sheen. Glass is subject to thermal stress when it experiences extreme hot or cold condi ons
suddenly. Glass needs me to be heated or cooled to extreme temperatures, and sudden changes can cause stress cracks to the
product.
●Clean regularly with hot water and a mild detergent solu on applied with a so cloth or sponge to remove deposits.
●Rinse thoroughly and towel dry a er every use to prevent water spots and mineral deposits.
●Drying your sink a erwards will help prevent water spots.
●Rain-X®, which is available at most automo ve departments can be applied to keep your Dawn® sink water spot free.
Dawn® Ceramic Sinks
To keep your Dawn® products the center of a en on, we suggest you follow these guidelines to maintain its quality and beau ful
aesthe cs. Deep clean once a week with an approved cleanser and a so cloth or sponge rather than an occasional aggressive sin-
gle cleaning.
Water quality can also affect your Dawn® sink making it appear dull or stained. Lime scale is notorious for absorbing liquids like
coffee, tea, and wine making the stained or nged look. To remove lime scale build up on your Dawn ® sink, use a lime scale clean-
ing agent, such as CLR®. You can also soak the sink in 1 part white vinegar and 3 parts water to help loosen problema c areas mak-
ing it much easier to sponge away debris. Make sure to use a non-abrasive pad/sponge with a ceramic cleaner.
Do’s and Don’ts
●Clean regularly with hot water and a mild detergent solu on applied with a so cloth or sponge to remove deposits.
●Rinse thoroughly and towel dry a er every use to prevent water spots and mineral deposits.
●Drying your sink a er each use will help prevent water spots and lime scale.
●To remove lime scale or water spots, only use cleaners made specifically for that purpose. Apply cleaners to cleaning cloths,
pads, or sponges first, and test in a small area; do not apply directly onto the product.
●Do not allow any cleaning product to remain on your sink longer than necessary.
●Do not leave rubber patches, wet sponges, cloths, cleaning pads, or dishpans in the sink.
●Do not use coarse abrasive powders and metallic scourers, such as steel wool or brushes with metal bristles.
●Do not allow liquid soap or other cleansers to dry on the surface of the sink.
●Do not use detergents or soaps that contain acid or that are not dissolvable.

WARRANTY
All Dawn® products carry limited life me warranty unless otherwise noted. Dawn® products have been manufactured and tested to the highest
quality standards by Dawn Kitchen & Bath Products, Inc. (“Dawn®”). Dawn® warran es are limited to Dawn® products purchased and installed in
the United States.
Limited Life me Warranty
Dawn® warran es all of its products to be free from manufacturing defects in material and workmanship during normal residen al use for as long
as the original purchaser owns his or her home. This warranty only extends to the original consumer and this warranty is non-transferable. If any
defect is found in normal residen al use, Dawn® will, at its own elec on, repair, provide a replacement part of product, or make appropriate ad-
justment at no charge (excluding labor charges and other incidental or consequen al costs). Damage to a product caused by accident, misuse, or
abuse is NOT covered by this warranty. Improper care and cleaning will void the warranty. If Dawn® is unable to provide a replacement and repair
cannot be made, Dawn® may elect to refund the purchase price to the original consumer purchaser in exchange for the return of the product.
(IMPORTANT: The original consumer/purchaser should be responsible for inspec ng products upon receipt. Any defec ve product should be re-
ported immediately and should NOT be installed.)
One-Year Limited Warranty
Dawn® sinks, vani es, as well as kitchen and bath accessories are warranted to be free of defects in material and workmanship for one year from
date of purchase. Dawn® will, at its own elec on, repair, replace or make appropriate adjustment where Dawn® inspec on discloses any such
defects occurring in normal usage within one (1) year a er purchase. Dawn® is not responsible for removal or installa on costs. This warranty
voids if the product has been moved from its original installa on loca on. Defec ve parts or products will be replaced on availability basis. Dawn®
warranty does not apply to any local building codes. It is the customer’s responsibility to comply with all local plumbing codes before installa on.
Dawn® vani es are made from natural raw materials. Grain and color differences among wood, plant species, stone, and minerals occur naturally
and are not considered a defect. All wood darkens with age, which is considered a natural feature and not a defect. If a replacement part is need-
ed, exact color or grain match cannot be guaranteed. Exposure to direct sunlight may cause color varia on and/or surface damage and will not be
covered under warranty. Tempered glass may have a green nt which is a result of the tempering process and is not considered a defect. Color
varia on in stone is also a natural occurrence, and therefore new or replacement pieces may not match store display samples.
DAWN® WARRANTIES DO NOT COVER, AND DAWN® DISCLAIMS ANY LIABILITY FOR:
●Condi ons or damage NOT resul ng from defects in material or workmanship.
●Condi ons or damage resul ng from:
—Normal wear and tear, improper installa on or maintenance, misuse, abuse, negligence, accident, moving ( pping) or altera on, scratches
or handling damages.
—Use of abrasive cleaning products or the use of the product in any manner contrary to the product instruc ons.
—Condi ons in the home such as excessive water pressure, water quality or corrosion.
●Labor, shipping or other costs for removal, installa on, replacement or return of product for warranty service.
●Parts, accessories, connected materials or related products that are not manufactured by Dawn®.
●Imperfec ons such as checks (small surface splits), pitch pockets (small dark holes), grain or darker mineral streaks are natural and are not
considered defects.
●An invoice number will be required for proof of purchase
Dawn® reserves the right to inspect any Dawn® product reported to be defec ve prior to any repair or replacement. Repair and replacement
costs EXCLUDE shipping, labor, and consequen al expenses. To obtain warranty service contact Dawn® either through your Dealer, Plumbing
Contractor, Home Center or E-retailer, or by contac ng Dawn® at the contact informa on listed at the very top. Proof of purchase (original sales
receipt) and descrip on of problem must be provided with all warranty claims.
© 2014 Dawn Kitchen & Bath Products, Inc.
This manual suits for next models
4
Table of contents
Other Dawn Indoor Furnishing manuals


Popular Indoor Furnishing manuals by other brands

Regency
Regency LWMS3015 Assembly instructions

Furniture of America
Furniture of America CM7751C Assembly instructions

Safavieh Furniture
Safavieh Furniture Estella CNS5731 manual

PLACES OF STYLE
PLACES OF STYLE Ovalfuss Assembly instruction

Trasman
Trasman 1138 Bo1 Assembly manual

Costway
Costway JV10856 manual


