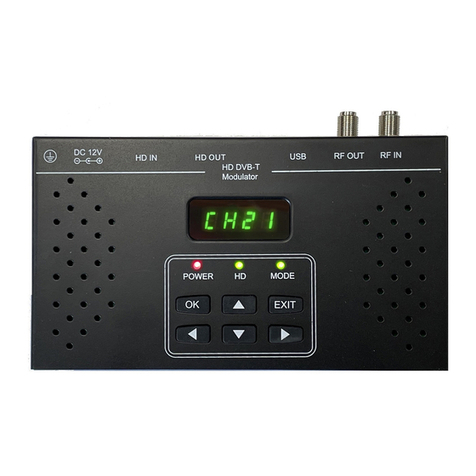
Dawnco PCMA860-HQ User manual

Installation and
Operation Manual
PCMA860-HQ
Universal-Chassis Agile A/V Mini-Modulator
DAWNco • 3340 S. Lapeer Rd • Orion, MI 48359-1320 • Ph (248) 391-9200 • Fax (248) 391-9207 • [email protected]

The lightning flash with arrowhead symbol, within an
equilateral triangle, is intended to alert the user to the
presence of un-insulated “dangerous voltage” within the
product’s enclosure that may be of sufficient magnitude
to constitute a risk of electric shock to persons.
The exclamation point within an equilateral triangle is
intended to alert the user to the presence of important
operating and maintenance (servicing) instructions in
the literature accompanying the appliance.
Product Inspection
Inspect the equipment for shipping damage. Should any damage be discovered, immediately file a claim with the carrier.
Important Safety Instructions
To insure proper installation and operation, take a moment to read this guide before proceeding with the installation. If you have any questions
or comments about the mini-modulator, please contact your dealer
1.Read Instructions: All safety and operating instructions should
be read before the appliance is operated.
2. Retain Instructions: The safety and operating instructions
should be retained for future reference.
3. Heed Warnings: All warnings on the appliance should be
adhered to.
4. Follow Instructions: All operating and user instructions should
be followed.
5. Cleaning: Unplug this appliance from the wall outlet before clean-
ing. Use a damp cloth for cleaning. Do not use liquid cleaners or
aerosol cleansers.
6. Do Not Use Attachments: Use of attachments not recommended
by the manufacturer may cause hazards.
7. Water and Moisture: Do not use this product near water—for
example, near a bathtub, washbowl, kitchen sink, laundry tub, in a wet
basement, or near a swimming pool—and the like.
8.Accessories: Do not place this product on an unstable cart,
stand, tripod, bracket, or table. The product may fall, causing serious
injury to a child or adult, and serious damage to the appliance.
9. Ventilation: This video product should never be placed near or
over a radiator or heat register. This video product should not be
placed in a built-in installation such as a bookcase or rack unless
proper ventilation is provided or the manufacturer’s instructions have
been adhered to. Any slots or opening in the cabinet are provided for
ventilation. To ensure reliable operation of the video product and to
protect it from overheating, these openings must not be blocked or
covered. Openings should never be blocked by placing the product on
a bed, sofa, rug, or other similar surface.
10. Grounding or Polarization: This video product is equipped with
either a three prong plug for 110 VAC use or a two prong flat blade
220 VAC type plug. Each type is to be inserted into only the type of
receptacle for which they specifically designed. Do not cut off the
round grounding pin in order to be able to fit into a two prong recep-
tacle as this could cause injury and will void the warranty.
WARNING: TO REDUCE THE RISK OF FIRE OR ELECTRIC SHOCK, DO NOT EXPOSE THIS APPLIANCE
TO RAIN OR MOISTURE. DO NOT OPEN THE CABINET.
REFER SERVICING TO QUALIFIED PERSONNEL ONLY.
CAUTION: TO PREVENT ELECTRIC SHOCK DO NOT USE THIS (POLARIZED) PLUG WITH AN
EXTENSION CORD RECEPTACLE OR OTHER OUTLET UNLESS THE BLADES CAN BE
FULLY INSERTED TO PREVENT BLADE EXPOSURE.
ATTENCION: POUR PREVENIR LES CHOCS ELECTRIQUES, NE PAS UTILISER CETTE FICHE POLARISEE
AVEC UN PROLONGATEUR, UNE PRISE DE COURANT OU UNE AUTRE SORTIE DE COURANT,
SAUF SI LES LAMES PEUVENT ETRE INSEREES A FOND SANS EN LAISSER AUCUNE PARTIE A DECOUVERT.
Safeguards
PCMA860-HQ

Safeguards
11. Power Sources: This product should be operated only from the
type of power source indicated on the marking label. If you are not
sure of the type of power supplied to your home, consult your appli-
ance dealer or local power company.
12. Power-cord Protection: Power-supply cords should be routed
so they are not likely to be walked on or pinched by items placed upon
or against them. Pay particular attention to cords and plugs, conven-
ience receptacles, and the point where they exit from the appliance.
13. Lightning: For added protection for this product during a lightning
storm, or when it is left unattended or unused for long periods of time,
the unit should be disconnected from power source.
14. Power Lines: An outside antenna system should not be located
in the vicinity of overhead power lines, other electric light or power cir-
cuits, where it can fall into such power lines or circuits.When installing
an outside antenna system, extreme care should be taken to keep
from touching such power lines or circuits as contact with them may
be fatal.
15. Overloading: Do not overload wall outlets and extension cords as
this can result in risk of fire or electric shock.
16. Object and Liquid Entry: Never push objects of any kind into this
product through openings as they may touch dangerous voltage
points or short-out parts that could result in a fire or electric shock.
Never spill liquid of any kind on the product.
17. Servicing: Do not attempt to service this product yourself as
opening or removing covers may expose you to dangerous voltage or
other hazards. Refer all servicing to qualified service personnel.
18. Damage Requiring Service: Unplug this product from the wall
outlet and refer servicing to qualified service personnel under the
following conditions:
a. When the power-supply cord or plug is damaged.
b. If liquid has been spilled, or objects have fallen into the product.
c. If the product has been exposed to rain or water.
d. If the product does not operate normally by following the oper-
ating instruction. Adjust only those controls that are covered by
the operating instructions. An improper adjustment may result in
damage and will often require extensive work by a qualified tech-
nician to restore the product to its normal operation.
e. If the product has been dropped or the cabinet has been
damaged.
f. When the product exhibits a distinct change in performance—
this indicates a need for service.
19. Replacement Parts: When replacement parts are required, be
sure the service technician has used replacement parts specified by
the manufacturer or have the same characteristics as the original
parts. Unauthorized substitutes may result in fire, electric shock or
other hazards.
20. Safety Check: Upon completion of any service or repairs to this
product, ask the service technician to perform safety checks to deter-
mine that the product is in proper operating conditions.
21. Outdoor Antenna Grounding: Before attempting to install this
product, be sure the antenna or cable system is grounded so as to
provide some protection against voltage surges and built-up static
charges.
a. Use No.10 AWG (5.3mm) copper, No.8 AWG (8.4mm) alu-
minum, No.7 AWG (10mm) copper-clad steel or bronze wire or
larger, as ground wire.
b. Secure antenna lead-in and ground wires to house with stand-
off insulators spaced from 4 feet (1.22m) to 6 feet (1.83m) apart.
c. Mount antenna discharge unit as close as possible to where
lead-in enters house.
d. A driven rod may be used as the grounding electrode where
other types of electrode systems do not exist. Refer to the
National Electrical Code, ANSI/NFPA 70-1984 for information.
e. Use jumper wire not smaller than No.6 AWG (13.3mm) copper
or equivalent, when a separate antenna grounding electrode is
used.
NOTE TO THE CATV SYSTEM INSTALLER
THIS REMINDER IS PROVIDED TO CALL THE CATV SYSTEM
INSTALLER’S ATTENTION TO ARTICLE 820-22 OF THE NEC
THAT PROVIDES GUIDELINES FOR PROPER GROUNDING
AND, IN PARTICULAR, SPECIFIES THAT THE CABLE
GROUND SHALL BE CONNECTED TO THE GROUNDING
SYSTEM OF THE BUILDING, AS CLOSE TO THE POINT OF
CABLE ENTRY AS PRACTICAL.
PCMA860-HQ

Descriptions
Aprofessional grade microprocessor-controlled agile audio/video mini-mod-
ulator. This modulator accepts any audio-video baseband television signal and provides a
45dBmV minimum output on CATV channels 2 to 135 (54-860 MHz) while accommodating
HRC and IRC offset frequencies. Channel selection is easily accomplished via channel
up/down buttons located on the front panel while built-in RF muting circuitry prevents inter-
ference during online channel reassignment. features >-90dB out-of-band
carrier-to-noise ratio, allowing virtually unlimited numbers of Mod’s to be combined in a
system without the need for external bandpass filtering. Up to 12 or 16 units can be installed
“mix-and-match” in chassis with
mini-modulators or mini-demodulators.Its unique design
enables it to be installed in other manufacturers’ mini-mod chassis. The unit’s tracking filter
technology and double-heterodyne conversion ensure accurate and spurious-free output.
Uses SAW filtering in conjunction with FCC group delay correction circuitry to
provide superior adjacent channel selectivity. The unit’s PLL circuitry in conjunction with the
non-volatile memory contained in the microprocessor ensures easy and reliable channel
selection and restoration. The modulator is shipped with all internal adjustments
preset.
135-Channel Range 54-860 MHz
(CATV 2-135)
>45dBmV min adjustable output
for optimum carrier-to-noise
performance
Compatible with most manufac-
turers mini-modulator chassis
State-of-the-art digital phase-
locked-loop (PLL) design guaran-
tees precise frequency locking for
solid drift-free operation
Microprocessor control enables
quick digital push-button channel
selection for ease of installation,
configuration, and improved sys-
tem uptime
SAW (surface acoustic wave)
filtered for superior adjacent
channel performance enables
drop-in channel expansion
BTSC stereo compatible pre-
emphasis disable switch provides
pass-through for stereo signals
In-band carrier-to-noise ratio
>65dB ensures superior picture
quality
Automatic selection of aeronauti-
cal offsets (12.5kHz, 25kHz) for
trouble-free configuration
Front panel access to controls
enables easy setup
IRC and HRC offset available for
frequency settings in systems
using offset channels
PCMA860-HQ
Universal-Chassis Agile A/V Mini-Modulator

Specifications
Universal-Chassis Agile A/V Mini-Modulator
www.picomacom.com
Ph:800-421-6511
Channels: 135 Channels
Frequency Range: 54-860 MHz
(CATV Ch. 2-135)
Output Impedance: 75 Ohms
RF Output Level: 45 dBmV, adjustable from front
panel (min.)
Output Return Loss: -15 dB
Audio/Video Ratio: Adjustable -7 to -22 dB below
video carrier
Frequency Stability: ±5 kHz in aeronautical band;
conforms to FCC Docket 21006
Spurious Output: -60 dB below video carrier with
A/V ratio @ 15 dB
C/N (In-Band): >65 dB
C/N (Out-Of-Band): >90 dB
Fv+6 MHz (Upper Adj. Rejection): >-60 dBc
Fv-1.5 MHz (Lower Adj. Rejection): >-60 dBc
I.F. Frequency: Video 45.75 MHz
Audio 41.25 MHz
RF
Video Input Level: 1 V p-p minimum
for 87.5% modulation
Video Input Type: Clamped video negative sync
Video Frequency Response: ±0.8 dB, 30 Hz to 4.2 MHz
Differential Gain: <5% (10 to 90% APL)
Differential Phase: <5° (10 to 90% APL)
Chrominance Luminance Delay:<50 nsec, standard or FCC
predistortion option
Video
Hum And Noise: -60 dB @ 87.5% modulation
Audio Baseband Input Impedance: 600 Ohms
Audio Baseband Input Level: 0.5 V p-p for 25 kHz
peak deviation
Preemphasis: 75 microsecond
Flatness Audio: 1.5 dB (50 Hz to 15 kHz)
Audio
General
Dimensions: 1˝(W) x 8˝(D) x 3.45˝(H)
Weight: 0.8 lbs.
Power Input: 5 VDC, 12 VDC @ .25A
Operating Temperature: -10° C to 50° C
Connectors: Video In/RF Out “F” type
Audio In RCA
AUDIOVIDEO
CH
A/V
RATIO RF
LOCK
UNLOCK
CA
ANT
TV
PCMA860-HQ

6
Rev. 04/03
Ph:800-421-6511 www.picomacom.com
Operations and Controls
1. Video Level Control:
Use this control to adjust the video modulation level (picture quality).
2. Audio Level Control:
Use this control to adjust the audio modulation level (volume).
3. Audio /Video Ratio Control:
Used to set the level of the audio carrier in relation to the video carrier.
4. RF Output Level Control:
Used to set output level.
5. CATV/ANT:
Push this button to select either CATV or TV mode.
6. Channel Select:
Push this button to change channel to higher number.
7. Channel Select:
Push this button to change channel to lower number.
8. Channel Lock Control:
Switch is used to prevent accidental change of channel.
9. Channel Display:
Indicates selected channel and that power is on when lit.
10. HRC, IRC Off-set Control:
Slide switch selects standard, HRC and IRC frequencies.
11. Pre-emphasis on/off:
Allows preemphasis to be disabled when used with BTSC generator.
12. Video Input:
Accepts video output from satellite receiver, VCR and CCTV camera.
13. Audio Input:
Accepts audio output from satellite receiver and VCR.
14. DC Power Inputs:
The three-wire power cable from the power supply connects to this jack.
15. RF Output:
Connect this port to distribution system.
Panels
PCMA860-HQ

MODULE REPLACEMENT
1. Disconnect the 3 pin molex connector from module.
2. Disconnect the audio, video, and RF connectors from back of module.
3. Remove module by sliding the unit out the front of the chassis.
4. Insert replacement module into chassis.
5. Reconnect the 3 pin molex connector and audio, video, and RF connec-
tors to the rear of module.
6. Set Channel Frequency, level and deviation controls as described in
installation procedures.
OPERATION AND CARE
Do’s & Don’ts
•Always operate in a cool well-ventilated environment.
•Always provide a stable, conditioned power source..
•Heed all safety warnings and obey all environmental and electrical oper-
ating requirements.
•To clean, use a damp cloth only and clean only with mild soap.
•Do not use solvents or harsh detergents.
•Do not use this product for purposes other than intended.
HEADEND/DISTRIBUTION INTERFACE
We recommend connecting the headend components in
the following manner:
Each of the modulators, signal processors or strip amplifiers output are
connected to a combining network. Either a head-
end combiner may be used to accomplish this purpose.
The passive headend combiner consists of two rows
of directional couplers combined by a hybrid splitter. Normally, the odd chan-
nels are combined on one row while even channels are combined on the
other row of directional couplers for maximum isolation. The output of the
combiners may be connected to the
input of a launch amplifier
The output of the
amplifier is connected to the main
distribution line.
A 24 channel system hook-up is shown. (The
same combining result may be accomplished
by using a single #____). The two #____
outputs are combined via a two-way split-
ter, which is connected to a
launch amplifier. The input levels to the com-
biner, whether from a modulator, signal
processor or a strip amplifier, must be at the
same amplitude.
Installation Procedure
Use a small plastic screwdriver to make required selection of switches
and buttons
1. If module is to be used in an HRC or IRC CATV frequency assignment,
slide the format assignment switch inside the side of module to HRC or
IRC. (Unit is shipped with this switch in the STD position)
2. If the audio source is BTSC stereo, slide the preemphasis switch inside the
side of module to off. (Unit is shipped with this switch in the on position)
3. Align the top and bottom edge of module with the guide channel in chassis.
4. Slide module into chassis.
5. Connect the 3 pin molex power supply connector.
6. Connect a cable between the module RF output connection and the
channel-combining network.
7. Connect cables from the programming source baseband output to the
audio and video input connectors of module.
8. If needed, press the CATV/ANT button to select between cable TV and off-
air channel assignments.
9. Select the desired channel by pressing either channel button adjacent to
the arrows on front panel.
10. When the desired channel is displayed, press the set button to lock channel.
11. Connect a signal level meter or spectrum analyzer to a common port of
the channel combiner network.
12. Adjust RF output control on the front of modulator until the RF video
carrier level matches the RF video level of adjacent channels.
13. Adjust the A/V ratio control on the front panel until the RF audio carrier
level is between 13 and 17dB below the RF video carrier level.
14. Connect a television set to a common port of the channel combiner network.
15. Analyze the brightness of channel compared to adjacent channels.
16. If needed, adjust video control on the front of modulator until the bright-
ness level matches the brightness of adjacent channels.
17. Analyze the sound level of channel compared to adjacent channels.
18. If needed, adjust audio control on the front of modulator until the sound
level matches the sound of adjacent channels.
PCMA860-HQ
Table of contents
Popular Modulator manuals by other brands
Santec
Santec LCOS-SLM SLM-200 Operation manual

Blankom
Blankom A-PALIOS-IPM4CI 5113.81 instruction manual

Channel Plus
Channel Plus 5425 installation manual
Net Media
Net Media TriplePlay NM-MM73S Installation
Channel Plus
Channel Plus 5525 installation manual
Blankom
Blankom ATB 19 series operating instructions
