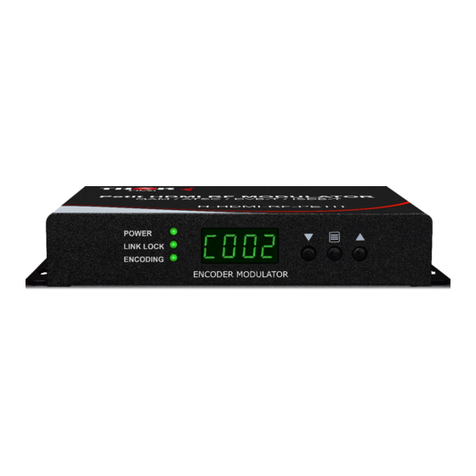
Thor Broadcast H-HDMI-RF-PETIT User manual

H-HDMI-RF-PETIT
2
A Note from Thor Broadcast about this Manual
Intended Audience
This user manual has been written to help people who have to use, integrate and to install the product. Some
chapters require some prerequisite knowledge in electronics and especially in broadcast technologies and
standards.
Disclaimer
No part of this document may be reproduced in any form without the written permission of Thor Broadcast.
The contents of this document are subject to revision without notice due to continued progress in methodology,
design and manufacturing. Thor shall have no liability for any error or damage of any kind resulting from the
use of this document.
Copy Warning
This document includes some confidential information. Its usage is limited to the owners of the product
that it is relevant to. It cannot be copied, modified, or translated in another language without prior written
authorization from Thor Broadcast.
Table of Contents
1. INTRODUCTION………………………..…………………………………………………………………..………………4
2. FEATURES……………………………………………………………………………………………….…….…… ………4
3.SPECIFICATION……………….............................................................................................................................5
4.SAFETYINSTRUCTIONS………………..………………………………………………………………….……………..6
5.INSTALLATION ……. ……………………………………………………………………………………………………..7
6.DISPLAYANDBUTTONS …………………………………………………………………..…………………………….8
7.SETTINGUPTHESYSTEM ………….................................................................................................................9

H-HDMI-RF-PETIT
Tel: (800) 521-8467 Email: sales@thorfiber.com http://www.thorbroadcast.com
1. INTRODUCTION
The H-HDMI-RF-PETIT is the most cost-effective and smallest form factor solution in the market. With a
second HDMI output port and a RF loop port, user can easily install the system with different requirement.
Extremely compact and wall mountable, the H-HDMI-RF-PETIT fits into any space with quick installment in
less than a minute or two. Utilize the exterior buttons to control the unit, or an NMS RJ45 jack to control via
IP.
This inexpensive and HD quality unit can stand the test of time and will allow you to expand your RF system
quickly and easily.
2. FEATURES
1. Extremely compact with less than 1.18” height
2. Supports MPEG 2 video HD encoding
3. MER greater than 35dB
4. Integrated HDMI output for HD content quick display
5. Output level - 30dBmV
6. Built-in Web GUI allow for easy set-up and control via the web browser

H-HDMI-RF-PETIT
Tel: (800) 521-8467 Email: sales@thorfiber.com http://www.thorbroadcast.com
3. SPECIFICATION
ENCODING
Input Connector
HDMI 1.4
VIDEO
Encoding
MPEG 2
Input Resolution
1920*1080_60P; 1920*1080_50P; 1920*1080_60i;
1920*1080_50i;1280*720_60P; 1280*720_50P
Bitrate
2 ~ 18 Mbps
AUDIO
Encoding
MPEG 1 Layer II; AC 3
Sample Rate
48KHz
Bitrate
384kbps
MODULATION
ATSC
Standard
ATSC A/53
Bandwidth
6M
Constellation
8VSB
MER
≥35 dB
DVB-C J.83B
Standard
Annex B
Bandwidth
6M
Constellation
64QAM, 256QAM
MER
≥36 dB
OUTPUT
RF
Output Level
≥30dBmV
Output Frequency Range
50 ~ 999.999MHz
Out-band Rejection
≥60dB
SYSTEM
Management
Control Keys; NMS
LCN Insertion
YES
Language
English
Upgrade
NMS
GENERAL
Power Supply
DC12V 1A
Power Consumption
< 10W
Net Weight
0.36KG
Dimension
136*165*25 (mm)
TO REDUCE THE RISK OF ELECTRICAL SHOCK, DO NOT REMOVE COVER FROM THIS UNIT.
NO USER-SERVICEABLE PARTS INSIDE.
REFER SERVICING TO QUALIFIED SERVICE PERSONNEL.
WARNING: TO PREVENT SHOCK HAZARD, DO NOT EXPOSE THIS UNIT TO RAIN OR MOISTURE
CAUTION
RISK OF ELECTRIC SHOCK
DO NOT OPEN

H-HDMI-RF-PETIT
Tel: (800) 521-8467 Email: sales@thorfiber.com http://www.thorbroadcast.com
4. SAFETY INSTRUCTIONS
1. Read all safety and operating instructions before you operate the modulator
2. Retain all safety and operating instructions for future reference
3. Heed all warnings on the modulator and in the safety and operating instructions
4. Follow all installation, operating and use instructions.
5. Unplug the modulator from the AC power outlet before cleaning. Use only a damp cloth for cleaning the exterior of the
modulator
6. Do not use accessories or attachments not recommended by us, as they may cause hazards, and will void the warranty
7. Do not operate the modulator in high-humidity areas, or expose it to water or moisture.
8. Do not place the modulator on an unstable cart, bracket or table. The modulator may fall, causing serious personal injury and
damage to the modulator. Install the modulator only in a mounting rack designed for 19” rack-mounted equipment.
9. Do not block or cover slots and openings in the modulator. These are provided for ventilation and protection from overheating.
Never place the modulator near or over a radiator or heat register.
10. We strongly recommend using an outlet that contains surge suppression or ground fault protection. For added protection during
a lightning storm, or when the modulator is left unattended for long periods of time, unplug it form the wall outlet or PDU and
disconnect the lines between the modulator and its source. This will prevent damage caused by lightning or power line surges.
11. Do not overload wall outlets or extension cords, as this can result in a risk of fire or electrical shock.
12. Never insert objects of any kind into the modulator through openings as the objects may touch dangerous voltage and will void
the warranty. Refer all servicing to authorized service personnel.
13. Unplug the modulator from the wall outlet or PDU and refer servicing to authorized service personnel whenever the
following occurs:
14. When replacement parts are required, ensure that the service technician uses replacement parts specified by us. Unauthorized
substitutions may damage the modulator or cause electrical shock or fire, and will void the warranty.
4.1 Unpacking and Handling:
A full H-HDMI-RF-PETIT is shipped with all equipment assembled, wired, factory tested, and then packaged in an appropriate
shipping container.
4.2 Mechanical Inspection
Inspect the front and rear of the equipment for shipping damage. Make sure the equipment is clean, and no wire, cable, or connectors
are broken, damaged or loose.
4.3 Precautions
Avoid heat buildup
Ensure easy access to rack wiring
Facilitate servicing and maintenance
Avoid direct heating or air conditioning
Make sure rack supports are sufficiently rigid to support racks
Beware of dripping water onto equipment form leaky roofs, waveguide roof entries and coldwater pipe condensations
4.4 Damage in Shipment
Should any damage be discovered after unpacking the unit, immediately file a claim with thecarrier. A full report of the damage
shall be made and a copy forwarded to Seller.

•The power supply cord or plug is damaged
•Liquid has been spilled into or objects have fallen into modulator
•The modulator has been exposed to rain or water
•The modulator has been dropped or the chassis has been damaged
•The modulator exhibits a distinct change in performance

H-HDMI-RF-PETIT
Tel: (800) 521-8467 Email: sales@thorfiber.com http://www.thorbroadcast.com
5. INSTALLATION
Please follow the instructions below to install the H-HDMI-RF-PETIT
1. Connect the power plug to the jack.
2. Connect the video source to the H-HDMI-RF-PETIT like DVD or STB
3. Connect the H-HDMI-RF-PETIT to a set-top box or a digital TV
4. Power up the modulator

H-HDMI-RF-PETIT
Tel: (800) 521-8467 Email: sales@thorfiber.com http://www.thorbroadcast.com
6.DISPLAY AND BUTTONS
2 1 3
1. LED DISPLAY
To display all the setting information
2. INDICATORS
POWER: Indicate power on
LINK LOCK: Indicate signal is locked
ENCODING: Indicate the modulator is working
4 5 6 7 8 9 10
3. CONTROL KEYS
Number up and confirm restore
Enter and Save; Next option;
7. HDMI INPUT
Feed the HD signal into the modulator
8. HDMI OUT (LOOP)
For HD signal quick display to TV
9. RF OUTPUT
40dBmV maximum output is provided at this port
10. RF INPUT
To combiner another external RF signal
Switch the MENU
WARNING:
For the protection of your equipment and its proper working is necessary to connect the H-HDMI-RF-PETIT to a
ground connection.
4GND
For grounding the modulator
5POWER SOCKET
Feed the DC 12V 1A
6RJ45
Network management system
(Default IP 192.168.1.10
Login : user / user )

H-HDMI-RF-PETIT
Tel: (800) 521-8467 Email: sales@thorfiber.com http://www.thorbroadcast.com
7.SETTING UP THE SYSTEM
7.1 THE SYSTEM MAP
7.2 DETAILS
7.2.1 Loading System 7.2.2 Software Version
7.2.3 Channel selection
7.2.4
7.2.5
Loading
System
•MENU
Channel
Setting
•MENU
Bandwidth
Restore
Use to enter the select mode and press to change the
channel. When you have your desired channel, please press
to save.
Press to active the restore function. When the numbers
are flashing, press again to confirm.
Use to enter the select mode and press to change the
channel. When you have your desired channel, please press
to save.

H-HDMI-RF-PETIT
Tel: (800) 521-8467 Email: sales@thorfiber.com http://www.thorbroadcast.com
WEB MANAGEMENT
1. Connect the modulator and the computer by the RJ45 port.
2. Open your Google Chrome and input default IP address 192.168.1.10, and press enter.
3. The default user name is user and the default password is user
01
You can quickly check out the modulator working status here.
Notice: 1.Please turn off the DHCP in the modulator. If there is only one modulator, it is OFF at default.
2. Please use Google Chrome or Mircosoft Edge to login the system (best browsers)
Notice: Please make sure your computer is in the same IP range as the modulator is.
The Setting MENU

H-HDMI-RF-PETIT
Tel: (800) 521-8467 Email: sales@thorfiber.com http://www.thorbroadcast.com
02
The second page is the basic parameters settings.
The unique ID for this modulator
Input name for the device (The unique name)
Input signal source
Please check SPECIFICATIONS for supported resolutions
Save settings
No Video Input or Unsupported Resolution
///////////////
HDCP Switch *
When the System Time Source is ON, the
NTS Server will active. If your modulator
can access to the internet, it will adjust
the time with the NTS Server
See
See

H-HDMI-RF-PETIT
Tel: (800) 521-8467 Email: sales@thorfiber.com http://www.thorbroadcast.com
1. Changing the time zone will change the
time automatically.
2. You can set the time manually by the
time box.
3. Clear : Reset the time display
4. Today : The modulator will read the
time from your computer
5. OK : Save and exit
Please adjust the time according to your local time zone. This time information will be displayed in the channel
information in the TV

H-HDMI-RF-PETIT
Tel: (800) 521-8467 Email: sales@thorfiber.com http://www.thorbroadcast.com
03
1. Transport stream way: Air for ATSC standard and Cable
for QAM.
When it is Air, the constellation will be 8VSB.
While it is Cable, the constellation will be QAM64 or
QAM256.
2. Major number and Minor number will help you to sort
out the channel order.
3. RF Config. : In Select from list mode, you can quickly
select the channel from the list. Please notice that the
Major number will change to match the Channel. For
example: you choose CH-02 57MHz, then the major
number is automatically change into 2. Of course, you
can edit the major number as you want after that.
4. Attenuation: the number input here is a negative
value. For example, input number 5, the output level
will minus 5 dB.
5. Constellation: In Air mode, it is 8VSB while in Cable
mode, it is QAM64 or QAM256
6. Audio Encoder: AC3 or MPEG 2. Please choose the
one to go with your TV
7. In Cable mode, there will be three channel plans:
STD,HRC and IRC.

H-HDMI-RF-PETIT
Tel: (800) 521-8467 Email: sales@thorfiber.com http://www.thorbroadcast.com
04
NOTICE:
Input Range : 1 ~ 65535
Input Range : 32 ~ 8190
Input name you wish up to 6 characters
Input Range : 1 ~ 65535
The Video PID, Audio PID and PMT PID should use different numbers, otherwise it won’t be accepted.
You don’t need to set this since it is one carrier to one program type. Long name and Short name will
be display in the TV with the word you input.
Select service type from the menu ATSC or DVB-C QAM
QAM box
Input Range : 0 ~ 65535
NOTICE:
There are 4 standards of RRT ranges. Please select according
to the program.
NOTICE:
Different RRT Range has different Age Rating. Please select
according to the program.

H-HDMI-RF-PETIT
Tel: (800) 521-8467 Email: sales@thorfiber.com http://www.thorbroadcast.com
05
To work with computer or router
DHCP
If you have only
modulator, then
turn it off. If you
have several ones,
and go through the
router, please turn
it on.
The default one is 192.168.1.10
The default one is 255.255.255.0
The default one is 192.168.1.1
The default one is 8.8.8.8
The default one is 202.96.134.133
MAC is changeable
NOTICE :
The modulator will reboot automatically if any changes on the network setting is applied.

H-HDMI-RF-PETIT
Tel: (800) 521-8467 Email: sales@thorfiber.com http://www.thorbroadcast.com
06
6.1 Backup settings
You can backup your settings and import to another modulator. Or if the modulator isn’t working well, you can send the
backup file to us for modification.
6.2 Restore settings from file
From here you can import the setting file to save time or import the right one to recover.
6.3 Upgrade system from file
Upgrade the modulator
6.5 Restore to factory settings
All settings will go back to factory settings
6.6 Reboot
Restart the modulator

H-HDMI-RF-PETIT
Tel: (800) 521-8467 Email: sales@thorfiber.com http://www.thorbroadcast.com
07
The default user name is user and the default password is user.
⚫If you forget your new user name or new password, you can use the reset button in the front panel to restore.
⚫If you want to change the password only, the user name is required to be input as well.
Other manuals for H-HDMI-RF-PETIT
1
Table of contents
Other Thor Broadcast Modulator manuals

Thor Broadcast
Thor Broadcast H-HDMI-RF-Petit-IR User manual

Thor Broadcast
Thor Broadcast H-THUNDER-8 User manual

Thor Broadcast
Thor Broadcast H-PCKT-MOD User manual

Thor Broadcast
Thor Broadcast H-HDCOAX-1 User manual

Thor Broadcast
Thor Broadcast H-HDMI-RF-PETIT User manual

Thor Broadcast
Thor Broadcast H-PCKT-MOD User manual

Thor Broadcast
Thor Broadcast H-HDMI-CC-RF User manual

Thor Broadcast
Thor Broadcast H-XX-SDI-QAM-IPLL User manual

Thor Broadcast
Thor Broadcast H-IP-32RF User manual

Thor Broadcast
Thor Broadcast H-IPRF-16QAM User manual