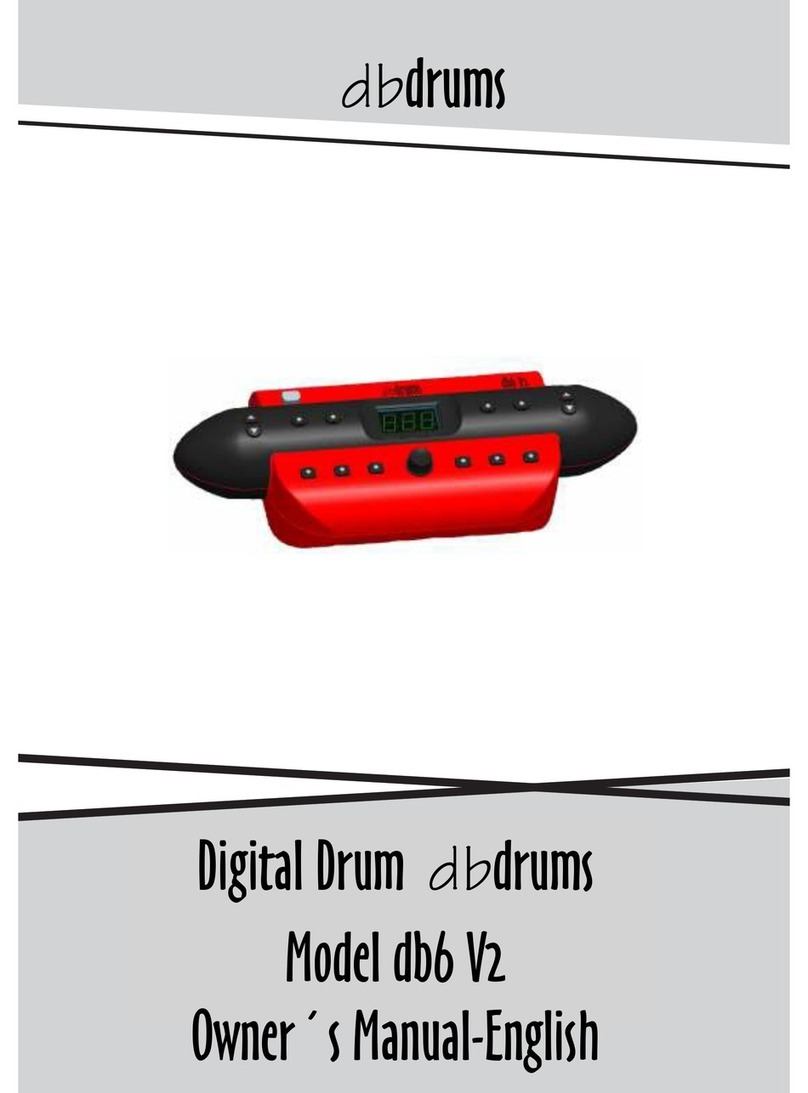
db drums db20 User manual

AW_DD650_manual_G04_150923.ai 1 2015/9/23 16:12:11
PHONES AUX IN
L/MONO
CRASH 2 TOM 4
IN OUT
USB MIDI
OUTPUT MIDI
C
M
Y
CM
MY
CY
CMY
K
Digital Drum dbdrums
Model db20
Owner´s Manual-English
db20

AW_DD650_manual_G04_150923.ai 2 2015/9/23 16:12:25
2
INFORMATION FOR YOUR SAFETY!
THE FCC REGULATION WARNING (for USA) PRECAUTIONS
C
M
Y
CM
MY
CY
CMY
K
This equipment has been tested and found to comply with
the limits for a Class B digital device, pursuant to Part 15 of
the FCC Rules.
These limits are designed to provide reasonable protection
against harmful interference in a residential installation. This
equipment generates, uses, and can radiate radio frequency
energy and, if not installed and used in accordance with the
instructions, may cause harmful interference to radio
communications. However, there is no guarantee that
interference will not occur in a particular installation.
If this equipment does cause harmful interference to radio or
television reception, which can be determined by turning the
equipment off and on, the user is encouraged to try to
correct the interference by one or more of the following
measures:
Reorient or relocate the receiving antenna.
Increase the separation between the equipment and
receiver.
Connect the equipment into an outlet on a circuit
different from that to which the receiver is connected.
Consult the dealer or an experienced radio/TV technician
for help.
Unauthorized changes or modification to this system can
void the user's authority to operate this equipment.
CAUTION
The normal function of the product may be disturbed by
Strong Electro Magnetic Interference. If so, simply reset
the product to resume normal operation by following the
owner's manual. In case the function could not resume,
please use the product in other location.
PLEASE READ CAREFULLY BEFORE PROCEEDING
Please keep this manual in a safe place for future reference.
Power Supply
Please connect the designated AC adaptor to an AC outlet
of the correct voltage.
Do not connect it to an AC outlet of voltage other than that
for which your instrument is intended.
Unplug the AC power adaptor when not using the
instrument, or during electrical storms.
Connections
Before connecting the instrument to other devices, turn off
the power to all units. This will help prevent malfunction and
/ or damage to other devices.
Location
Do not expose the instrument to the following conditions to
avoid deformation, discoloration, or more serious damage:
Direct sunlight
Extreme temperature or humidity
Excessive dusty or dirty location
Strong vibrations or shocks
Close to magnetic fields
Interference with other electrical devices
Radios and televisions placed nearby may experience
reception interference. Operate this unit at a suitable
distance from radios and televisions.
Cleaning
Clean only with a soft, dry cloth.Do not use paint thinners,
solvents, cleaning fluids, or chemical-impregnated wiping
cloths.
Handling
Do not apply excessive force to the switches or controls.
Do not let paper, metallic, or other objects into the
instrument. If this happens, remove the electric plug from
the outlet. Then have the instrument inspected by qualifie
dservice personnel.
Disconnect all cables before moving the instrument.

AW_DD650_manual_G04_150923.ai 3 2015/9/23 16:12:25
Contents
Main Features
...........................................................4
Panel & Display Description
Front Panel.
................................................................5
Side Panel.
.................................................................6
LCD Display
................................................................7
The Drum Pad Triggers Settings
About the Drum Pad Trigger Settings.........................17
Save the Drum Pad Trigger Settings..........................18
Utility Settings..........................................................19
C
M
Y
CM
MY
CY
CMY
K
Setup
Connecting Pads and Pedals.
....................................8
Getting Ready to Play
Setting Up the Power Supply
......................................9
Turning the Power On/off.
..........................................9
Drum Kits and Voices
Selecting a Drum Kit.
................................................10
Selecting a Voice.
.....................................................10
Playing Techniques.
..................................................10
Select a Preset Drum Kit and Create a User Drum
Kit
About the Preset and User Drum Kit.
.......................12
Edit the Drum Kit Parameters.
..................................12
Edit the Voice Parameters.
.......................................12
About the User Voice.
...............................................13
Save User Drum Kit.
.................................................13
Playing Along with a Song
Playing Along with a Song.
.......................................14
Metronome.
...............................................................15
Starting/Stopping the Metronome.
............................15
Adjusting the Tempo Value.
......................................15
Record
Prepare Recording.
..................................................16
Start /Stop Recording.
..............................................16
Using Usb Flash Drive (Usb Memory)
Sample Load..............................................................20
Kit Save......................................................................21
Kit Load......................................................................21
Format. .......................................................................21
Factory Set................................................................22
MIDI
About MIDI.................................................................23
Making the MIDI Settings...........................................23
Connecting with an External Sound Device. .............23
Using the Digital Drum as a Sound Module. .............24
Troubleshooting .......................................................25
Prompt Messages.....................................................25
Specifications ...........................................................26
Appendix
Drum Kit List...............................................................27
Drum Voice List..........................................................28
Song List....................................................................31
GM Drum Kit List........................................................33
GM Melody Voice List.................................................39
MIDI Implementation Chart........................................40
3

AW_DD650_manual_G04_150923.ai 4 2015/9/23 16:12:25
Main Features
PURE DRUM Technology
No matter playing the pads with softly stroke or forcefully passion grooves, with
this new technology, all performances can show up extremely wide range of
velocity dynamics. Perfectly express the various changes of acoustic drums, all of
these let you enjoy the real delicate nuances, capture the unique characteristics of
acoustic drum kit from the PURE DRUM!
PURE DRUM—Bring the Natural and Realistic Voices to Your Performance!
With our unique PURE DRUM technology, which has vastly improved sound quality for digital drums, will reach a
super natural and realistic sense for your ears. No matter playing the stroke roll or striking pads with velocity
dynamic, all of these let you enjoy delicate nuances and natural voice, capture the unique characteristics of
acoustic drum kit.
Simulating the Real Drum Pads and Cymbals
Our engineers are always keeping keen on simulating the real drum kit, this time we have redefined our previous
pad designing, specialized surface material, even with superb trigger sensitivity, hand-feeling and mute function.
Simulate various play effects: head/ bow shot, rim shot, ride, damper and so on.This creates a new era of digital
drum.
C
M
Y
CM
MY
CY
CMY
K
Enjoy Playing with the USB Songs
Support directly playing songs (WAV and MP3 format) from the USB flash , even you can freely playing with the
USB song, just enjoy your music.
Or play with the background music via the AUX IN terminal and instantly record/ save your perfect performance to
the USB disk.
Download Your Favorite Voices to Drum Module
Via the USB function, you can download your favorite wave samples (no matter download from the internet or soft
sound source) to digital module and use them as the internal voices. This makes your drum voices limitless any
more, try and experience this exciting function.
Steady Elegant Appearance
Equipped with full lattice LCD display and data dial, sufficiently shows the professional and user experience
features.
4

AW_DD650_manual_G04_150923.ai 5 2015/9/23 16:12:25
Panel & Display Description
Front Panel
PHONES AUX IN
L/MONO CRASH 2 TOM 4
IN OUT
USB MIDI
OUTPUT MIDI
1 3
2
4 5 6 7
C
M
Y
CM
MY
CY
CMY
K
1. [MASTER VOLUME] Knob
Adjust the output volume level.
2. [PHONES] Knob
Adjust the phones volume level.
3. [POWER] button
Press this button to power on/ off the module.
4. [MENU] Button
Enter menu mode.
5. [CURSOR +]/ [CURSOR -] Button
Select a specified item by moving the cursor position
up/down.
6. [ENTER] Button
Enter the selected menu.
7. [EXIT] Button
Exit current menu and back to previous menu.
8. DATA DIAL
Use this to select drum kits or to quick edit values
(increase/decrease value, select specified item).
9. [CLICK] Button
Start/Stop the metronome, enter the metronome
parameter setting.
10. [SONG] Button
Enter Song mode.
11. [KIT] Button
Enter the Drum Kit mode.
12. [SAVE]Button
Save the drum kit/ pad settings.
13. [TEMPO] Button
Adjust the tempo value.
14. [RECORD] Button
Enter the quick record mode.
15. [START/STOP] Button
Start/ Stop playing back songs.
16. [<]/ [>] Button
Gradually increasing or decreasing the
parameter value, also can be used to select kit,
pad, and song parameters.
17. LCD Display
Shows the name and parameter settings of Kit,
Voice, Song and so on.
5

AW_DD650_manual_G04_150923.ai 6 2015/9/23 16:12:26
US
B
M
E
M
USB
MEM
9V
Panel & Display Description
Rear Panel
18 19 20 21 22 23 24
PHONE S AUX IN L/MONO
CRAS H 2 TOM 4
N
OUT
USB M D
OUTPUT
M D
26 27
C
M
25
Y
CM
MY
CY
CMY
K18. USB Terminal
Use this when you want to connect a PC/laptop
or USB host device.
Note: Only transmit MIDI data.
19. MIDI Terminal (IN, OUT)
Use this to connect extra MIDI sequencer,
transmit MIDI data.
MIDI IN Connector: receive MIDI data; you can
receive MIDI data from an extra MIDI device or a
PC/laptop.
MIDI OUT Connector: send MIDI data; you can
send MIDI data to an extra MIDI device or a
PC/laptop.
20. TOM 4 jack (1/4”)
This allows you to connect additional Tom 4.
21. CRASH 2 jack (1/4”)
This allows you to connect additional Crash 2.
22. OUTPUT jack (L/MONO, R) (2 x1/4”)
Connect to your audio system or amplifier. For
stereo output use both the L/MONO and R jacks.
For monaural output use the L/MONO jack.
6
23. AUX IN jack (1/8”)
For connecting an extra audio player, for
example, MP3 and so on via a stereo plug.
You can enjoy playing the drum along with your
favorite songs.
24. PHONES jack (1/8”)
Connect stereo headphones here. Detecting all
output sounds.
25. USB Flash Drive port
Insert your USB flash drive here, and play back
audio files from it. Or save setting data on it.
26. DC IN jack
Connect the AC adaptor here. Plug the AC
adaptor cable into the DC IN jack.
27. TRIGGER INPUT CONNECTOR terminal
Connect the included dedicated cable to this
connector, and use it to connect the pads and
pedals.

AW_DD650_manual_G04_150923.ai 7 2015/9/23 16:12:26
Panel & Display Description
LCD Display
1 2 3
4 5
6
7
1. Menu Item
Display the current menu, such as “KIT”, “VOICE”,
“SONG”, “TRIGGER”, “UTILITY” and so on.
4. External Device
Indicate external device when it is correctly
connected.
C
M
Y
CM
MY
CY
CMY
K
2. Trigger Pad Name
Display current selected Trigger pad name, such
as “KICK”, “SNARE”, “SN-R”, “TOM1”, “T1-R”
and so on.
3. Prompt Move Cursor Up/ Down
Prompt to view more parameters by pressing
cursor up/down button.
Prompt Enter
Prompt that you can enter current menu item for
more settings.
5. Strength of the pad strike
Display the strength of the pad you strike.
6. The Main Parameter Information
Display current main parameter information, as the
picture shows.
7. Detailed Parameter Value
Corresponding to main parameter, list detailed
parameters.
7

AW_DD650_manual_G04_150923.ai 8 2015/9/23 16:12:27
C
Setup
Caution!
To prevent electric shock and damage to the device, make sure the power is switched OFF
on the drum and all related device before making any connection.
Connect the Pads and the Pedals
Standard configuration: KICK, SNARE (Dual-zone trigger), TOM 1~3(Dual-zone trigger), CRASH1
(Dual-zone trigger with choke), RIDE (Triple-zone trigger with choke), HI-HAT, HI-HAT CONTROL PEDAL.
Note:
1.
Using the cables provided, connect each Trigger input jack on the rear panel of the module, and make sure
each pad is connected to its corresponding trigger input jack.
2.
For details on assembling the drum stand, attaching the digital drum and connecting pads, refer to the
Installation Manual description.
M
Y
Ride Crash
CM
MY
CY
CMY
K
Tom 1
Tom2
Hat-Hat Tom3
Snare
Kick Trigger
Hi-Hat Control Pedal
8
8

AW_DD650_manual_G04_150923.ai 9 2015/9/23 16:12:29
Getting Ready to Play
Setting up the Power Supply
1. Connect the DC plug of the AC power adaptor to the DC IN jack on
the rear panel.
2. Connect the other end of the power cord to the AC outlet.
Note:
1. Only use the voltage specified as correct for the drum module.
2. Even when the module is turned off, electricity is still flowing to the
module at the minimum level. When you are not using the drum
module for a long time, make sure to unplug the AC power adaptor
from the wall AC outlet.
Turning the Power On/Off
Turning the power on
Make sure that you have made all necessary connections (trigger,
audio and so on), turn down all volume controls of the module and
other audio equipments.
1. Turn both the [VOLUME] knobs always to minimize the volume.
C
M
Y
CM
MY
CY
CMY
K
2. Press the [POWER] button.
3. Turn the amplifier or audio system on, or listen to the headphones.
4. Striking the pads and adjust the volume by slowly turning the
[PHONES VOLUME] and [MAIN VOLUME] knob towards the right
direction. Keep turning until you get an appropriate value.
Turning the power off
1. Minimize the volume of the module and audio device.
2. Turn the connected external audio device off.
3. Keep pressing the [POWER] button until the power is turned off.
Hint:
You can restore the factory set by following steps:
a) Press the [<] and [>] buttons simultaneously.
b) Press [POWER] button.
c) Until the LCD displays “FactoryResetting…”. Complete reset
operation, the module will return to the KIT MENU.
About the Auto Power Off Function
For purpose of energy conservation and environmental protection, this
function automatically turns the power off if there isn't any operation
(eg, playing, striking , button pressing and so on) for about 30 minutes.
You can enable or disable this function as you like. Refer to Utility
Settings.
9

AW_DD650_manual_G04_150923.ai 10 2015/9/23 16:12:29
Drum Kits and Voices
An acoustic drum has only a fixed kit, but the digital drum set has a lot.
It is a particular characteristic of digital drum.
The structure of a drum kit showed on the right:
KIT xx
KICK
Head
SNARE
Head
Rim
TOM1
Head
Rim
TOM2
Head
Rim
TOM3
Hea
d
Rim
TOM4
Head
HI-HAT
Head
CRASH1
Head
CRASH2
(Option)
Head
RIDE
Head
Rim Edge Edge Bell
Edge
Drum kit setting: kit volume, 3-band EQ
Voice setting: Volume, Pan, Pitch, Reverb, Decay, Pad Song
and so on.
Selecting a Drum Kit
1. Press the [KIT] button, enter drum kit menu.
The screen shows on the right:
2. Press the [<]/ [>] button or data dial, select your desired drum kit.
(Refer to Drum Kit List)
C
M
Y
CM
MY
CY
CMY
K
Selecting a Voice
While striking the pads, you can enjoy the ensemble sound effect. If
you are not satisfied with the voice of any pads, change the voice as
you want.
1. In the KIT menu, press the [MENU] button. Select the “VOICE” item
and then press the [ENTER] button to enter the voice menu.
The screen display is shown on the right:
2. Strike the pad you want.
The screen will display the name of current pad.
3. While striking the pad, press the [<] / [>] button or data dial until you
get an appropriate voice for your pads. (Refer to Voice List)
Playing Techniques
This section introduces various performance functions to make your
performance professional. Similar to an acoustic drum kit, the digital
drum responds differently to various playing techniques and dynamics.
All the pads are velocity sensitive. And some voices change timbre
depending on the striking force.
Pad
Only the snare drum can detect both head shot and rim shot.
Head Shot
Strike only the head of the pad.
Head
Head
Rim
10

AW_DD650_manual_G04_150923.ai 11 2015/9/23 16:12:31
M
Drum Kits and Voices
Rim Shot
Strike the head and the rim of the pad simultaneously. Or you can only
strike the rim of the pad.
Cymbal
Cymbal Bow Shot
Strike the middle area of the cymbal.As shown in the figure.
Cymbal Edge Shot
Strike the edge area of the cymbal. As shown in the figure.
Cymbal Bell Shot
Strike the bell area of the cymbal. As shown in the figure.
Choke Play
C Both Ride and Crash cymbals have cymbal choke. But hi-hat don't have
the cymbal choke.
Choking the crash/ride edge with the hand immediately after hitting the
Y crash/ride mutes the crash/ride sound.
CM
Bow
Edge
Bell
Choke
MY
CY
CMY
K
Hi-Hat
Hi-Hat Pedal Change
With different positions the pedal pressed down, the voice of pad varied
while you are striking the Hi-Hat pad. And this is similar to an acoustic
drum.
Open Hi-Hat
Strike the Hi-Hat pad without pressing the pedal.
Closed Hi-Hat
Strike the Hi-Hat pad with the pedal pressed completely down.
Hi-Hat Pedal
Press down the hi-hat controller’s pedal to create a foot-close sound
without having to strike the hi-hat pad.
Splash
Playing the hi-hat with the pedal fully pressed and then instantly
releasing it.
11

AW_DD650_manual_G04_150923.ai 12 2015/9/23 16:12:31
Parameter
Value
Description
KIT NAME
Preset: 1~50
User: 51~70
Drum kit selection.
VOLUME
0~16
Adjust the volume of drum kit; the volume
of each pad will be changed.
EQ HIGH
-12(dB)~12(dB)
Adjust the gain (amplitude change) in the
EQ high frequency band.
EQ MID
-12(dB)~12(dB)
Adjust the gain (amplitude change) in the
EQ middle frequency band.
EQ LOW
-12(dB)~12(dB)
Adjust the gain (amplitude change) in the
EQ low frequency band.
M
Select a Preset Drum Kit and Create a User Drum Kit
About the Preset and User Drum Kit
From no.1 to 50 are preset drum kits, and the drum kits from no.51 to
70 are user drum kits. You can edit the parameters of drum kit (from
no.1-70), and save them into user drum kits (from no.51-70).
Note:
Please save your own parameter or voice after edited, otherwise, all
data will be lost.
Edit the Drum Kit Parameters
Change the drum kit volume, the overall effect of drum kit will be
affected. It means if you increase the volume of drum kit, all volume of
the pads will be increased.
1. Press the [KIT] button, the LCD displays the first page of kit menu.
Press the [KIT] button again will quickly enter the user drum kit
menu: KIT51.
Note:
The character “*”, in front of the kit name, indicates that the data of user
kit still keep the default value even after the reset operation.
(Please refer to the Kit List)
C
2. Press the [∧]/ [∨] button to select the item that you want to edit.
Y
CM
MY
CY
CMY
K
3. Use the [<]/ [>] button or data dial to adjust parameter value.
Edit the Voice Parameters
Editing parameters of one pad will not affect others. For example, if you
increased the volume of a snare pad, the other pads wouldn’t change
their parameters.
1. Press the [KIT] button, and then press the [MENU] button later.
Use the [∧]/ [∨] button to select the “VOICE” item, press the
[ENTER] button to enter VOICE menu.
2. Press the [∧] button and use data dial or [<]/[>] button to select the
pad that you want to edit. Or you can directly strike the specified
pad.
3. Press the [∧]/ [∨] button to select the item that you want to edit.
12

AW_DD650_manual_G04_150923.ai 13 2015/9/23 16:12:32
Select a Preset Drum Kit and Create a User Drum Kit
Parameter
Value
Description
TRIGGER
KICK, SNARE, SN-R,
TOM1, T1-R…
Select the trigger input.
VOICE NAME
1~628, U01~U99
Select a voice. The U01~U99
represent user voice which
download form USB flash drive.
VOLUME
0~16
Adjust the volume of voice.
PAN
-8~ +8
Adjust the pan of voice.
PITCH
-8~ +8
Adjust the pitch of voice.
REVERB
0~16
Adjust the reverb of voice.
DECAY
-5~0
Adjust the decay of voice.
PAD SONG
Off, 1-120
Switch the pad song on/off and
choose the song number.
About the User Voice
You can download the wave samples which you like from USB flash
drive into the module. We call them as“User Voice”. The “User Voice”
were used as same as the Preset Voices in module.
1. Use the [<] / [>] button or data dial to adjust parameter value.
C
M
Y
CM
MY
CY
CMY
K
Save User Drum Kit
Please save your own parameter or voice after edited, otherwise, all
data will be lost.
1. While in the drum kit and voice edit menu, pressing the [SAVE]
button to enter user drum kit saving page.
2. Use the [<]/ [>] button or data dial to select a user drum kit. Press
the [ENTER] button to confirm save operation.
3. Temporally display “Save OK!” about 2~3 seconds, and then back
to KIT.
Note:
The character “*”in front of the kit name will disappear after saving.
13

AW_DD650_manual_G04_150923.ai 14 2015/9/23 16:12:34
Playing Along With a Song
There are up to 120 songs with variety of styles, including 70 Patterns,
10 Hits, 40 Taps, and 5 User songs (Refer to the Song List). You can
play the drums while listening to one of these songs.
A song contains Drum part and Accompaniment part. Drum part
means the rhythm you played on the pads; the Accompaniment part
means percussion and melody. The volume of each part can be
adjusted.
Playing Along With a Song
1. Press the [SONG] button to enter the selection menu.
Parameter
Value
Description
NUMBER
1~125
U01~U99
The number of songs:
1~60: Preset Patterns.
61~70: Preset Percussion loop.
71~80: Preset Hit
81~120: Preset Tap
121~125: User Song.
U01~U99: WAV/MP3/MIDI files from SONG
folder on the USB.
ACCOM VOL
0~16
Accompaniment volume.
DRUM VOL
0~16
Drum volume.
C
M
Y
CM
MY
CY
CMY
K
2. Press the [∧]/ [∨] button to select the item that you want to edit.
Use the [<]/ [>] button to adjust parameter value.
3. Press the [START/STOP] button to play/stop songs.
4. In SONG menu, press the [SONG] again, switch between
preset and USB flash drive songs.
The menu of USB flash drive song:
Press the [START/STOP] button to play back WAV, MP3 or MIDI
files. The buttons [∧]/ [∨] and [<]/ [>] are used to move the cursor
position.
Temporally display “Processing...”, and then begin playing the
selected song, the first line displays time or beat.
5. In the SONG menu, press the [MENU] button to enter SONG
MENU. Press the [∧]/ [∨] button to select the item that you want to
edit.
6. Press the [∧]/ [∨] button to select the “USB FOLDER” item, and
then press [ENTER] button to display the folders of USB flash drive,
open folders and display the song files (It will auto back to this
folder even being switched to other menu.).
The module will load the songs from the default folder “SONG” in USB
flash drive. Please accord to the operations above to enter related
folder,if the mp3 songs located at other folder.
Up to 99 MP3/ WAV/ MIDI songs can be displayed in a folder.
If you have more than 99 MP3/ WAV/ MIDI songs on USB flash drive,
please arrange them in different folders.
14

AW_DD650_manual_G04_150923.ai 15 2015/9/23 16:12:36
Parameter
Value
Description
TIME
SIGNATURE
0-9/2, 0-9/4,
0-9/8, 0-9/16
Adjust the time signature.
VOLUME
0~16
Adjust the volume of metronome.
INTERVAL
1/2,3/8,1/4,1/8,
1/12,1/16
Adjust the rhythm interval.
CLICK NAME
METRO,
CLAVES,
STICKS,
COWBELL,
CLICK, VOICE
Select metronome voice which you
want. There are totally 6 metronome
voice types.
OUTPUT
PHONES
ALL (PHONES+
OUTPUT)
Select the destination of metronome
output.
Playing Along With a Song
Format requires:
1.
MIDI SONG: SMF 0, track number should be less than 16,
PPQN ≤480, MIDI file size ≤128k byte.
2.
WAV: Bit rates : ≤1536kbps, Sampling rates: ≤48kHz
3.
MP3: Bit rates: ≤320kbps, Sampling rates: ≤48kHz.
4.
Besides above formats, there will pop up an error message.
Metronome
Practicing with the metronome is the best way to follow the beats.
Choose a right tempo for your learning/ performance requirement.
Starting/ Stopping the Metronome
1. Press the [CLICK] button.
The metronome starts playing, and the button light will blink at the
current tempo. (Current time signature will be displayed on top
of LCD.)
2. Press the [∧]/ [∨] button to select the item that you want to edit.
Use the [<]/ [>] button or data dial to adjust parameter value.
C
M
Y
CM
MY
CY
CMY
K
3. Press the [CLICK] button again to stop the metronome, the light will
be off, and the display will return to the screen before entering
CLICK MENU.
Adjusting the Tempo Value
1. Press the [TEMPO] button.
2. Use the [<]/ [>] button or data dial to adjust parameter value.
Note:
Temporally display tempo value about 3 seconds, automatically back
to the original mode.
15

AW_DD650_manual_G04_150923.ai 16 2015/9/23 16:12:37
Drum of
Record
Drum off indicator
In this chapter, we will introduce how to use this digital drum to record
your own performance.
There are two methods to record: record as MP3 format or MIDI
format.
a) When using an USB flash drive, auto record your own performance
as MP3 files, up to 99 user songs can be recorded to an USB flash
drive.
b) Without an USB flash drive, auto record your own performance as
MIDI files, up to 5 user songs can be recorded in this drum module
flash drive.
About how to prepare and start recording, please refer to the details
bellow:
Prepare Recording
Before recording a song, you can preset these parameters as you like:
Tempo, Kit, Time Signature, Interval and Song if background music
needed.
After [RECORD] button pressed, please choose one position from
USER SONG 121~125 to save the recorded song.
If the USB flash drive has been plugged, the recorded song will be
mp3 format and will be automatically saved to the USB flash drive.
C
M
Y
CM
MY
CY
CMY
K
Start / Stop recording
1. You can start recording in real time while in the prepare recording
menu, there are two ways to start recording:
Press the [START/STOP] button.
Strike one pad.
2. If you want to exit recording in the prepare recording menu, just
one way as below.
Press the [RECORD] button again.
Note:
1.
In Song menu, press the [RECORD] button, recording performance
with accompaniment playing.
2.
In Kit menu, press the [RECORD] button, only recording your drum
part performance.
3. While recording, the [RECORD] button keeps lighting all the time
and “RECORDING--”displays on the LCD.
4. Press the [START/STOP] button again to stop recording, and the
[RECORD] button light will be off.
The recordings will be saved and the LCD displays“Saving…”. When
saved successfully, the system will return to record folder.
16

AW_DD650_manual_G04_150923.ai 17 2015/9/23 16:12:39
Parameter
Value
Description
SENSITIVITY
1~16
The sensitivity of the pads can be adjusted to satisfy your personal preference.
If you adjust the sensitivity parameter to a high value, even a soft strike can produce loud sound.
If you adjust the sensitivity parameter to a low value, even heavy strikes only produce low sound.
RIM SEN
1~16
Adjust the sensitivity of rim shot.
HEAD-RIM ADJ
1~16
Adjust the disturbance between head and rim shot.
THRESHOLD
1~16
The threshold of the pads means a specified signal level, and
only the trigger signal above it can be sounded. This setting can Threshold
prevent some unwanted sounding , such as crosstalk from other
pads and so on.
For example, B will sound but A and C will not sound. A B C
If it is set to a high value, no sound may be heared when strike lightly.
You can adjust threshold like this:
1. Firstly set it to a low value;
2. Raise the value a little, then strike the pad to check and adjust;
3. Repeat step2 until the most suitable setting for performance has been achieved.
XTALK
1~16
“Crosstalk” means when one pad is hitted, another pad would also be triggered, which should
be avoided. “XTALK” setting is set for that. Usually this may happen when two pads sit on the
same stand.
Sometimes crosstalk may be effectively prevented by increasing the distance between two
pads.
For example: If you hit the snare pad and the tom 1 also sounds.
Striking the snare pad, and listen whether there is any sound from Tom 1. If yes, raise Tom1’s
“XTALK” value, and repeat this adjusting again until no crosstalk.
Note: Be careful and don’t set “XTALK” too high. Because in this situation, when two pads are
hitted at the same time, the one which is striked gently may be judged as a “crosstalk” and not
sound. So it is best to set “XTALK” to the minimum value required to prevent crosstalk.
CURVE
1~6
You can control the relation betweeen striking force and response volume by this setting.
RETRIG
Adjust the curve to satisfy your playing requirement. Refer to the CURVE description.
CANCEL
1~16
This setting avoids “re-triggering”, which means that when you strike a pad once, maybe you
can hear two hits coming from one strike. This may happen when pad vibrating.
Adjust the “Retrigger Cancel” value and strike the pad to see if there is any re-triggering.
Be careful to set it to a suitable value. If too high, some sounds may be ommitted when
played fast; if too low, retrigger can’t be prevented effectively. It is best to set it to a value just
prevented retriggering.
MIDI NOTE
0~127
MIDI output key mapping
SPLASH SENS
1~5
Splash sensitivity. The higher value makes the splash easier.
The Drum Pad Triggers Settings
About the Drum Pad Trigger Settings
As a professional drummer, you may be very pleased to set your drum
triggers carefully corresponding to your playing habits and feelings,
making your performance more interesting and professional. In the
meantime, your digital drum will be more operable.
1. In the KIT menu, select the “TRIGGER” item.
2. Press the [∧]/ [∨] button to select the trigger parameters that you
want to edit.
The drum pad trigger settings are shown below:
C
M
Y
CM
MY
CY
CMY
K
3. Striking the specified pad, select the pad that you want to edit.
4. Use the [<] / [>] button or data dial to adjust the parameter value.
When the LCD displays “--”, it means these parameter values are
fixed and unchangeable.
17

AW_DD650_manual_G04_150923.ai 18 2015/9/23 16:12:39
The Drum Pad Triggers Settings
Note:
The Curve descriptions are shown below:
VOL VOL VOL
Curve 1: The most natural setting. There is a linear change between
playing dynamics and volume response.
Curve 2, 3: Compared to Curve 1, heavily strikings make greater
change.
Curve 4, 5: Compared to Curve 1, gentle strikings make greater
change
Curve 6: Even a soft strike can make strong volume, and the range of
dynamic response is small. Especially when a drum trigger is used as
an external pad, reliable triggering can be made.
VOL
Curve1
Striking
VOL
Curve2
Striking
VOL
Curve3
Striking
Curve4 Striking Curve5 Striking Curve6 Striking
Save the Drum Pad Trigger Settings
Press [SAVE] button in TRIG menu to save your settings before turn
off the power. Otherwise the settings you’ve edited will be lost.
Note:
Parameter settings above are efficient to all drum kits.
C
M
Y
CM
MY
CY
CMY
K
18

AW_DD650_manual_G04_150923.ai 19 2015/9/23 16:12:39
Parameter
Value
Description
GM MODE
ON/OFF
ON: The channel 10 will respond GM drum kit.
OFF: The channel 10 will respond local drum kit.
LOCAL CTRL
ON/OFF
Describe the connection state about pad signal and internal sequencer with internal
sound generator.
ON: The pads and internal sequencer are connected to the digital drum’s internal
sound generator. Sounds are produced by the internal sound generator when the
pads are struck.
OFF: The pads and internal sequencer are disconnected from the digital drum’s
internal sound generator. Striking the pads does not cause sound to be produced
by the internal sound generator.
L-R EXCHANG
ON/OFF
Exchange the left and right pad position.
R: Normal settings.
L: You can exchange the left and right pad position to satisfy the left-hand player.
AUTOPOWER
30, 60 ,OFF
Factory settings, approximately 30 minutes.
30: Automatically turns the power off if no operation for approximately 30 minutes.
60: Automatically turns the power off if no operation for approximately 60 minutes.
OFF: The power will not power off automatically.
Utility Settings
1. In the KIT menu, select the “UTILITY” item.
2. Press the [∧]/ [∨] button to select the utility parameters that you
want to edit.
C
M
Y
CM
MY
CY
CMY
K
3. Use the [<] / [>] button or data dial to adjust the parameter value.
19

AW_DD650_manual_G04_150923.ai 20 2015/9/23 16:12:40
Parameter
Description
Remarks
SAMPLE
LOAD
Download wave samples to
drum module from the
external USB flash drive.
See the note below.
KIT SAVE
Save a user kit data of drum
module to the external USB
flash drive.
The saved file name is
MyKitxxx.kit.
KIT LOAD
Save back a user kit data of
USB flash drive to the drum
module.
Transmit the MyKitxxx.kit
file from the USB flash
drive to the drum module.
FORMAT
Format the USB flash drive.
Strongly recommend
formatting the USB flash
drive once before using it.
Using USB Flash Drive (USB Memory)
The USB flash drive function contains:
1. Sample/ Kit load or save. Transmit data between USB flash drive
and drum module.
2. Format. Format the USB flash drive.
Note:
This digital drum supports 4G~64G USB flash drive which in FAT
format. Brand Kinston and SanDisk are suggested.
1. In the KIT menu, select the “USB MEMORY” item.
Press the [ENTER] button, enter to the USB flash drive menu.
2. Press the [∧]/ [∨] button to select the USB flash drive function that
you want.
C
M
Y
CM
MY
CY
CMY
K
Sample Load
Wave sample on the USB flash drive can be downloaded/saved to the
drum module in this function. These voices are called user voices.
1. There is no limitation of sample capacity except exceeding internal
memory. Sample’s size can reach to 15M Byte.
2. Requirement of Sample wav's format: mono 16 bit, 48k / 44.1k /
32k / 22.05k / 11.025k rate.
3. Samples in internal memory can only be deleted as a whole. One
sample deleting is not permitted except that there is only one
sample.
4. Both loaded samples and preset voices can be used in the same
way.
Enter the “SAMPLE LOAD” interface. The LCD will list all wave files
(.wav) which under the sample catalogue. It can display 99 files at
most.
Select a sample from the USB flash drive:
Press the [ENTER] button to enter load interface:
Press the [ENTER] button again:
20
Table of contents
Other db drums Drum manuals

