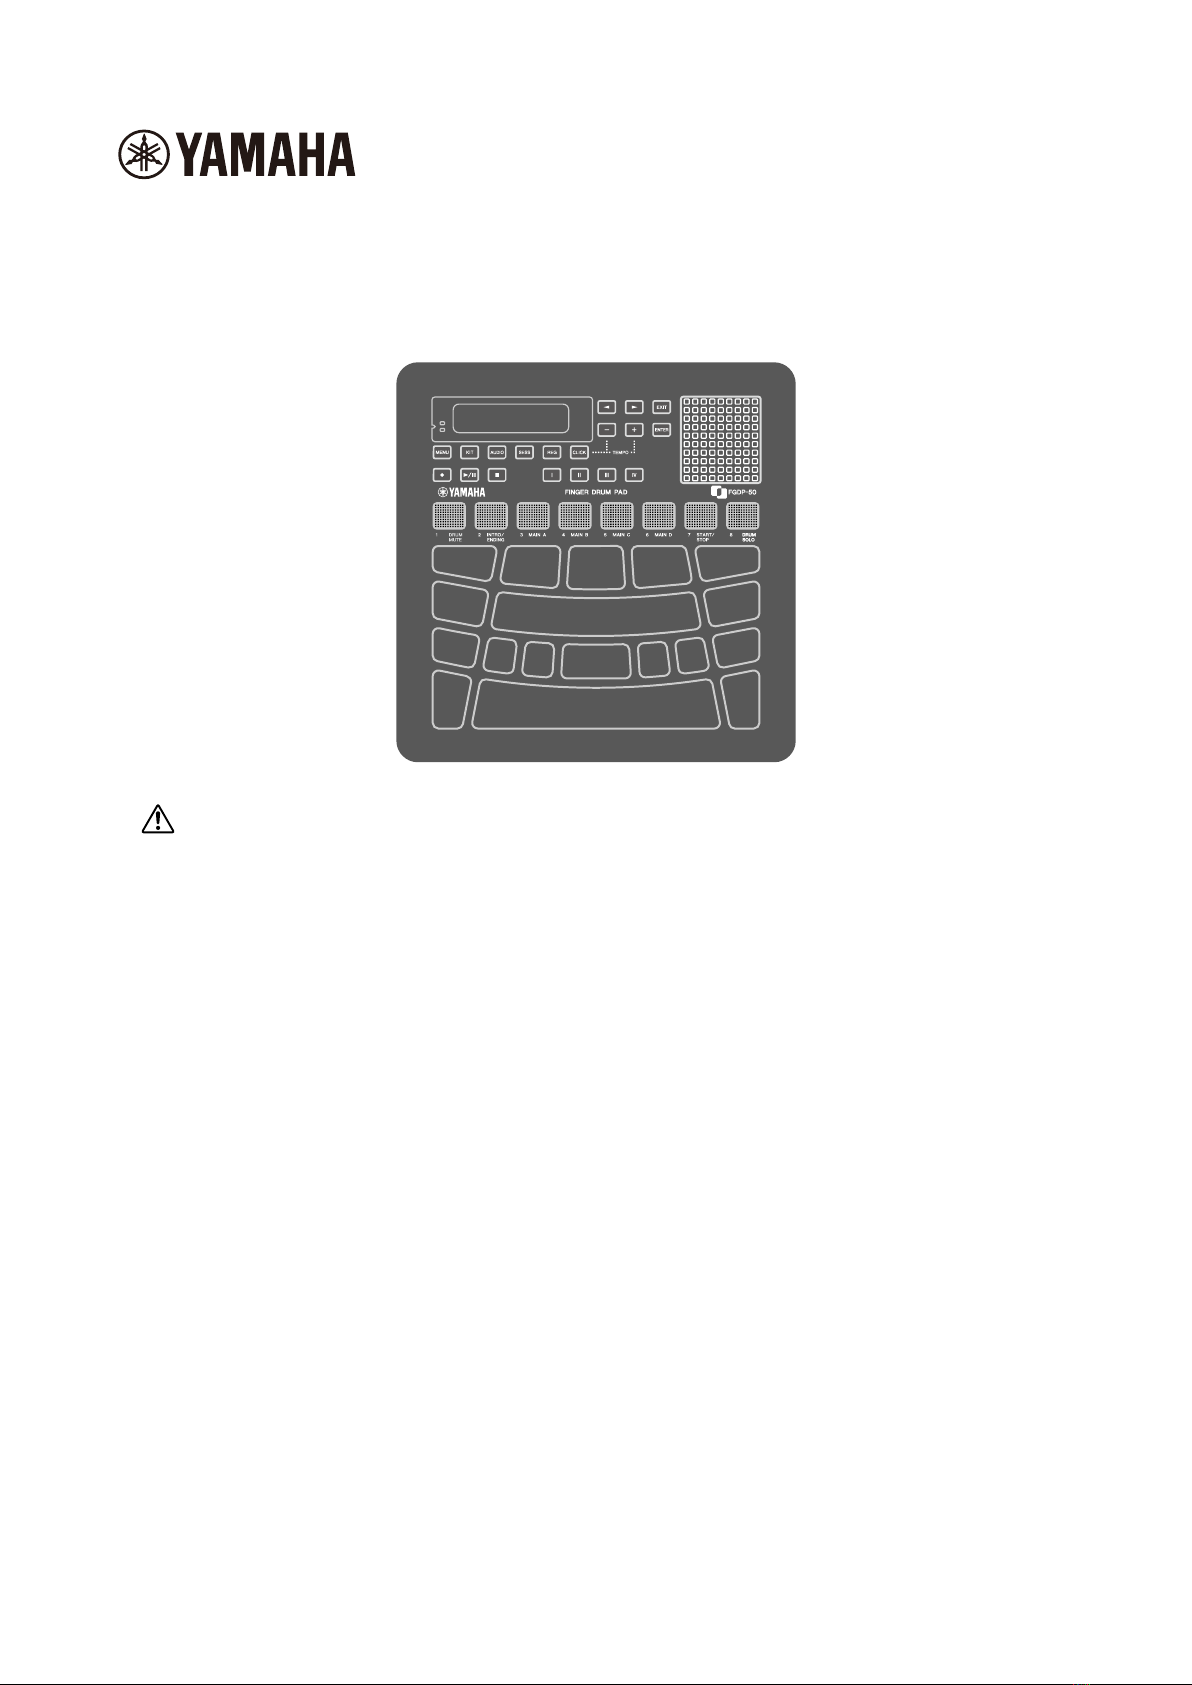
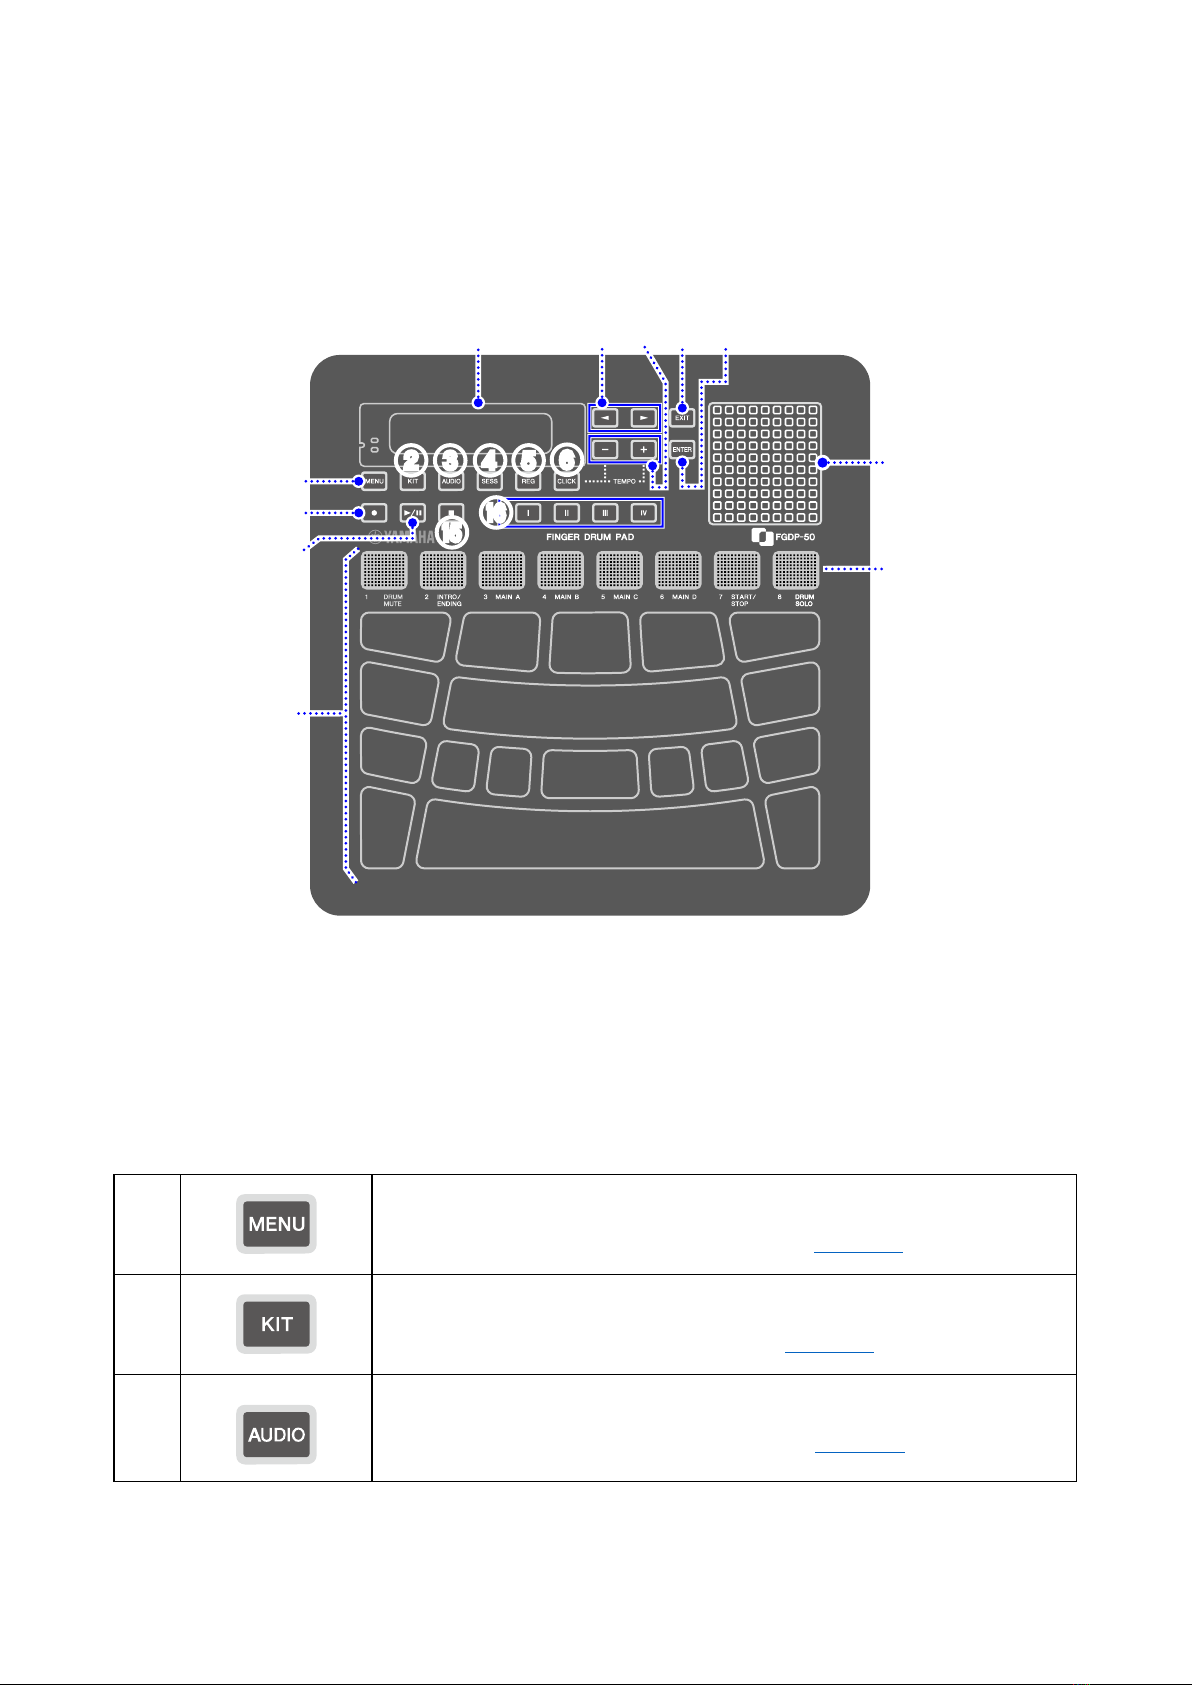
Yamaha FGDP-50 User manual
Other Yamaha Drum manuals

Yamaha
Yamaha RX-11 User manual

Yamaha
Yamaha DTX RS500 User manual

Yamaha
Yamaha XP80 User manual

Yamaha
Yamaha RX 5 User manual

Yamaha
Yamaha DD-11 User manual

Yamaha
Yamaha ED10 User manual

Yamaha
Yamaha DD-6 User manual

Yamaha
Yamaha DTX700 Mounting instructions

Yamaha
Yamaha RX-17 User manual

Yamaha
Yamaha DD-7 User manual

Yamaha
Yamaha RX-7 User manual

Yamaha
Yamaha DTX10K-X User manual

Yamaha
Yamaha DD-65 User manual

Yamaha
Yamaha RX-11 User manual

Yamaha
Yamaha DD-11 User manual

Yamaha
Yamaha DTX900K User manual

Yamaha
Yamaha DTXTREME IIs Assembly instructions

Yamaha
Yamaha PCY10 User manual

Yamaha
Yamaha TP-3123 User manual

Yamaha
Yamaha RS-80 Installation guide