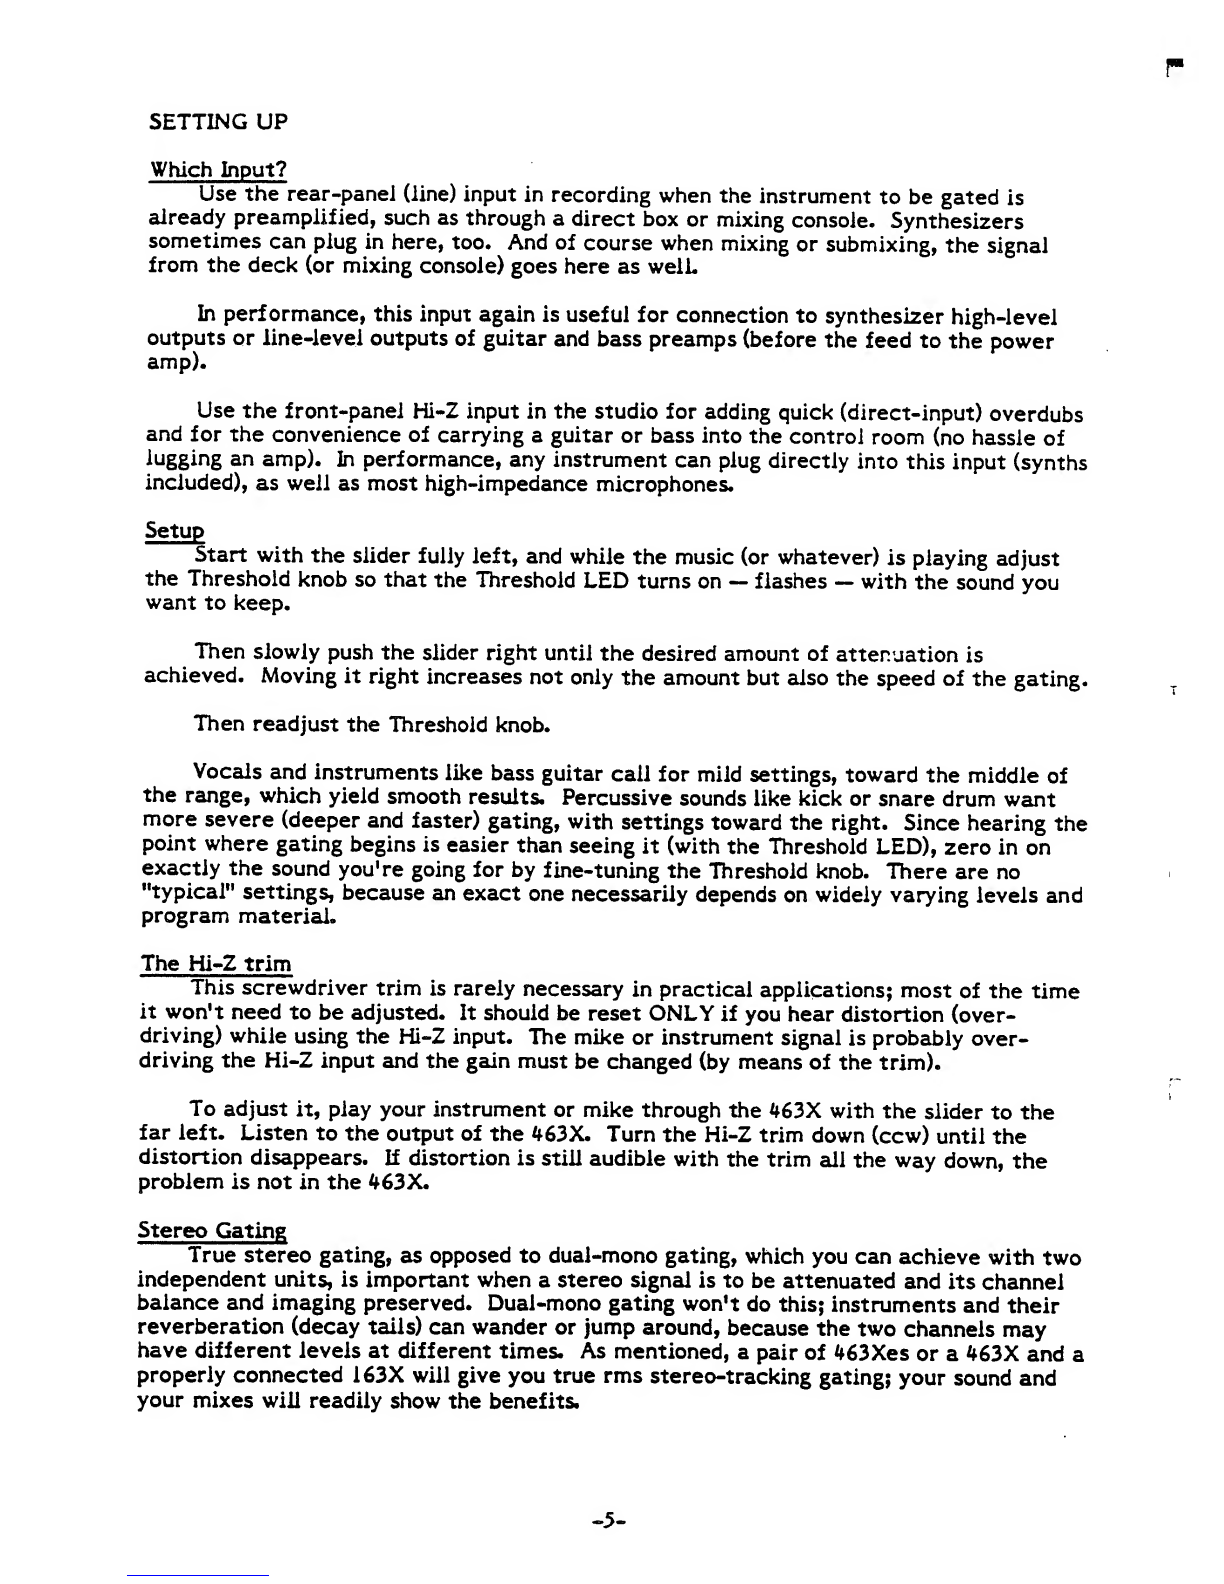
dbx 463X Operating manual

Preliminary Technical Service Manual
MODEL 463X
OverEasy® Noise Gate Expander
dbx Professional Products

Manufactured under one or more of the following U.S. patents: 3,377,792; 3,681,618; 3,714,462; 3,789,143; 4,097,767; 4,329,598;
4,403,199; 4,409,500; 4,425,551 ;4,473,795. Other patents pending.
This dbx-branded product has been manufactured by AKG Acoustics, Inc.
©1991 AKG Acoustics, Inc.
dbx Professional Products
adivision of AKG Acoustics, Inc.
1525 Alvarado Street
San Leandro, CA 94577 USA
Telephone: (1) 415/351-3500 Fax: (1) 415/351-0500

/j (2 '^rNoise Gate
*J. mExpander
The dbx model 463X is the simplest, easiest-to-use noise-
gate expander on the market. (It's also easy on the budget.)
Modeled after our 904 modular noise gate, the 463X is
designed for the recordist/mixer, instrumentalist, ENG
technician, sound contractor —indeed, for anyone who
needs afriendly processor that gets rid of unwanted noise
between notes or sounds.
The important operating feature of the 463X is the single-
slider action, which enables quick setting of the amount and
severity of gating. There's also aknob for setting the
threshold point where this gating occurs. In an instant you
can change the gating characteristics —and the noisiness
and overall sound of the program —by ear.
The single-ended input and output let the user patch into
the signal path at line level. For the performer, there's a
high-impedance input jack on the front as well. Plug in,
connect the 463X to the amp or board, and you're on your
way. (The Hi-Z input defeats the rear input and has its own
trim for awide range of instrument/ pickup levels.) Finally,
there's a“Key” input for special applications like frequency-
sensitive gating.
Two 463Xes become amaster/slave stereo pair of noise
gates at the push of abutton and asingle connection cable.
However, if you pair a463X with a163X OverEasy Compres-
sor/Limiter, you have achoice of configurations. If the 163X
is the slave and the 463X the master, you'll have astereo
pair of 463Xes —the 163X turns into a463X. And if it's the
other way around (the 163X the master and the 463X the
slave), then the 463X turns into a163X and you have a
stereo pair of 163X Compressor/ Limiters.
Features
Single-slider action
Adjustable threshold
1/4“ front-panel
high-impedance input
Stereo-strappable
600-ohm output to +18 dBv
Key input for special
applications

Circuit Characteristics
4—4— IIII I III i I I I
INPUT
463X
Performance
Specifications
Frequency response
20 Hz-20 KHz ±1dB
THD
0.2°/o (unity gain)
Equivalent input noise
-85 dBv unweighted
(unity gain)
Maximum input
18 dBv to soft clipping
Maximum output
18 dBv into 600 ohms
Input impedance
391 k-ohms, single-ended
Output impedance
22 ohms, single-ended
(designed to drive 600 ohms
or greater)
KEY input impedance
62 K-ohms
Threshold range
+10 to -60 dBv (OverEasy)
Attenuation range
0-70 dB, depending on input
level and slider setting
Gain (no gating)
Unity (rear jack);
0-20 dB, adjustable
(instrument input)
Downward
expansion ratio
Adjustable from none to 6:1,
front slider
Attack time
Approximately 1ms, program-
and slider-dependent
Release time
10-500 ms, program- and
slider-dependent
Power requirements
100-120/220-240 Vac,
switchable; 50-60 Hz; 7W
Notes
1} Specifications are subject to change.
2) Ail voltages are rms (root-mean-square).
3) 0dBv is defined as 0.775 Vregardless of
load Impedance. Subtract 2.2 from the dBv
figure to convert to dBV (i.e., referred to 1V).
When the load impedance is 600 ohms, this
particular dBv is also Known as "dBm."
4) Noise figures are for 20 Hz-20 KHz.
5) Attack time is the time required to restore
the signal to 654b of the input level after It
has gone above the OverEasy threshold;
release time is the time required for the
signal to be reduced to 654b of Its final gated
level.
dbx
Professional Products Division
71 Chapel Street
Newton. Mass. 0219S USA
617-964 3210
Adivision of BSR North America Ltd. naiao
ION 600335 Printed in USA **dbx” and -OverEasy” are registered trademarks

INSPECTION and INSTALLATION
Your unit was carefully packed at the factory in aprotective carton. Nonetheless,
be sure to examine the unit and the carton for any signs of damage that may have
occurred during shipping. If there is such evidence, don't destroy the carton or packing
material, and notify your dealer immediately.
It's agood idea in any case to save the carton and packing should you ever need to
ship the unit.
In the event of initial problems, contact your dealer first; your unit was thoroughly
inspected and tested at the factory.
The carton should contain this owner's manual, a463X, of course, and awarranty/
registration card. Please fill the card out and send it to us. The carton also should con-
tain hardware for rack-mounting both asingle unit (screws, along [half-rack-width] ear,
asmall L-bracket, and ashort rack ear) and two units together (side plates along with a
screwdriven joiner). See below.
No special ventilation is required in any installation; other components may be
stacked above or below the unit provided they don't generate excessive heat.
Here's rack-mounting for asingle unit:
It may help to line everything up on atable as you tighten the screws. The enclosed
sticker with circuit-action graphs may be placed on the long rack ear.
Here's rack-mounting for apair of 463Xes or for a463X and a 163X or other "-63X"
series units:
1<5c 2) Attach side panels;
3) Bring units together, lining up the side panels with the screw-joiner catches,
and then gently tighten the screw to close the catches.

CONTENTS
Rear panel (connections) 2
Front panel (operation) 3
Hookups (plug and cable wiring) 4
Setting up 3
About noise gating and downward expansion 7
Applications note 7
Block diagram 10
SPECIFICATIONS
Frequency response
THD
Equivalent input noise
Maximum input
Maximum output
Input impedance
Output impedance
KEY input impedance
Threshold range
Attentuation range
Gain (no gating)
Downward
expansion ratio
Attack time
Reiease time
Power requirements
Notes
1) Specifications are subject to change.
2) All voltages are rms (root-mean-square).
3) 0dBv is defined as 0.775 Vregardless of load impedance.
Subtract 2.2 from the dBv figure to convert to dBV
(i.e., referred to 1V). When the load impedance is 600 ohms,
this particular dBv is also known as "dBm."
4) Noise figures are for 20 Hz-20 kHz.
5) Attack time is the time required to restore the signal to 63% of the
input level after it has gone above the OverEasy threshold; release time
is the time required for the signal to be reduced to 63% of its final gated level.
20 Hz-20 kHz +1 dB
0.2% (unity gain)
-85 dBv unweighted (unity gain)
18dBv to soft clipping
18 dBv into 600 ohms
391 k-ohms, single-ended
22 ohms, single-ended (designed to drive
600 ohms or greater)
62 k-ohms
+1 0to -60 dBv (OverEasy)
0-70 dB, depending on input level and slider setting
Unity (rear jack); 0-20 dB, adjustable (instrument input)
Adjustable from none to 6:1, front slider
Approximately 1ms, program- and slider-dependent
10-500 ms, program- and slider-dependent
100-120/220-240 Vacj switchable; 50-60 Hz; 7W

1INPUT, OUTPUT. These jacks are for aline-level input and ouput and are the stan-
dard 2-circuit ("mono") 1/4" phone type, where the tip carries the signal and the
sleeve carries the ground.
2KEY IN. Use this jack if you want to control the 463X gating action from an
external source, allowing you to alter the dynamics of one signal with another.
Same plug type as above. Key In will be discussed in detail in the Applications Note.
3Hi-2 trim. This screwdriver control sets the gain of the preamp for the Hi-Z input
only (see front panel). The gain is set at the factory at +20 dB (all the way right, or
clockwise) and shouldn't be changed unless your instrument's output is very hot. All
the way left (ccw) is unity (0 dB) gain.
4STEREO STRAPPING jack and button. Connect this jack to the same jack on
another 463X and you have atrue rms-detecting stereo noise gate. Connect it to a
163X and you have the same thing —astereo pair of noise gates —provided this
first unit remains the Master.But if you connect it to a163X and press the button
in, to Slave, this unit becomes a163X and you have atrue stereo pair of 163X
compressor/limiters. Neat, huh? The jack is a1/4" 3-circuit ("stereo") phone type
(tip/ring/sleeve); use 3-circuit plugs and cables only, for anything else won't work.
Of course, be sure to disconnect everything for independent operation.
Note that you must leave the Master/Slave button out, at Master, for normal
463X (non-stereo) operation as well as for stereo operation as aMaster. Pushing it
in, to Slave (the front-panel LED will light), deactivates the controls and forces the
unit to obey the Master's settings when asecond 463X or a163X is properly con-
nected and switched. (If you push the button in when no Master is connected, it's a
bypass switch for the gate only; the preamp still worksT)
5VOLTAGE SWITCH. This must be properly set for your ac voltage; be sure to check
before plugging in and powering up. For nominal 220-V operation an adaptor plug on
the ac cord will be required.
-2-

HP
1POWER LED. This indicates when the unit is connected to alive ac outlet.
2STEREO SLAVE LED. See previous page; this indicates that the unit has been set by
its rear switch to be the Slave in a163X or 463X team.
3DOWNWARD EXPANSION LEDs. These 12 LEDs show in dB how much the signal is
being gated.
4DOWNWARD EXPANSION slider. For any signal that goes below the threshold point
(see below), moving this slider to the right —MORE —increases the amount of
gating, pushing that signal's level down both farther and faster than the signal's
natural decay rate. The ultimate amount of this attenuation depends on the slider
position, of course, as well as on how far below threshold the signal is in the first
place. We'll discuss this in detail presently.
5THRESHOLD. This thumb knob sets the point where gating begins, the level below
which asignal is attenuated. Set fully clockwise (+10) and the signal will begin to be
pushed down even when it's still loud. Turn the knob counterclockwise and the
signal is not gated until it has dropped to alow level on its own. At full ccw, the
gate is inactivated and the 463X effectively bypassed. Ideally, the knob should be
set such that only wanted signal is above the threshold, and below it is only
unwanted signal or noise.
THRESHOLD LED. This will light whenever the signal level goes above the
threshold point. It's very useful for setting levels and adjusting the 463X to work at
exactly the right times.
6Hi-2 input jack. This connects to the 463X's low-noise FET preamp. There's enough
gain that virtually ail low-level instruments can be plugged in directly —guitars,
basses, keyboards, even high-impedance mikes. As explained, there's again trim on
the rear for ve|7 hot instruments (likely to be useful with some synthesizers, etc.).
Note that this jack overrides the rear line-level input.
-3-

HOOKUPS
Inputs and Outputs
The line-level inputs and outputs are single-ended (unbalanced) and should be con
nected to other such equipment with single-conductor shielded cable, as shown here.
TS
Cl TvAntST
_SvU—itri rL>
2-Circuit ("Mono") Plugs and Single-Conductor Shielded Cable
This will work fine for balanced inputs, too, but if the 463X input is connected to source
equipment with balanced outputs, the next hookup should be used. Most balanced sources
will work without the dotted connection between the ring (-) output and the sleeve (the
ground -- this is true for "active-balanced" and "ground-referenced" outputs). This float-
ing condition unbalances abalanced source, which is usually okay. However, some
sources require the dotted connection, e.g., "transformer-isolated" balanced outputs. We
recommend making the connection only if necessary for your installation, because some
active balanced and ground-referenced outputs may be damaged by doing so. Consult the
owner's manual.
cnz
FROM SOURCE
OUTPUT MAKE THIS COMSECTIOW
Only if necessary—see text
ZD
TO 463X
INPUT
Balanced Outputs and the 463X Line Input, Single-Conductor Shielded Cable
To take advantage of the balancing capability provided by the balanced inputs, the
following connection may be used when the 463X output is connected to adevice with
balanced inputs.
TS
csz~
FROM 463X
OUTPUT ONLY IF NECESSARY—SEE TEXT
SRT
ZED
TO BALANCED
INPUT
Balanced Inputs and the 463X Line Output, Two-Conductor Shielded Cable
The connection between the shield and the sleeve at the 463X end of the cable should be
made only if hum develops in your installation.
The Key input jack provides adirect connection to the 463X's "brains" —its
level-sensing circuitry, or rms detector —without disturbing the normal audio path. This
feature lets you control the gating from an external signal source, or lets you add
processing (e.g., equalization) to the control path only. This jack overrides the
detector's normal connection to the main input signal (see the block diagram, p. 9).
Plugs and cabling are the same as in the two illustrations above.
The Hi-Z (instrument) input is single-ended (unbalanced) also and should be connected
to instrument outputs with single-conductor shielded cable as shown at the top of this
page for line-level jacks.
-4-

SETTING UP
Which Input?
Use the rear-panel (line) input in recording when the instrument to be gated is
already preamplified, such as through adirect box or mixing console. Synthesizers
sometimes can plug in here, too. And of course when mixing or submixing, the signal
from the deck (or mixing console) goes here as well.
In performance, this input again is useful for connection to synthesizer high-level
outputs or line-level outputs of guitar and bass preamps (before the feed to the power
amp).
Use the front-panel Hi-Z input in the studio for adding quick (direct-input) overdubs
and for the convenience of carrying aguitar or bass into the control room (no hassle of
lugging an amp). In performance, any instrument can plug directly into this input (synths
included), as well as most high-impedance microphones.
Setup
Start with the slider fully left, and while the music (or whatever) is playing adjust
the Threshold knob so that the Threshold LED turns on —flashes —with the sound you
want to keep.
Then slowly push the slider right until the desired amount of attenuation is
achieved. Moving it right increases not only the amount but also the speed of the gating.
Then readjust the Threshold knob.
Vocals and instruments like bass guitar call for mild settings, toward the middle of
the range, which yield smooth results. Percussive sounds like kick or snare drum want
more severe (deeper and faster) gating, with settings toward the right. Since hearing the
point where gating begins is easier than seeing it (with the Threshold LED), zero in on
exactly the sound you're going for by fine-tuning the Threshold knob. There are no
"typical" settings, because an exact one necessarily depends on widely varying levels and
program material.
The Hi-Z trim
This screwdriver trim is rarely necessary in practical applications; most of the time
it won't need to be adjusted. It should be reset ONLY if you hear distortion (over-
driving) while using the Hi-Z input. The mike or instrument signal is probably over-
driving the Hi-Z input and the gain must be changed (by means of the trim).
To adjust it, play your instrument or mike through the 463X with the slider to the
far left. Listen to the output of the 463X. Turn the Hi-Z trim down (ccw) until the
distortion disappears. If distortion is still audible with the trim all the way down, the
problem is not in the 463X.
Stereo Gating
True stereo gating, as opposed to dual-mono gating, which you can achieve with two
independent units, is important when astereo signal is to be attenuated and its channel
balance and imaging preserved. Dual-mono gating won't do this; instruments and their
reverberation (decay tails) can wander or jump around, because the two channels may
have different levels at different times. As mentioned, apair of 463Xes or a463X and a
properly connected 163X will give you true rms stereo-tracking gating; your sound and
your mixes will readily show the benefits.

Use this mode whenever imaging must remain stabie. Acable as shown below is
what's needed to link two 463 Xes (or a463X and a163X). It's 2-conductor shielded
(3-wire) with standard 1/4" tip/ring/sleeve phone plugs at the ends. Shielding is
essential, and keep the cable short, too, to minimize hum pickup. Don't use mono cable
or plugs (tip/sleeve) lest you damage the rms detectors.
3-Circuit ("Stereo") Plugs and Dual-Conductor Shielded Cable
Don't fail to disconnect the units from ac power when hooking up astereo pair;
you'll avoid apotentially loud (and damaging) pop.
Also see the assembly drawing at the bottom of the inside front cover.
After you've decided which unit is the Slave by pressing in the rear button, the yel-
low LED on the front will light. As explained earlier, the front controls are inactivated
(will have no effect) and the LED bar graph will be blank since the amount of attenuation
is exactly the same for both Master and Slave.
When you want to have two independently operating units, as we have said, remove
the strapping cable and leave both Master buttons out.

r
ABOUT NOISE GATING
Although the basic idea behind gating is simple —attenuate the background noise
whenever the signal of interest is absent —there's more than one way to go about it.
Classic gating is to use a fixed amount of attenuation (say, 30 dB) whenever the
signal level drops below agiven point, the Threshold. Essentially, the signal is switched
off whenever its level is insufficient.
Another approach is downward expansion, where the amount of attenuation is based
on how far down the signal has dropped below threshold.
The 463X takes this latter approach. As the signal level drops down below
threshold, it gets pushed, or expanded, down farther yet. How much so depends on the
expansion ratio, the ratio of change in input level to change in output level. For
example, if the signal has dropped 10 dB below threshold and the ratio is 1:5, the signal
will get forced down to 50 dB below threshold.
The slider on the 463X adjusts this ratio —and at the same time it changes the
release rate of the circuit and sets the final attenuation limit. This combination of
functions on one slider makes the 463X aunit that can be easily set for smooth gating of
avery wide variety of source material. Low ratios, light attenuation, and slower release
rates are obtained with the slider in mid-position. High ratios, heavy attenuation, and
faster release rates result, of course, from settings farther to the right —MORE. Below
are the explanatory circuit-action illustrations accompanying your unit.
APPLICATIONS
Noise reduction
As we've said, the basic purpose of anoise gate is to remove unwanted background
sounds in the spaces between desired foreground sounds. But note that there has to be
some real distance in level between the unwanted and wanted material —at least afew
dB -in order for the 463X to "get its foot in the door." If levels are too close (e.g.,
because of earlier compression or because the mikes were closer to the unwanted than to
the wanted sound), the gating efforts of the 463X will go for naught.
One of the common uses for agate is to tighten or "dry up" drum sounds. As with
most dynamics processing, it's ideal if there's aseparate mike on each drum and cymbal
(or group of cymbals) and each is individually gated. Each mike is auditioned separately
and the gate threshold adjusted to eliminate the sound of all but the desired drum. (Hint:
start with the threshold very low, so all the sounds come through, then increase it until
only the desired drum is left.) It's likely that you'll find the far-right slider settings best
for most drums, while milder positions are usually better for cymbals and some toms.
When things are adjusted correctly, each drum will sound tight, punchy, and drv —
detailed and defined.
-7-

When you don't have enough mikes (or 463Xes'.) to cover each drum, then group
them: snare and center toms, side toms, bass, cymbals. The idea is to get as ciose as
possibie to only one mike on at atime,so only one sound is picked up, instead of several.
Another common use for agate is in vocal recording. Especially after compression,
the noises picked up by amike an inch away from asinger's mouth can be very obtrusive.
Try the 463X in its middle slider settings to gate out these noises. Other applications
include keeping live drum tracks from "contaminating" an acoustic-piano track, and
general solving of other sorts of leakage problems.
Changing sound quality
There's more to gating than just keeping out unwanted background noises: you can
use the 463X gate to change sonic character. This is because gates can be used to
reduce or otherwise alter the quality of instrumental ambience and reverb. As the sound
decays after an instrument stops, its reverberation level will fall through the 463X
Threshold setting, below which it can be made to die out more or less quickly —in any
case faster than the natural sound. Experiment with changing the "tail" of the sound; the
correct setting will nearly eliminate reverb.
In other situations, a463X can be used to prevent or reduce leakage among mikes
in sound reinforcement or during panel discussions. Simply set the Threshold control
below the level of the music or speech. Similarly, in broadcasting, a463X can be used to
clean up noisy feeds (land lines, ENG audio) if it's placed at the output. Wind or air-
conditioning noise during aremote interview can be controlled as well: proper attenua-
tion can keep noise during pauses from being either loud (obtrusive-sounding) or too soft
(peculiar-sounding) —or modulated.
Hum Instruments with magnetic pickups (like abass guitar) often exhibit some buzz or
hum between notes, which may be aggravated by compression (which will pull it all up
into annoying audibility). Gating will knock it back down again.
MIDI (musical instrument digital interface) keyboard stacks
When all of the outputs of acomplex synthesizer setup are summed, the resultant
noise can be substantial when no notes are being played. Hum, rolling buzz, that strange
digital grunge —ail of this can accumulate. Set the Threshold knob so the gate begins
attenuating (the light goes out) just as the last note decays into the sea of background
noise, and then move the slider until the noise is no longer audible. You should get a
smoother transition as the notes now fade into silence.
Multiple keyboard stacks (especially during aperformance) call for acompressor
and agate used together. The compressor will keep the lid on during wild crescendos,
avoiding speaker distortion, while the gate will keep the ensemble tight and clean —
silent when it should be.
Keyed gating
Controlling the gating of one signal by another permits perfectly in-synch playing
and overdubbing among individual instruments. Another use of this function is adding
sounds in synch with an existing track, "fattening" it. An example of the former would
be synchronizing abass guitar and akick drum; an example of the latter would be using
-8-

the drum signal to key an oscillator which is set to an appropriate frequency to tune and
punch up the drum sound. See diagram.
SO Hz—VARY TO
TUNE* DRUM 463X
TAT*
KICK-DRUM
TRACK
OR KICK-DRUM
TRACK WITH
SYNCHED BASS
Selective gating
You can also do frequency-sensitive gating, which lets you tune the response of the
gating action. This is especially useful when gating signals that are nearly buried in
noise. If, for example, you're gating akick drum in atrack with lots of leakage, you can
tune in to the frequency of the kick with an EQ and the gate will respond only to the
drum. See below. 463X
OUTPUT
NOTES
FILTER TUNED
TO KICK-DRUM
FREQUENCY


Circuit Descriptions (Theory of Operation)
Audio Signal Path
Preamp (Input Buffer)
The Incoming audio signal Is first buffered by the LF353 type op-amp,
0A1A. Ac coupling Is through C2 to the FET Input stage of 0A1A. The Input
Impedance of 391k ohms Is determined by the sum of R1 and R2. Cl provides
some RF suppression, shunting to ground high frequency signals greater,
than about 1MHz. When the front panel H1-Z Input Is used, R3 Is connected
to ground through the sleeve of the Input plug activating the gain trim,
R4. The gain can be adjusted from unity (OdB) to amaximum of 10 (20dB).
When the rear panel input Is used, the signal travels via shielded cable
through the tip-shunt of the front panel Jack and then to 0A1A. One end of
R3 Is now left open and the circuit will have unity gain regardless of the
setting of R4. Correct operation of this circuit can be checked at TP1.
R5,R6 and zener diodes CR1 and CR2 provide soft clipping on Input signals
greater than +18dBv.
VCA The output of 0A1A Is then ac coupled through C5 and R7 to the Input
of the Voltage Controlled Amplifier (VCA), IC1. The ratio of the Input
current (at pin 1) to the output current (pin 8) Is controlled by the
voltage applied to pins 2and 4. Positive voltages here produce
attenuation and negative voltages produce gain. The actual scaling Is -6mV
per dB. If, for example, the voltage applied to pins 2and 4Is *36mV,
then the current gain will be -6dB and the output current will be half as
big as the Input current. Since the output signal at pin 8is acurrent,
it cannot be viewed easily on an oscilloscope and Is best checked after It
has been converted Into avoltage by the Output Buffer described below.
Rll Is used to adjust the VCA symmetry and is set to minimize distortion
and offset. For acomplete description of the VCA design and operation see
dbx application note AN106
Output Buffer
The output current of the VCA Is fed to the summing Junction (pin 2)
of the Output Buffer, 0A2, and converted Into avoltage by R14. This
signal Is then fed to the Output Jack through R17. R17 provides some
protection to 0A2 from Improper output connections and sets the output
impedance at 22 ohms. The other 22 ohm resistor, R16, Is inside the
feedback loop and does not contribute to the output Impedance. C6 and C7
roll off the gain at very high frequencies, necessary for the closed-loop
stability of the op-amp. This 5534 op-amp will drive a600 ohm load to
«18 dBv.

Control Voltage Path
Is also sent to the
volts when the Input
Match* point and
This level Is
RMS Detectors (general)
The heart of the level sensing circuitry In the 463X Is the dbx
patented RMS Integrated circuit. This IC takes an ac signal at Its Input
and produces adc voltage at Its output that Is proportional to the true
rais level directly In dB. The Input (pin 1) Is acurrent, requiring a
resistor 1n.series from avoltage source, and acts basically like a
summing Junction. This Input resistor sets the nominal level at which the
output (pin 7) Is 0volts. This output Is alow Impedance voltage source
and can drive external circuits directly, the scaling of the output Is
alYa£S«+6my/JB;th1s dc voltage Is asmall amount of ripple
at tw2c«thc 1n P“t frequency. The *RMS SYM* trim pot adjusts this
l?pl ?f? rperfect symmetry. Attack and release time constants are
adjustable with external components connected to pin 6. For amore
detailed explanation of this IC see dbx application note AN110
RMS Detector (463X)
nwe.In addition to feeding the VCA, the output of 0A1
RMS detector, IC2. The output of IC2 (pin 7) is 0.000
current (pin 1) Is 5.7 micro-amps. This Is the "Level
corresponds to an input level of about -lOdBv at C12.
calibrated exactly via R25. For example, with the scaling of **-6mV/dB. the
/onEri* J[ olta ?e(at TP6 )*111 be +120mV when the Input level is +10dBv
fb?V€ ]eve Jmatch )and will be -120mV when the Input level Is -30dBv
(20dB below level match). The RMS symmetry Is adjusted by R31 and Is
»uribinneH-» Sefhtha *aInput signal the ripple component Is a
pure 100 Hz sine wave at about 70mV p-p at TP11.
*«,*..* *< speed at which output of this detector changes when the
Input signal suddenly gets smaller Is called the 'Release Rate* and
determines the basic rate at which the 463X will *downward-expand* or gate
A? enfii nal jIt115 rate .1a sct by the non-linear capacitor circuit made up
ul 0A :P and Jts associated components connected to pin 6of the detector.
When the voltage changes at pin 6are large, this circuit looks like a
small capacitor and sets the release rate at 125dB/second. When the
voltage changes are small, this circuit looks like amuch larger capacitor
vith arelease rate of about 25dB/second. This unique feature eliminates
any increase in distortion at lo* frequencies.
When connected to another 463X for stereo operation, pin 6of the
jetector Is tied directly to pin 6of the detector in the other unit via
the ring on the Stereo Strapping Jack. By making this connection, the
iudio levels of each unit are combined, and the output of the detector at
m’ ri 7Is the true rms sum of the two levels, reqsrdless of the relative
>hese between them.

Threshold Circuit
The output of the RMS Detector Is then fed to the OverEasy threshold
circuit Bade up of 0A4A, 0A5A, 0A5B, and their associated components. 0A4A
Is an Inverting summer that sums the voltages froa the RMS Detector, front
panel Threshold control .R38, and the temperature compensating diode, CR4.
Also added here Is asmall offset voltage from R69 to calibrate the
Threshold control. When the Inversion of the sum of these voltages Is less
than zero, CR5 Is reverse biased and the output at TP12 Is 0volts. This
Is the case when the level of the audio signal Is greater than the setting
of the Threshold control and no gating Is desired. When the output of 0A4A
Is greater than zero, as Is the case when the audio signal Is below the
Threshold setting, CR5 will begin to conduct, causing acontrol voltage to
be generated. This control voltage Is then further processed by the
Attenuation Limit and Expansion Processor circuits where It ultimately
goes to the VCA which attenuates the audio signal. The turn-on
characteristics of CR5 give the circuit agentle transition Into gating
for the first 6dB or so of downward expansion.
0A5A acts as acomparator and turns on the yellow Threshold LED
whenever the audio signal level Is above the Threshold setting. The minus
Input to this comparator comes from the output (pin 1) of 0A4A described
above. The plus Input comes from 0A5B which subtracts out the temperature
compensating voltage that was added In at 0A4A. This voltage Is normally
about 300mV but gets pushed to 7.5 Vwhen the Slave switch Is activated.
This Insures that the LED will be off during Slave operation.
Attenuation Limit Circuit
When the voltage at TP4 Is less than about lOOmV, 0A4B acts as an
/*n^f rter a9a1n 14.6. As the voltage increases above this level,
begins to conduct and will ultimately limit the output voltage from
0A4B to 1.4 V. This controls the maximum amount of attenuation at the VCA.
Resistors R44 and R68 form avoltage divider for the feedback through the
diode, allowing the output to go to 1.4 volts even though the voltage
across the diode Is 0.5 volts.
Expansion Processor
The amplitude of this control voltage Is adjusted by the front panel
potentiometer R67, the More control. This Is where the actual amount of
gating action Is set by the user. The gating characteristics are further
modified by 0A3B and CR3, which create an additional "OverEasy* circuit.
When the control voltage levels are small, CR3 is in its transition region
of conduction and the gating action is relatively slow and gentle. As the
control voltage becomes large, as Is the case when the More control Is set
to Its maximum position, CR3 Is biased full on and the resulting gating
action is fast and severe. The temperature compensating voltage from CR4
is summed in through R40 along with asmall offset adjustment voltage from.
R1
8
.

0A3A Is an Inverting buffer for the signal through CR3 with again of
sinus two. Its output Is sent to the LED display, the tip of the Strapping
jack, and the VCA. R24 Is added Inside the feedback loop to help protect
this op-amp from Improper connections at the Strapping jack. When the
Slave switch, SI, Is activated the output of 0A3A Is disconnected and the
VCA now gets Its control voltage from the signal externally connected to
the tip of the Strapping jack. The control voltage Is scaled at 16mV/dB at
this point and Is divided down to 6mV/dB at the VCA by R8 and R12.
LED Display
Q1 provides aconstant current of approximately 10mA for the string of
12 LEDs. The comparators IC3, IC4, and IC5, shunt this current to the -15v
supply when the control voltage (16mV/dB) Is less than the reference at
the minus Input of each comparator section. When the control voltage
exceeds the reference voltage, the comparator section becomes an open
circuit and allows the current to flow through the LED connected to that
section, turning It on. All LEDs above this point will be on, and all LEDs
below this point will be off. When the 'Slave* switch Is pressed, this
current Is sent to the Slave LED, turning It on and the entire string off.
Power Supply
The voltage selector switch, located on the rear panel, connects the
dual primary windings of the power transformer In parallel for 120 volt
operation and In series for 240 volt operation. The center tapped
secondary of the transformer reduces the primary voltage to about 48v ac
rms, which Is full-wave rectified by the diodes CR21, CR22, CR23, and
CR24. The plus and minus 24v dc Is smoothed by capacitors C28, C29, C30
and C31 and checked at TP7 and TP8. The voltage regulators VR1 and VR2
reduce this voltage to aconstant +and -15 volts dc which is used for
most of the circuitry In the 463X and can be monitored at TP9 and TP10
respectfully. The front panel *Power* LED Is connected to the -24v supply
through R66 and Is used to indicate connection to alive sc mains.

Troubleshooting and alignment
Before attempting any troubleshooting or alignment, study the 463X
owners manual to familiarize yourself with the unit. The manual covers the
operation of all controls, specifications for Inputs and outputs, correct
hook-up etc. The following procedures assume abasic understanding of the
operational details of the 463X.
1. Instruments Required:
A. Audio-frequency sine-wave oscillator with 50-ohm output Impedance
(Krohn-HIte 4200A or equivalent).
B. Oscl 11oscope with 10-MHz bandwidth and 2»V per division sensitivity.
(Philips PM 3233 or equivalent)
C. Dc voltneter capable of measuring lmV (Fluke 8060A or equivalent).
D. Ac voltmeter with rms response (Fluke 8086A or equivalent).
E. Distortion meter, with low distortion oscillator If necessary,
capable of measuring THD to less than 0.02S.
(Sound Technology Model 1700B or equivalent)
2. Inspection and warm-up:
Inspect the unit for any signs of external damage such as acut line
cord or broken controls. Check the position of the voltage selector
switch on the rear panel and ensure that It Is set correctly for the
ac mains voltage you are using. Connect the 463X to alive ac outlet
and let it warm up for at least 10 minutes before making any
adjustments.
3. Disassembly:
Be sure the 463X Is disconnected from any ac outlet. Refer to the
exploded mechanical view and locate the four corner rear panel screws.
Remove only these corner screws and slide out the rear panel about 4
Inches. Carefully disconnect the transformer secondary cables from the
main PCB by sliding apart at the connector. Pull only on the connector
body, If you pull on the wires they may break. Set the rear panel aside
for now and remove the four corner screws from the front panel using the
special hex wrench supplied In the accessory kit. The front panel and main
PCB will now slide out of the chassis intact.
Inspect the PCB for any signs of damage such as burnt-out resistors or
broken wires. It Is not necessary to remove the front panel from the main
PCB unless service is necessary on the LED board or the Level Set pot.
Reconnect the transformer secondary to the main PCB, connect the line cord
to alive ac outlet, and let the unit warm back up for afew minutes.
4. Power Supply Check:
Before attempting any calibration or troubleshooting, check that the
power supply is working correctly. Verify the following.-
iProbe location
TP9
TP10
|TP7
JTP8
Test Condition
+15. OOv
-15. OOv
+24 Vdc
-24 Vdc
Tolerance
+/- 500it. V
+/- 500mV
+/- 3Vdc,
+/- ?Vdc, 750mV ripple
750 mV ripple
I
Table of contents
Other dbx Stereo System manuals