DCS LINA User manual

Lina Master Clock
Getting Started Guide
dCS LINA Master Clock Getting Started Guide A5.indd 2 01/12/2021 16:08

2
View the full User Guide
To view the full User Guide for your LINA Master
Clock, visit https://dcsaudio.com/documentation
Document information
Published on: 14/10/2021
Document ID: DCS322681 - Rev1.0
Copyright
Copyright © 2021 Data Conversion Systems Ltd. All Rights Reserved.
Information contained in this manual is subject to change without notice, and whilst it is
checked for accuracy, no liabilities can be accepted for errors.
dCS is Data Conversion Systems Ltd. Company registered in England No. 2072115.
dCS is a registered trademark of Data Conversion Systems Ltd.
Other product and company names may be trademarks or registered trademarks of other
companies, and are the property of their owners. They are used only for explanation,
without intent to infringe.

3
Introducing the LINA Master Clock
The LINA Master Clock is an optional addition to your LINA system. While
the LINA Network DAC and LINA Headphone Amplifier together deliver
great performance, adding the LINA Master Clock improves the sound
quality when using the network or USB inputs.
The LINA Master Clock generates word clock signals at 44.1 and 48kHz,
which have a very low jitter. After setting the LINA Network DAC to lock to
a word clock, the LINA Network DAC automatically locks to the clock
frequency that is an exact multiple of the incoming audio data. For
example, if the incoming data rate is 192kS/s, the LINA Network DAC
selects the 48kHz clock.
The LINA Master Clock cannot be used with source devices
connected to the AES or SPDIF inputs on the LINA Network DAC,
because there are no spare word clock outputs to connect an
input to, such as a CD Transport. In these cases, select that
input on the LINA Network DAC and use the Audio sync mode.
4
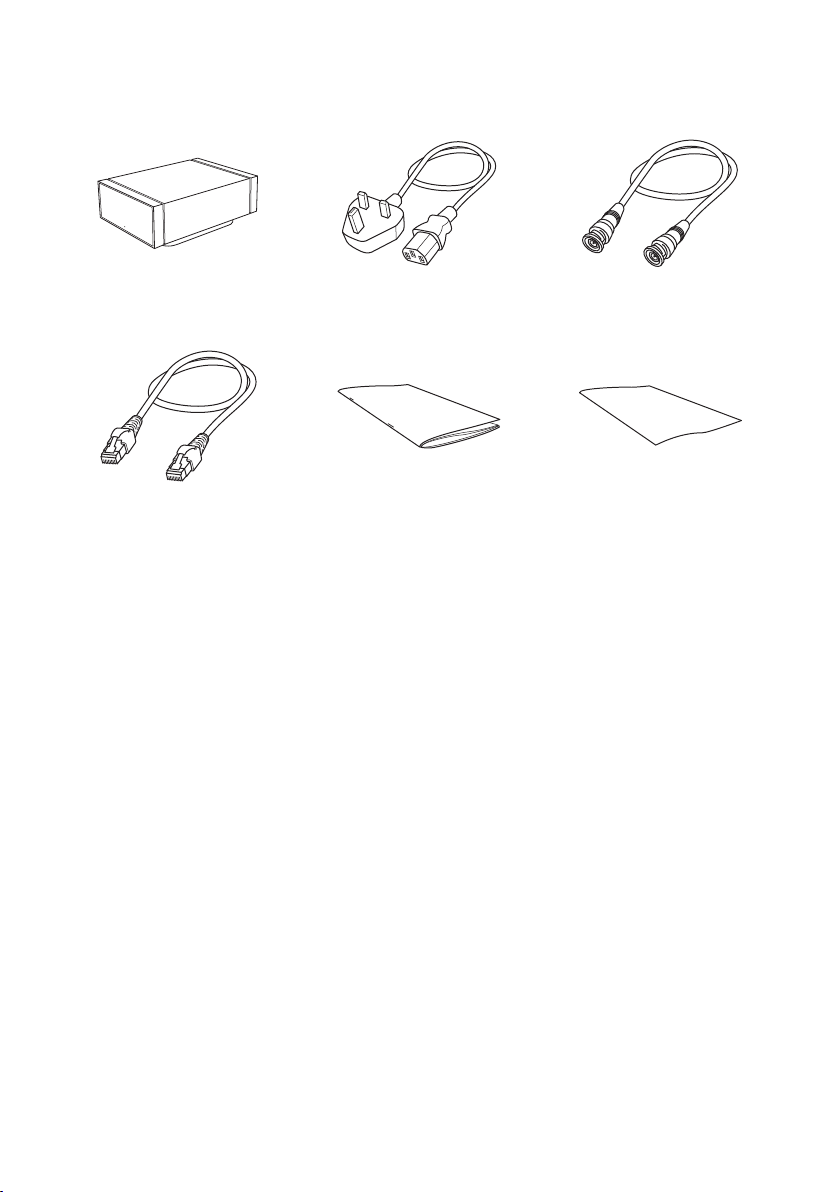
What's in the box
dCS LINA Master Clock Power cable (2m) 2x BNC cable (0.5m)
Power Link cable
(0.5m) Getting Started Guide Welcome letter
5
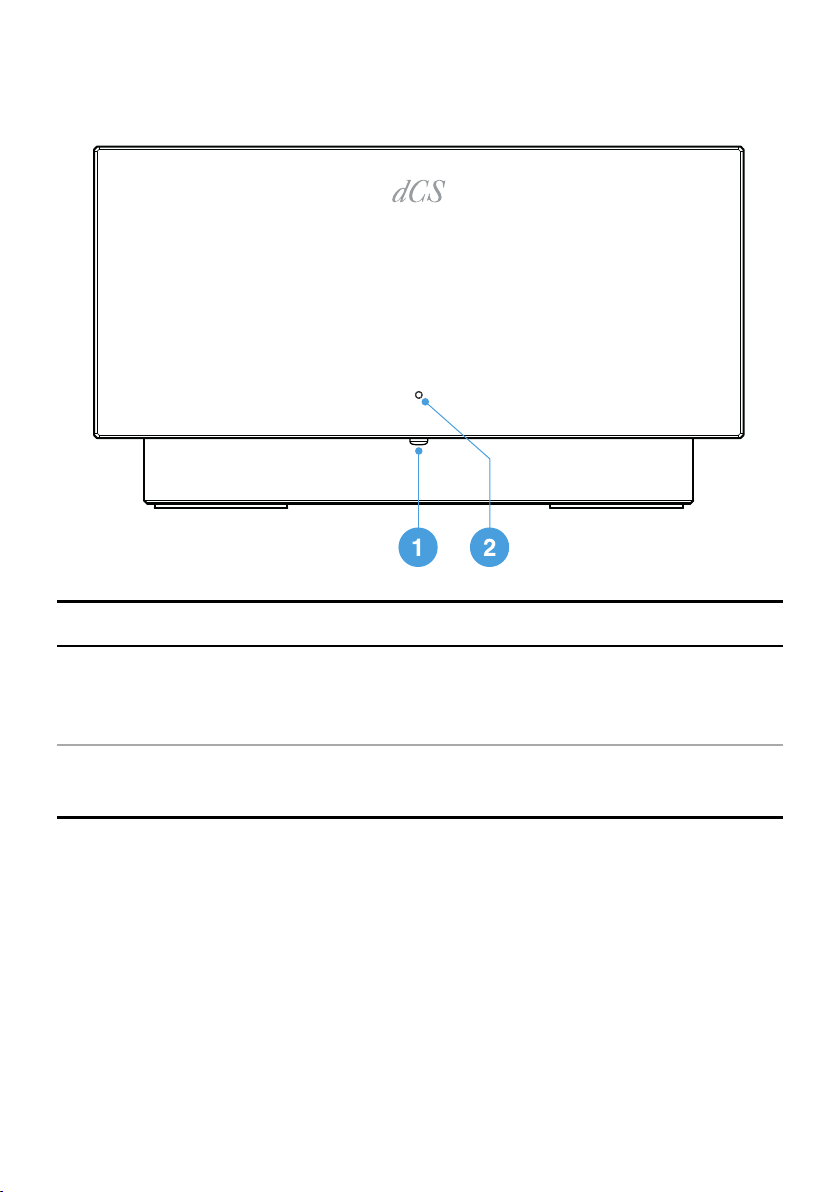
Front
Item Description
1
Power
button To switch on or enter sleep mode, press briefly.
To switch off, press and hold until the status indicator
turns off.
2Status
indicator
When in sleep mode, the status indicator is dim white.
When the unit is on, the status indicator is bright white.
6
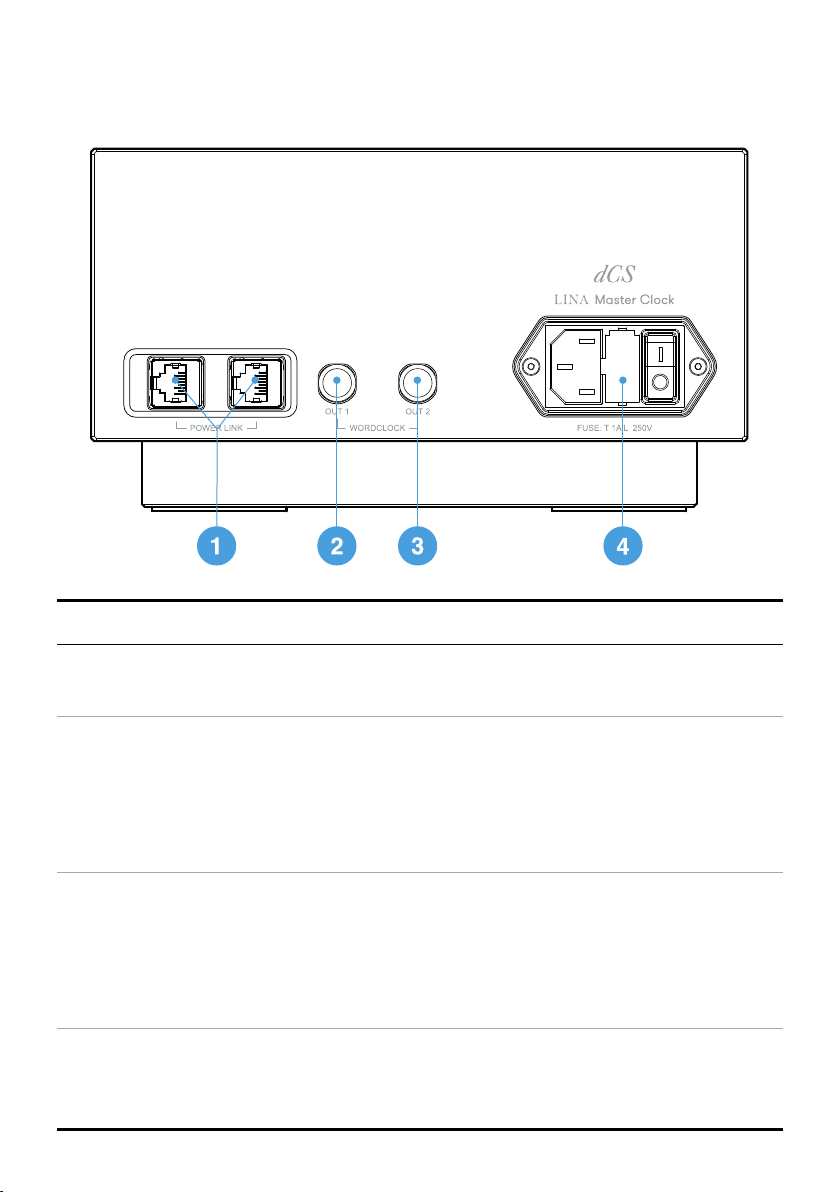
Rear
Item Description
1
POWERLINK
RJ45 input. Connects the unit to other LINA units to
enable Power Link.
2
WORDCLOCK
OUT1
Word clock output1. A 75ΩBNC connector, fixed at
44.1kHz.
Connects the unit to an audio device such as a DAC.
Word clock is only used for synchronisation and does not
carry digital audio data.
3
WORDCLOCK
OUT2
Word clock output2. A 75ΩBNC connector, fixed at
48kHz.
Connects the unit to an audio device such as a DAC.
Word clock is only used for synchronisation and does not
carry digital audio data.
4Power socket,
fuse, and
power switch
Power is connected via a standard IEC320 connector,
with a power switch and a fuse holder.

7
Setting up
1 2
3
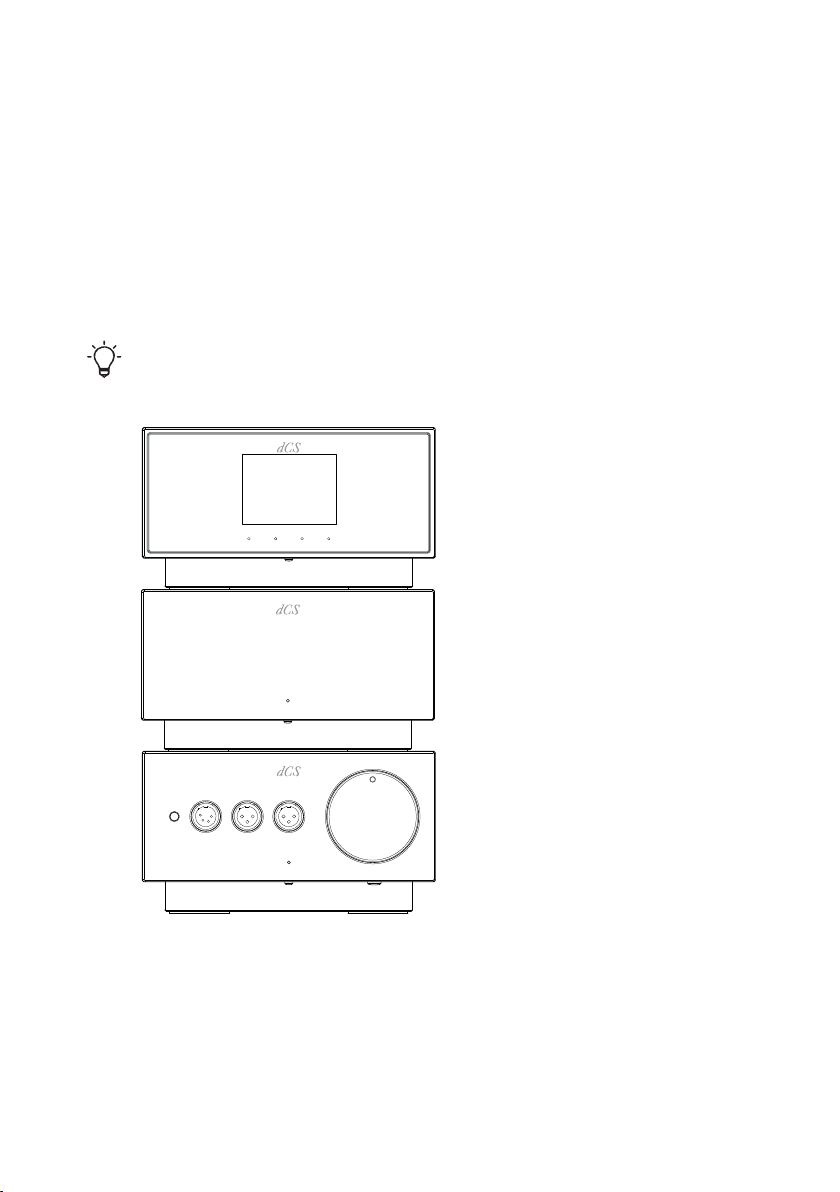
Connecting the LINA range
To connect the LINA Network DAC, LINA Master Clock and LINA
Headphone Amplifier together:
1. Position the LINA range.
2. Connect the LINA Network DAC to the LINA Headphone Amplifier.
3. Connect the LINA Master Clock to the LINA Network DAC.
8
1. Positioning the LINA range
You can position the units in one of the following ways:
• Place the units side by side.
• Stack the units vertically in the following order:
• LINA Headphone Amplifier at the bottom
• LINA Master Clock in the middle
• LINA Network DAC on top
To prevent overheating, we recommend that you leave some
space around the units to allow for ventilation.

9
2. Connecting the LINA Network DAC to the LINA
Headphone Amplifier
You can connect the LINA Network DAC to the LINA Headphone Amplifier
using the balanced XLR sockets.
1. Using two balanced XLR cables, connect the
BAL.LEFT
and
BAL.RIGHT
outputs on the LINA Network DAC to the
BAL.LEFT
and
BAL.RIGHT
inputs on the LINA Headphone Amplifier.
2. On the LINA Headphone Amplifier, choose the unbuffered XLR
input. If the status indicator is not white, press the
Power/Input
button until it changes to white.
3. Connecting the LINA Master Clock to the LINA Network
DAC
You can lock the network and USB inputs on the LINA Network DAC to the
LINA Master Clock.
1. Switch on the LINA Network DAC and the LINA Master Clock.
2. On the LINA Network DAC, choose the network or USB input.

10
3. Using two BNC cables, connect the
WORDCLOCK
output
sockets on the LINA Master Clock to the
WORDCLOCK
input
sockets on the LINA Network DAC.
4. Set the clocking sync mode on the LINA Network DAC to Auto .
The LINA Network DAC selects the appropriate clock input and
locks to it.
If you lock an AES or SPDIF input on the LINA Network DAC to
the LINA Master Clock, the source equipment will not be locked
to the Clock, resulting in periodic clicks, dropouts or distortion.
To use the LINA Network DAC in this way, use source equipment
that has a word clock input and a Master Clock with extra
outputs.
Other manuals for LINA
1
Table of contents
Other DCS Amplifier manuals


