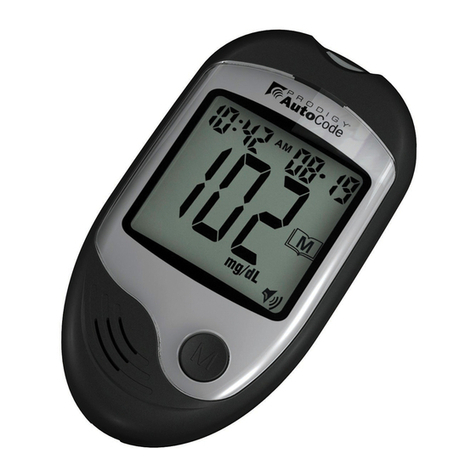
DDI PRODIGY AUDIO 51720 User manual

User’s Manual
Blood Glucose Monitoring Systems
Diagnostic Devices, Inc.
“Talking” “Talking”
No-Coding
Required!
No-Coding
Required!
Model No. 51720
Model No. 51600
Model No. 51810
Model No. 51850

Diag ostic Devices, I c. www.prodigymeter.com 1- 800-243-2636
P R O D I G Y ®
Blood Glucose Monitoring Systems – User’s Manual
Dear
PRODIGY
Owner:
Thank you for choosing one of our
PRODIGY
blood glucose moni-
toring systems. This manual contains important information about the
PRODIGY
system you now own. Please read it thoroughly and care-
fully. A warranty registration card is included with your system.
Please complete it and mail it to us.
PRODIGY
meters are designed to help you and your health care
professionals monitor your blood glucose levels. This manual is
designed to help you use the
PRODIGY
system, and technical
support is available twenty four (24) hours a day and seven (7) days a
week by calling 1-800-243-2636. All questions about interpreting the
results should be directed to your healthcare professionals.
Caution: Before using any product to test your blood glucose,
read all instructions thoroughly and practice the test. Do all
quality control checks as directed and consult with a diabetes
healthcare professional.
This manual is written for four (4) models of the PRODIGY meter:
PRODIGY Advance, PRODIGY Audio, and PRODIGY
Autocode talking meter and non-talking meter.
All four (4) PRODIGY models have the latest technology for blood
glucose monitoring, are easy to use, and will give fast and accurate
results with a minimal sample of blood. All four (4) PRODIGY
meters have a large screen display for easy reading, and are small and
lightweight for portable convenience. All the PRODIGY meters allow
Alternative Site Testing (AST), as well as have memory and data man-
agement capabilities, with free software available at
www.prodigymeter.com, to give you and your healthcare professionals
powerful graphic tools to manage your diabetes.
PRODIGY Audio and PRODIGY Autocode Talking also include
a speaking (talking) function, which is an acoustic aid for using the
meter and hearing test results. The PRODIGY Autocode meters
(talking and non-talking) are no-coding meters, allowing you to save
time and avoid human error due to improper coding.

IMPORTANT AFETY IN TRUCTION
READ THI BEFORE U ING
The following basic safety precautions should always be taken.
1. Close supervision is necessary when the device is used by, on,
or near children, handicapped persons or invalids.
2. Use the device only for the intended use described in this manual.
3. Do not use strips and control solutions which are not supplied by
the manufacturer.
4. Do not use the device if it is not working properly, or if it has
suffered any damage.
5. Before using any product to test your blood glucose, read all
instructions thoroughly and practice the test. Do all quality control
checks as directed and consult with a diabetes healthcare
professional.
KEEP THE E IN TRUCTION
Diag ostic Devices, I c. www.prodigymeter.com 1- 800-243-2636
P R O D I G Y ®
Blood Glucose Monitoring Systems – User’s Manual

Diag ostic Devices, I c. www.prodigymeter.com 1- 800-243-2636
P R O D I G Y ®
Blood Glucose Monitoring Systems – User’s Manual
Table of Contents
Important Safety Instructions ...........................3
Important Information ...................................5
About Alternative Site Testing (AST) ......................5
Introduction of the System ..............................7
IntendedUse ........................................7
Principle of Meas rement . . . . . . . . . . . . . . . . . . . . . . . . . . . . . . .7
Contents of the System . . . . . . . . . . . . . . . . . . . . . . . . . . . . . . . . . .8
Appearance and Key unction of the Meter . . . . . . . . . . . . . . . . .10
Meter Display Segments . . . . . . . . . . . . . . . . . . . . . . . . . . . . . . . .11
Speaking unction . . . . . . . . . . . . . . . . . . . . . . . . . . . . . . . . . . . . .12
Appearance of the Test Strip . . . . . . . . . . . . . . . . . . . . . . . . . . . . .13
Important Test Strip Information . . . . . . . . . . . . . . . . . . . . . . . . . . .14
Before Testing .......................................15
Checking the Display . . . . . . . . . . . . . . . . . . . . . . . . . . . . . . . . . . .15
Calibration............................................15
About
PRODIGY
Control Solution . . . . . . . . . . . . . . . . . . . . . . . .17
Important Control Solution Test Information . . . . . . . . . . . . . . . . .17
How to Do a Control Solution Test . . . . . . . . . . . . . . . . . . . . . . . . .18
Testing Your Blood ...................................21
Getting a Drop of Blood . . . . . . . . . . . . . . . . . . . . . . . . . . . . . . . . .21
Step-by-Step Test Procedure . . . . . . . . . . . . . . . . . . . . . . . . . . . . .24
Using the Meter Memory ...............................26
Viewing Results on a Personal Computer .................28
Comparing Meter and Laboratory Results . . . . . . . . . . . . . . . .29
Setting the Meter and Deleting the Memory ...............30
Caring for Your Meter .................................35
Maintenance ..........................................35
Battery Replacement . . . . . . . . . . . . . . . . . . . . . . . . . . . . . . . . . . .35
Displaying Messages and Problem-Solving Guide . . . . . . . . . .37
Special Messages . . . . . . . . . . . . . . . . . . . . . . . . . . . . . . . . . . . . . .38
ErrorMessages........................................39
Troubleshooting Guide . . . . . . . . . . . . . . . . . . . . . . . . . . . . . . . . . .42
Specifications .......................................44
Expected Test Results ................................44
ymbols Information ..................................47

5
Diag ostic Devices, I c. www.prodigymeter.com 1- 800-243-2636
Important Information
Severe dehydration and excessive water loss may cause false low
results. If you believe you are suffering from severe dehydration,
consult a healthcare professional immediately.
Elevated blood triglycerides, reducing substances such as uric acid and
ascorbic acid at normal blood concentration, or acetaminophen, dopa,
methyldopa, L-dopa, and tolbutamide at normal blood concentrations
should not significantly affect the test results.
If you are experiencing symptoms that are not consistent with your blood
glucose test results and you have followed all instructions described in
this owner’s manual, call your healthcare professional.
Test results below 60 mg/dL (3.3 mmol/L) indicate low blood glucose
(hypoglycemia). Test results greater than 240 mg/dL (13.3 mmol/L)
indicate high blood glucose (hyperglycemia). If you get results below
60 mg/dL or above 240 mg/dL, repeat the test, and if the results are
still below 60 mg/dL (3.3 mmol/L) or above 240 mg/dL (13.3 mmol/L),
consult your healthcare professional immediately.
Inaccurate results may occur in severely hypotensive individuals or
patients in shock. Inaccurate low results may occur for individuals expe-
riencing a hyperglycemic-hyperosmolar state, with or without ketosis.
Critically ill patients should not be tested with blood glucose meters.
Please refer to your test strip package insert for additional important
information.
About Alternative Site Testing (AST)
Important: There are important limitations to AST. Please consult your
healthcare professionals before you do AST.
What is A T?
Alternative Site Testing (AST) means you can use parts of the body
other than your fingertips to check your blood glucose levels. The
PRODIGY blood glucose meters allow you to test on your palm, fore-
arm, upper arm, calf, or thigh.
P R O D I G Y ®
Blood Glucose Monitoring Systems – User’s Manual

6
Diag ostic Devices, I c. www.prodigymeter.com 1- 800-243-2636
P R O D I G Y ®
Blood Glucose Monitoring Systems – User’s Manual
What is the advantage?
ingertips feel pain more readily because
they are full of nerve endings (receptors). At
other body sites, nerve endings are not so
numerous, and you will not feel as much
pain as you will experience at the fingertip.
When to use AST?
ood, medication, illness, stress, and exer-
cise all can affect blood glucose
levels. Capillary blood at the fingertip
reflects these changes faster than
capillary blood at other sites. Therefore,
if you are testing your blood glucose level
during or immediately after a meal, physical
exercise, or stressful event, take the bloo
sample from your fingertip only.
Use AST only:
•Two hours or more after your last meal.
•Two hours or more after taking insulin.
•Two hours or more after exercise.
Do OT use AST if:
•You have reason to believe you have
hypoglycemia or hyperglycemia.
•Your routine glucose results are often fluc-
tuating.
•You are pregnant.
To increase the accuracy when using AST, rub the puncture
site before extracting blood.
Figure 1

7
Diag ostic Devices, I c. www.prodigymeter.com 1- 800-243-2636
P R O D I G Y ®
Blood Glucose Monitoring Systems – User’s Manual
Introduction of the System
• Intended Use
The system is intended for use outside the body (in vitro diagnostic use
only). It should be used only for testing glucose (sugar) and only with fresh
capillary whole blood samples (from the fingertip, the palm, the forearm, the
upper arm, the calf and the thigh). The system is intended for use in the
home and in clinical settings. It should not be used for the diagnosis of dia-
betes or for the testing of newborns.
Alternative Site Testing (AST) in this system can be used only during steady-
state blood glucose conditions described in the “About AST” section.
• Principle of Measurement
The test is based on the measurement of electrical current generated by the
reaction of glucose with the reagent of the strip. The meter measures electric
current and displays the corresponding blood glucose level. The strength
of the electric current produced by the reaction depends on the amount
of glucose in the blood sample.

Contents of the System
This Manual is written for ALL four (4) PRODIGY systems:
PRODIGY Advance, PRODIGY Audio, PRODIGY
Autocode Talking and Non-Talking meters. Each model is available
either as a meter alone or as a kit. Each kit includes the supplies
needed to start testing your blood glucose, i.e., test strips, control
solution, lancets and lancing device. If you have a meter only, you
can purchase these supplies from your provider. Please check the
“RE ” number marked on the side panel of the box to see if you
have purchased a “Meter Kit” or a “Meter”. Please review the
contents of your purchace to confirm that all of the components are
included as listed below:
8
P R O D I G Y ®
Blood Glucose Monitoring Systems – User’s Manual
Diag ostic Devices, I c. www.prodigymeter.com 1- 800-243-2636
Your “Meter Kit” includes:
• Meter with 2-AAA Batteries
• Carrying Case
• 1- 4ml Bottle of Control Solution
• 10 - Prodigy Test Strips
• 10 - Sterile Lancets
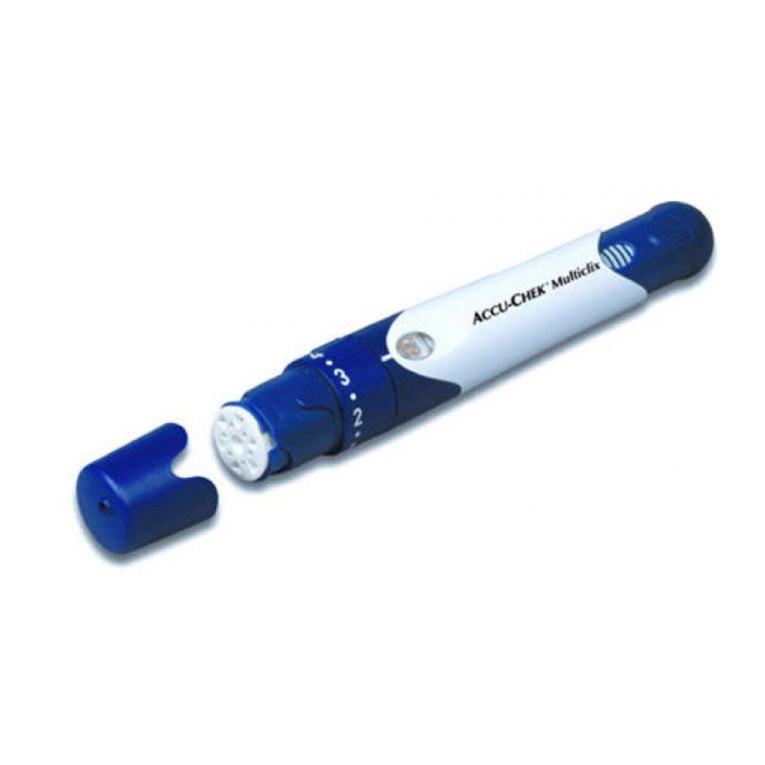
• Lancing Device (with clear cap)
• Complete Instructions:
- Manual
- Log Book
- Quick Reference
- Warranty Card
Your “Meter” includes:
• Meter with 2-AAA Batteries
• Carrying Case
• Complete Instructions:
- Manual
- Log Book
- Quick Reference
- Warranty Card

9
The PRODIGY meters, test strips, and control solutions have
been designed, tested, and proven to work together as a system to
produce accurate blood glucose test results. Use only PRODIGY
control solutions, and use only the proper PRODIGY test strips
for your PRODIGY meter model. PRODIGY Advance
and PRODIGY Audio models use PRODIGY test strips
RE . 52400 and RE . 52100. Both PRODIGY Autocode meters
use PRODIGY Autocode test strips RE . 52800 and RE . 52810.
ote: Check your system to be sure that it is unopened prior to
use and that it contains all parts listed. If your product has been
opened before use or does not contain all parts listed above,
please return your system to the place of purchase.
Diag ostic Devices, I c. www.prodigymeter.com 1- 800-243-2636
P R O D I G Y ®
Blood Glucose Monitoring Systems – User’s Manual

10
Diag ostic Devices, I c. www.prodigymeter.com 1- 800-243-2636
Appearance and Key Function of the Meter
P R O D I G Y ®
Blood Glucose Monitoring Systems – User’s Manual
Figure 2
Figure 3
Figure 4
Test Slot
Insert the test strip here. The meter
will turn on automatically.
Main Button
Press to turn the meter on or perform
other functions described in this
manual.
LCD Display
Guides you through the test using symbols
and simple messages.
Talking Symbol
Appears on PRODIGY Audio and
PRODIGY Autocode to confirm
audio function.
Code Button
On PRODIGY Advance and
PRODIGY Audio, used to code
meter. PRODIGY Autocode meters
do this automatically.
Data Port
or Interface Cable connection to your
computer.
Set Button
(in the back) Located in the battery
compartment, used to set up the
meter.

11
Diag ostic Devices, I c. www.prodigymeter.com 1- 800-243-2636
Meter Display Segments
P R O D I G Y ®
Blood Glucose Monitoring Systems – User’s Manual
Test Strip Symbol
Appears when the meter is turned on.
Blood Drop Symbol
lashes when it is ready to apply the
sample.
Code
Shows current code
number for PRODIGY
Advance and PRODIGY
Audio. PRODIGY
Autocode meters do
this automatically.
Temperature
Symbol
Appears when
ambient temperature
is outside of
operating range.
Day Average
Indicates that the
displayed result is an
average.
Time
Memory Symbol
Appears when you
review the memory.
CTL Symbol
Appears when doing
a control test. Result
will not be stored in
memory.
Date
Voice Symbol
Shows if audio
function is on, for
PRODIGY Audio
and PRODIGY
Autocode (Talking).
Test Result Area
Displays glucose
results. A decimal
point appears when
the measurement
unit is mmol/L.
Low Battery
Symbol
Appears when the
battery power is low.
Ketone Warning
Appears when the
test result is equal
or higher than
240mg/dL
(13.3mmol/L).
Measurement Unit
Appears with the
test result either in
mg/dL or mmol/L.
Figure 5
Face and Low/High
Symbol
Indicates that test
result is outside of
reference range.

12
Diag ostic Devices, I c. www.prodigymeter.com 1- 800-243-2636
Speaking “Talking” Function
(Model o. 51720, 51850 only)
PRODIGY Audio and PRODIGY Autocode Talking meters will
“speak” or “talk” step-by-step through your test. The following table
shows you when the meter “speaks” or “talks” and what it says.
WHE WHAT
does the meter speak?
does the meter say?
Welcome music plays.
When the meter is turned on. Thank you for using
PRODIGY.
When room temperature is The room temperature is
detected. (number) egree Fahrenheit/
degree
Celsius.
When room temperature is Room temperature out of range,
outside operating range, which unable to measure.
is 50º ~104º (10ºC-40ºC).
After inserting test strip and The co e number is (number).
completing code selection. *Only for PRODIGY Audio.
When the meter is ready to test. Please apply bloo into the
( symbol appears on display) strip.
When the test is completed.
The bloo glucose is (number)
(The result appears on display)
milligrams per eciliter/ millimoles
per Liter
When the test result is outside The bloo glucose is out of
measurement range, which is range, unable to measure.
20-600 mg/dL.
When you turn off the meter. Music plays.
P R O D I G Y ®
Blood Glucose Monitoring Systems – User’s Manual

13
Diag ostic Devices, I c. www.prodigymeter.com 1- 800-243-2636
Appearance of the Test Strip
Your system measures the amount of sugar (glucose) in whole
blood. Blood is applied to the absorbent channel of the test strip and
is automatically drawn into the reaction cell.
The test strip consists of the following parts:
P R O D I G Y ®
Blood Glucose Monitoring Systems – User’s Manual
Contact Bars
Insert this end of the strip into the
meter. Push it in firmly until it will
go no further.
Please see pages 21~25, “Testing Your Blood”, for complete
instructions.
Test Strip Handle
Hold this part to insert the test
strip into the meter slot.
Confirmation Window
This is where you confirm whether
enough blood has been applied to
the strip absorbent channel.
Absorbent Channel
Apply a drop of blood here. The
blood will be drawn automatically.
Figure 6

14
Diag ostic Devices, I c. www.prodigymeter.com 1- 800-243-2636
Important Test Strip Information
Each model of the PRODIGY meters uses its own
PRODIGY test strips. The PRODIGY Advance and the
PRODIGY Audio meter will only work with PRODIGY test
strips RE . 52400 and RE . 52100. The PRODIGY Autocode
meters will only work with PRODIGY test strips RE . 52800 and
RE . 52810.
•Store test strip packages in a cool, dry place between
39.2º ~104º (4ºC~40ºC). Keep away from direct sunlight and heat.
Do not refrigerate.
•Store your test strips in their original vial only. Do not transfer
them to a new vial or any other container.
•After removing a test strip from the vial, immediately replace the
vial cap and close it tightly.
•With clean, dry hands, you may touch the test strip anywhere on
its surface when removing it from the vial or inserting it into the
meter.
•Use each test strip immediately after removing it from the vial.
•Apply only a blood sample or control solution to the strip
absorbent channel. Applying other substances to the strip
absorbent channel will cause inaccurate results.
•Write the discard date on the vial label when you first open it.
Discard remaining test strips 90 days after first opening date.
•Do not use test strips beyond the expiration date printed on the
package.
•Do not bend, cut, or alter a test strip in anyway.
Warning: Keep the test strip vial away from children; the vial cap
and the test strips can be a potential choking hazard. Never chew
or swallow a test strip. If this occurs, please seek medical
assistance immidiately.
P R O D I G Y ®
Blood Glucose Monitoring Systems – User’s Manual

Before Testing
Checking the Display
Each time you insert a test strip the meter displays
“CH” and “ ”, which means the meter is
running a series of self-checks. If no problems are
found, the meter proceeds to the next step.
or PRODIGY Audio only, you will hear this
voice message: “The code umber is ( umber).”
Calibration
ote: PRODIGY Autocode meters do not
require calibration. If you are using either of the
PRODIGY Autocode meters, skip this section.
If you are using PRODIGY Advance or
PRODIGY Audio, you will need to
calibrate the meter when you first use it or
when you begin using a new vial of test strips.
To calibrate the Meter, press the Code
Button, and follow these Steps:
A) To Calibrate When the Meter is Off,
Press the Code Button.
The screen displays “Code” and “SEL” ,
and then a flashing code number. Press the
Code Button and repeat until the code num-
ber on the Meter matches the Code Number
printed on the test strip vial. Then press the
Mbutton to set the code. “ ” and “OFF”
then appear, which indicate that calibration
is completed and the meter is turned off.
15
Diag ostic Devices, I c. www.prodigymeter.com 1- 800-243-2636
P R O D I G Y ®
Blood Glucose Monitoring Systems – User’s Manual
Figure 7
Figure 8
Figure 9

16
Diag ostic Devices, I c. www.prodigymeter.com 1- 800-243-2636
B) To Calibrate When the Meter
Has a Test Strip Inserted
Step 1 – Insert the Test Strip
Start with the meter off. Insert a test
strip into the test slot. LCD displays
“CH” and “ ” first, the ambient
temperature next, and finally a
flashing code number.
Step 2 – Match the Code umber
Compare the flashing number with
the code number on the test strip
vial. If the two numbers match, press
the Mbutton or wait 5 seconds to fix
the code. Then “ ” appears, indicat-
ing that you can directly begin
testing. If they do not match, proceed
to Step 3.
Step 3 – Select a Correct Code
While the code number is still flash-
ing, press the Code button to
advance one number. When the
correct code appears, press the M
button or wait 5 seconds to fix the
code. Then “ ” appears. You can
begin testing. If you would like to turn
off the meter, remove the test strip or
wait 2 minutes for the meter to auto-
matically shut down.
Caution: If the code number
displayed on the meter does not
match the number printed on the
vial, test results may be inaccurate.
P R O D I G Y ®
Blood Glucose Monitoring Systems – User’s Manual
Figure 10
Figure 11
Figure 12

17
Diag ostic Devices, I c. www.prodigymeter.com 1- 800-243-2636
About Control Solution
PRODIGY®Control Solutions contain a known amount of glu-
cose, which reacts with the test strips. By testing your Control
Solution and comparing the results with the expected range printed
on the test strip vial label, you can make sure that the meter and the
test strips are working properly together. It is very important that you
do this simple check routinely to make sure you get accurate results.
How often should the control solution test be performed?
•When you use this system to test your blood for the first time,
practice the procedure using control solution. When you can do
three tests in a row that are within the expected range, you are
ready to test your blood.
•To continue to get accurate results, you should perform a test with
control solution at least once a week.
•Also perform a control solution test whenever you begin using
a new vial of test strips, when your test strips are exposed to
extreme environmental conditions (See “Important Test Strip
Information” section of this manual), if you drop the meter, or if
you change the batteries.
Important Control Solution Test Information
•Use only PRODIGY control solutions.
•Check the expiration date on the control solution bottle. Do not use
if expired.
•Control solution, meter, and test strips should come to room
temperature (68-77º / 20-25ºC) before testing.
•Shake the bottle well before use. Discard the first drop of control
solution. After squeezing, wipe off the dispenser tip to avoid
contamination. These steps ensure you to get a good sample
and an accurate result.
P R O D I G Y ®
Blood Glucose Monitoring Systems – User’s Manual

18
Diag ostic Devices, I c. www.prodigymeter.com 1- 800-243-2636
•Use within a period of 90 days from the date that you first open it.
Record the discard date (date opened plus 90 days) on the control
solution bottle. Discard after 90 days.
•Store the control solution tightly closed at temperatures below
86º (30ºC). Do not refrigerate.
ote: The control solution range printed on the test strip vial is
for PRODIGY control solution only. It is used to test meter
and test strip performance. It is not a recommended range for
your blood glucose level.
How to Do a Control Solution Test
Step 1 – Insert Test Strip
Insert a test strip with contact bars end first
into the test slot. (Contact bars must be
inserted all the way into the meter or you
may get an inaccurate test result.) The meter
turns on automatically.
After the “ ” symbol appears on display,
press the Mbutton, and “CTL” appears on
the display. With the “CTL” symbol on the
display, the meter will not store your test
result in memory. If you decide not to
perform a control solution test, press the M
button again and the “CTL” symbol will
disappear.
ote: Every time you perform a control
solution test, you should enter into the
“CTL” test mode so that the test result
will not be stored in the meter memory.
P R O D I G Y ®
Blood Glucose Monitoring Systems – User’s Manual
Figure13
Figure 14

19
Diag ostic Devices, I c. www.prodigymeter.com 1- 800-243-2636
Step 2 – Apply Control Solution
Shake the control solution bottle well.
Remove the cap. Squeeze the bottle, discard
the first drop, and wipe off the dispenser tip
with a clean tissue paper or cotton. Squeeze
the bottle again to get a second drop onto a
clean non-absorbent surface or on your fin-
gertip first. Then apply the drop to the test
strip absorbent channel, (where it meets the
narrow channel) until the drop is drawn into
the test strip and the confirmation window
is filled. The meter begins to count down.
Caution: To avoid contaminating the control solution with the
content of the test strip, you have to place a drop of control solution
on a clean surface or on your fingertip first. Then touch the strip to
the drop.
DO NOT DIRECTLY APPLY CONTROL OLUTION ONTO A TRIP.
P R O D I G Y ®
Blood Glucose Monitoring Systems – User’s Manual
Figure 15
Correct – Figure 16 I correct – Figure 17

20
Diag ostic Devices, I c. www.prodigymeter.com 1- 800-243-2636
Step 3 – A Result Appears in 6 Seconds
After counting to 0, the control solution test
result appears. Compare the result with the
range printed on the test strip vial. The result
should fall within the printed range.
or PRODIGY Audio and
PRODIGY Autocode Talking only. You
will hear a voice message, “The blood
glucose is ( umber) (u it)”. (Ex: 137 mg/dL)
Out-of-Range Results
If test results fall outside the range printed
on the test strip vial, check the “Trouble-
shooting Guide” located in the “Displaying
Messages and Problem-Solving Guide”
section and repeat the test.
If you continue to get out-of-range results, it
means that the system may not be
working properly. DO NOT use the system to
test your blood glucose level. If you are
unable to resolve the problem, contact
Technical Support at 1-800-243-2636.
P R O D I G Y ®
Blood Glucose Monitoring Systems – User’s Manual
NORM AL
109-165
Figure 18
This manual suits for next models
3
Table of contents
Languages:
Other DDI Blood Glucose Meter manuals
