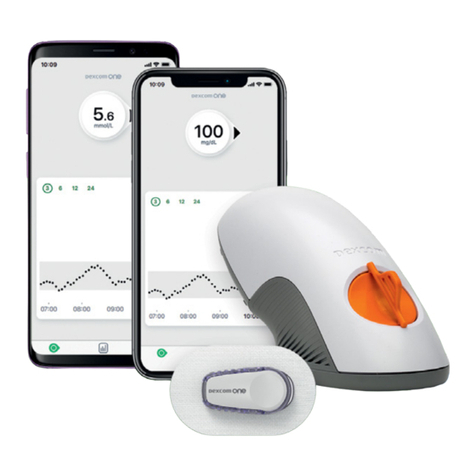
Dexcom one User manual

Welcome
Home screen overview
Alerts
Treatment decisions
Starting a new sensor
Appendices
Instructions For Use
USER GUIDE


Dexcom ONE User Guide 1
Chapter 1 Welcome! � � � � � � � � � � � � � � � � � � � � � 3
1.1 Get started . . . . . . . . . . . . . . . . . . . . . . . . . . . . . . . 3
Chapter 2 Dexcom ONE safety statements� � 5
Indications for use . . . . . . . . . . . . . . . . . . . . . . . . . . . 5
Important user information. . . . . . . . . . . . . . . . . . . . 5
Contraindication . . . . . . . . . . . . . . . . . . . . . . . . . . . . . 5
Warnings. . . . . . . . . . . . . . . . . . . . . . . . . . . . . . . . . . . .6
Start up safety statements . . . . . . . . . . . . . . . . . . . . .8
System/hardware/software safety statements. . . .8
Transmitter safety statements. . . . . . . . . . . . . . . . . 11
Display device safety statements . . . . . . . . . . . . . . 12
Chapter 3 Display device screens � � � � � � � � � 15
3.1 Home screen . . . . . . . . . . . . . . . . . . . . . . . . . . . . 15
3.2 Reports. . . . . . . . . . . . . . . . . . . . . . . . . . . . . . . . . 21
3.3 Screen issues. . . . . . . . . . . . . . . . . . . . . . . . . . . .22
Chapter 4 Alerts � � � � � � � � � � � � � � � � � � � � � � � � 23
4.1 Low and high alerts . . . . . . . . . . . . . . . . . . . . . .24
4.2 Turn on alerts . . . . . . . . . . . . . . . . . . . . . . . . . . .25
Chapter 5 Treatment decisions � � � � � � � � � � � 29
5.1 When to use your BG meter instead of your
Dexcom ONE. . . . . . . . . . . . . . . . . . . . . . . . . . . .29
5.2 When to watch and wait . . . . . . . . . . . . . . . . . . 31
5.3 How to use the trend arrows . . . . . . . . . . . . . .32
5.4 Treat with professional advice . . . . . . . . . . . . .32
5.5 Practice making treatment decisions . . . . . . .32
5.6 Additional treatment help . . . . . . . . . . . . . . . .35
Chapter 6 Starting a new sensor session� � � 37
6.1 Remove your sensor . . . . . . . . . . . . . . . . . . . . . 37
6.2 Reuse your transmitter . . . . . . . . . . . . . . . . . . .38
Appendix A Troubleshooting � � � � � � � � � � � � �40
A.1 Accuracy – sensor readings do not
match blood glucose meter value . . . . . . . . . 40
A.2 Accuracy – sensor readings do not
match symptoms . . . . . . . . . . . . . . . . . . . . . . . . 41
A.3 Adhesive patch . . . . . . . . . . . . . . . . . . . . . . . . . . 41
A.4 App shuts off. . . . . . . . . . . . . . . . . . . . . . . . . . . .43
A.5 Cannot hear alerts . . . . . . . . . . . . . . . . . . . . . .43
A.6 Common alerts . . . . . . . . . . . . . . . . . . . . . . . . .44
A.7 End sensor session early . . . . . . . . . . . . . . . . . .48
A.8 Gap in graph . . . . . . . . . . . . . . . . . . . . . . . . . . . .49
A.9 Technical support . . . . . . . . . . . . . . . . . . . . . . .49
A.10 Recharge receiver . . . . . . . . . . . . . . . . . . . . . .50
A.11 Water and Dexcom ONE . . . . . . . . . . . . . . . . .50
Appendix B Dexcom Clarity � � � � � � � � � � � � � � 51
Table of Contents
Dexcom ONE User Guide
2
Appendix C Taking care of your
Dexcom ONE � � � � � � � � � � � � � � � � � � � � � � � � � � � 52
C.1 Dexcom ONE storage and maintenance . . . .52
C.2 System disposal . . . . . . . . . . . . . . . . . . . . . . . . .53
Appendix D Packaging Symbols � � � � � � � � � � 54
Appendix E Risks and Benefits� � � � � � � � � � � � 57
E.1 Risks. . . . . . . . . . . . . . . . . . . . . . . . . . . . . . . . . . . . 57
E.2 Benefits . . . . . . . . . . . . . . . . . . . . . . . . . . . . . . . .59
Appendix F Dexcom ONE Warranty � � � � � � � 61
F.1 Dexcom receiver limited warranty .........61
F.2 Dexcom sensor limited warranty . . . . . . . . . . .63
F.3 Dexcom transmitter limited warranty . . . . . . .64
Appendix G Technical information � � � � � � � � 67
G.1 Device performance characteristics
summary . . . . . . . . . . . . . . . . . . . . . . . . . . . . . . . 67
G.2 Product specifications . . . . . . . . . . . . . . . . . . .68
G.3 Radio regulations compliance. . . . . . . . . . . . . 75
Appendix H Professional use instructions� � 76
H.1 Introduction . . . . . . . . . . . . . . . . . . . . . . . . . . . . 76
H.2 Prepare Dexcom ONE for patient . . . . . . . . . . 76
H.3 Explain to patient what Dexcom ONE is
and how it works . . . . . . . . . . . . . . . . . . . . . . . .79
H.4 Set up Dexcom ONE with patient . . . . . . . . .79
H.5 Follow up with patient . . . . . . . . . . . . . . . . . . 80
H.6 Next steps . . . . . . . . . . . . . . . . . . . . . . . . . . . . . 81
Appendix I Glossary � � � � � � � � � � � � � � � � � � � � �82
Index � � � � � � � � � � � � � � � � � � � � � � � � � � � � � � � � � � 86

Dexcom ONE User Guide 3
Welcome!
Chapter 1
Welcome!
Congratulations on making the Dexcom ONE
Continuous Glucose Monitoring (CGM) System
(Dexcom ONE) part of your life!
1.1 Get started
To set up your Dexcom ONE, follow instructions in
the Start Here guide or the Dexcom ONE video
tutorials available at dexcom.com.
This booklet, the Dexcom ONE User Guide,
introduces you to the home screen, shows you how
to turn on alerts and customize your alert sounds,
guides you through making treatment decisions,
and shows you how to start a new sensor session.
Images in this guide are representational. Your
materials may look different.
Optional receiver may not be available in all regions.

Dexcom ONE User Guide
4
Welcome!
Critical safety notices
Dexcom ONE alerts
No glucose alerts unless you turn them on.
• Turn on alerts during setup to get glucose and
system alerts when sensor warmup is over.
Dexcom ONE alerts will NOT override your
smartphone’s settings.
• You will NOT hear high or low glucose alerts if
your phone is set to silent (sound is turned off)
• You will hear alerts ONLY when your
smartphone's sound is turned on.
• Check your smartphone’s settings or you may
miss an alert.
Dexcom ONE alerts will NOT override your
receiver settings.
• If your receiver is set to vibrate, you will not hear
high or low glucose alerts.
• Turn on receiver sound to hear alerts.

Dexcom ONE User Guide 5
Dexcom ONE safety statements
Chapter 2
Dexcom ONE safety
statements
Indications for use
The Dexcom ONE Continuous Glucose Monitoring
System (Dexcom ONE) is a glucose monitoring
system indicated for persons, including pregnant
women, ages 2 years and older. Dexcom ONE is
designed to replace fingerstick blood glucose (BG)
testing for diabetes treatment decisions.
Interpretation of Dexcom ONE results should be
based on the glucose trends and several sequential
readings over time. Dexcom ONE also aids in
the detection of episodes of hyperglycemia and
hypoglycemia, facilitating both acute and long-term
therapy adjustments.
Dexcom ONE is intended for use by patients at
home and in healthcare facilities.
Important user information
Please review the product instructions before
using Dexcom ONE. Indications, contraindications,
warnings, precautions, and other important user
information can be found in the product instructions
that are included with Dexcom ONE. You and your
healthcare professional must discuss how you
should use the information displayed on Dexcom
ONE to help manage your diabetes. Getting familiar
with the system could take days, weeks, or even
months. The product instructions contain important
information on troubleshooting Dexcom ONE and on
the performance characteristics of the system.
Contraindication
• No MRI/CT/diathermy – MR unsafe
Do not wear any component of Dexcom ONE
during magnetic resonance imaging (MRI),
computed tomography (CT) scan, or high-
frequency electrical heat (diathermy) treatment.
MR

Dexcom ONE User Guide
6
Dexcom ONE safety statements
Dexcom ONE has not been tested in those
situations. The magnetic fields and heat could
damage the components of Dexcom ONE, which
may cause it to display inaccurate CGM sensor
glucose readings (Dexcom ONE readings) or may
prevent alerts. Without Dexcom ONE readings or
alert notifications, you might miss a severe low
or high glucose event.
Warnings
• Read user materials
Before you use your Dexcom ONE, carefully read
the materials included with it. If you do not, you
might:
• Not use Dexcom ONE correctly
• Not understand Dexcom ONE information
• Affect how well it works
• Do not ignore low/high symptoms
Do not ignore how you feel. If your glucose alerts
and Dexcom ONE readings do not match what
you are feeling, use your blood glucose meter (BG
meter) to make diabetes treatment decisions or, if
needed, seek immediate medical attention.
When in doubt, get your BG meter out.
• No number, no arrow, no CGM treatment
decision
If your Dexcom ONE does not show a number
or arrow, or your Dexcom ONE readings do not
match your symptoms, use your BG meter to make
diabetes treatment decisions.
No number, no arrow, no treatment decision. When
in doubt, get your BG meter out.
• Do not use if…
Do not use Dexcom ONE if you are on dialysis, or
critically ill. It is not known how different conditions
or medications common to these populations may
affect performance of the system. Dexcom ONE
readings may be inaccurate in these populations.

Dexcom ONE User Guide 7
Dexcom ONE safety statements
• Take Healthcare Professional Advice
Has your healthcare professional given you self-
monitoring tasks? You should keep doing them.
Having Followers does not replace medical advice.
Follow Dexcom ONE instructions. If you do not, you
could have a severe low or high glucose event.
Precaution
• Avoid sunscreen and insect repellent
Some skin care products, such as sunscreens
and insect repellents, can make the plastic used
in your Dexcom ONE crack. Before using your
Dexcom ONE, make sure there are no cracks in
your transmitter and transmitter holder. If you
find a crack, please contact Technical Support
at dexcom.com, or contact your local Dexcom
representative. Do not allow these skin care
products to contact your Dexcom ONE. After
using skin care products, wash your hands
before touching your Dexcom ONE. If any
skin care products get on your Dexcom ONE,
immediately wipe with a clean cloth.
• Hydroxyurea precaution
If you are taking hydroxyurea, your Dexcom ONE
readings may be falsely elevated and result in
missed hypoglycemia alerts or errors in diabetes
management decisions. The level of inaccuracy
depends on the amount of hydroxyurea in your
body. Use your BG meter.
• Going through security check point
When wearing your Dexcom ONE, ask for
hand-wanding or full-body pat-down and
visual inspection instead of going through
the Advanced Imaging Technology (AIT) body
scanner (also called a millimeter wave scanner)
or putting any part of the Dexcom ONE system
in the baggage x-ray machine.
You can wear Dexcom ONE for the walk-through
metal detector. If you do, use your BG meter for
treatment decisions until you leave the security
area.
Because we have not tested every x-ray and
scanner, we do not know if they damage
Dexcom ONE.

Dexcom ONE User Guide
8
Dexcom ONE safety statements
Not sure what kind of machine it is? Be safe –
request either hand-wanding or full-body pat-
down.
Start up safety statements
Warnings
• Use BG meter during startup
When you start a new sensor, you will not get
any Dexcom ONE readings or alerts until you
enter your sensor code. Use your BG meter to
make treatment decisions during the 2-hour
sensor warmup period.
Precautions
• Use correct sensor code
When you start a new sensor, you must enter a
code into your display device to use Dexcom ONE.
Each sensor has its own code printed on the
back of the adhesive patch. Do not use a code
from a different sensor or make up a code. If
you do not enter the correct code, your sensor
will not work as well and could be inaccurate.
System/hardware/software
safety statements
Warnings
• Sensor wire breaks off or detaches
Do not ignore broken or detached sensor wires.
A sensor wire could remain under your skin. If
this happens, please contact Technical Support
at dexcom.com, or contact your local Dexcom
representative.
If a sensor wire breaks off under your skin
and you cannot see it, do not try to remove it.
Contact your Healthcare Professional as soon as
possible. Also seek professional medical help if
you have symptoms of infection or inflammation
– redness, swelling, or pain – at the insertion
site.

Dexcom ONE User Guide 9
Dexcom ONE safety statements
• Where to insert: abdomen, back of arms, or
buttocks?
All patients can use their abdomen or back of
upper arms. Patients 2 to 17 years old can also
choose their upper buttocks. Look for a place
on your abdomen, back of upper arms, or upper
buttocks where you have some padding.
The sensor is not tested or approved for other
sites. Talk to your Healthcare Professional about
the best site for you.
Ages 2-17 years: Insert in your abdomen, back
of upper arms, or upper buttocks
Ages 18 and older: Insert in your abdomen or
back of upper arms.
Ages 2-17
Can insert in upper
buttocks
Anyone age 2
or older
Can use abdomen or
back of upper arm
• Where to store
You can store your sensors at room temperature
or in your refrigerator – as long as it is between
2°C and 30°C. Do not store sensors in the
freezer.
Precautions
• Do not start sensor past use by date
You can start a new sensor on or before its Use
By date. This gives you full wear.
Starting a sensor past its Use By date may
cause incorrect results.

Dexcom ONE User Guide
10
Dexcom ONE safety statements
The Use By date is in YYYY-MM-DD
(Year-Month-Day) format on the sensor package
label, next to the hourglass symbol.
• Check package
Do not use sensor if its sterile package has been
damaged or opened, because it might cause an
infection.
• Clean and dry skin
Clean and dry your hands and your insertion site
before inserting your sensor.
Wash your hands with soap and water, not gel
cleaners, and then dry them before opening the
sensor package. If your hands are dirty when
you insert the sensor, you may get germs on the
insertion site and get an infection.
Clean your insertion site with alcohol wipes to
prevent infections. Do not insert the sensor until
your skin is dry. If your insertion site is not clean
and completely dry, you run the risk of infection
or the transmitter holder not sticking well.
Make sure you do not have insect repellent,
sunscreen, perfume, or lotion on your skin.
• Where to insert: things to check
Keep the safety guard on until you put the
Dexcom ONE applicator against your skin. If
you remove the safety guard first, you may hurt
yourself by accidentally pushing the button that
inserts the sensor before you mean to.
Change your insertion site with each sensor.
Using the same site too often might not allow
the skin to heal, causing scarring or skin
irritation.
Sensor placement is important. Choose a site:
• At least 8 cm from insulin pump infusion set
or injection site
• Away from waistband, scarring, tattoos,
irritation, and bones
• Unlikely to be bumped, pushed, or laid on
while sleeping

Dexcom ONE User Guide 11
Dexcom ONE safety statements
• Use correct transmitter and sensor
Dexcom ONE components are not compatible
with any previous Dexcom products. Do not
mix transmitters, receivers, and sensors from
different generations.
Transmitter safety
statements
Warnings
• Inspect
Do not use a damaged or cracked transmitter. A
damaged transmitter could cause injuries from
electrical shocks and may make Dexcom ONE
not work correctly.
• Use as directed
The transmitter is small and may pose a
choking hazard. Do not put it in your mouth or
let children hold it without adult supervision.
Precautions
• Reuse transmitter – do not throw away
When ending a session, do not throw away the
transmitter. The transmitter is reusable until
Dexcom ONE notifies you that the transmitter
battery is about to expire.
For Healthcare Professionals: Please see
cleaning and disinfection instructions in
Professional Use Instructions.
• Do not start transmitter past use by date
You can start a new transmitter on or beforeits
Use By date to get full use.
Starting a transmitterpastits Use By date may
cause incorrect results.
The Use By date is in YYYY-MM-DD
(Year-Month-Day) format on the transmitter
package label, next to the hourglass symbol.

Dexcom ONE User Guide
12
Dexcom ONE safety statements
Display device safety
statements
Warnings
• Check settings
• Optional alerts: You will be prompted to
turn on the optional alerts when setting up
your Dexcom ONE system. You must turn
them on to get glucose and system alerts.
Follow the instructions and safety warnings
in this user guide to make sure you receive
alerts on your display device.
No glucose alerts unless you turn them on.
Turn alerts on during setup to get glucose
and system alerts when sensor warmup is
over. Dexcom ONE alerts will NOT override
your display device settings. You will NOT
hear high or low glucose alerts if your
display device is set to silent (sound is off).
Check your display device settings, or you
may miss an alert.
• Smartphone volume/sound: Make sure
your smartphone volume is turned up,
not muted and speaker works. If your
smartphone is on mute, “Total Silence,” or
“Do Not Disturb” modes, you will not receive
any alerts related to Dexcom ONE.
• Receiver volume/sound (optional display
device): Test your receiver speaker and
vibrations regularly.
To make sure the speaker and vibrations
work, plug in the receiver to charge. The
Speaker Test screen appears for a few
seconds. Follow the directions on the screen
to test the speaker and vibrations. If it
doesn't beep and vibrate, Contact Technical
Support at dexcom.com or your local
Dexcom representative, and use your app or
BG meter until the receiver is fixed.
• Bluetooth®:When using Bluetooth
headphones, speakers, etc., your alerts
may sound on your display device or on the
smartphone accessory. Each accessory is
different. Test yours so you know where you
will hear your alerts.

Dexcom ONE User Guide 13
Dexcom ONE safety statements
• Notifications (smartphone): Make sure
your smartphone settings allow Dexcom app
notifications to show on your lock screen.
This will allow you to see notifications
without unlocking your phone. During
Dexcom ONE setup, enable Dexcom app
notifications or you will not get alerts.
• Battery: Keep the battery of your display
device charged to avoid missing Dexcom
ONE data.
• Compatibility (smartphone): Before
upgrading your smartphone or its operating
system, check dexcom.com/compatibility.
Automatic updates of the app or your phone
operating system can change settings or
shut down the app. Always update manually
and verify correct device settings afterward.
• Time (smartphone): Let the date and time
on your smartphone automatically update
when you travel across time zones or switch
between standard and daylight-saving times.
Do not manually change your smartphone
time, because it can make the time on the
trend screen wrong and the app may stop
displaying data.
• Do not use receiver if damaged (receiver
is an optional display device): Do not use
a receiver that is damaged or cracked. A
damaged receiver could cause injuries from
electrical shocks and may make the Dexcom
ONE System not work correctly.
Follow Dexcom ONE instructions. If you do
not, you could have a severe low or high
glucose event.
Tips
• Use Dexcom ONE receiver: If you use the
Dexcom receiver, be sure to use the one
that comes with your Dexcom ONE system.
Receivers from previous generations won't work
with the Dexcom ONE system.

Dexcom ONE User Guide
14
Dexcom ONE safety statements
Precautions
• Keep transmitter close to display device:
Keep your transmitter and display device within
6 meters with no obstacles (like walls or metal)
between them. Otherwise, they might not
be able to communicate. If water is between
your transmitter and the display device – for
example, if you are showering or swimming –
keep them closer to each other. The range is
reduced because Bluetooth does not work as
well through water.
• Keep receiver clean and dry (receiver is an
optional display device): Do not submerge
your receiver in water and do not get dirt or
water in the USB port. That could damage it.
• Get alerts on display device you use
You will be prompted to turn on the optional
alerts when setting up your Dexcom ONE
system. You must turn them on to get glucose
and system alerts.
No glucose alerts unless you turn them on.
Turn alerts on during setup to get glucose and
system alerts when sensor warmup is over.
Dexcom ONE alerts will NOT override your
phone’s settings. You will NOT hear high or
low glucose alerts if your phone is set to silent
(sound is off). Check your phone’s settings, or
you may miss an alert.
• Is it on?
If the display device is turned off (shut down), it
will not show Dexcom ONE readings or alerts.
Make sure your display device is turned on.
• Check smartphone accessory devices
When using smartphone accessory devices
(such as headphones or Bluetooth speakers),
keep in mind you may get your alerts on
only one device or accessory, not all. After
connecting any smartphone accessory devices,
make sure that your smartphone settings allow
you to continue receiving alerts.

Dexcom ONE User Guide 15
Display device screens
Chapter 3
Display device screens
This chapter describes the Dexcom ONE glucose
information and navigation features on your display
device.
3.1 Home screen
You spend most of your time on the home screen. It
shows your sensor readings (readings) and glucose
trend information. In the app, the home screen is
called the Glucose screen. Access it by tapping the
Glucose icon in the navigation menu.
Overview
The home screens have 3 main sections:
1. Sensor reading (number) and trend arrow
2. Trend graph
3. Navigation menu or Menu
App home screen
SettingsReportsGlucose
Now11:0010:009:00
2
3.9
10
14.0
18
22
3 Hours 61224
8
.
5
mm
ol
/
L
8.5
mmol/L
Navigation
menu
Sensor
reading
T
rend
graph
Trend
arrow

Dexcom ONE User Guide
16
Display device screens
Receiver home screen
Sensor readings
The number at the top of your home screen is your
current sensor reading. It updates every 5 minutes.
App Receiver
If alerts are OFF, the app background and receiver
text will always be white.
When you turn on your:
• Low Alert: Color changes to red when your
glucose goes too low.
• High Alert: Color changes to yellow when your
glucose goes too high.
2
3.9
14.0
22
Now
mmol/L
8.3
Menu3 Hours
10:30 50%
8:00 9:00 10:00
Menu
Navigation
Sensor
reading
Trend
graph
Trend
arrow
8.5
mmol/L
mmol/L
8.5

Dexcom ONE User Guide 17
Display device screens
Trend arrow
Trend arrows help you predict where your glucose
will be in the next 30 minutes. Use them to be
proactive in managing your diabetes.
App Receiver What it means
Steady
Changing up to:
• 0.06 mmol/L each
minute
• 1.8 mmol/L in 30
minutes
Slowly rising or falling
Changing:
• Between
0.06–0.1 mmol/L
each minute
• Up to 3.4 mmol/L in
30 minutes
Rising or falling
Changing:
• Between
0.1–0.2 mmol/L each
minute
• Up to 5 mmol/L in 30
minutes
Rapidly rising or falling
Changing more than:
• 0.2 mmol/L each
minute
• 5 mmol/L in 30
minutes
No arrow
Cannot determine trend.
Use BG meter to make
treatment decisions.

Dexcom ONE User Guide
18
Display device screens
Trend graph
The trend graph displays current and past readings
and shows your alert levels when alerts are turned
on.
App
Receiver
• Current and past sensor readings: The larger
dot on the right is your current reading. The
smaller dots to the left are your past readings.
• High and Low Alert levels: When alerts are on,
they appear as lines on your trend graph. Low is
red. High is yellow.
• Target range: The gray box shows the
fixed target range of 3.9-10.0 mmol/L, the
international consensus for the recommended
target range.
Now11:0010:009:00
2
3.9
14.0
22
18
10
3 Hours612 24
mm
ol
ol
/
/
L
L
Hours Shown
Current
Sensor
Reading
Alert
settings
High Alert Level
(when alert is on)
Low Alert Level
(when alert is on)
Past sensor readings
14.0
2
3.9
22
8:00 Now9:00 10:00
Menu3 Hours
Menu
Current
Sensor
Reading
Past Sensor
Readings
High Alert Level
(when alert is on)
Low Alert Level
(when alert is on)
Hours shown
Other manuals for one
3
Table of contents
Other Dexcom Blood Glucose Meter manuals
Dexcom
Dexcom Pro Q User manual

Dexcom
Dexcom G5 Mobile User manual

Dexcom
Dexcom G7 User manual

Dexcom
Dexcom G4 Platinum User manual

Dexcom
Dexcom G6 Instruction Manual

Dexcom
Dexcom G4 Platinum User manual

Dexcom
Dexcom G6 User manual

Dexcom
Dexcom G6 User manual

Dexcom
Dexcom STS User manual

Dexcom
Dexcom G4 Professional User manual

Dexcom
Dexcom G4 Platinum User manual

Dexcom
Dexcom G5 Mobile User manual

Dexcom
Dexcom G4 Professional User manual

Dexcom
Dexcom G6 Instruction Manual

Dexcom
Dexcom G4 Platinum User manual

Dexcom
Dexcom G5 Mobile User manual

Dexcom
Dexcom G5 Mobile User manual

Dexcom
Dexcom G6 Pro User manual

Dexcom
Dexcom G5 Mobile User manual

Dexcom
Dexcom G4 Platinum User manual