Deco Gear DecoHome DGSTEPPER User manual

USER MANUAL
DGSTEPPER Step Machine with Handle Bars

- 1 -
Contents
1. Introduction ...........................................................................................4
2. Safety ....................................................................................................4
3. Warnings ...............................................................................................5
4. The Step Machine Parts .........................................................................8
5. Assembly instructions ...........................................................................9
5.1. Package list: ..................................................................................9
5.2. Assembly steps: ..........................................................................11
5.2.1. Step 1: .................................................................................11
5.2.2. Step 2: .................................................................................12
5.2.3. Step 3: .................................................................................13
5.2.4. Step 4: .................................................................................14
5.2.5. Step 5: .................................................................................15
5.2.6. Step 6: .................................................................................15
5.2.7. Step 7: .................................................................................16
5.2.8. Step 8: .................................................................................17
5.2.9. Step 9...................................................................................17
6. The display ..........................................................................................18
6.1. Specifications: .............................................................................18
6.2. Key functions:..............................................................................18
6.3. Operation procedures: .................................................................19
6.3.1. AUTO ON/OFF:.....................................................................19
6.3.2. RESET: ................................................................................19
6.3.3. MODE: .................................................................................19
6.4. Display functions:........................................................................19
6.4.1. TIME: ...................................................................................19
6.4.2. COUNT:................................................................................19
6.4.3. CALORIE:.............................................................................20
6.4.4. REPS/MIN: ...........................................................................20
6.5. Scan: ...........................................................................................20

- 2 -
6.6. Battery:........................................................................................21
6.6.1. When to replace:..................................................................21
6.6.2. Placing/replacing the battery:...............................................21
6.6.3. Recycling the battery: ..........................................................21
7. Workout Guide.....................................................................................22
7.1. General Cardio-Training Principle. ...............................................23
7.1.1. Maintenance/Warm-up: ........................................................23
7.1.2. Aerobic exercise for getting into shape:...............................23
7.1.3. Aerobic training for endurance: ...........................................23
7.2. Cardio-Training Exercise..............................................................24
7.3. Controlling your heartbeat. ..........................................................24
7.4. Phases of a physical activity. .......................................................24
7.4.1 Warm-up phase: progressive effort..........................................24
7.4.2 Training ...................................................................................25
7.4.3 Slowing down ..........................................................................25
7.4.4 Stretching ................................................................................25
7.5. Exercise Range............................................................................26
7.6. Using the Step Machine without the resistance bands..................27
7.7. Using the Step Machine with the resistance bands.......................28
8. Care and Maintenance..........................................................................31
9. Warranty ..............................................................................................32
9.1. Manufacturer's 1-Year Limited Warranty.......................................32
9.2. Procedure for Replacement or Return within the 1 Year. ..............32
10. Notes ...............................................................................................33

- 3 -
Before using this product, please read this User Manual carefully and
follow the information provided to use your Step Machine correctly.
This User Manual contains important safety information and
instructions which should be read carefully before using this
product.

- 4 -
1. Introduction
You have chosen a piece of fitness equipment from DECOHOME. We thank you for
your confidence in us. We have created the DECOHOME brand to provide a way
for all athletes to train at home.
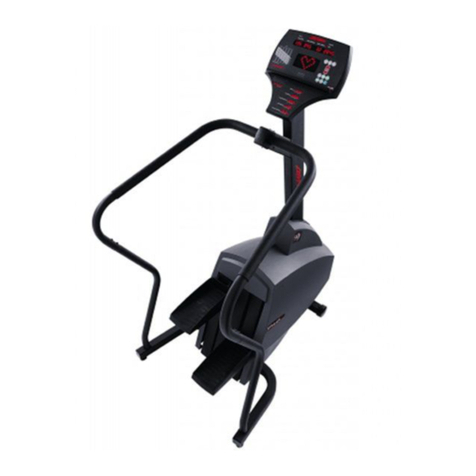
The DGSTEPPER Step Machine is a staircase simulator that uses hydraulic pumps
for doing exercises on the spot.
The Step Machine is a cardio-training machine. Using cardio-training (aerobics
exercise) principles, it improves your endurance (maximum oxygen absorption
capacity) and your physical condition and helps you burn calories (control and lose
weight in association with a diet plan).
Beyond the cardio-vascular and breathing benefits of exercise, the Step Machine
strengthens the bottom, hips and calves with an impact-free movement.
2. Safety
Before starting any exercise program you should consult your doctor to determine if
you have any physical or health conditions that could create a risk to your health
and safety, or prevent you from using the equipment properly.
This is especially important for persons over the age of 35 or persons with pre-
existing health problems. Your doctor’s advice is essential if you are taking
medication that affects your heart rate, blood pressure, or cholesterol level.
Read all the instructions before use. DECOHOME does not accept any
responsibility for any personal injury sustained by or through use of this Step
Machine.

- 5 -
3. Warnings
Warning: To reduce the risk of serious injury, read the important
instructions for safe usage below before using the Step Machine.
1. It is important to read this entire manual before assembling and using the
equipment. Safe and efficient use can only be achieved if the equipment is
assembled, maintained and used properly. Keep this manual for the entire life
of the product.
2. It is your responsibility to ensure that all users of the equipment are properly
informed of all warnings and precautions.
3. DECOHOME disclaims any responsibility for injuries or damage sustained by
any person or property caused by improper use of this product by the
purchaser or by any other person.
4. This product is intended for domestic use only. Do not use this product in any
commercial, rental, or institutional setting.
5. Use this product indoors, away from moisture and dust, on a solid, hard, flat
level surface with a protective cover for your floor or carpet, and in a
sufficiently large space. For safety, the equipment should have at least 1.6
feet (50cm) of free space all around it.
6. Before using the equipment, check that the nuts and bolts are securely
tightened. Some parts like pedals, etc., can loosen over time with excessive
use.
7. The user is responsible for ensuring proper care and maintenance of the
equipment. Prior to each use, check that the non-slip surfaces are still
effective. Check the condition of the parts that are the most subject to wear
and tear.
8. Always use the equipment as indicated. If you find any defective components
whilst assembling or checking the equipment, or if you hear any unusual noise
coming from the equipment during use, stop. Do not use the equipment until
the problem has been rectified.

- 6 -
9. In the event that your product becomes damaged, immediately have any worn
or defective parts replaced by Customer Service Department of DECOHOME.
You can contact support by email at customerservice@decogear.com or call
844-413-2646. Do not use the equipment until it has been completely repaired.
10. Do not try to repair this product yourself.
11. Wear suitable clothing whilst using the equipment. Avoid wearing loose
clothing which may get caught in the equipment or that may re-strict or
prevent movement.
12. Never exercise in bare feet or socks; always wear proper footwear such as
running, walking, or cross training shoes that fit well, provide foot support, and
feature non-skid rubber soles.
13. Make sure to place your feet properly on the parts designed for this purpose
(the left and right pedal).
14. Be careful to maintain your balance while using, mounting or dismounting the
Step Machine, loss of balance may result in a fall and bodily injury.
15. Before undertaking an exercise program, you must consult a physician to be
sure there are no counter-indications, particularly if you have not participated
in sports for several years.
16. Be aware of your body’s signals. Incorrect or excessive exercise can damage
your health. Stop exercising if you experience any of the following symptoms:
Pain, tightness in your chest, irregular heartbeat, extreme shortness of breath,
feeling light headed, dizzy or nauseous. If you do experience any of these
conditions you should consult your doctor before continuing with your exercise
program.
17. Keep children and pets away from the equipment. The equipment is designed
for adult use only. Only one person at a time should use this stepper.
18. DO NOT touch the cylinders while doing exercises. The cylinder may heat
during use.
19. Keep hands feet and hair away from all moving parts.

- 7 -
20. Do not store the product in a damp place (near a swimming pool, in a
bathroom etc.); avoid exposing your Step Machine to sunlight and to
temperatures higher than 50° C or 122° F.
21. The equipment has been tested and certified to EN957 under class H.C.
Suitable for domestic, home use only. Maximum weight of user, 220 pounds
(100kg). Breaking is speed independent.

- 8 -
4. The Step Machine Parts
Main base
Left pedal
Right pedal
Display
Handle bar base
Feet cover (4 pieces)
Hydraulic cylinder (2 pieces)
Handle bars

- 9 -
5. Assembly instructions
One person alone can assemble this product.
All required tools are delivered with the package.
5.1. Package list:
Place all parts from the box in a cleared area and position them on the floor in front
of you. Remove all packing materials from your area and place them back into the
box. Do not dispose of the packing materials until the assembly is completed. Read
each step carefully before beginning.
If you are missing a part, please our Contact support at
customerservice@decogear.com or call 844-413-2646 and order the part needed.
Business Hours:
Mon-Thurs: 9AM–6:30PM
Fri: 9AM–3PM
Sat-Sun: Closed
Part
Quantity
Picture
(see next page)
Main Base
1
A
Handle bars
1
B
Handle bar base (upper part)
1
C
Handle bar base (lower part)
1
D
Adjustment knob
1
E
Flange for fixing the main base on the handle bar
base (lower part)
1
F
Display base
1
G
Display (battery is not included)
1
H
Resistance bands
2
I
Curved spring washers
6
J
Short bolts
6
K
Long bolts
2
L
Wrench
1
M
Hex key / screwdriver
1
N
Small bottle of lubrication oil
1
O
User manual
1
P

- 10 -
Picture overview of the package list
A
B
C
D
E
F
G
H
I
J
K
L
M
N
O
P

- 11 -
After unpacking the unit, open the small plastic bag and make sure that you have all
the fasteners. You should have 6 curved spring washers (J), 6 short bolts (K) and 2
long bolts (L).
5.2. Assembly steps:
5.2.1. Step 1:
You can find the main base (A) completely assembled when you open the box.
The sensor cable is already attached on the main base. Be sure not do
damage this cable.
Put the main base (A) on the floor. Do not put the heavy main base on the
sensor cable because this can damage the cable.
Slide first the sensor cable carefully through the flange. Do not pull on the
cable.
Put the flange (F) for fixing the main base on the handle bar base in the tube
of the main base (A). The positions of the holes in the flange need to be in the
same position as the holes in the tube on the main base.

- 12 -
5.2.2. Step 2:
Slide first the sensor cable carefully through the handle bar base (lower part)
(D). Do not pull on the cable.
Put the handle bar base (lower part) (D) on the flange (F). The positions of the
holes in the handle bar base (lower part) need to be in the same position as
the holes in the flange.

- 13 -
5.2.3. Step 3:
It is time to fix the handle bar base (lower part) (D) on the flange (F). For this
step you need the wrench (M), 5 small bolts (K) and 4 curved spring washers
(J). There are 5 holes to fill up with the screws.
Warning:
Be sure that the curved washers are mounted correctly. The curves of the
washers need to follow the curve of the tube.
Left picture: The washers are incorrect mounted.
Right picture: The washers are correct mounted.
Use J+K for the left hole.
Use J+K for the right hole.
Use K for the front hole.
Use J+K for both holes on the backside.
Use the wrench to
tighten the small
bolts.
J+K
J+K
K
J+K

- 14 -
5.2.4. Step 4:
Put the handle bar base (upper part) (C) in the handle bar base (lower part)
(D).
Be sure that you slide first the sensor cable carefully through the handle bar
base (upper part) (C). Do not pull on the cable.
The positions of the holes in both handle bars (C and D) must be aligned with
each other on the front side of the Stepper Machine. The height of the handle
bar base can me adjusted with the big round knob from 41.5” to 45.5”
(1054mm to 1156mm).
Loose the knob, pull the knob out and move the pin of the knob in one of the
holes to adjust the height. With this feature you can adjustment the handle
bars, allowing users to cater to their specific height and for the machine to be
used by multiple people.

- 15 -
5.2.5. Step 5:
Put the display base (G) on the top of the handle bar base (upper part) (C).
Be sure that you slide first the sensor cable carefully through the small round
opening on top of the display base. Do not pull on the cable.
5.2.6. Step 6:
Fix the handle bars (B) on handle bar base (upper part) (C).
For this step you need to use the hex key / screwdriver (N), 2 long bolts (L)
and 2 curved spring washers (J). There are 2 threaded holes available for the
bolts. Fix the bolts tightly with the hex key.
Warning:
Be sure that the curved washers are mounted correctly. The curves of the
washers need to follow the curve of the tube of the handle bar.

- 16 -
5.2.7. Step 7:
Before mounting the display (H), we refer to chapter 6.6.2 in this User Manual.
Follow the guidelines in that chapter to mount a 1.5V AA battery in the display.
Take the sensor cable out of the small round opening in display base (G). Be
sure that it does not slip back into both handle bar base tubes. Slide the
display (H) on the display base (G) and push the short display cable attached
on the display through the small round opening in display base.
Connect the short display cable to the long sensor cable that comes out of the
handlebar base tubes. Just push gently both connectors at the end of both
cables in each other.
Mount the display base (G) back on the upper handle bar base tube (C).

- 17 -
5.2.8. Step 8:
If you want to use the resistance bands (I), clip the bands with the carbineers
onto the eyelets as shown.
We refer to chapter 7.7. of this user Manual for the use of the resistance
bands on the Step Machine.
5.2.9. Step 9
On the very bottom of the machine base (A) there is an opening for the
adjustment knob (E). Screw the adjustment knob in this hole.
Tighten the knob to increase the resistance of the Step Machine, loosen to
decrease the resistance.

- 18 -
6. The display
6.1. Specifications:
TIME
00:00 ~99:59min
COUNT (CNT)
0 ~9999
CALORIE (CAL)
0 ~9999KCAL
REPS/MIN (STRIDES/MINUTE)
0 ~9999
6.2. Key functions:
MODE-Key: This blue colored key let you to select and lock on to a particular
function you want. It can also reset the display.
RESET-Key: This red colored key resets the display immediately.

- 19 -
6.3. Operation procedures:
6.3.1. AUTO ON/OFF:
The system turns on when any key is pressed or when it sensors an input
from the speed sensor.
The system turns off automatically when the speed has no signal input or if
no key is pressed for approximately 4 minutes.
6.3.2. RESET:
The unit can be reset by either changing battery or pressing the mode key for
3 seconds or by pressing the RESET-key.
6.3.3. MODE:
You can choose to SCAN or to LOCK the data shown on the display.
If you do not want the scan mode, press the MODE key. The pointer will move
from one function to the next function after each press. The function besides
the blinking pointer is selected.
6.4. Display functions:
6.4.1. TIME:
Press the MODE key until the pointer locks on to TIME.
The total working time will be shown when starting the exercise.
The total working time of the previous workout is always memorized. The time
of the new workout will be added to the previous total working time.
6.4.2. COUNT:
Press the MODE key until the pointer locks on to COUNT.
The display automatically accumulates the workout count when starting the
exercise.
The count of the previous workout is always memorized. The count of the new
workout will be added to the previous count.
Table of contents
