Insportline PROFI Imperial User manual

USER MANUAL –EN
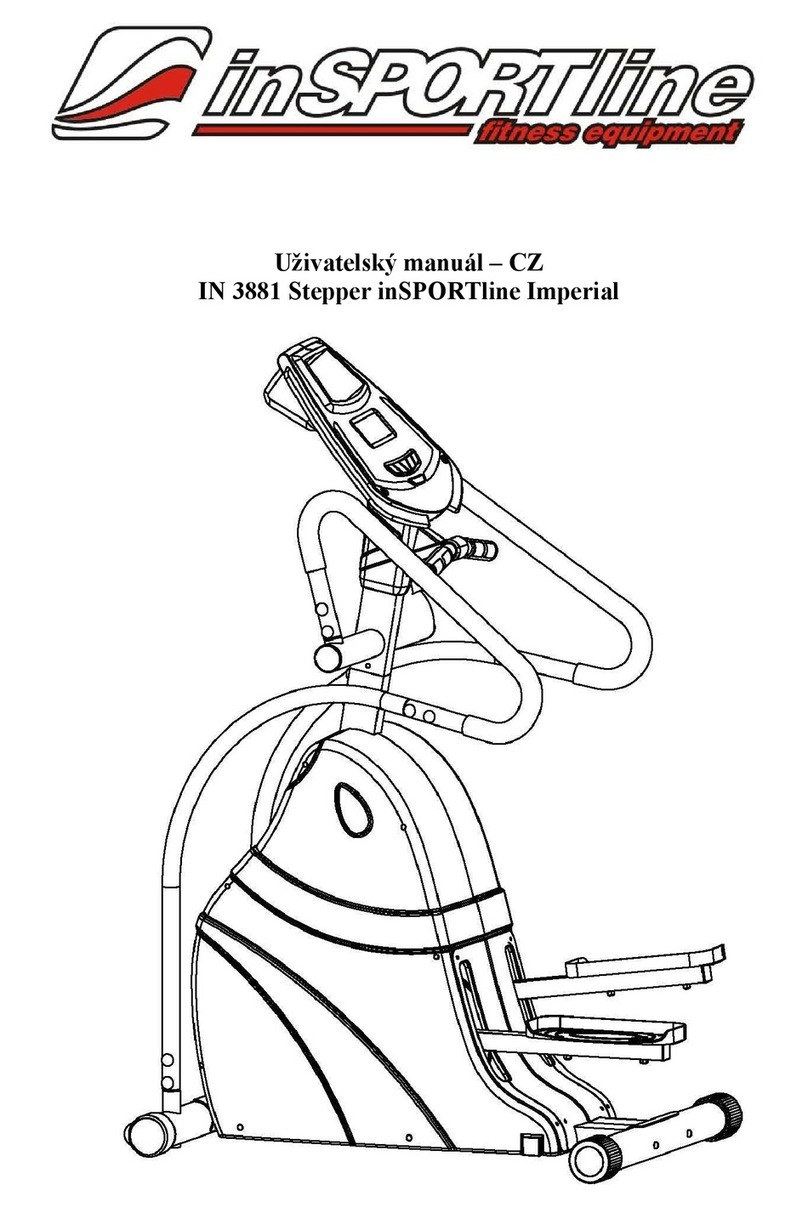
IN 3881 Stepper inSPORTline PROFI Imperial

2
CONTENTS
INTRODUCTION..................................................................................................................................... 3
SAFETY PRECAUTIONS........................................................................................................................ 3
DIAGRAM................................................................................................................................................ 4
PARTS LIST............................................................................................................................................ 4
ASSEMBLY ............................................................................................................................................. 5
Step 1................................................................................................................................................... 5
Step 2................................................................................................................................................... 5
Step 3................................................................................................................................................... 6
Step 4................................................................................................................................................... 6
Step 5................................................................................................................................................... 7
Step 6................................................................................................................................................... 7
Step 7................................................................................................................................................... 8
CONSOLE............................................................................................................................................... 9
Buttons................................................................................................................................................. 9
Display ............................................................................................................................................... 10
Operating range................................................................................................................................. 11
Instructions before exercising............................................................................................................ 11
Operation Instructions........................................................................................................................ 14
Exercising with a Specific Goal:..................................................................................................... 14
Pulse Rate...................................................................................................................................... 14
Manual Program:............................................................................................................................ 14
Preset Programs: ........................................................................................................................... 15
Body Fat Program: ......................................................................................................................... 15
Heart Rate Control Programs:........................................................................................................ 15
User Setting Programs:.................................................................................................................. 15
*Speed Independent Program:....................................................................................................... 15
* Pulse Recovery:........................................................................................................................... 16
GENERAL EXERCISE RECOMMENDATIONS.................................................................................... 16
USE OF STEPPER ............................................................................................................................... 17
EXERCISE INSTRUCTIONS ................................................................................................................ 17
MAINTENANCE .................................................................................................................................... 18
ENVIRONMENT PROTECTION ........................................................................................................... 18
TERMS AND CONDITIONS OF WARRANTY, WARRANTY CLAIMS................................................. 18

3
INTRODUCTION
Thank you for purchasing this product. To use it properly and safely, read the entire manual and
observe all warnings and recommendations.
SAFETY PRECAUTIONS
•WARNING! This product has been designed to offer the maximum safety. Nevertheless,
certain precaution should be kept while using it. Read the whole manual before first using and
retain it for future reference.
•It’s the owner responsibility to use it safely and properly. Instruct all other users in correct
using.
•Use this product only for intended purpose. Don’t do any improper modification.
•Keep it away from children and pets. Never let children unattended near this device.
•Regularly check all bolt, nuts and components, if they are well tightened. Retighten, if
necessary. Regularly check this machine for damage or wearing. Never use damaged or worn
product. All damager or worn parts should be replaced immediately.
•Place it only on a flat, clear and solid surface and keep a safety clearance of at least 0.6 m
round it. Put a mat under this device to protect your floor.
•Use it only indoors and protect it from humidity and dust. Assure sufficient ventilation. Never
exercise in an airless place.
•Don’t put any sharp objects on or near this stepper.
•Always wear appropriate clothes and sports shoes. Avoid too loose dress that can be caught
in device.
•Keep your hands away from moving parts to avoid an injury. No adjustable part should
protrude and obstruct user movements.
•Control your speed and exercise reasonably.
•If you remark it works abnormally, stop using.
•Only one person can use it at time.
•Consult your physician before starting any exercise. It is especially necessary if you are over
35 years of age or if you have some problems. If you feel faintly or remark other health
complications, stop immediately. Don’t use it, if you have health complications or if you take
some medical care.
•Avoid using if you have: leg pain, waist pain, wounded neck, waist, leg, arthritis, rheumatic,
gout, osteoporosis, perfunctory obstacles (heart problems, wrong blood circulation,
hypertension), respiratory complications, sarcomata, thrombus, diabetes, skin irritation,
hyperpyrexia, bone problems, if you are pregnant or have catamenia or similar problems.
•Weight limit: 150 kg
•Dimensions after assembly: 125 x 76 x 160 (l x w x h)
•Category: SC (according to EN957 norm) suitable for semi-commercial, hotel and Club use.
•WARNING! The heart rate frequency monitoring may not be completely accurate.
Overexertion during training can lead to a serious injury or even death. If you start to feel faint,
stop the exercise immediately.
4
DIAGRAM
PARTS LIST
No.
Name
Qty
No.
Name
Qty
1
Main Frame
1
21
Cross Pan Head Bolt M4*12
4
2
Handlebar Post
1
22
Nylon Nut M8
4
3
T-Handlebar
1
23
Acorn Nut
4
4
Handrail (L)
1
24
Flat Washer Ø8
11
5
Lower Handrail (L)
1
25
Control wire
1
6
Handrail (R)
1
26
Flat Washer Ø4
4
7
Lower Handrail (R)
1
27
Arc Washer
18
8
Pedal Arm (L)
1
28
Pulse Sensor Wire
2

5
9
Pedal Arm (R)
1
29L/R
Pedal (L/R)
1
10
Front Stabilizer
1
30
Square Pipe Cap 38*38
4
11
Rolling cap
2
31
Ф60 Round Pipe Cap
2
12
Rear Stabilizer
1
32
Ф32 Round Pipe Cap
2
13
End Cap
2
33
Adapter
1
14
Pedal Fixed Plate
2
34
Cap
16
15
Hex Head Bolt M8*55
4
35
Pulse Sensor
2
16
Hex Head Bolt M8*15
16
36
Console
1
17
Hex Socket Pan Head Bolt M8*58
2
37a/b
Vertical cover
1
18
Hex Socket Pan Head Bolt M8*90
4
38a/b
Bar cover
1
19
Hex Socket Pan Head Bolt M8*15
1
39
Cross bolt
5
20
Extended wire
1
NOTE: Most of the listed assembly hardware has been packaged separately, but some hardware
items have been preinstalled in the identified assembly parts. In these instances, simply remove and
reinstall the hardware as assembly is required. Please reference the individual assembly steps and
make note of all preinstalled hardware.
ASSEMBLY
Before assembling the device, remove all parts from the box, unpack them and check their number
according to the parts list. If the numbers match, you can proceed to the first assembly step. If any part
is missing, contact the complaints department.
Step 1
Attach the stabilizers (10, 12) to the main frame (1), secure them with 4x hex socket pan head bolts
(18), 6x arc washers (27) and 2x acorn nuts (23).
Step 2
Connect the extended wire (20) with control wire (25), then insert the handlebar post (2) to the main
frame (1), secure it with the 4x hex head bolts (16) and 4x flat washers (24), cover the bolts with 4x
caps (34).

6
* Ensure that all bolts and washers are in place and partially threaded in before completely tightening
all bolts.
Step 3
Feed pulse sensor wires (28) through hole in front of handlebar post (2), and out of the top of the
handlebar post. Attach the T-handlebar (3) to the handlebar post, secure in place with the 2x hex
socket pan head bolts (17), 2x flat washers (24) and 2x acorn nuts (23), and then fix the T-handlebar
with hex socket pan head bolt (19) and flat washer (24).
Step 4
Carefully insert the upper part of the lower handle (R) (7) into the lower end of the handle (R) (6). Align
the mounting holes. Secure the handle with 2x hex bolts (16) and 2x arc washers (27). Position the
handle assembly by sliding the upper end of the handle into the handle post on the front post (2), and
at the same time the lower end of the handle into the front stabilizer bracket (10). Align the mounting
holes. Secure the handle in place with 4x hex bolts (16) and 4x arc washers (27) as shown in the
illustration below. Use the 6x caps (34) to cover the bolts. Apply the same mounting procedure when
mounting the other side of the handle.

7
Step 5
Attach the pedal fixed plate (14) and the pedals (29L/R) on the pedal arms (L/R) (8/9) respectively.
Align the mounting holes. Secure with 4x hex head bolts (15), 4x flat washers (24) and 4x nylon nuts
(22) as shown.
Step 6
Fix the bar covers (38a/b) , vertical covers(37a/b) to the T-handlebar (3), handlebar Post (2)
respectively and make sure the covers are fixed properly ,then secure the covers (37a/b, 38 a/b) with
4x cross bolt (39).

8
Step 7
Connect the extended wire (20) , pulse sensor wire (28) with wires from console (36) respectively,
attach the computer (36) carefully onto the bracket and secure in place with the 4x flat washers (26)
and 4x cross pan head bolts (21) which are pre-attached to the console.

9
CONSOLE
AUTO ON /OFF:
The console will turn on automatically if the exercise machine is in motion or you press one of the
buttons ENTER, START/STOP and MODE. If you stop exercising for 256 seconds, console will turn
off
(These operating instructions are for guidance only and the functions marked "*" are
alternative, details depend on the exact type of console.)
Buttons
There are total of 6 buttons including START/STOP, ENTER, MODE, UP, DOWN, and RECOVERY.
A. START/STOP: Starts or stops the program chosen. And, resets the monitor by pressing and
holding for 2 seconds.
B. ENTER: Chooses the functions from PROGRAMS, GENDER, TIME, HEIGHT, WEIGHT,
DISTANCE, WATT, TARGET HEART RATE, AGE, and 10 columns. The chosen function
shall flash. Please note that not all the functions can be selected in every program according
to the types of each program.
C. MODE: Changes the displays of the values between RPM or SPEED, and KJOULE/CAL or
WATT. The values of RPM and WATT show at the same time, or the values of SPEED and
KJOULE/CAL do by pressing it.
D. UP (▲): Selects or increases the values of PROGRAMS, GENDER, TIME, HEIGHT,
WEIGHT, DISTANCE, WATT, TARGET HEART RATE, AGE, and 10 columns.
E. DOWN (▼): Selects or decreases the values of PROGRAMS, GENDER, TIME, HEIGHT,
WEIGHT, DISTANCE, WATT, TARGET HEART RATE, AGE, and 10 columns.
F. *RECOVERY: Starts the function of PULSE RECOVERY.

10
Display
A. START: Indicates the program selected has started.
B. STOP: Indicates the program selected has stopped. And, users are free to change the
programs and the value of functions applied.
C. PROGRAM: Indicates the programs selected from PROGRAM 1 to PROGRAM 15 (or 17).
D. LEVEL –úroveň: Indicates the level of loading selected from LEVEL 1 to LEVEL 16.
E. GENDER –:Display the gender (Male or Female) selected.
F. TIME/ HEIGHT /WEIGHT: Display the value of one selected function depending on the
selected program.
G. RPM/SPEED/KMH (MPH): Display only 1 value of RPM, SPEED, or KMH (MPH) displayed
depending on the program.
H. DISTANCE /FAT –fat %: Display value of one function depending on the program
I. CAL/WATT/BMR: Display value of one function depending on the program.
J. TARGET H.R./ BMI/ AGE: Display value of one function depending on the program.

11
K. HEART RATE /BODY TYPE: Display value of one function depending on the program.
L. LOADING: There are 10 columns of loading bars, and 8 bars in each column. Each column
represents 3 minutes workout (without the change of TIME value), and each bar represents 2
levels of load.
Operating range
Values
Range (Count up)
Count down
Preset
Increase (Decrease)
PROGRAM
1 ~ 17
17 ~ 1
1
1
LEVEL
1 ~ 16
16 ~ 1
N/A
1
GENDER
Male , Female
N/A
Male
N/A
TIME
0:00 ~ 99:59
99:00 ~ 5:00
0:00
1:00
HEIGHT
110.0 ~ 199.5
199.5 ~ 110.0
175.0
0.5
WEIGHT
10.0 ~ 199.8
199.8 ~ 10.0
70.0
0.2
DISTANCE
0.0 ~ 999.0
999.0 ~ 1.0
0.0
1.0
WATT
30 ~ 300
300 ~ 30
100
10
TARGET H.R.
60 ~ 220
220 ~ 60
90
1
AGE
10 ~ 99
99 ~ 10
30
1
Instructions before exercising
•The values calculated or measured by the console are for exercise purpose only, not for
medical purpose.
•The variables may need to change in the programs:
Programs
Variables
P1 ~ P7
TIME, DISTANCE, AGE
P8
GENDER, HEIGHT, WEIGHT, AGE
P9
TIME, DISTANCE, TARGET H.R.
P10 ~ P12
TIME, DISTANCE, AGE
P13 ~ P16
TIME, DISTANCE, AGE, 10 Intervals
P17
TIME, DISTANCE, WATT, AGE

12
Please note that only one value of TIME or DISTANCE can be adjusted. Both values do not exist at
the same time. For example, the value of DISTANCE is “0.0” while the value of TIME is adjusted to be
any number except “00:00”.
•Programs Selection:
There are 17 programs: 1x Recovery, 1x Manual Program, 6x Preset Programs, 1x Body Fat
Program, 4x Heart Rate Control Programs, 4x User Programs, 1x Speed Independent Program,
and 1x Pulse Recovery Measuring.
•Program Graph:
Each column is made of segments. Segments display load and columns time interval of 3 minutes.
Total exercise time is 30 minutes. If you enter time countdown, time is divided into 10 intervals. If
you set exercise time to 40 minutes, each column will represent 4 minutes. Load is displays in
pictures below:
Program 1 (Manual )
Program 2 (Polling)
Program 3 (Valley)
Program 4 (Fat Burn)
Program 5 (Ramp)
Program 6 (Mountain)
Program 7 (Random)
Program 8 (Body Fat )
Program 9 (Target H.R.)
Program 10 (60% H.R.C)

13
Program 11 (75% H.R.C.)
Program 12 (85% H.R.C.)
Program 13 (User setting)
Program 14 (User setting)
Program 15 (User setting)
Program 16 (User setting)
Program 17 (Watt control)
Body type:
According to the% of body fat, body types can be divided into 9 categories:
1. Type –Very slim (5% - 9%)
2. Type –Ideal (10% - 14%)
3. Type –Highly sport (15% - 19%)
4. Type –Sport (20% - 24%)
5. Type –Healthy (25% - 29%)

14
6. Type –Slim (30% - 34%)
7. Type –Slightly obese (35% - 39%)
8. Type –Obese (40% - 44%)
9. Type –Morbid obese (45% - 50%)
BMR: Basal Metabolism Ratio
Your baseline metabolic rate (BMR) shows the number of calories your body needs to function
normally. It does not include any activity, simply put, it is the energy needed to work the heart, breathe,
and maintain a normal body temperature. They are measured when the body is at rest, not at sleep,
and at room temperature.
Formula for calculating BMR:
BMR (women) = 655.0955 + (9.5634 × weight in kg) + (1.8496 × height in cm) - (4.6756 × age in
years)
BMR (men) = 66.473 + (13.7516 × weight in kg) + (5.0033 × height in cm) - (6.755 × age in years)
BMI: Body Mass Index
The body mass index (BMI) helps people determine what their weight should be based on a simple
weight-to-height ratio. BMI is a figure calculated from a person's weight and height, and doctors and
other nutritionists commonly use it to determine underweight, overweight, and obesity in both men and
women.
Operation Instructions
Exercising with a Specific Goal:
A. TIME Control: Sets up a period to exercise. (Except in Program 8)
B. DISTANCE Control: Sets up a certain distance to exercise. (Except in Program 8)
C. BODY FAT Control: Computer designs various programs for different people with different
body fat ratio.
D. WATT Control: Keeps different bodies burning in desire WATT consumed.
E. Heart Rate Control: Keeps users to exercise under a safe heart-beating condition
Pulse Rate
The whole set of heart rate detector include 2 sensors each side. Each sensor has 2 pieces
of metal parts. The correct way to get detected is to gently hold both metal parts each hand.
With the good signals picked up by the computer, the heart mark in the HEART RATE/BODY
TYPE Display shall flash.
* (Options: Chest Belt for wireless pulse system is optional. If wireless pulse system is
adapted, please refer to the leaflet of wireless pulse system. It may not apply to all the
models, only if the option is along with the computer.)
Manual Program:
PROGRAM 1 is a manual program. Press “ENTER” key to select TIME, DISTANCE, and
AGE. Then, press ▲ or ▼ key to adjust the values. The default level of loading is 6. After
pressing “START/STOP” key to exercise, please also apply the heart rate detector
appropriately. Users may exercise in any desire level (by pressing ▲ or ▼ during the
workout) with a period of time or a certain distance. With the input of age, the computer may
suggest a target heart rate to exercise. The suggested heart rate is 85%(220 –age). So, if
the heart rate detected equals to or greater than the TARGET H.R., the value of HEART
RATE will keep flashing. Please note that it is a warning for users to slow down or to
lower the level of loading.

15
Preset Programs:
PROGRAM 2 to PROGRAM 7 are the preset programs. Press “ENTER” key to select TIME,
DISTANCE, and AGE. Then, press ▲ or ▼ key to adjust the values. Users may exercise
with different level of loading in different intervals as the profiles show. After pressing
“START/STOP” key to exercise, please also apply the heart rate detector appropriately.
Users may also exercise in any desire level (by pressing ▲ or ▼ during the workout) with a
period of time or a certain distance. With the input of age, the computer may suggest a target
heart rate to exercise. The suggested heart rate is 85%(220 –age). So, if the heart rate
detected equals to or greater than the TARGET H.R., the value of HEART RATE will keep
flashing. Please note that it is a warning for users to speed down or to lower the level
of loading.
Body Fat Program:
Program 8 is a special program designed to calculate users’ body fat ratio and to design a
specific loading profile for users. With 9 different body types, the computer can generate 9
different profiles for each. Press “ENTER” key to select GENDER, HEIGHT, WEIGHT, and
AGE. Then, press ▲ or ▼ key to adjust the values. After pressing “START/STOP” key to
calculate body fat, please also apply the heart rate detector appropriately. If the detector
cannot pick up any signals, an error message “E3” will show up in the profile display. If it
happens, press “START/STOP” key to calculate again. Then, the calculation values of
FAT%, BMR, BMI, BODY TYPE, and a designed profile will show up shortly. Press
“START/STOP” key to exercise. The profile shown in the display is specially designed for
your body type.
Heart Rate Control Programs:
Program 9 to Program 12 are the Heart Rate Control Programs. In program 9, press “Enter”
key to select TIME, DISTANCE, and TARGET H.R. Users may setup a target heart rate to
exercise in a period of time or a certain distance. In Program 10 to Program 12, press “Enter”
key to select TIME, DISTANCE, and AGE. Then, press ▲ or ▼ key to adjust the values.
Users may exercise in a period of time or a certain distance with 60% Max Heart Rate in
Program10, 75% Max Heart Rate in Program 11, and 85% Max Heart Rate in Program 12.
After pressing “START/STOP” key to exercise, please also apply the heart rate detector
appropriately. In these programs, the computer will adjust the level of loading according to
the heart rate detected. For example, the level of loading may increase while the heart rate
detected is lower than TARGET H.R. Also, the level of loading may decrease while the heart
rate detected is higher than TARGET H.R. As a result, the user’s heart rate will be adjusted
to close the TARGET H.R. in the range of TARGET H.R. –5 and TARGET H.R. +5.
User Setting Programs:
Program 13 to Program 16 are the user-setting programs. Users are free to edit the values in
the order of TIME, DISTANCE, AGE, and the level of loading in 10 intervals. The values and
profiles will be stored in the memory after setup. After pressing “START/STOP” key to
exercise, please also apply the heart rate detector appropriately. Users may also change the
ongoing loading in each interval by pressing ▲ or ▼ key, and they will not change the level of
loading stored in the memory. With the input of age, the computer may suggest a target
heart rate to exercise. The suggested heart rate is 85%(220 –age). So, if the heart rate
detected equals to or greater than the TARGET H.R., the value of HEART RATE will keep
flashing. Please note that it is a warning for users to speed down or to lower the level
of loading.
*Speed Independent Program:
Program 17 is a Speed Independent Program. Press “ENTER” key to select the values of
TIME, DISTANCE, WATT, and AGE. Then, press ▲ or ▼ key to adjust the values. After
pressing “START/STOP” key to exercise, please also apply the heart rate detector
appropriately. During the exercise, the level of loading is not adjustable. In this program,
computer will adjust the level of loading according to the value of WATT setup. For example,
the level of loading may increase while the speed is too slow. Also, the level of loading may
decrease while the speed is too fast. As a result, the calculated value of WATT will close to

16
the value of WATT setup by users. With the input of age, the computer may suggest a target
heart rate to exercise. The suggested heart rate is 85%(220 –age). So, if the heart rate
detected equals to or greater than the TARGET H.R., the value of HEART RATE will keep
flashing. Please note that it is a warning for users to speed down or to lower the level
of loading.
* Pulse Recovery:
It is a function to check the condition of pulse recovery that is scaled from 1.0 to 6.0 while 1.0
means the best and 6.0 means the worst and the increment is 0.1. In order to get rated
correctly, users must test it right after the workout finished by pressing “RECOVERY” key and
then stop exercising. After the key is pressed, please also apply the heart rate detector
appropriately. The test will last for 1 minute and the result will show in the display.
GENERAL EXERCISE RECOMMENDATIONS
Be careful when starting your exercise program, exercise should not take too long, and you should not
exercise more than once every two days. Extend the exercise time gradually every week. Do not set
unattainable goals. In addition to exercising on stepper, perform other sports activities, such as.
swimming, dancing, or cycling.
Always warm up properly before exercising. Stretch or perform gymnastic exercises to warm up for at
least 5 minutes to reduce muscle tension and prevent pain.
Breathe regularly and calmly during exercise.
Make sure you drink properly during exercise. Remember that the recommended daily dose of fluids is
2-3 liters and this increases with physical exertion. The fluids you drink should be at room
temperature.
Always wear comfortable and light clothing and sports shoes when exercising on the device. Do not
wear loose clothing that could get caught in the moving parts of the device during exercise.
Measure your heart rate regularly. If your device does not have a heart rate monitor, consult your
doctor about how you can measure your heart rate yourself. Determine the interval in which your heart
rate will move, the more effective the training. Consider your age and fitness. The following table is
used to determine the optimal heart rate interval:
Age
Heart rate 50 - 75% (of maximum heart rate) -
optimal heart rate
Maximum heart rate 100%
20 years old
100 –150
200
25 years old
98 –146
195
30 years old
95 –142
190
35 years old
93 –138
185
40 years old
90 –135
180
45 years old
88 –131
175
50 years old
85 –127
170
55 years old
83 –123
165
60 years old
80 –120
160
65 years old
78 –116
155
70 years old
75 –113
150

17
USE OF STEPPER
Whether you are looking for a nice figure, relaxation, or improved physical condition, the stepper is an
aerobic equipment that you can quickly enjoy because of its positive influence on the cardiovascular
and circulatory system.
In fact, steppers simulate walking down the stairs. Additionally, compared to just walking down the
stairs, they do not burden the joints and are therefore more suitable for overweight people and people
with joint problems. Because the body is free to move in space and upright, they are also suitable for
people who have some back problems and who do not like, for example, the static position of the
exercise bikes.
The Stepper works by putting your feet on two moving platforms, setting up specific features, and then
moving the weight of your body alternately from one foot to the other. The basic features you can set
for some steppers include step counting, total training time, energy consumption, walking distance or
heart rate. These simpler devices do not contain handholds and are more demanding for stability, but
of course you can also buy one with the holders.
The main muscles involved in the movement are the thigh muscles (quadriceps and hamstrings), the
muscles of the buttocks, but also the calves and some smaller stabilizing muscles. However, the
involvement of individual groups also depends on what you are doing on the stepper.
Deeper exercising uses more quadriceps muscles (quadriceps). Shallow exercising uses hamstrings
and calves.
When exercising on most types of steppers, you can, to a certain extent, adjust the resistance and
intensity of your activity to your performance level, goals, or type of aerobic unit. Take care of the right
stance and avoid moving the knees into the sides or inwards.
EXERCISE INSTRUCTIONS
A successful workout starts with the warm-up phase and ends with the cool-down phase (relaxation).
At the warm-up phase your muscle should be prepared for strenuous workout. The cool-down phase
should protect your body form muscular problems. Follow stretching exercise instructions for warming
up and cooling down your body.
Toe Touch
Slowly bend forward from your waist, letting your back and shoulders
relax as you stretch toward your toes. Reach down as far as you can
and hold for 15 seconds counts.
Tights
With one hand, lean against the wall. Put your other hand down and
grasp your foot. Tighten it to the buttocks, do not overextend your
thighs. Hold for 30 seconds and repeat with the second leg.
Hamstring Stretch
Sit with your right leg extended. Rest the sole of your left foot against
your right inner thigh. Stretch toward your toe as far as possible. Hold
for 30-40 seconds. Relax and then repeat with left leg extended.
Inner Thigh Stretch
Sit with the soles of your feet together with your knees pointing
outward. Pull your feet as close into your groin as possible. Gently
push your knees towards the floor. Hold for 30-40 seconds.

18
Calf-Achilles Stretch
Lean against a wall with your left leg in front of the right and your arms
forward. Keep your right leg straight and the left foot on the floor; then
bend the left leg and lean forward by moving your hips toward the wall.
Hold, then repeat on the other side for 30-40 counts.
MAINTENANCE
•Use only a soft cloth and a mild detergent.
•Do not clean the plastic parts with abrasives or solvents.
•Wipe the sweat after each use.
•Protect the device from moisture and extreme temperatures.
•Protect your device, computer and console from direct sunlight.
•Check the tightening of all bolts and nuts regularly.
•Store in a dry and clean place away from children.
ENVIRONMENT PROTECTION
After the product lifespan expired or if the possible repairing is uneconomic, dispose it according to the
local laws and environmentally friendly in the nearest scrapyard.
By proper disposal you will protect the environment and natural sources. Moreover, you can help
protect human health. If you are not sure in correct disposing, ask local authorities to avoid law
violation or sanctions.
Don’t put the batteries among house waste but hand them in to the recycling place.
TERMS AND CONDITIONS OF WARRANTY, WARRANTY CLAIMS
General Conditions of Warranty and Definition of Terms
All Warranty Conditions stated here under determine Warranty Coverage and Warranty Claim
Procedure. Conditions of Warranty and Warranty Claims are governed by Act No. 89/2012 Coll. Civil
Code, and Act No. 634/1992 Coll., Consumer Protection, as amended, also in cases that are not
specified by these Warranty rules.
The seller is SEVEN SPORT s.r.o. with its registered office in Strakonická street 1151/2c, Prague 150
00, Company Registration Number: 26847264, registered in the Trade Register at Regional Court in
Prague, Section C, Insert No. 116888.
According to valid legal regulations it depends whether the Buyer is the End Customer or not.
“The Buyer who is the End Customer” or simply the “End Customer” is the legal entity that does not
conclude and execute the Contract in order to run or promote his own trade or business activities.
“The Buyer who is not the End Customer” is a Businessman that buys Goods or uses services for the
purpose of using the Goods or services for his own business activities. The Buyer conforms to the
General Purchase Agreement and business conditions.
These Conditions of Warranty and Warranty Claims are an integral part of every Purchase Agreement
made between the Seller and the Buyer. All Warranty Conditions are valid and binding, unless
otherwise specified in the Purchase Agreement, in the Amendment to this Contract or in another
written agreement.
Warranty Conditions
Warranty Period

19
The Seller provides the Buyer a 24 months Warranty for Goods Quality, unless otherwise specified in
the Certificate of Warranty, Invoice, Bill of Delivery or other documents related to the Goods. The legal
warranty period provided to the Consumer is not affected.
By the Warranty for Goods Quality, the Seller guarantees that the delivered Goods shall be, for a
certain period of time, suitable for regular or contracted use, and that the Goods shall maintain its
regular or contracted features.
The Warranty does not cover defects resulting from (if applicable):
•User’s fault, i.e. product damage caused by unqualified repair work, improper assembly,
insufficient insertion of seat post into frame, insufficient tightening of pedals and cranks
•Improper maintenance
•Mechanical damages
•Regular use (e.g. wearing out of rubber and plastic parts, moving mechanisms, joints, wear of
brake pads/blocks, chain, tires, cassette/multi wheel etc.)
•Unavoidable event, natural disaster
•Adjustments made by unqualified person
•Improper maintenance, improper placement, damages caused by low or high temperature,
water, inappropriate pressure, shocks, intentional changes in design or construction etc.
Warranty Claim Procedure
The Buyer is obliged to check the Goods delivered by the Seller immediately after taking the
responsibility for the Goods and its damages, i.e. immediately after its delivery. The Buyer must check
the Goods so that he discovers all the defects that can be discovered by such check.
When making a Warranty Claim the Buyer is obliged, on request of the Seller, to prove the purchase
and validity of the claim by the Invoice or Bill of Delivery that includes the product’s serial number, or
eventually by the documents without the serial number. If the Buyer does not prove the validity of the
Warranty Claim by these documents, the Seller has the right to reject the Warranty Claim.
If the Buyer gives notice of a defect that is not covered by the Warranty (e.g. in the case that the
Warranty Conditions were not fulfilled or in the case of reporting the defect by mistake etc.), the Seller
is eligible to require a compensation for all the costs arising from the repair. The cost shall be
calculated according to the valid price list of services and transport costs.
If the Seller finds out (by testing) that the product is not damaged, the Warranty Claim is not accepted.
The Seller reserves the right to claim a compensation for costs arising from the false Warranty Claim.
In case the Buyer makes a claim about the Goods that is legally covered by the Warranty provided by
the Seller, the Seller shall fix the reported defects by means of repair or by the exchange of the
damaged part or product for a new one. Based on the agreement of the Buyer, the Seller has the right
to exchange the defected Goods for a fully compatible Goods of the same or better technical
characteristics. The Seller is entitled to choose the form of the Warranty Claim Procedures described
in this paragraph.
The Seller shall settle the Warranty Claim within 30 days after the delivery of the defective Goods,
unless a longer period has been agreed upon. The day when the repaired or exchanged Goods is
handed over to the Buyer is considered to be the day of the Warranty Claim settlement. When the
Seller is not able to settle the Warranty Claim within the agreed period due to the specific nature of the
Goods defect, he and the Buyer shall make an agreement about an alternative solution. In case such
agreement is not made, the Seller is obliged to provide the Buyer with a financial compensation in the
form of a refund.
CZ
SEVEN SPORT s.r.o.
Registered Office: Strakonická 1151/2c, Praha 5, 150 00, ČR
Headquaters: Dělnická 957, Vítkov, 749 01
Warranty & Service: Čermenská 486, Vítkov 749 01

20
CRN: 26847264
VAT ID: CZ26847264
Phone: +420 556 300 970
E-mail: eshop@insportline.cz
reklamace@insportline.cz
servis@insportline.cz
Web: www.inSPORTline.cz
SK
inSPORTline s.r.o.
Headquaters, warranty & service center: Električná 6471, Trenčín 911 01, SK
CRN: 36311723
VAT ID: SK2020177082
Phone: +421(0)326 526 701
E-mail: objednavky@insportline.sk
reklamacie@insportline.sk
servis@insportline.sk
Web: www.inSPORTline.sk
This manual suits for next models
1
Table of contents
Other Insportline Stepper Machine manuals

Insportline
Insportline Imperial User manual

Insportline
Insportline Easy step User manual

Insportline
Insportline CT200 User manual

Insportline
Insportline IN 9101 User manual

Insportline
Insportline In 3882 User manual

Insportline
Insportline AVALOR ST 16186 User manual

Insportline
Insportline IN 9100 User manual

Insportline
Insportline 20104 User manual

Insportline
Insportline Cylina IN 9099 User manual

Insportline
Insportline Cylina User manual