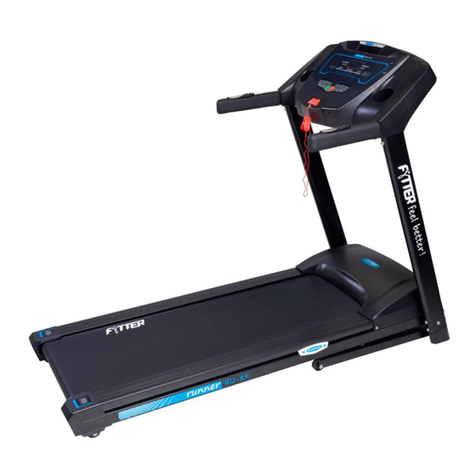
Decora Y600 Series User manual

1
Y600 Series Self-powered Treadmill Manual
Important note
Please keep these instructions
•When using a treadmill, be sure to follow basic precautions, including
the following points: Read all instructions before using this treadmill.
It is the owner's responsibility to ensure that all users of this treadmill
are notified of all warnings and precautions regarding this equipment.

2
•The ultimate commercial environmental use of this product. To ensure
your safety and protection, please read all instructions before use.
warning!
To reduce the risk of personal injury:
•Incorrect or excessive exercise may cause injury. If you experience any
discomfort, including but not limited to chest pain, nausea, dizziness, or
shortness of breath, stop exercising immediately and consult a physician
before continuing.
•Maintain an appropriate speed when exercising.
•Do not wear clothing that may get caught in any part of the treadmill.
•Always wear sports shoes when using this equipment.
•Just grab the front or side handles and jump your feet on the
decorative trims on both sides to get out of the machine.
•Do not jump on a treadmill.
•The treadmill in motion is for single use only.
•Do not use this treadmill if your weigh more than the weight specified
in the instruction manual. Failure to comply will void the warranty.
•When cleaning, wipe the surface of the machine thoroughly with a
slightly damp cloth. Do not use solvents. (See "Maintenance")
•Children under 14 years of age must not approach this equipment.
Teenagers are required to use this equipment under adult supervision.

3
•This equipment is not suitable for persons with poor physical,
perceptual or mental function or lack of experience and the knowledge;
if it is to be used, it must be carried out under the supervision of others,
and the use of the equipment must be instructed by those responsible
for their personal safety.
•Be sure to follow the instructions in the treadmill guide and
instruction manual for the intended use of the treadmill.
•Do not use accessories other than those recommended by the
manufacturer. Improper use of accessories may result in personal injury.
•Do not use the treadmill if it is not functioning properly, if it has been
dropped or damaged, or if it has been immersed in water. Call customer
technical support for inspections and repairs.
•Do not use this equipment in locations where temperature cannot be
controlled, including but not limited to garages, balconies, pool areas,
bathrooms, outdoor carports or outdoors. Failure to comply may void
the warranty.
•Excessive exercise may cause serious injury or death.
Note !
Consult a physician before using this equipment. Please read the manual
before use.
Assembly steps

4
Unpack
Unpack where you plan to use this equipment. Place the wooden box on
a flat surface. It is recommended that you place a protective mat on the
floor. Never open the box with the box on its side.
Important note
For each assembly step, make sure that all nuts and bolts are installed in
the correct position and that they are partially locked.
Some parts are lubricated in advance to facilitate your assembly and use.
Do not wipe off the lubricant.
If assembly is difficult, it is recommended that you apply a small amount
of lubricant.
Warning!
There are several points that must be paid special attention during
assembly. Be sure to follow the assembly instructions correctly to ensure
that all parts are locked. Failure to follow the assembly instructions
properly may cause the parts of the equipment to become unfastened
and become loose, making a disturbing noise. To avoid damage to the
equipment, be sure to read the assembly instructions and correct them.
Need help?
If you have any questions or missing parts, please contact customer

5
technical support.
Installation tools:
□5mm Allen wrench
□8mm Allen wrench
□10mm Allen wrench
□14mm open end wrench
Included parts:
□1 base rack
□1 left armrest set
□1 right armrest set
□1 toboggan
□1 set of fixed meter
□1 toboggan
□1 hardware kit
Product Name: Y600 Self-powered Treadmill
Contents description / quantity
A M8 hexagon socket head bolt /4
1

6
Bφ8 flat washer /4
C M10 Hex Socket Head Cap Screws /10
Dφ10 flat washer /10
Assembly is complete
Before the starting
Treadmill position
Place the treadmill on a flat, stable surface that is away from direct
sunlight. Strong UV rays can cause plastic to fade. Place the treadmill in a
cool, low-humidity area. Behind the treadmill, leave a space at least as

7
wide as the treadmill and at least 2 meters in length. This area must be
free of obstacles and provide a clear path for users to leave the machine.
For the convenience of up and down, there should be at least 60 cm of
up and down space on both sides of the treadmill, so that users can get
up and down from any side. Do not place the treadmill in an area that
would obstruct any air vents or vents. The treadmill should not be placed
in a garage, pergola, by the water, or outdoors.
Follows:
Warning!
The treadmill is very heavy. To avoid injury or damage, use caution when

8
moving and seek assistance as needed.
Tightening and guiding of walking belt
After placing the treadmill in the use position, you must check the
tightness and center alignment of the walking belt. After the first two
hours of use, it may be necessary to adjust the walking belt. Temperature,
humidity, and use may cause the walking belt to stretch to varying
degrees. If the walking belt starts sliding while the user is on the walking
belt, be sure to follow the instructions below.
1. Locate the two hex head bolts located behind the bearing housing on
the rear of the treadmill. The bolts are located at the rear of the two
bearing blocks on the rear of the treadmill. These bolts can be adjusted
for the rear running roller. Do not make adjustments until the treadmill is
turned on. This prevents one side from being too tight.
2. The walking belt should be located between the two sides of the rack,
keeping equal distance from both sides. Do not use the treadmill if the
walking belt touches one side. Turn the bolts on both sides
counterclockwise about one full turn. Push the walking belt between the
sides and manually place the walking belt in the center until the walking
belt is parallel to the side rails. Tighten the bolts the same amount as
when the user loosens, is about one full turn. Check the running belt for
damage.
3. Walk on the treadmill at approximately 4.8 kilometers per hour (3

9
miles) and observe the position of the walking belt. If the walking belt
moves to the right, turn the right bolt ¼turn clockwise to tighten it, and
loosen the left bolt ¼turn. If the walking belt moves to the left, turn the
left bolt ¼turn clockwise to tighten it, and loosen the right bolt ¼turn.
Repeat step 3 until the walking belt remains in the center for several
minutes.
4. Check the tightness of the walking belt. The walking belt should be
very tight. The walking belt should not be sluggish or slippery when
walking or running on it.
Please note: Please make sure that the walking belt is centered before
using it, as shown in the figure. Please adjust the walking belt until the
edge of the walking belt is parallel to the decorative strips on both sides.
First loosen the two M8 bolts with an 8mm Allen wrench, then tighten / loose them clockwise /
counterclockwise with a 14mm open-end wrench, and then tighten the two M8 bolts.
Turn clockwise to tighten backwards and counterclockwise to loosen forward;
note! When making corrections, do not run faster than 4.8 kilometers per hour (3 miles). Be
careful not to get your fingers, hair, and clothing near the walking belt

10
Note!
Do not use a treadmill while performing calibration.
Adjustment of equipment level
Correct adjustment of the support angle is extremely important for the
proper operation of the equipment. If the treadmill is unbalanced, it may
cause misalignment of the running belt or other problems.
After placing the treadmill in the intended use position, raise or lower
one or two adjustment levers located behind the bottom of the rack.
As pictures shown:
Correct usage
There are four modes that treadmills can be used: pull, walk / sprint, leg
coordination and leg agility and leg resistance training. If you need to use
the treadmill in pull mode, you can use the handlebar or optional belt to
achieve a variety of push and pull exercises.
To use the treadmill in walking / sprint mode, keep your body steady.
If you need to use the treadmill in leg coordination and leg agility mode,

11
you can exercise leg coordination and agility very well, and burn excess
fat more effectively.
For resistance from the treadmill in leg resistance training mode. When
using this brake, resistance is immediately applied to the walking belt.
Just grab the handles on the front or sides and jump your feet on the
decorative trims on both sides to get out of the machine.
Adjustment of resistance
There are 8 gears on the treadmill.
Speed resistance is designed to simulate the resistance generated when
running on a parachute. When using this brake, the resistance increases
as the user's speed increases.
Maintenance
1. Disassembly or replacement of any part must be performed by a
qualified service technician.
2. Once any equipment is damaged or the parts are worn / broken, it
shall not be used continuously. Contact the dealer's after-sales personnel
for replacement.
3. Maintain labels and tags: Do not remove labels for any reason. The
label contains important advice. If the label is illegible or missing, please

12
contact your dealer and ask for re-posting.
4. Equipment maintenance: Preventive maintenance is to keep
equipment functioning normally and safely. Please check the equipment
regularly.
5. Confirm that personnel responsible for adjusting or maintaining /
repairing equipment are qualified. The dealer will provide repair and
maintenance training on request.
Specifications
Maximum user weight
200kg
Product weight
Aluminium Belt:165kg / High-strength nylon:140kg
Overall Dimensions (LxWxH)
1850x860x1580(mm)
Speed limit range
0-20km/h
Running area
1500x430(mm)
Keep a width of at least 60 cm around unpowered treadmill equipment
for easy use and passage. Please note that the ADA recommended
wheelchair access width is 1 meter.
Maintenance Schedule
Measures
frequency

13
Use clean water and mild soap, or other
solutions (the detergent should not
contain alcohol or ammonia) to clean the
entire machine.
every day
Table of contents

