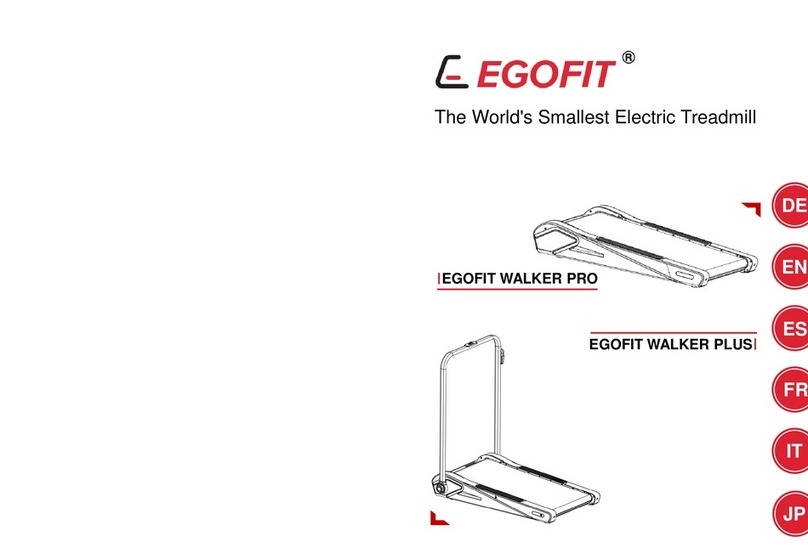
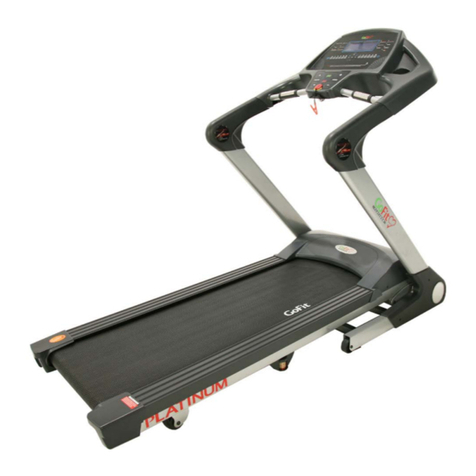
EGOFIT WALKER PRO User manual

EGOFIT WALKER PROエゴフィットウォーカープロFOR WORK WHILE WALKINGJP
EN
ES
EGOFIT

日本語版目次お客様へエゴフィット商品の中からこちらの商品をお選びいただきありがとうございます。エゴフィットのスポーツ製品は、高品質で最先端の技術を提供致します。再度、取扱説明書をよくお読み頂き商品を使用することをお願いしています。説明書は必要な時に、いつでも見られるよう大切に保管してください。商品の機能を長期間、存分に使用して頂けるよう、ご使用前に説明書をお読み頂き、説明に従いご使用ください。商品の操作の安全性と機能、及び取扱説明書の安全上の注意事項は、法規定の一般的安全規約と事故防止規約に基づき保証されています。誤った使用方法、操作による損傷については当社は一切責任を負いません。安全規約3
4
組立部品リスト付属品リスト4
5
組立方法テクニカルパラメータ5
5
エクササイズガイド6
ストレッチエクササイズワークアウトガイド7
7
操作ガイド8
操作についてさらに知りたい方は9
連携可能なフィットネスアプリメンテナンス10
10
問題解決ガイド11
ランニングベルトの調整 取扱説明書

安全規約付属品リスト組立部品リスト重要:組み立て・使用前によくお読みください深刻な怪我を避けるため、組み立て・使用前に説明書の全ページをお読みください。特に、以下の安全予防策に従ってください。組み立て・全ての部品が揃っているか確認し、部品リストのツールに従ってください。いくつかの部品を事前に組み立てておくと、全体を組み立てる過程で役立ちます。・子供や動物の手の届かないところに置いてください。小さい部品を飲み込んで、喉に詰まらせる危険があります。・始める前に器具を置く十分なスペースを確保してください。・組み立てに必要な部品は、完成するまで同じ部屋のなるべく近い場所に置いてください。・安定した水平な場所に置いてください。使用方法・幼い子供からは離して設置してください。・誤ったトレーニング・過度なトレーニングは身体を壊す恐れがあります。・調整器具を作動中のままにしておくと、動作に支障をきたす恐れがあります。・商品を安全に使用して頂くために、全てのお客様に責任持って正しい情報に従った使用をして頂くことをお願いしています。・こちらは家庭用向けの商品です。・宣伝・貸出・設置を禁止します。・商品を使って運動する前は、必ずストレッチなどのウォーミングアップを行ってください。・めまい、吐き気、胸の痛みなどの症状が出た場合は、直ちに運動を中止し病院の指示に従ってください。・お一人でご使用ください。・動作部分に手を近づけないでください。・体の不自由な方は介護人または医師がいる時のみ使用してください。・商品は湿気や埃の少ない室内で保管してください。倉庫や屋外、屋根付きの中庭や水の近くには置かないでください。・お子様に使用させる場合、保護者の指導・監督の元で行っていただくことで、精神的・身体的な成長が見込めます。商品を玩具のように使用しないでください。・最大110kgの方までご利用頂けます。・セラピー目的ではお使い頂けません。・0.6m以上の障害物のない空間に設置してください。また商品からすぐに降りることのできる空間を確保してください。商品を置く場所が遊び場となり得る場合、商品を幼いお子様から離してください。RF リモコン X 15mm六角棒スパナ X 1スクリュードライバーX 1潤滑油X 2電源コード X 1取扱説明書X 1注意:お子様の遊びや好奇心は予期せぬ状況を引き起こす可能性があるため、保護者の方は責任を持ってご指導ください。注意:各エクササイズを始める前に医師との相談をお願いします。特に35歳以上の方、または以前健康状態に問題があった方は特に重要事項となります。フィットネス器具をご使用になられる前に、必ず全ての説明をお読みください。No.1234567部品名ウォーキングトレッドミルディスプレイスクリーンランニングベルトリフィルキャップキャスタースイッチ電源コード個数1311211123456341234567

組立方法テクニカルパラメータエクササイズガイドヘッドロールストレッチエクササイズ注意:運動をする前に、かかりつけの医師にご相談ください。45歳以上のご年齢の方、以前健康状態に問題があった方は必ずご相談ください。エクササイズは体重を管理する最適な方法であり、身体面の向上、老化防止、ストレスの軽減などに役立ちます。習慣的に運動をし、生活の一部として楽しむことにより成果が得られます。心臓や肺の状態、血液の酸素が筋肉に運搬される度合いなどが運動に欠かせない要因になります。筋肉は日常生活の動作に必要な十分なエネルギーを供給するために酸素を消費します。これがエアロビック運動です。健康体の方の場合、この運動で心臓にそこまで負荷はかかりません。数分に数回心臓から血液が汲み上げられ、心臓の摩耗を減少することができます。以上のことから分かる通り、運動すればするほど、より健康的で快感を得ることができます。エゴフィットウォーカープロは全ての部品を使用し完成します。トレッドミルの破損を防ぐため、太陽光に直接当たらない場所に置いてください。トレッドミルの周辺は約2mの空間を確保してください。頭を右側から、左側の首に伸びを感じるくらい回してください。その後、顎を天井に向け、口を開きながら頭を後ろに回してください。頭を胸の方に下げるよう下に回してください。1ショルダーリフト右肩を耳に付くくらいまで上げてください。その後、左肩も同じように上げると同時に、右肩を下げてください。2サイドストレッチ両腕を広げ、頭の上まで上げてください。右腕を天井に向かってできるだけ高く上げ、左腕も同様に行います。3四頭筋ストレッチ片手を壁につきバランスをとり、右足を後ろ側に引き上げます。かかとをできるだけお尻の方に近づけてください。その状態で15秒キープ4内腿ストレッチ足裏を合わせて座り、膝を外側に向けます。足は鼠蹊部にできるだけ近づけてください。膝を徐々に床に向かって押していき、15秒その状態でキープします。5つま先タッチゆっくりと屈み腰と肩はリラックスさせながら、つま先に向かってストレッチします。できる限りのばして15秒キープします。6ハムストリングストレッチ右足を開きます。左足の足裏を右足に付けるように曲げ、つま先に向かってできるだけ伸ばします。15秒キープしてください。リラックスして左足も同様に行います。7ふくらはぎ・アキレス腱ストレッチ左足を右足の前に出し、両手で壁を押すように寄り掛かります。右足は真っ直ぐ、左足の足裏はぴったりと床につけてください。左足を屈折させお尻を壁に向かって前に傾け、その状態で15秒キープします。反対足も同様に行います。8ボルテージ最大ロード数寸法有効面積最大モーター力速さ機能DC110V, 50-60Hz110kgs/242.51lbs962 X 545 X 190mm/37.87'' X 21.46'' X 7.48''420 X 870mm/16.54'' X 34.25''2HP1.0-5.0Kmh/0.62-3.1Mphウォーキング56

トレーニングゾーンエクササイズトレッドミルの操作ウォーミングアップが終わったら、エクササイズに移りましょう。最大限のパフォーマンスができるよう、常に緊張感を持ってとり組んでください。運動することよって呼吸が止まってしまわぬよう、深呼吸を継続して行ってください。トレッドミルが正しく電源に繋がっているか確認してください。モーターカバーの後ろにある赤いボタンをoから1に押し、電源を入れます。電源が入ると音が鳴り、LCDスクリーンが表示されます。停止状態のトレッドミルはリモコンのスタート / ストップボタンで起動させることができます。始めのスピードは1.0kmh /0.62mphです。クールダウン1.スタート:起動中のトレッドミルはリモコンのスタート / ストップボタンで停止させることができます。前回のエクササイズデータは残ります。もう一度START / STOPボタンを押してルームランナーを起動すると、エクササイズデータが追加されます。2.ストップ:起動中のトレッドミルはリモコンの+ / −ボタンで速度の調整ができます。3.スピード調整モーターの下面両側に持ち運びに便利なキャスターがついています。4.キャスタースタート / ストップ:トレッドミルの動作を起動・停止スピードアップ:速度の値を上げる5. RFリモコンルームランナーを停止し、デフォルト設定に戻します。6. リセット操作ガイドムーブメントパラメーター全てのトレーニングが終わったら、ウォーキングや軽いジョギングを最低でも1分は行ってください。その後、5分〜10分クールダウンでストレッチを行ってください。これらの動作は筋肉を柔らかくさせ、怪我の予防に役立ちます。説明書には以下のような専門的な用語が含まれます:トレッドミルパラメーター:速度値モーションパラメーター : 距離・カロリー・時間の値速度表示の最低値は 1kmh /0.62mph速度表示の最大値は5.0 kmh/3.1mphタイムモードの最長値は99:59ディスタンスモードの最長値は99.9 kmディスタンスモードの最短値は0.1 kmカロリー表示の最大値は999カロリー表示の最小値は000SPEED UPSTART/STOPSPEED DOWNCUSTOM カスタムRESET リセット78時間、距離、カロリーをカスタムします。ルームランナーを開始する前に、CUSTOMボタンを押してカスタムモードに入り、+または-のボタンを押して、必要な運動範囲(時間、距離、カロリー)を調整します。カスタム設定が終了したら、STARTボタンを押してカスタムモードを実行します。ルームランナーは、カスタムしたデータ(時間、距離、カロリー)に到達すると、速度が低下して停止します。7. カスタム※ヒント:リモコンに適用の電源ボタン電池タイプ:CR2025 3Vリモコンには、完全に電力が供給されるボタン電池が含まれています。 ボタン電池の電力がなくなったら、新しいものと交換する必要があります。

連携可能なフィットネスアプリ潤滑油:メンテナンス問題解決ガイド以下に記載しているQRコードもしくはアプリストアから、アプリをダウンロードしていただけます。お使いいただける機種はAndroid5.0以上、またはBluetooth4.0、iOS8.0以上の機器です。トレッドミルには事前にシリコンオイルが塗られています。シリコンオイルは不揮発性であるため、ランニングベルトに徐々に浸透しています。潤滑油は50時間以上使用した場合にのみお使い下さい。注意:シリコンオイルはこの商品の潤滑油としてのみ、ご使用ください。また、その他のオイルは使用しないでください。トレッドミルが破損する恐れがあります。潤滑油を歩行板に落とさないようにしてください。落とした場合、清潔なタオルで必ず拭き取ってください。アプリをお使いいただくにあたって:Androidユーザーの方は、[設定]>[セキュリティとプライバシー]から不明なソースを確認し許可してください。Bluetoothの設定はオンにしてください。AndroidIOSFitShowE01E02E03E04E05E06以下の原因による問題の可能性があります。 機器同士がきちんとはまっていないモーターが壊れている速度センサーが壊れているモーターの回路が繋がっていない過電流保護電気供給が足りない追記装置が起動しないインダクティブドライブと関係910※ヒント:通常15日に1回オイルを追加する必要があります。 ただし、頻繁に使用する場合は、7日に1回潤滑油を補給することをお勧めします。つまり毎回潤滑油ボトルの半分の15mlのオイルを追加します。

ランニングベルトの調整ランニングベルトを右側に寄せる場合ベルトが緩んでいる場合ベルトが緩んでいるかどうか確かめる方法:ケース3:ケース2:マシーンの簡単なメンテナンスを普段から行うことで部品の消耗を減らし、騒音を無くすことできます。マシーンのある生活をより良いものにし、楽しくトレーニングを行うことができます。ランニングベルトが左側に寄ってしまう場合、マシーンの右側のネジを時計回りに半回転させます。ベルトの位置を確認してください。1〜2分後にベルトが真ん中の位置に戻らない場合、同じ動作をもう一度繰り返してください。もしベルトが過度に左側によっている場合、右側のネジを半時計周りに半回転させてください。ベルトの位置を見て1〜2分後にベルトが中央に戻らない場合、同じ動作をもう一度繰り返してください。潤滑剤によりベルトが緩んだ場合、ベルトを正しく固く締め直す必要があります。ベルトは長期の使用でも緩んでくる場合があります。マシーンを3km/hの速度に設定し、ベルトを止めるように片足を乗せてください。この時フロントローラーが回っている音が聞こえたら、ベルトが緩んでいる証拠です。(ベルトが十分に張られており、ランニングベルトを止めようとしてもフロントローラーが滑らないのが理想的な状態です。)ベルトが緩んでいる場合、フロントローラーとストップベルトが擦れて大きな音が聞こえます。この場合、ベルトをよりピンと締める必要があります。マシーンと床の接触部が水平でない場合や、体重・走り方によってランニングベルトがずれてしまうことがあります。必要な道具:5mm六角棒スパナケース1:ランニングベルトを左側に寄せる場合ランニングベルトが端に寄るかどうか確認してください。マシーンを3km/hの速度に設定してランニングベルトが右側に寄ってしまう場合、マシーンの左側のネジを時計回りに半回転回します。ベルトの位置を確認してください。1〜2分後にベルトが真ん中の位置に戻らない場合、同じ動作をもう一度繰り返してください。ベルトが正常な位置に戻ると、トレーニングを再開できます。ベルトがきわめて右にある場合は、機械の左側のネジ(L)を反時計回りに1/2回転回してください。ベルトの位置を確認してください。1〜2分後にベルトが中央にならない場合は、手順を繰り返してください。1112

ベルトの締め方:DEAR CUSTOMER,重要:トレッドミルベルトを締めすぎないでください。保証が適用されなくなります。右側と左側の両方のネジを時計回りに一回転させます。必ず両方同じだけ締めるようにしてください。締めた後は、ベルトがきちんと張られたかどうか確認するため、ベルトを止めるように足を乗せてください。ランニングベルトを止めるのが難しく、音が聞こえないようであれば、十分に正しく締められたということになります。ベルトがまだ緩いようであれば、同じ動作をもう一度繰り返してください。We are pleased you chose a device from the EGOFIT product range. With sports equipment from EGOFIT you get the highest quality and latest technology.In order to fully use the potential of your device and be able to enjoy it for many years, please read this manual carefully before starting up and beginning of training, and use the device according to the instructions. The operational safety and function of the device can only be guaranteed if the legal provisions on general safety and accident prevention as well as the safety instructions in this user manual are observed. We shall not assume any liability for damages resulting from improper use or incorrect operation.Please ensure that all persons using the device have read and under-stood the user manual.KEEP THE USER MANUAL IN A SAFE PLACE TO BE ABLE TO ACCESS IT AT ANY TIME IF NEEDED.トレッドミルベルトを締めすぎないようお気をつけください。フロントローラーやリアローラーベアリングに過度な圧がかかったり、ランニングベルトの縫い目がほつれることがあります。ランニングベルトの締め過ぎは、ローラーベアリングやトレッドミルベルトにダメージを与えます。ENGLISHMANUAL13

SAFETY INFORMATIONINDEXIMPORTANT – PLEASE READ FULLY BEFORE ASSEMBLY OR USETo reduce the risk of serious injury, read the entire manual before you assemble or use your treadmill. In particular, note the following safety precautions.ASSEMBLY• Check you have all the components and tools listed in the parts list, bearing in mind that, for ease of assembly, some components are pre-assembled.• Keep children and animals away from the exercise area, small parts could pose a choking hazard if swallowed.• Make sure you have enough space to layout the parts before starting.• Assemble the item as close to its final position (in the same room) as possible.• The product must be installed on a stable and level surface.USING Keep unsupervised children away from the equipment.• Injuries to health may result from incorrect or excessive training.• If any of the adjustment devices are left projecting, they could interfere with the user’s movement.• It is the responsibility of the owner to ensure that all users of this product are properly informed as to how to use this product safely.• This product is intended for domestic use only.• Do not use in any commercial, rental, or institutional setting.• Before using the equipment to exercise, always perform stretching exercises to properly warm up.• If the user experiences dizziness, nausea, chest pain, or other abnormal symptoms stop the workout and seek immediate medical attention.• Only one person at a time should use the equipment.• Keep hands away from all moving parts.• Always wear appropriate workout clothing when exercising. Do not wear loose or baggy clothing, as it may get caught in the equipment. Wear trainers to protect your feet while exercising.• Do not place any sharp objects around the equipment.• Disabled persons should not use the equipment without a qualified person or doctor in attendance.• Keep this equipment indoors, away from moisture and dust. Do not put the equipment in a garage, outbuilding, covered patio, or near water.• If children are allowed to use the equipment under supervision, their mental and physical development should be taken into account. They should be controlled and instructed to the correct use of the equip-ment. The equipment is under no circumstances suitable as a toy.• This product is suitable for a maximum user weight of: 110 kgs.• This product is not suitable for therapeutic purposes.• Free area shall be not less than 0.6m greater than the training area in the directions from which the equipment is accessed. The free area must also include the area for emergency dismount. Where equipment is positioned adjacent to each other the value of the free area may be shared. Keep unsupervised children away from the equipment.WARNING: Parents and others in charge of children should be aware of their responsibil-ity because the natural play instinct and the fondness of experimenting of children can lead to situations and behavior for which the training equipment is not intended.WARNING: Before beginning any exercise programme, consult your doctor. This is espe-cially important for individuals over the age of 35 or persons with pre-existing health problems. You MUST read all instructions before using any fitness equipment.SAFETY INFORMATION16
17
ASSEMBLY PARTS LISTACCESSORY BAG17
18
ASSEMBLY STEPSTECHNICAL PARAMETER18
18
EXERCISE GUIDE19
STRETCH EXERCISEWORKOUT GUIDELINES20
20
OPERATION GUIDE21
OPERATE THE TREADMILL22
COMPATIBLE FITNESS APPLICATIONMAINTENANCE23
23
TROUBLESHOOTING GUIDE24
ADJUST THE RUNNING BELT16

ACCESSORY BAGASSEMBLY PARTS LISTTECHNICAL PARAMETEREXERCISE GUIDEASSEMBLY STEPSRF Remote Controller X 15mmAllen Wrench 5mm X 1Screw Driver X 1Lubricant Oil X 2Power Cord 1.8m X 1User Manual X 1PLEASE NOTE: Before beginning any exercise programme, consult your physician. This is important especially if you are over the age of 45 or for individuals with pre-existing health problems.Exercising is great way to control your weight, improving your fitness and reduce the effect of aging and stress. The key to success is to make exercise a regular and enjoyable part of your everyday life.The condition of your heart and lungs and how efficient they are in delivering oxygen via your blood to your muscles is an important factor to your fitness. Your muscles use this oxygen to provide enough energy for daily activity. This is called aerobic activity. When you are fit, your heart will not have to work so hard. It will pump a lot fewer times per minute, reducing the wear and tear of your heart.So as you can see, the fitter you are, the healthier and greater you will feel.Egofit Walker Pro comes with full assembled.To avoid damage to the treadmill, place the treadmill in a location out of direct sunlight. Make sure that there is at least 6 feet of open space around the treadmill.No.1234567Part nameWalking TreadmillDisplay ScreenRunning BeltRefilling CapManeuverable WheelsSwitchPower Cord 1.8mQty.1311211VoltageMaximum loadDimensionsAn effective area ofMotor maximum powerSpeedFunctionDC110V, 50-60Hz110kgs/242.51lbs962 X 545 X 190mm/37.87'' X 21.46'' X 7.48''420 X 870mm/16.54'' X 34.25''2HP1.0-5.0Kmh/0.62-3.1MphWalking12345617181234567

HEAD ROLLSSTRETCH EXERCISETRAINING ZONE EXERCISEAfter warming up, increase the intensity to your desired exercise programme. Be sure to maintain your Intensity for maximum performance. Breathe regularly and deeply as you exer-cise -never hold your breath.COOL DOWNOPERATION GUIDEMovement parameters:Finish each workout with a light jog or walk for at least 1 minute. Then complete 5 to 10 minutes of stretching to cool down. This will increase the flexibility of your muscles and will help prevent post-exercise problems.The terms used in the specification are:Treadmill parameters: "speed" value.Motion parameters:"distance" value, "calories" value, "time" value.• Minimum display speed of 1 kmh/0.62mph• Maximum display speed of 5.0 kmh/3.1mph• The longest movement time in the time mode: 99:59 minutes• The longest movement distance in distance mode: 99.9 km/62.07miles• Shortest distance in the distance mode: 0.1 km/0.062mile• Maximum calories in calorie mode: 999 cals• Minimum calories in calorie mode: 000 calsRotate your head to the right for one count, feeling the stretch up the left side of your neck, then rotate your head back for one count, stretching your chin to the ceiling and letting your mouth open. Rotate your head to the left for one count, then drop your head to your chest for one count.1SHOULDER LIFTSLift your right shoulder toward your ear for one count. Then lift your left shoul-der up for one count as you lower your right shoulder.2SIDE STRETCHESOpen your arms to the side and lift them until they are over your head. Reach your right arm as far toward the ceiling as you can for one count. Repeat this action with your left arm.3QUADRICEPS STRETCHWith one hand against a wall for balance, reach behind you and pull your right foot up. Bring your heel as close to your buttocks as possible. Hold for 15 counts and repeat with left foot.4INNER THIGH STRETCHSit with the soles of your feet together and your knees pointing outward. Pull your feet as close to your groin as possible. Gently push your knees toward the floor. Hold for 15 counts.5TOE TOUCHESSlowly bend forward from your waist, letting your back and shoulders relax as you stretch toward your toes. Reach as far as you can and hold for 15 counts.6HAMSTRING STRETCHESExtend your right leg. Rest the sole of your left foot against your right inner thigh. Stretch toward your toe as far as possible. Hold for 15 counts. Relax and then repeat with left leg.7CALF / ACHILLES STRETCHLean against a wall with your left leg in front of the right and your arms forward. Keep your right leg straight and the left foot on the floor; then bend the left leg and lean forward by moving your hips towardthe wall. Hold, then repeat on the other side for 15 counts.81920

COMPATIBLE FITNESS APPLICATIONOPERATE THE TREADMILLYou can download the app using the QR codes shown here or search in your store. Minimum compatibility specifications for mobile device; android 5.0 or higher with Bluetooth 4.0, iOS 8.0 or higher.Notes on using the App:As an android user, please make sure that under "Settings -> Device Security" the "Unknown sources" is set by ensuring it is ticked.Please remember to turn on the Bluetooth feature on your device.Make sure that the treadmill is correctly connected to a power source. Touch the red button behind the motor cover from o to 1 and switch on the power. You will hear a signal and the LCD screen will light up.The treadmill is in stop state, press START/STOP key of remote controller, start the tread-mill. The initial speed is 1.0kmh/0.62mph.1. START:The treadmill is in running state, press START/STOP key of remote controller, pause running.The former exercise data will remain, and when press button START/STOP again to start the treadmill , the exercise data will add up.2. STOP:The treadmill is in running state, press "+" and "-" keys of remote controller to speed up or speed down. 3. ADJUST THE SPEED:There are two maneuverable wheels beneath the end of motor side for you to move the walking treadmill with effort saving.4. MANEUVERABLE WHEELS:START/STOP: start or pause the motion of treadmillSPEED UP: increase the speed valueSPEED DOWN: reduce the speed value5. RF remote controllerStop the treadmill and restore the default setting.6. RESETCustomize the wanted exercise time, exercise distance, or exercise calories.Before start the treadmill, press button CUSTOM to enter the mode of CUSTOM, then press button + or button - to adjust the wanted exercise range(time, distance, or calories). 7. CUSTOMAndroidIOSFitShow2122SPEED UPSTART/STOPSPEED DOWNCUSTOM RESET ※Tips: Applicable Power Supply for Remote ControllerButton Cell type: CR2025 3VYour remote controller contains a button cell with full electricity supply. Once the button cell runs out of power, you will need to replace the cell with new one.

LUBRICATION:MAINTENANCETROUBLESHOOTING GUIDE The treadmills have already been spread with "Silicone Oil" in advance before leaving the manufacturing plant. Silicone oil is without volatility and has gradually permeated through the running belt.NOTE: Only use "Silicone Oil" lubricants for this equipment. In addition, do not add any other oil ingredient; otherwise the treadmill will be damaged. Do not over-lubricate the walking board. Excess lubricant should be wiped off with a clean towel.Adjust the running beltCarrying out a simple and regular maintenance in the machine will reduce the wear of the parts, remove annoying noises, increase the life of the machine and enjoy more your workouts.An incorrect machine leveling on the contact points or weight and running styles differences can produce the running belt to shift sideways.Needed tool:- Allen Wrench 5mmCASE 1:BELT OFFSET TO THE LEFTCheck the side to examine if the running belt is offset to the side.Set the unit in motion at a speed of 3km/h, if the belt has moved to the left, turn screw(L) on the left-hand side of the machine a 1/2 turn clockwise.Look at the position of the belt. If after one or two minutes the belt is not totally centered, please repeat the procedure.Once the belt is adjusted, you can start the workout again.If the belt has excessively moved to the right, turn screw(L) on the left-hand side of the machine a 1/2 turn anticlockwise.Look at the position of the belt. If after one or two minutes the belt is not totally centered, please repeat the procedure.E01E02E03E04E05E06Possible CausesProblemConsole communication failuresMotor failureSpeed sensor failureMotor Circuit disconnectionOver current protectionThe supply voltage is too lowNoteDrives do not receive a digital signalWith inductive drive2324※Tips: Usually it requires lubrication every 15 days, however if quite frequent use, we suggest apply lubricant every 7 days. Pour 15ml each time, that is, half of the bottle included in the package.

How to tighten the belt:IMPORTANT: DO NOT OVERTIGHTEN THE TREADMILL BELT. THIS WILL VOID YOUR BELT WARRANTY.Turn screw(L) and screw(R) on both sides of the machine a full 1 turn clockwise. Ensure the screws are turned with the same amount of adjustment on each side. Then put one foot on the running belt to try stopping its motion, to test the tension of belt. If you can hardly strug-gle to stop the running belt, and there is no sound of rubbing, then the tension is enough and just perfect for your workout.Be careful not to over tighten the treadmill belt as you can create excessive pressure on the front and rear roller bearings and or tear the running belt seam. An excessively tightened running belt will damage the roller bearings and treadmill belt.BELT OFFSET TO THE RIGHTBELT LOOSEHow to test if the belt is loose:CASE 3:CASE 2:If the belt has moved to the right, turn screw(R) on the right-hand side of the machine a 1/2 turn clockwise.Look at the position of the belt. If after one or two minutes the belt is not totally centered, please repeat the procedure.If the belt has excessively moved to the left, turn screw(R) on the right-hand side of the machine a 1/2 turn anticlockwise.Look at the position of the belt. If after one or two minutes the belt is not totally centered, please repeat the procedure.After loosening the belt for lubrication, you will need to adjust the tension of belt to suitable state. The belt may come to be loose after long use as well.Set the unit in motion at a speed of 3km/h, and put one foot on the running belt and try to get the running belt to stall, when it stalls you can hear the front roller is still slipping which indicates that the running belt is too loose(the ideal scenario is that the belt is tight enough so that when you trying to stall the running belt, the front roller not slipping). When the belt is loose, there will be loud noise because the slipping front roller rubbing the stopped belt. In this case, you need to tighten the belt to increase the tension.2526

CONTENIDOSINFORMACIÓN DE SEGURIDAD29
30
ASSEMBLY PARTS LISTBOLSA DE ACCESORIOS30
31
PASOS DE MONTAJEPARÁMETROS TÉCNICOS31
31
GUÍA DE EJERCICIOS32
EJERCICIOS DE ESTIRAMIENTO LINEAMIENTOS DEL EJERCICIO33
33
MANUAL DE OPERACIONES34
ACTIVAR LA CINTA DE CORRER35
APLICACIÓN DEPORTIVA COMPATIBLEMANTENIMIENTO36
36
SOLUCIÓN DE PROBLEMAS37
AJUSTAR LA CINTA DE CORRER ESTIMADO CLIENTE,Nos complace que haya elegido ir dispositivo de la línea de productos EGOFIT. Con el equipo deportivo de EGOFIT usted obtiene la más alta calidad y la mejor tecnología.Con d fin de usar todo el potencial de su dispositivo y para que pueda disfrutarlo durante muchos ares, por favor lea este manual cuidadosamente artes de comenzar a ejercitarse, y use el dispositivo de acuerdo a las nstrucciones La seguridad y funcionamiento operativos del dispositivo solo puede garantizarse si se tienen presentes las disposi-ciones legales sobre seguridad general y prevención de accidentes así como también las instrucciones de seg jndad en este manual de usuario. Nosotros no asumimos ninguna responsabilidad por daños resultantes del uso inadecua-do o incorretío del dispositivo.Por favor asegúrese de que todas las personas que usen el dispositivo hayan leído y entendido este manual de usuario.MANTENGA EL MANUAL DE USUARIO EN UN LUGAR SEGURO PARA PODER ACCEDER A ÉL CUANDO SEA NECESARIO.ESPAÑOLMANUAL DE USUARIO

BOLSA DE ACCESORIOSASSEMBLY PARTS LISTControl remoto RF X 1Llave Allen de 5mm X 1Destornillador X 1Aceite lubricante X 2Cable de alimentación 1.8 m X 1Manual de usuario X 1No.1234567Nombre de la pieza Cinta de correrPantalla de visualizaciónCinturón para correrTapa de recargaRuedas maniobrablesInterruptorCable de alimentación 1.8mQty.131121112345630INFORMACIÓN DE SEGURIDADPara reducir el riesgo de lesiones senas lea todo el manual antes de ensamblar o usar su banco de ejercicios. En particular, tenga en cuenta las siguientes precauciones de seguridad.IMPORTANTE - POR FAVOR LEA CUIDADOSAMENTE ANTES DE ENS-AMBLAR O USAR EL DISPOSITIVOENSAMBLAJE• Verifique que tenga todos los componentes y herramientas indicadas en la lista de pezas, tendiendo en cuenta que, para un ensamblaje más sencillo algunos componentes están preinstalados• Marterga a niños y mascotas lejos de la zona de ejercicio, las piezas pequeñas podrían representar un riesgo de asfixia si se irgieren• Asegúrese de tener espacio suficiente para disponer de las piezas antes de oomenzar• Ensamble el dispositivo cerca de su ubicación final• (en la misma habitación} de ser posible.• El producto debe instalarse sobre una superficie estable y nivelada• Deshágase de todos los empaques de manera cuidadosa y responsable.USO• Marterga a los niños sin supervisión lejos del dispositivo.• El ejercicio excesivo o incorrecto puede causar daros a la salud.• Dejar dispositivos de ajuste salientes podría interferir con el movimiento del usuario.• Es responsabilidad del propietario garantizar que todos los usuarios de este producto se informen adecuadamente sobre cómo usar el producto de manera segura.• Este producto está diseñado sólo para uso doméstioo.• No use el producto en instalaciones comerciales, de alquiler o nstit joorales.• Antes de usar el dispositivo para ejercitarse, realioe siempre ejercicios de estiramiento para calentar adecuada-mente.• Si el usuario expenmenta mareos, nauseas, dolor abdominal u otros sintomas anormales, detenga el ejercicio y busque atención medica inmediata.• Sólo una persona a la vez debe usar el dispositivo• Marterga las manos lejos de las piezas móviles• SÉmpre use ropa adecuada para haoer ejercicio. No use ropa helgada o ancha, ya que podría quedar arrapada en el dispositivo. Use zapatos deportivos para proteger sus pies cuando se esté ejercitando• No ubique objetos afilados cerca del dispositivo• Las personas con discapacidades no deben usar el dispositivo sin la supervisión de una persona calificada o medico.• Marterga el dispositivo adentro, lejos de la humedad y el polvo. No ubique el dispositivo en el garaje, en dependen-cias, en patios cubiertos o cerca del agua.• Si permite que los niños usen el equipo bajo supervisión, debe tener en cuenta su desarrollo mental y físico. Deben recibir instrucciones para un uso adecuado del dispositivo. Bajo ninguna circunstancia debe considerarse al dispositivo como un juguete• Este producto es apto para usuarios con ui peso máximo de: 110 kgs• Este producto no es apto para fines terapéuticos• La zona libre no debe tener menos de 0.6m para la zona de ejercicio en donde estará el dispositivo. La zona libre también debe incluir una zona para un desmonte de emergencia. Mantenga a los niños sin supervisión lejos del equipo.ADVERTENCIA: Los padres y otras personas a cargo de los niños deben ser conscientes de su responsabilidad debido al instinto natural de juego y a la predilección a experimentar de los niños ya que esto podría producir situaciones y comportamientos para los que el dispositivo no fue diseñado.ADVERTENCIA: Antes de comenzar cualquier programa de ejercicios, consulte a su médico. Esto es especialmente importante para personas mayores de 35 años con problemas de salud preexistentes. DEBE leer todas las instruc-ciones antes de usar cualquier dispositivo deportivo.291234567

PARÁMETROS TÉCNICOSGUIA DE EJERCICIOSPASOS DE MONTAJEGIROS CON LA CABEZAEJERCICIOS DE ESTIRAMIENTOPOR FAVOR TENGA EN CUENTA: Antes de comenzar cualquier programa de ejercicios, consulte a su médico. Esto es de especial importancia en personas mayores de 45 años o con problemas de salud preexistentes.0 ejercido es Líia excelente manera de controlar su peso, mejorando su estado físico y reduciendo el efecto del envejecimiento y el estrés La dave del éxito radica en hacer del ejercicio una parte constante y disfrutare de su vida daría.La condición de su corazón y pulmones y su eficiencia al llevar oxigeno mediante su sangre a sus músculos es Ln factor importante para su estado físico. Sus músculos usan este oxigeno para proporcionar sufidente energía para las actividades diarias Esto se llama actividad aeróbica. Cuando esté en forma, su corazón no tendrá que trabajar tanto. Bombeara sangre menos veces por minuto, redudendo así el desgaste del mismo.Entonces como puede ver. entre mejor estado físico tenga, más saludable y esplendido se sentirá.Egofit Walker Pro viene con el completo ensamblado.Para evitar daños a la cinta de correr, colóquela en un lugar fuera de la luz solar directa. Asegúrese de que haya por lo menos 6 pies de espacio abierto alrededor de la cinta de correr.Gire su cabeza hacia la derecha por un segundo, sienta como se estira el lado izquierdo de su cuello, luego gire su cabeza haca tras por un segundo, estirardo su barbilla hada el techo y dejando su boca abierta. Gire su cabeza hacia la izquierda por un segundo, luego deje caer su cabeza hace su pecho por un segundo.No importa cómo se ejercite, siempre haga algo de estiramiento primero El calentamiento muscular hará que sus músculos se extiendan fácilmente, así que caliente al menos 5-10 minutos. Luego le sugerimos hacer los siguientes ejercicios de estiramiento cinco veces El estiramiento antes del ejercicio le ayuda a mejorar la flexibilidad y reduce los riesgos de lesiones1LEVANTAMIENTO DE HOMBROSLevante su hombro hada su oreja por un segundo. Luego levante su hombro izquierdo por un segundo a medida que baja su hombro derecho.2ESTIRAMIENTOS LATERALESAbra sus brazos hacia un lado y lévamelos hasta que estén sobre sj cabeza Alcance su brazo derecno hada el techo tanto como pueda durante un segundo Repita esta acción con su brazo izquierdo.3ESTIRAMIENTO DE CUADRICEPSCon una mano hacia la pared para equilibrarse, mueva su otra mano hacia atrás y levante su pie derecho. Lleve su talón lo más cerca posible de sus glúteos. Aguante durante 15 segundos y repita con el pe izquierdo.4ESTIRAMIENTO DEL MUSLO INTERIORSiéntese con las suelas de sus pies juntas y sus rodillas apuntando hacia afuera Empuje sus pies hada su ingle tan cerca como sea posible Empuje sus rodillas suavemente hada el suelo. Aguante durante 15 segundos.5DEDOS DE LOS PIESIndínese lentamente hada su cintura . dejando su espalda y brazos relajados a medida que se estira hacia los dedos de sus pies. Llegue los más lejos que pueda y aguante durante 15 segundos.6ESTIRAMIENTO DE TENDONESExtienda su pierna derecha. Descanse la suela de su pie izquierdo hacia su muslo intenor derecho. Estírese hacia los dedos de su pie derecho tanto como pueda. Aguante durante 15 segundos Relaje y repita con la pierna izquierda.7Apóyese hada una pared con su pierna izquierda frente a la derecha y con sus brazos hacia adelante Mantenga su pierna derecha recta y el pie izquierdo sobe el suelo; luego doble la pierna izquierda y apóyese hacia adelante moviendo su cadera haca la pared. Aguante, luego repita con el otro lado durante 15 segundos.8VoltajeCarga máximaDimensionesUn área efectiva dePotencia máxima del motorVelocidadFunciónDC110V, 50-60Hz110kgs/242.51lbs962 X 545 X 190mm/37.87'' X 21.46'' X 7.48''420 X 870mm/16.54'' X 34.25''2HP1.0-5.0Kmh/0.62-3.1MphCaminar3132ESTIRAMIENTO DE PANTORILLA/TENDÓN DEAQUILES

INTENSIDAD DEL EJERCICIOACTIVAR LA CINTA DE CORRERDespués de calentar aumente la ntensdad de su programa de ejercicio deseado Asegúrese de mantener su intensidad para un máximo rendimiento Respire de manera constante y profunda mientras se ejercita-nunca aguante la respiraciónAsegúrese de que la cinta de correr esté correctamente conectada a una fuente de alimentación. Toque el botón rojo detrás de la tapa del motor de 0 a 1 y encienda la alimentación. Oirá una señal y la pantalla LCD se iluminará.La cinta de correr está en estado de parada, presione la tecla START/STOP del control remoto, encienda la cinta de correr. La velocidad inicial es de 1,0 km h / 0,62 mph.ENFRIAMIENTO1. INICIO:La cinta de correr está en estado de funcionamiento, presione la tecla START/STOP del control remoto, pause el funcionamiento.Los datos del ejercicio anterior se mantendrán, y cuando pulse el botón START/STOP de nuevo para iniciar la cinta de correr, los datos del ejercicio se agregarán.2. PAUSA:La cinta de correr está en funcionamiento, presione las teclas "+" y "-" del control remoto para acelerar o reducir la velocidad.3. AJUSTAR LA VELOCIDAD:Hay dos ruedas maniobrables debajo del extremo del lado del motor para que pueda mover la caminadora sin esfuerzo.4. RUEDAS MANIOBRABLES:START / STOP: inicia o pausa el movimiento de la cinta de correrSPEED UP: aumenta el valor de velocidadSPEED DOWN: reduce el valor de velocidad5. Control remoto RFMANUAL DE OPERACIONESParámetros de movimiento:Termine cada ejercicio con un trote ligero o camine durante al menos 1 minuto. Después complete de 5 a 10 minutos de estiramiento para el enfriamiento. Esto aumentará la flexibilidad de sus músculos y le ayudará a evitar problemas después del ejercicio.Los términos utilizados en las especificaciones son:Parámetros de la cinta de correr: valor de "velocidad".Parámetros de movimiento: valor de "distancia", valor de "calorías", valor de "tiempo".• Velocidad mínima de visualización de 1 km h / 0,62 mph• Velocidad máxima de visualización de 5,0 km h / 3,1 mph• El tiempo de movimiento más largo en el modo de tiempo: 99:59 minutos• La distancia de movimiento más larga en el modo de distancia: 99.9 km / 62.07 millas• Distancia más corta en el modo de distancia: 0,1 km / 0,062 millas• Máximo de calorías en el modo de calorías: 999 cal.• Mínimo de calorías en el modo de calorías: 000 cal.3433Detiene la cinta de correr y restablece la configuración predeterminada.6. RESETPersonaliza el tiempo de ejercicio, la distancia recorrida o las calorías quemadas deseadas. Antes de iniciar la cinta de correr, pulse el botón CUSTOM para entrar en el modo CUSTOM, y luego pulse el botón + o el botón - para ajustar el rango de ejercicio deseado (tiempo, distancia o calorías quemadas). Después de finalizar la configuración de personalización, presione el botón START para correr en el modo personalizado. La cinta de correr bajará su velocidad y se detendrá cuando llegue a los datosestablecidos (tiempo, distancia o calorías).7. CUSTOMSPEED UPSTART/STOPSPEED DOWNCUSTOM RESET ※Consejo: fuente de alimentación para el control remotoEl controlador remoto incluye una unidad de botón con suficiente potencia.Una vez que el botón de la batería esté apagado, tendrá que reemplazarlo con una nueva batería.

APLICACIÓN DEPORTIVA COMPATIBLELUBRICACIÓN:MANTENIMIENTOSOLUCIÓN DE PROBLEMASPuede descargar las aplicaciones usando los códigos QR mostrados aquí o buscarlas en la tienda.Requisitos para dispositivos móviles: Android 5.0 o superior con Bluetooth 4.0, iOS 8.0 o superior.La caminadora ya ha sido lubricada con ‘aceite de siliccna’ con antelación antes de dejar ta planta de fabricación. EI aceite de silicona no es volátil y ha sido extendido gradualmente por toda la cinta.La lubricación se debe aplicar todas las 50 horas de trabajo.NOTA: Solamente use lubricantes deuaceite de silicona” para este equipo. Además, no agregue ningún otro ingrediente de aceite; de otra manera la caminadora se dañará. No lubrique la plataforma en exceso. El exceso de lubricante debe limpiarse con un paño limpio.Consejos para el uso de las aplicaciones:Como usuario de Android, por favor, asegúrese de marcar la opción "Fuentes desconocidas" en "Ajustes -> Seguridad del dispositivo'.Por favor, recuerde activar la función Bluetootti en su dispositivo. AndroidIOSFitShowE01E02E03E04E05E06Causas posiblesProblemaFallas er la oomLnicación oon la consolaFaJIa en el motorFalla en el sensor de velocidadDesconexión del circuito del motorProtección contra sobrecorrienteLa tensión de alimentación es demasiado bajaNoteLa transmisión no recibe señales digitalesCon transmisión indutírva3536※Consejo: por lo general se necesita lubricación cada 15 días, pero si se utiliza con frecuencia, se recomienda lubricación cada 7 días.Vierta 15 ML cada vez, es decir, la mitad del frasco que contiene el envase.

Ajustar la cinta de correrCORREA DESPLAZADA A LA DERECHACINTURÓN SUELTOCómo probar si el cinturón está suelto:CASO 3:CASO 2:Realizar un mantenimiento sencillo y regular de la máquina reducirá el desgaste de las piezas, eliminará ruidos molestos, aumentará la vida de la máquina y disfrutará más de sus entrenamientos.Si la correa se ha movido hacia la derecha, gire el tornillo (R) en el lado derecho de la máquina 1/2 vuelta en sentido horario.Mira la posición del cinturón. Si después de uno o dos minutos el cinturón no está totalmente centrado, repita el procedimiento.Si la correa se ha movido excesivamente hacia la izquierda, gire el tornillo (R) del lado derecho de la máquina 1/2 vuelta en sentido antihorario.Mira la posición del cinturón. Si después de uno o dos minutos el cinturón no está totalmente centrado, repita el procedimiento.Después de aflojar la correa para lubricarla, deberá ajustar la tensión de la correa al estado adecuado. El cinturón también puede aflojarse después de un uso prolongado.Ponga la unidad en movimiento a una velocidad de 3 km/h, coloque un pie en la cinta de correr e intente hacer que la cinta de correr se detenga, cuando se detenga podrá oír que el rodillo delantero todavía se desliza, lo que indica que la cinta de correr está demasiado floja (el escenario ideal es cuando la correa esté lo suficientemente apretada para que cuando intente detener la correa, el rodillo delantero no se desliza). Cuando la correa está suelta, se producirá un ruido fuerte debido al deslizamiento del rodillo delantero que frota la correa bloqueada. En este caso es necesario apretar la correa para aumentar la tensión.Una nivelación incorrecta de la máquina en los puntos de contacto o las diferencias de peso y estilos de carreras pueden hacer que la cinta de correr se desplace lateralmente.Herramienta necesaria:- Llave Allen de 5 mmCASO 1:CORREA DESPLAZADA A LA IZQUIERDARevise el costado para examinar si la banda para correr está desplazada lateralmente.Ponga la unidad en movimiento a una velocidad de 3 km/h, si la correa se ha movido hacia la izquierda, gire el tornillo (L) en el lado izquierdo de la máquina 1/2 vuelta en sentido horario.Mira la posición del cinturón. Si después de uno o dos minutos el cinturón no está totalmente centrado, repita el procedimiento.Una vez que se ajusta el cinturón, puede comenzar el entrenamiento nuevamente.Si la correa se ha movido excesivamente hacia la derecha, gire el tornillo (L) en el lado izquierdo de la máquina 1/2 vuelta en sentido antihorario.Mira la posición del cinturón. Si después de uno o dos minutos el cinturón no está totalmente centrado, repita el procedimiento.3738
Other manuals for WALKER PRO
1
Table of contents
Languages:
Other EGOFIT Treadmill manuals
