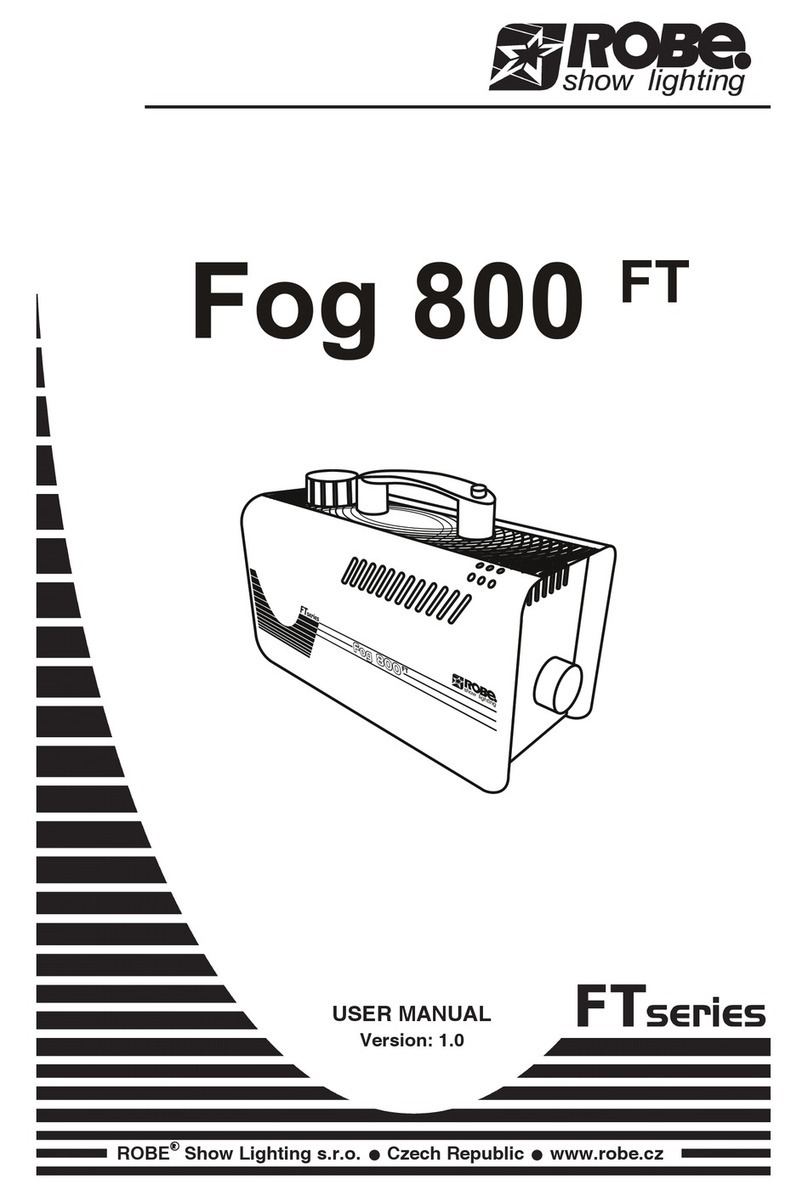
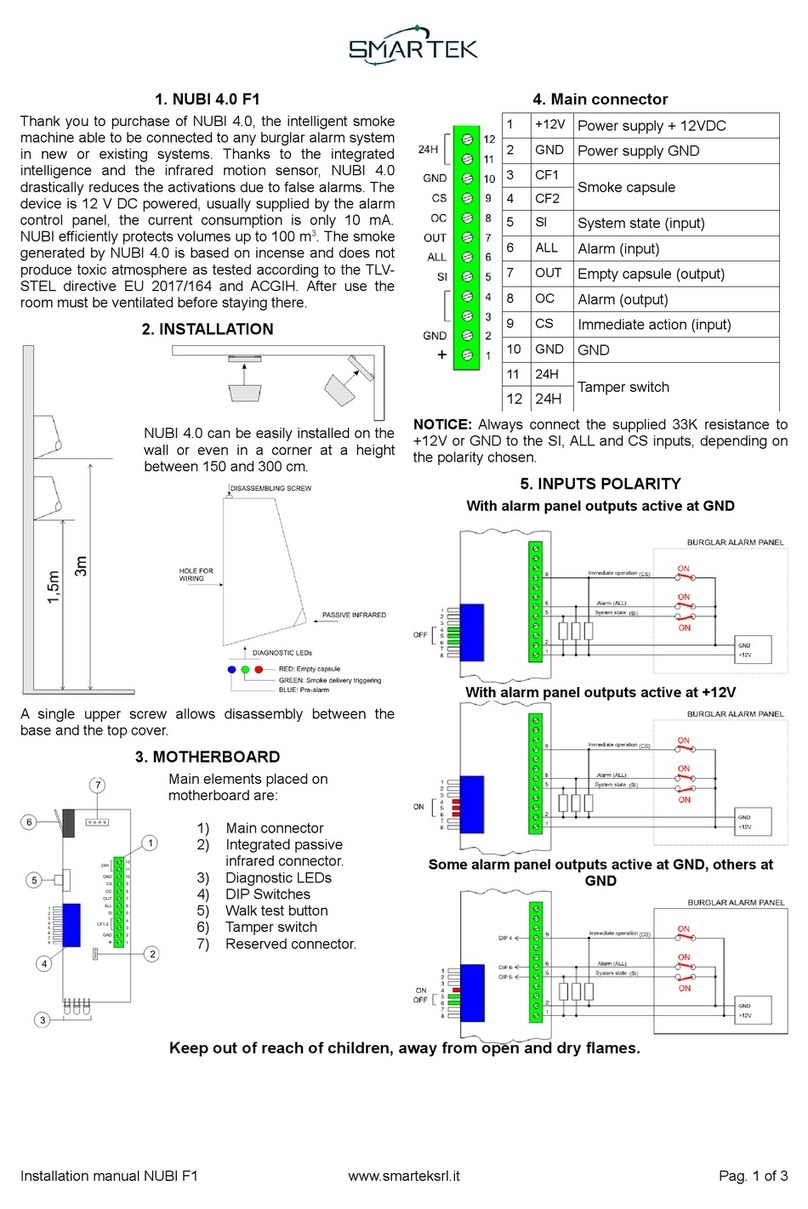
DEFENDERTECH DT-800Lan Manual

Manual
of installation and maintenance
Fog Generators DEFENDERTECHDT-800Lan


Warnings
This appliance must only be used for the purpose for which it was expressly designed, any other
use is to be considered improper and therefore dangerous.
The current legislation does not allow the use of the device as an anti-theft device.
The appliance is not intended for use by children under 18 or persons without the necessary
technical skills.
Using the appropriate bracket supplied, fix the appliance to a wall or ceiling in an inaccessible
position without the aid of ladders.
This product is an electrical appliance. The maintenance and top-up operations of the liquid must
be carried out with the electrical power supply disconnected.
The power supply of the appliance must be supplied through a special switch or plug in order to
allow it to be switched off.
Danger of burns: the components of the appliance are subject to heating, do not handle them until
the temperature has lowered.
In case of overdosing of the supply (also due to repeated shots) and in the absence of proper
ventilation of the emission environment, the fog may thicken on the surfaces of the sprayed room
leaving a patina. The fog deposit can be removed and washed.
The air-conditioning process accelerates the abatement of humidity that "supports" the substance
that creates a mist effect, thus increasing the risk of leaving oily residues on every surface.
Eventually, if the air conditioning was necessary, this risk can be avoided ventilating the room.
The user must ventilate the room after each operation of the appliance.

Warranty and Liability Conditions
1) With this warranty, TEK GROUP S.r.l., based in 61025 Montelabbate (PU), Via Leonardo Da Vinci n. 8,
guarantees the product from any defects in materials and manpowers, provided that the use complies with
the conditions indicated in the manual, for the duration of 24 months from the date of purchase of the
product resulting from a fiscally valid document.
2) This warranty does not apply to: (a) consumable parts - such as fluids and batteries - and components
subject to wear; (b) damage resulting from an installation not carried out according to the instructions
contained in the manual supplied with the product; (c) failures resulting from the use of non-original
components and / or fluid; (d) damage due to repairs made by unauthorized personnel or by the Customer;
(e) faults caused by incorrect power supply or connection; (f) defects resulting from normal wear or
otherwise due to aging of the product; (g) damage caused by fortuitous events, lightnings, flooding, fire,
incorrect ventilation or other causes not attributable to TEK GROUP S.r.l.
3) If during the warranty period the Customer finds defects of conformity of the product, then this will have to
report their presence to the Producer on penalty of forfeiture within one week of discovery.
4) The Customer, provided that he has provided a timely description of the data contained in the
documentation referred to in point (5), may be authorized by TEK GROUP S.r.l. to send the faulty or
defective device for its repair. The Producer reserves the unconditional right to replace the defective parts
with new or regenerated parts and equivalent to new ones in terms of functions, performances and
reliability.
5) In order for the warranty to be operational, it must be kept together with a fiscally valid purchase document
- such as an delivery note, invoice, receipt, showing the name of the seller, the date of purchase, the
identification details of the product and the sale price.
6) This warranty will expire if the product is shipped unaccompanied by the aforesaid documentation, without
a suitable packaging to protect it from shocks and vibrations and in case it is not shipped in its entirety
(including cover and fluid tank). The wall fixing bracket is not included among the components that must be
sent to the manufacturer for repair purposes.
7) The costs of uninstalling the defective device and reinstalling the repaired product or returned product, as
well as the return shipping costs, are not included in this warranty.

Caution !!! Obligation to display
The legislation provides for the obligation to post in the access route of the
premises, a notice that signals the presence of a Fog Generator.
Use the adhesive label supplied with the appliance.

DEFENDERTECH® FOG GENERATOR DATA SHEET ETHERNET VERSION
WITHOUT INTEGRATED ALARM CONTROL UNIT
FEATURES AND PERFORMANCE
DT-800Lan
Fog dispensed in 60”
830 m3 effective continuous
Fog dispsensing time
1-120 sec
Forced breack time
From 5 a 20 min
Total dispensing time
6.5 min (with a full tank)
total quantity dispensed
4.980 m3 (with a full tank)
Fog maintenance fuction
NO
Heating time (100%)
Max 12 min
Reaction time
200 MS
Power Supply
220 volts
Nominal Power consumed when armed
1750 watts
Power consumption management
Yes
Power consumed in Stand-by
120 mA
DimensioniDimension
450 X 450 X145 MM
Built-in backup battery
Yes (nr. 2 x 1 3A)
Burner autonomy without mains power
At least one 60” shot can be made within 1 hour
Fault indicator system
Yes
liquid level indicator
Yes
Anti-opening tamper-proof device
No
12 Vdc output fro external sensor
500 mA
Double Protective Shell
Yes (internal and external)
Colour
Withe, Silver, Gold, Anthracite
Weight
14 Kg with a full tank
Tank Capacity
1,5 LT
MECHANICAL OPTIONS
Nozzles for directing the Fog jet: 1×0° 1×45° 1×90° 3×0° 3×45° 2×0°/45°
●
Nozzles extension, lengh adjustable up to 200 mm.
●
Nozzles extension, lengh adjustable up to 500 mm.
●
Fog jet diversion kit, passes through the wall behind the equipment,
●
Fog jet split and diversion kit, 50% passes through the wall behind the
equipment, 50% at the front (to cover 2 adjacent rooms)
●
ELECTRONIC FUNCTIONALITY
●
Event log saved on the device and on the Web Server
●
“Safew shoot” function (requires double consent to shoot)
●
Automatic update of date and time referring to two programmable NTP Web
Servers
●
“Device Armament Block” function on a programmable time band
●
Monitoring, drive and device programming via Web (LAN or Wi-fi) or PC
● (4)
Physical outputs for signaling: status, lev. Liquid, burner ready, shot in
progress
●
3 Different leves of password-protected access that can be changed
●
“Unlimited Tank” function (allows the withdrawal of fluid from larger tanks)
INPUTS –OUTPUTS –SIGNALS
●
1 Input for fog activation (armament)
● (2)
NC –NP and –OR progrannable inputs for shot activation
● (2)
Programmable reley outputs for signaling liquid level and device failure
● (2)
Outputs OC for burner signaling ready-activation shot in progress
●
6 LED lights indicating operation/failure
●
1 buzzer for operation/failure
●
1 Ethernet connector for remote monitoring and management of the device
●
1 WI-FI card connector (optional) for monitoring and device control
●

SUPPORT BRACKET INSTALLATION
Make sure that the wall or ceiling chosen for the placement of the machine is suitable to support the
weight indicated in the technical data sheet.
Position the bracket as shown in the photo at a minimum distance of 15 cm from the ceiling.
For wall installation DO NOT TURN THE APPLIANCE
Use 4 10 mm dowels (fisher) of the type suitable for the wall on which the machine will be installed.
If necessary, it is possible to drill the bracket at any point of it adjacent to the wall.
In the case of ceiling installation directly to the wall, the procedure does not change.
In the case of "Floating" installation (spaced from the ceiling), use 10 mm galvanized steel threaded rods
instead of the dowel screws and lock the bracket between nut and counternut.
PREDISPOSITION –CABLE POSITIONING

PLACING THE MACHINE ON A SLED BRACKET
1. Take the appliance in the two points shown in the picture.
2. Place the appliance on the front of the bracket and let the four fins of the bracket penetrate the side slits of the appliance
(operation 1 °)
3. Slide the appliance down (2nd operation)
4. Using a 4mm Allen screwdriver, tighten the anti-release screw in the appropriate position to the right of
the tank.

Description DT-800Lan Control Card

Electrical connection
N1 L1 Electrical Grounding
Power supply 220Vac. +/- 10% 1.750 Watt (10.5 A)
• Supply the machine by connecting the mains cable to the appropriate terminal, printed: "N1 L1", located on the
electronic card.
• Connect the system grounding to the specific Faston fixed to the frame
Note: Prepare a dedicated 220V power supply line,
with a switch and adequate protections.
Input-Output connection (commands)
+ 12V -
Output 12vdc max 500mA protected by fuse (F7) to power external devices.
LEVEL (Liquid Level)
"Clean" contact NC H24 (normally closed) when the DEFENDERTECH liquid level is acceptable. It will open when the
level is in "reserve" (at least 60 "of autonomy available).
It is recommended to bring the contacts to the control panel and create an unarmed area for signaling purposes.
Note: This contact can be used to assign other functions, see p. 14 "special features"
STATE (system status / failure signal)
When the appliance is disarmed or switched off, the "Clean" NA contact (normally open) will be close in when the
machine receives the command to arm.
The tamper placed on the left side of the appliance "is in series" with this output.
If a malfunction occurs, the "STA" contact will open.
It is recommended to bring the contacts into the central unit and create a delayed zone of 0.5 '' not alarmed in order
to signal the status of the machine.
Note: This contact can be used to assign other functions, see p. 14 "special features"
SHOOT
"Negative OC" output (normally off) during the firing phase.
READY
"Negative OC" impulsive output (normally off), in order to signal the "burner ready" status.
The output will be activated when the appliance is armed and the burner will have reached the 100%, it will only be
desactivated when the burner temperature has fallen below the allowed threshold.

COM
The common terminal of negative polarity, in common with "-12V", is to be used for the interaction with
the terminals ARM, FOG and FOG2.
ARM (N.A. by default but modifiable N.C)
Bringing to this input the continuous signal taken from the terminal COM or -12v, it will emit a "beep" of 3
seconds, followed by the "armament" of the device that will be ready to deliver at 100% after about 6-12
min. (depending on the ambient temperature or how long it has been disarmed) when it is ready, it will
emit a "beep" warning of a 1 second.
If during the Armament the appliance emits an endless "beep", it means that there is also a signal on "FOG"
or "FOG2" which must always be at rest during this phase, so keep them at rest and re-arm .
If desired, it is possible to change the contact activation mode to "OPEN" (N.C.) turning ON the DipSwitch
nr 3. In this case also "FOG" and "FOG2" will become N.C.
FOG (N.A. by default but modifiable N.C.)
When the device is "ARMED" and ready, carrying / removing a pulse lasting more than 0.5 "from the COM
or -12V terminal to this input, the firing and forced pause cycle will start according to the times
programmed through the DipSwitch as shown in the table on page 13.
If desired, it is possible to change the contact activation mode to "OPEN" by turning ON the DipSwitch nr 3
(Also ARM and FOG2 will be modified)
At the end of the firing and forced pause cycle if the FOG input is still unbalanced, the cycle will start again.
It is possible to set the FOG command in "Bistable" mode (checkout the “Special Functions”on page 13),
i.e. the device will dispens until there is (or absent if N.C.) a signal on FOG. In any case, if the signal extends
beyond the configured firing time, the dispens will stop as programmed, proceeding with the forced pause.
When the signal is interrupted within the firing time, dispens is immediately stops and the forced pause
time is also skipped.
The parameters set in the factory are:
Shot time: 60 ''
Forced pause: 10’ (used to prevent unnecessary shooting once the environment is saturated)
Admission: N.O. (Normally Open)
DIP-Switch configuration ON 1-2-6-9
It is possible to INCREASE the duration of the shot up to 120 '' in pulsed mode, turning ON the DipSwitch
nr.8, the amount of fog will be the same but you will have the possibility to prolong the firing cycle.
Note. This function doubles the firing time whatever the time that has been set (dip 1-2)

FOG2 (N.A. by default but modifiable N.C.)
This input, as for factory programming, behaves like the "FOG" input (in OR), through the "menu 2" of the
special functions it is possible to modify the operating logic.
"And-Fog2" Function
By activating this function, the shot will be executed ONLY if FOG and FOG2 will receive an input in a 15-
minute time window and the waiting period will be scanned with a beep per second.
At the end of the waiting time, if the 2nd signal on the other input has not arrived, the pre-alarm will be
reset.
"Handbrake" or "Safe Firing" Function
Activating this function, the Fog2 input takes on the task of preventing (accidental) firing.
- If a negative signal is present on FOG2, the shot will not be allowed.
- If the signal arrives while the shot is in progress, it will be ignored.
- If a signal is present at the Armament time this will be ignored, allowing ARM.
- If DIP3 is "ON", ie the inputs are set to "NC" mode, FOG2 will only be at rest when it is grounded (same
logic as ARM and FOG).
CAUTION !!!!!!
NEVER DISPENSE FOG IN A AIR-CONDITIONED AMBIENCE
The air-conditioning process accelerates the abatement of humidity that "supports" the substance that
creates a fog effect, thus increasing the risk of leaving oily residues on surfaces.
If the air-conditioning is necessary, this risk can be avoided by ventilating the ambience.

"BASE" DIP-SWITCH PROGRAMMING
FUNCTIONING
DIP1
DIP2
DIP3
DIP4
DIP5
DIP6
DIP7
DIP8
DIP9
DIP10
SHOT TIME
15 SEC
OFF
OFF
X
X
X
X
X
X
X
X
30 SEC
ON
OFF
X
X
X
X
X
X
X
X
45 SEC
OFF
ON
X
X
X
X
X
X
X
X
60 SEC
ON
ON
X
X
X
X
X
X
X
X
SHOT
INPUT
NORMALLY OPEN (N.O.)
X
X
OFF
X
X
X
X
X
X
X
NORMALLY CLOSE (N.C.)
X
X
ON
X
X
X
X
X
X
X
LIQUID
LIQUID RESET
X
X
X
ON-
OFF
X
X
X
X
X
X
FAILURE
RESET BLOCK FOR
FAILURE
X
X
X
X
ON-
OFF
X
X
X
X
X
FORCED PAUSE
TIME
5 MIN
X
X
X
X
X
OFF
OFF
X
X
X
10 MIN
X
X
X
X
X
ON
OFF
X
X
X
15 MIN
X
X
X
X
X
OFF
ON
X
X
X
20 MIN
X
X
X
X
X
ON
ON
X
X
X
PUMP
MODE
CONTINUE
X
X
X
X
X
X
X
OFF
X
X
IMPULSIVE (DOUBLE THE
SHOT TIME)
X
X
X
X
X
X
X
ON
X
X
RESISTANCE
NUMBER
1
X
X
X
X
X
X
X
X
OFF
OFF
2
X
X
X
X
X
X
X
X
ON
OFF
X
X
X
X
X
X
X
X
X
X
X
X
X
X
X
X
X
X
X
X
X
X
Basic SET-UP of the Fog Generator
Shot time: 60 seconds.
Forced pause after firing: for the next 10 minutes the unit will ignore further firing commands
DIP-Switch configuration ON 1-2-6-9
ARM and FOG, N.O. (Normally Open)
Number of Resistors used: by default two but it is possible to limit its use to only one, in that case the
appliance will take twice the time to reach the operating temperature, but the quantity of fog delivered will
not change.
The above parameters can however be modified using DIP switches according to the table above.

SPECIAL FUNCTIONS - MENU 1
It is possible to activate special functions that vary the operation of the two relay outputs and other functions such
as: the deactivation of network failure signal on the relay, deactivate the liquid control, activate a relay during firing,
deactivation of the burner washing cycle, "Bistable" shot mood, burner preheating (it is maintained at 50% of the
operating temperature during the disarming, this to speed up the resetting phase).
To access the "Menu 1" of Programming special functions you need:
1. Disconnect ARM and FOG
2. Note down the DIP-SWITCH configuration
3. Turn all DIP-SWITCH OFF
4. Remove the Jumper from BUZZ (J3)
5. Place the Jumper on J2
6. Set all DIP-SWITCHS to ON for the functions to be activated
7. Remove the Jumper from J2 and replace it on BUZZ (J3)
8. Restore the DIP-SWITCH as noted down before (point 2)
DIP-SWITCH
FUNCTIONING
SPECIAL FUNCTIONS PROGRAMMING (J2 CLOSED)
DIP1
DIP2
DIP3
DIP4
DIP5
DIP6
DIP7
DIP8
DIP9
SETTING
LACK OF
NETWORK
SIGNALING
OFF
OFF
X
X
X
X
X
X
X
X
LACK OF NETWORK SIGNALED ON
STATE RELAY
ON
ON
X
X
X
X
X
X
X
X
LACK OF NETWORK NON-SIGNALED
ON STATE RELAY
LIQUID LEVEL
CONTROL
OFF
X
OFF
X
X
X
X
X
X
X
LIQUID LEVEL CONTROL ACTIVATED
(standard)
ON
X
ON
X
X
X
X
X
X
X
LIQUIDI LEVEL CONTROL
DEACTIVATED
STATE RELAY
LOGIC
OFF
X
X
OFF
X
X
X
X
X
X
RELE N.O.; CLOSED IF ARMED
WITHOUT ALARMS
ON
X
X
ON
X
X
X
X
X
X
RELE N.O.; CLOSED IF IN ALARM
LIQUID LEVEL
LOGIC
OFF
X
X
X
OFF
X
X
X
X
X
RELE N.C.; IT IS OPEN WHEN THERE
IS A LACK OF LIQUID (standard)
ON
X
X
X
ON
X
X
X
X
X
RELE NO.; IT IS CLOSED WHEN
THERE IS A LACK OF LIQUID
LIQUID/SHOT
RELAY
OFF
X
X
X
X
OFF
X
X
X
X
RELAY USED AS LACK OF LIQUID
(standard)
ON
X
X
X
X
ON
X
X
X
X
RELE N.O.; CLOSES WHEN
SHOOTING
SAVE PUMP
OFF
X
X
X
X
X
OFF
X
X
X
SAVE PUMP FUNCTION DISABLED
ON
X
X
X
X
X
ON
X
X
X
SAVE PUMP FUNCTION ENABLED
DO NOT WASH
OFF
X
X
X
X
X
X
OFF
X
X
WASH IF PROVIDED
ON
X
X
X
X
X
X
ON
X
X
WASH AUTOMATICALLY EXCLUDED
BIESTABLE SHOT
OFF
X
X
X
X
X
X
X
OFF
X
IMPULSE SHOT INPUT
ON
X
X
X
X
X
X
X
ON
X
BIESTABLE SHOT INPUT
HEATING
PREHEATING
OFF
X
X
X
X
X
X
X
X
OFF
PREHEATING FUNCTION DISABLED
ON
X
X
X
X
X
X
X
X
ON
PREHEATING FUNCTION ENABLED

CAUTION!!!
EVERY TIME YOU ENTER IN THIS MENU, THE SPECIAL FUNCTIONS ARE RESTORED TO THE FACTORY VALUES, so if
for example we have used 2 special functions and we have changed our mind on one of these, entering in the menu
again we will only need to reactivate the function that we intend keep (the other one will be deactivated
automatically).
SPECIAL FUNCTIONS - MENU 2
To access this menu for activation of special functions, you must:
1. Disconnect ARM and FOG
2. Note down the DIP-SWITCH configuration
3. Turn all DIP-SWITCH OFF
4. Remove the Jumper from BUZZ (J3)
5. Place the Jumper on J2
6. Set the DIP-SWITCH No. 10 to ON
7. Set all DIP-SWITCHS to ON for the functions to be activated
8. Remove the Jumper from J2 and replace it on BUZZ (J3)
9. Restore the DIP-SWITCH as noted down before (point 2)
if you want to use the special functions of the Menus 1 and 2 you will have to program them simultaneously starting
from those of the "menu 1", activate the DIP10 and then the DIP corresponding to the desired functions of the
"Menu2".
DIP-SWITCH
MENU 2 PROGRAMMING (J2 CLOSED + DIP. 10 on)
FUNCTIONING
DIP1
DIP2
DIP3
DIP4
DIP5
DIP6
DIP7
DIP8
DIP9
DIP10
SETTING
AND FOG2
OFF
OFF
X
X
X
X
X
X
X
X
X
FOG2 INPUT SETTING
IN OR MODE
ON
ON
X
X
X
X
X
X
X
X
X
FOG2 INPUT SETTING
IN AND MODE
SHOT
BLOCK
OFF
X
OFF
X
X
X
X
X
X
X
X
FUNCTION DISABLE
(OFF DEFAULT)
ON
X
ON
X
X
X
X
X
X
X
X
FOG2 INPUT SETTING
IN SAFE SHOT MODE
STATE
RELAY H24
N.C.
X
X
X
X
OFF
X
X
X
X
X
X
THE CONTACT OPENS
IN THE PRESENSE OF
A FAULT
X
X
X
X
ON
X
X
X
X
X
X
CAUTION!!!
EVERY TIME YOU ENTER IN THIS MENU, THE SPECIAL FUNCTIONS ARE RESTORED TO THE FACTORY
VALUES, so if for example we have used 2 special functions and we have changed our mind on one of
these, entering in the menu again we will only need to reactivate the function that we intend keep (the
other one will be deactivated automatically)

FUNCTIONING A FAILURE STATE SIGNALING VIA LED
ARMED
LED1
FIXED ON
ARMED APPLIANCE
SLOW FLASHING
DISARMED APPLIANCE
FAST FLASHING
DISARMED APPLIANCE BUT WITH ACTIVE BURNER
PREHEATING FUNCTION (50% of maintenance)
HEATING
LED2
TURNED OFF
ALL THE RESISTANCES OFF
FIXED ON
ALL THE RESISTANCES SELECTED ON
CODED FLASHING
ONLY ONE RESISTANCE ON; THE NUMBER OF FLASHES =
RESISTANCE NUMBER
SHOT
LED3
TURNED OFF
SHOT NOT ACTIVE
FIXED ON
SHOT ACTIVE
ONE FLASH
TO EVERY REARMAMENT OF THE MACHINE
WASH
LED4
TURNED OFF
BURNER WASH NOT IN FUNCTION
FIXED ON
BURNER WASH IN FUNCTION
ON FLASH
TO EVERY REARMAMENT OF THE MACHINE
FORCED PAUSE
LED5
TURNED OFF
THE APPLIANCE IS NOT IN THE FORCED PAUSE STATE
FIXED ON
THE APPLIANCE IS IN THE FORCED PAUSE STATE
(it will ignore every firing commands untili its end)
ONE FLASH
FOR EVERY RIARMAMENT OF THE MACHINE
FAILURE
LED6
(RED)
TURNED OFF
NO ALLARM
CODED FLASHING
N. 1 FLASH: LIQUID_LEVEL_ALARM
N. 2 FLAS: CARD_OVERHEATING_ALARM
N. 3 FLASH: BATERY_ABSENT_ALARM
N. 4 FLASH: DEFECTIVE_SONDE_ALARM
N. 5 FLASH: LACK_NETWORK_ALARM
N. 6 FLASH: BURNER_OVERHEATING_ALARM
N. 7 FLASH: PUMP_FAILURE_ALARM
N. 8 FLASH: RESISTANCE_FAILURE_ALARM
SOUND FAILURE SIGNALING
When a failure occurs, the appliance will emit 10 beeps and repeat the signal every 60 min. until it is
restored.
Note. In case of "self-resetting" faults (battery or 220V missing) the sequence of the 10 Beeps may stop
earlier, so if the signals are irregular in the Beep number or the repetition, it means that we are in the
presence of a "false contact" on the battery or on the 220V mains.

FUNCTIONAL DESCRIPTION IN SHORT
BURNER “INTELLIGENT” MANAGEMENT:
The burner is activated only when the appliance is ARMED and this can happen only by activating the
"ARM" input on the CPU board or by using the "Preheating" special function which maintains the operating
temperature at 50% during the disarmament phase (this to speed up the reset phase especially if the
number of resistances has been halved for electric charge issues (DIP9)).
The 100% burner ignition will be inhibited if the time block is active and it is programmable through the Sw
DT-FogControl (checkout the instruction manual).
By ARMING the appliance (ARM), the resistances are activated in increments of 5 seconds.
The resistences will only turn off after reaching 100% of the operating temperature
When the temperature drops below 97%, only one resistence will be reactivated, to reduce current
absorption peaks especially if there are more Fogs Generators or there is only one that is turned on
24H.
SHOT MANAGEMENT:
The shot is inhibited when:
- the appliance is unarmed.
- the burner temperature is lower than that needed to dispense dry and quality fog.
- The forced pause phase is active (used to avoid excessive shots in a room already
saturated with fog).
- The "Safe Firing" function is active.
- Liquid level is ZERO.
After the shot, of configurable duration (60 seconds by deafult) a 10 seconds wash will follow. This
phase consists in the activation of a selenoid valve that introduce air into the burner to clean it at
the end of the shot.
At the end of the shot the system will ignore any further firing request for the set standby time
(forced pause).
At any time the firing phase can be interrupted, DISARMING the appliance; however, also in this
case, the wash cycle will still be executed.
ETHERNET NETWORK CONNECTIVITY:
The DT-x00Lan series devices have been designed to be monitored and programmed remotely using the
DEFENDERTECH "DT-FogControl" and "DT-MultiFogControl" software.

DT-FogControl is responsible for programming:
The IP address and port
Date and time
The Time block function
Download the technical log of the events
Liquid Level Reset
Reset Fault messages (Note. If the fault is persistent, the signal will continue)
Perform the "shot" (if there are the necessary technical conditions)
Changing the passwords of the 3 access levels
The default IP address is 192.168.1.99 port 502.
DT-FogControl also allows you to check the status of the device and the wire inputs, as well as the basic
and special programming set physically through the DipSwitches.
DT-MultiFogControl is responsible for monitoring simultaneously the operating status of several Fogs
Generators (even in different geographical sites).
Both software can be requested free of charge by making a request (complete
with social data) at the following address
info@defendertech.eu
IP ADDRESS AND PASSWORD RESET PROCEDURE
1. Disconnect ARM and FOG
2. Switch the appliance off completely
3. Note down the DIP-SWITCH configuration
4. Turn all DIP-SWITCH OFF
5. Remove the Jumper from BUZZ (J3)
6. Place the Jumper on J2
7. Set the DIP-SWITCH No. 10 to ON
8. Supply the appliance
9. Set the DIP-SWITCH no. 1 to ON
10. Switch the appliance off again
11. Remove the Jumper from J2 and replace it on BUZZ (J3)
12. Restore the DIP-SWITCH as noted down before (point 3)
13. Supply the appliance

MANAGEMENT OF MALFUNCTIONS:
The "malfunction" (opening status contact and video-acoustic signals) is generated by the system if any of
the following conditions should occur:
LIQUIDI_LEVEL_ALARM: occurs when the liquid level is below 20% of the tank.
When the estimated liquid in the tank end up, the system will allow a further 120 sec of firing (even if not
consecutive) and after this it will not allow others. It will be necessary to intervene to restore correct
operation, reloading the tank and setting the 100% level again using DipSwitch 4.
CARD_OVERHEATING_ALARM: (self-resetting) occurs when the inside of the appliance has exceeded the
maximum allowed temperature due to extreme weather conditions or bad installation (poor ventilation).
ABSENT_BATERY_ALARM: (self-resetting) the appliance will continue to operate until the 230Vac power
supply will be present.
FAULTY_SONDE_ALARM: occurs when the thermocouple is disconnected or damaged or if the reading is
incorrect, reset the error by operating the DipSwitch no. 5 if it persists, the appliance will not work until it
is replaced by the service DefenderTech.
LACK_NETWORK_ALARM: (self-restoring) lack of electricity grid
BURNER_OVERHEATING_ALARM: reset the error by operating on Dip Switch no. 5 if it persists contact the
DefenderTech service.
PUMP_FAILURE_ALARM: it occurs when the pump does not work or does not suck up liquid from the tank.
This signal does not affect the operation of the pumps, the machine will perform the firing procedure
regardless.
Reset the error by operating DipSwitch 5, if it persists contact the DefenderTech service.
Check if there is liquid in the tank, otherwise the hose, the pump or the solenoid valve are faulty, contact
the Service DefenderTech to be adviced on the action to be taken.
RESITENCE_BROKEN_ALARM: it occurs during the burner heating phase, if the temperature does not
increase in the expected quantity when the resistance is activated. Reset the error by operating DipSwitch
5, if it persists contact the DefenderTech service.
All faults can be verified through the monitoring sw DT-FogControl and
DT-MultiFogControl

START-UP AND TESTING
It is possible to test the machine independently from a connection to an alarm center.
It is possible to freely test the system using "drinking water" instead of the liquid with which the fog is
produced, from the appliance will come out a dry and transparent but "noisy" steam (at the end of this
operation remember to restore the liquid level to the 100% acting on DipSwitch nr.4).
TECHNICAL INSTALLATION
• Once the machine is connected to the mains, activate the buffer battery, connecting the "flying" cable to
the respective free terminal.
• Make sure that the whole DIPSWITCH is properly set (see table on page 11).
• Give 220V power to the appliance
• ARM the appliance through "ARM" (see page 10), when it will be ready it will emit a BEEP of 3 "
• Operate the shot using "FOG" (see page 10)
To interrupt the "shot and pause" cycle, the device must be disarmed by opening the contact on ARM.
Other manuals for DT-800Lan
1
Table of contents
Other DEFENDERTECH Fog Machine manuals

