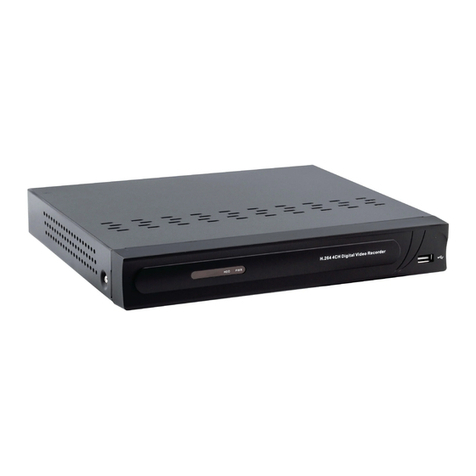
DEFEWAY D5010WH4 User manual

DVR User Manual

USER'SMANUALOFEMBEDDEDDIGITALVIDEORECORDER
Page 2 of 27
Contents
ChapterOneProductDescription
1.1General...............................................................................................................................3
1.2OpenCaseAndConnectCables…………………………………………………………………………………..…4
ChapterTwoStructureAppearanceDescription
2.1PanelDescription...............................................................................................................5
2.2ProductInterfaceDescription............................................................................................8
2.3RemoteControlDescription.............................................................................................11
ChapterThreeDescriptionforOperationSystem
3.1Turnon/off.....................................................................................................................12
3.2Preview............................................................................................................................12
3.3Menubasicoperationinstructions..................................................................................12
3.3.1Entermenumode..................................................................................................12
3.3.2MenuCompositioninstruction.............................................................................12
3.3.3Exitmenumode....................................................................................................12
3.4MainMenuIntroduction.................................................................................................12
3.5VideoPlayback.................................................................................................................13
3.5.1VideoSearch.........................................................................................................13
3.5.2Articlereplaytools................................................................................................14
3.6ManualRecording............................................................................................................14
3.7PTZControl.......................................................................................................................14
3.8Menu................................................................................................................................15
3.8.1VideoSearch.........................................................................................................15
3.8.2FileBackup............................................................................................................15
3.8.3SystemSetup.......................................................................................................15
3.8.3.1GeneralSetup............................................................................................15
3.8.3.2EncodeSetup.............................................................................................15
3.8.3.3RecordSetup..............................................................................................16
3.8.3.4NetworkSetup...........................................................................................17
3.8.3.5ScreenSetup..............................................................................................18
3.8.3.6MotionDetection.......................................................................................19
3.8.3.7PTZSetup...................................................................................................19
3.8.3.8SensorSetup..............................................................................................20
3.8.4SystemTools..................................................................................................................21
3.8.4.1UserManagement..............................................................................................21
3.8.4.2HDDManagement..............................................................................................22
3.8.4.3SystemMaintencance........................................................................................22
3.8.4.4FactorySetting....................................................................................................22
3.9SystemInformation..........................................................................................................23
3.9.1HDDInformation...................................................................................................23
3.9.2SystemInformation
...............................................................................................23
3.9.3LogInformation.....................................................................................................23
3.10SystemLogout................................................................................................................24
ChapterFourDescriptionforWeboperation................................................................................25

USER'SMANUALOFEMBEDDEDDIGITALVIDEORECORDER
Page 3 of 27
Chapterone:ProductDescription
1.1General
Thisequipmentisdesignedspecificallyforthefieldofanumberofdigitalsecuritysurveillanceproducts,
whichusesanEmbeddedProcessorInit(MPU)andoperatingsystems,combinedwiththefieldofthelatestIT
technologies,suchasvideoandaudioencode/decode,high‐capacityharddiskrecorder,TCP/IPnetwork
technology,firmwareinFLASH,makingsystemoperationmorestable.Thisequipment,withdigitalvideoand
audiorecorder(DVR)anddigitalvideoandaudioserver(DVS)featuresatthesametime,canworksnotonlyin
localindependently,butalsobenetworkedtoformapowerfulsecuritymonitoringnetwork.Itappliestobank,
telecommunications,electricpower,justice,transportation,residence,factory,warehouses,waterconservancy
facilitiesandotherareasanddepartmentsofthesafetyprecautions.

USER'SMANUALOFEMBEDDEDDIGITALVIDEORECORDER
Page 4 of 27
1.2OpenCaseAndConnectCables
1.2.1open‐caseinspection
Firstofall,pleasecheckifthereisapperantdamageofthepackingassoonasyoureceivedtheproducts.
thematerialcanprotectfromthedamageverywellinthetransportation.
Secondly,takeouttheproduct,takeawaytheprotectionfilmfromtheDVRtocheckifthereisdamage.
Thirdly,opencase,checkifthereisanylooseofdatacableoffrontpanel,powercable,connectionbetweenfan
powerandmotherboard.
1.2.1.1Frontpanelandrearpanel
Thereareinstructionsofhowtousekeysonthefrontpanelandtheinterfacesonrearpanel
pleasecheckthemodelno.withtheoneyouordered.
Asforthelablesonthepanel,pleasetakegoodcareofthem,whichisveryimportanttoourafter‐saleservice.
youneedtoofferthemodelno.andserailno.duringtheafter‐saleservice.
1.2.1.2Afteropencase,needtocheck
Besidescheckingobviousdamage,alsoneedtocheckifthereisanylooseoffrontpaneldatacable,connect
betweenpowerandmotherboard
1.2.2HDInstall
makesuretoinstalltheHDDwhenufirstuseit.

USER'SMANUALOFEMBEDDEDDIGITALVIDEORECORDER
Page 5 of 27
ChapterTwo:StructureAppearanceDescription
2.1FrontPanelDescription
D5010WH4:
1.POW:PowerStatesLED8.REC:ManualRecordingSwitch
2.CH1~CH4:Single‐ScreenSwitch9.PTZ:Pan/Tilt/Zoombutton
3.QUAD:Multi‐ScreenSwitch10.ESC:ExitKey
4. :SystemRunningStateLED 11.MENU:MenuKey
5.HDD:HDDStateLED12.▲▼◀▶:DirectionKey
6.Auxiliaryfunctionkeys13.:SelectKey
7.PLAY:RecordPlaybackKey14.IR:InfraredReceiver
D6010DH8:
1.HDD:PowerStateLED 7.REC:ManualRecordingSwitch
2. :SystemRunningStateLED 8.PLAY:VideoPlaybackKey
3.CH1~CH8:Single‐ScreenSwitch 9.ESC:ExitKey
4.POW:PowerStateLED10.MENU:MenuKey
5.IR:InfraredReceiver 11.▲▼◀▶:Direction
6.QUAD:Multi‐ScreenSwitch12.:SelectKey
D6011FH8:

USER'SMANUALOFEMBEDDEDDIGITALVIDEORECORDER
Page 6 of 27
1.HDD:Power State LED 8.PLAY:Video Playback Key
2. :System Running State LED 9.ESC:Exit Key
3.CH1~CH8:Single-Screen Switch 10.MENU:Menu Key
4.POW:Power State LED
11. ▲▼ :Direction
5.IR: InfraredReceiver 12. :Select Key
6.QUAD:Multi-Screen Switch 13. Power Switch
7.REC:Manual Recording Switch
D7010DH16:
1.1~9:numberkey2.PW:POWERLight
3.0:numberkey4.F1、F2:ReservedKey
5.▲▼◀▶:DirectionKey6.PowerKey
7.HDD:HDDLight8.IR:InfraredReceiver
9.:SystemRunningStateLED 10.MULTI:Multi‐screenSwitch
11.REC:RecordKey12.PTZ:Pan/Tilt/Zoombutton
13.PLAY:PlaybackKey 14.ESC:ExitKey
15.MENU:MenuKey16.:ConfirmKey
D7011DH16:
1.1~9:numberkey2.PW:POWERLight
3.HDD:HDDLight4.:SystemRunningStateLED
5.IR:InfraredReceiver6.0:numberkey
7.F1、F2:ReservedKey8.MENU:MenuKey
9.REC:RecordKey 10.MULTI:Multi‐screenSwitch
11.PTZ:Pan/Tilt/Zoombutton12.PLAY:PlaybackKey
13.ESC:ExitKey 14.:ConfirmKey
15.▲▼◀▶:DirectionKey

USER'SMANUALOFEMBEDDEDDIGITALVIDEORECORDER
Page 7 of 27
D6012WH8:
1.HDD:HDDLight2.:SystemRunningStateLED
3.1~9:numberkey4.▲▼◀▶:DirectionKey
5.PW:POWERLight6.IR:InfraredReceiver
7.QUAD:Multi‐screenSwitch8.REC:RecordKey
9.PLAY:PlaybackKey 10.ESC:ExitKey
11.MENU:MenuKey12.:ConfirmKey
D7012FH16:
1.1~9:numberkey2.PW:POWERLight
3.0:numberkey4.F1、F2:ReservedKey
5.▲▼◀▶:DirectionKey6.PowerKey
7.HDD:HDDLight8.IR:InfraredReceiver
9.:SystemRunningStateLED 10.MULTI:Multi‐screenSwitch
11.REC:RecordKey12.PTZ:Pan/Tilt/Zoombutton
13.PLAY:PlaybackKey 14.ESC:ExitKey
15.MENU:MenuKey16.:ConfirmKey
D8001CH24:

USER'SMANUALOFEMBEDDEDDIGITALVIDEORECORDER
Page 8 of 27
1.POW:PowerStatesLED8.F1:ReservedKey
2.HDD:HDDLight9.F2:ReservedKey
3.0~9:numberkey10.PTZ:Pan/Tilt/Zoombutton
4. :SystemRunningStateLED 11.ESC:ExitKey
5. QUAD:Multi-Screen Switch12.MENU:MenuKey
6.REC:RecordKey13.▲▼◀▶:DirectionKey
7.PLAY:RecordPlaybackKey14.:SelectKey
15.PowerKey
D8000WH16:
1.POW:PowerStatesLED8.MULTI:Multi‐ScreenSwitch
2.HDD:HDDLight9.1‐9:numberkey
3.0:numberkey10.ESC:ExitKeyPTZ:Pan/Tilt/Zoombutton
4.REC:RecordKey11.MENU:MenuKey
5.PLAY:RecordPlaybackKey12.▲▼◀▶:DirectionKey
6.PowerKey13.:SelectKey
7.FN:ReservedKey
2.2RearPanelInterfaceDescription
D5010WH4/D5011WH4:
1、VIDEOIN:VideoInputConnector8、HDMI:HDMIOutputConnector
2、VIDEOOUT:VideoOutputConnector9、USB:StandardUSBConnector
3、AUDIOIN:AudioInputConnector(1‐2)10、RS‐485:RS485Pan/TileDeviceConnector
4、ALARM:AlarmInput/OutputConnector11、DC12V:12V(DC)PowerSupplyConnector
5、NET:RJ‐45StandardNetworkConnector12、VGA:VGAOutputConnector
6、POWERSwitch:MainPowerSwitch13、AUDIOIN:AudioInputConnector(3‐4)
7、AUDIOOUT:AudioOutputConnector

USER'SMANUALOFEMBEDDEDDIGITALVIDEORECORDER
Page 9 of 27
D6010DH8/D6011FH8/D6012WH8:
1.VIDEOIN:Videoinputinterface8.NET:RJ‐45networkinterface
2.AUDIOOUT:Audiooutputinterface9.USB:USBinterface
3.AUDIOIN:Audioinputinterface(1‐2)10.RS‐485:RS‐485interface
4.Alarm:Alarminput/outputinterface11.DC12:12V(DC)PowerSupplyConnector
5.VIDEOOUT:BNCvideooutputinterface12.AUDIOIN:Audioinputinterface(3‐8)
6.POWERSwitch:MainPowerSwitch13.HDMI:HDMIOutputConnector
7.VGA:VGAoutputinterface
D7010DH16/D7011DH16/D7012FH16:
1.VIDEOIN:VideoInputConnector7.AUDIOOUT:Audiooutputinterface
2.VIDEOOUT:VideoOutputConnector8.VGA:VGAoutputinterface
3.AUDIOIN:AUDIOInputConnector(1‐2)9.NET:RJ‐45StandardNetworkConnector
4.HDMI:VideoOutputConnector10.USB:StandardUSBConnector
5.Alarm:Alarminputinterface11.R485:485Pan/TileDeviceConnector
6.POWER:Powerkey(RESERVE)12.DC12V:12V(DC)PowerSupplyConnector
13.AUDIOIN:AUDIOInputConnector(3‐8)
D8001CH24:
1.VIDEOIN:VideoInputConnector7.Alarm:Alarminputinterface
2.AUDIOIN:AUDIOInputConnector(1‐8)8.HDMI:VideoOutputConnectorinterface

USER'SMANUALOFEMBEDDEDDIGITALVIDEORECORDER
Page 10 of 27
3.VIDEOOUT:VideoOutputConnector9.VGA:VGAoutputConnector
4.AUDIOOUT:AudiooutputConnector10.NET:RJ‐45StandardNetwork&StandardUSBConnector
5.LINEIN:TALKIN11.R485:485Pan/TileDeviceConnector
6.POWER:Powerkey12.DC12V:12V(DC)PowerSupplyConnector
13.FAN
D8000WH16
1.VIDEOIN:VideoInputConnector7.POWER:Powerkey
2.AUDIOIN:AUDIOInputConnector8.Alarm:AlarminputinterfaceConnectorinterface
3.VIDEOOUT:VideoOutputConnector9.HDMI:VideoOutput
4.SPOTOUT10.VGA:VGAoutputConnector
5.AUDIOOUT:AudiooutputConnector11.NET:RJ‐45StandardNetwork
6.LINEIN:TALKIN12.USBConnector
13.R485:485Pan/TileDeviceConnector14.DC12V:12V(DC)PowerSupplyConnector
15.FAN

USER'SMANUALOFEMBEDDEDDIGITALVIDEORECORDER
Page 11 of 27
2.3RemoteControlDescription
POWERPowerswitch
DEVDevicebutton:inputthecorrespondingdevicenumberwithequipmentafterpressing
devicebutton,press“ENTER”tosavethesetting.Thencanoperateequipment.
0‐9Numberbutton
MENUMenubutton;eliminatealltheareaswhensetupmotiondetectionarea
ESCExit
▲Inmenumode,selectupwards;inPTZmode,controlthedomecameratorevolve
upwards
▼Inmenumode,selectdowmwards;inPTZmode,controlthedomecameratorevolve
dowmwards
Inmenumode,selectleft;inPTZmode,controlthedomecameratorevolveleft
Inmenumode,selectright;inPTZmode,controlthedomecameratorevolveright
ENTERSelectkey
PLAYVideoplayback
FNSubsidiarykey
RECRecordingkey
VIEWMulti‐screenkey
Note:Manydevicesinnearspace,remotecontrolshouldselectadeviceaccordingtodevicenumber.Soeach
deviceneedsauniquedevicenumber,unlessremotecontrolmayoperatedeviceswiththesamenumber.

USER'SMANUALOFEMBEDDEDDIGITALVIDEORECORDER
Page 12 of 27
ChapterThree:DescriptionofOperationSystem
3.1Turnon/off
ConfirmthatACvoltageaccessiblematchestherequirementsofdigitalvideorecorder.Ensurethatthe
digitalvideorecorderpoweroutlettoagoodmiddlegroundtermination.Accesstopower,thedevicestarted
【POWER】lightison,intothesystem,thepanelRUNlightflashingasnormalconditions.
3.2Preview
Previewscreencanbeseenimmediatelyafterequipmentisnormallystarts.Inthepreviewscreenyoucansee
thesystemdate,time,channelname.Presscorrespondingnumberkeyofpanelorclicktheleftmousebutton,
thenasingleimagepreviewcanbeavailable;Presspanel"QUAD"keyorclicktheleftmousebutton,youcan
returntoamulti‐screenmonitoringstate.
3.3Menubasicoperationinstructions
3.3.1Entermenumode
【MENU】keytoenterthedevice'smainmenuinterface.【PLAY】shortcutkeystoenterplaybackinterface.
【REC】shortcutkeystoentermanuallyrecordinginterface.【PTZ】shortcutkeysintoPTZcontrolinterface.
Note:SystemLogindefaultusername:admin,passwordisempty,click"OK"canintomenudirectly.
3.3.2Compositionofthemenu
Menucomponentunitsmainlyinthefollowingcategories:
(1)Checkbox:providingtwokindsofstatusoptions,"√"representenable,"□"disable,use
【confirmation/】buttonor【↑】,【↓】keyorclicktheleftmousebuttontochoose.
Forexample:filesearchmenupage,the"SelectChannel"andthe"Recordmode"checkbox.
(2)Selectionbox:Accordingtothesystem,thecontentsofthedrop‐downboxoptions,selectthetarget
content.Use【↑】,【↓】keyorclicktheleftmousebuttontoselect.
Forexample:intheencodesetupmenu,choose"SelectChannel"andthe"Recordmode"checkbox.
(3)ListBox:Displaystheinquiryresultsofinformationinthelist,youcanselectoneoptionforoperation
intheprovidedlist.
Forexample:ChoosingthefileintheVideobackupresultlistbypressing【OK/ 】buttonortheleft
mousebutton.
(4)Editbox:Enterthetargetnameintoeditbox

USER'SMANUALOFEMBEDDEDDIGITALVIDEORECORDER
Page 13 of 27
Forexample:SystemConfigurationmenupages,the“Cameratitle”editbox,enternumbers,English
letters,punctuationandsoon.
usepanelkey【↑】【↓】【←】,【→】orafterpositingtheeditboxbymouse,press" "key
orclicktheleftmousebutton,thentheenterkeyboardappears,selectthedesiredinputtarget
charactersthroughthearrowkeysorclicktheleftmousebutton.
b)SaveorExittheeditingstatusbypressingbutton【ENTER】【CANCEL】or【ESC】
(5)Button:usedtoimplementaspecificfunctionorenterthenextsettingmenu,enterbyclicking【OK
/】keyandtheleftmousebutton.
3.3.3ExitMenumode
Pressbutton【ESC】orclicktherightmousebuttontoexitthemenumode
Clicktherightmousebutton,returntothepreviousmenulevel.
3.4MainMenuIntroduction
PressMENUkeyortherightmousebuttonpop‐upthemainmenu,mainmenuconsistsofthefollowing
threecomponents
Previewmode:inthemenucolumn,selectthecorrespondingscreenpreviewmode.
Shortcutmenu:inmenucolumn,thereare:videoplayback,manualrecording,PTZcontrol,soundshortcut
menucanbedirectlyintothecorrespondingpagesinthemenu.
Themainmenubar:Clickintothepostincludesvideoinquiry,documentbackup,systemsetting,management
information,systeminformation,exitmenucolumn.
3.5VideoPlayback
Clickmainmenucolumn"videoplayback"intofilesearchinterface.

USER'SMANUALOFEMBEDDEDDIGITALVIDEORECORDER
Page 14 of 27
3.5.1VideoSearch
Channelselection:Selectthetargetchannel,clickcheckboxtochoose."√"ischecked;"□"notselected.
Recordmode:Selecttherecordmodeofsearching,clickcheckboxtochoose."√"ischecked;"□"notselected.
DATETimesetting:Enterthebeginningandendtimeintheeditboxtosearchthevideo.
Storagedevice:Intheselectionboxselectthetargetbackupstoragedevice.
Search:Aftersearchingcriteriaset,clickthebutton,thesystemwillbegintosearchthecorrespondingvideo
information,andlistthesearchresults.“BLUE”‐manualrecording,“RED”‐regulartimerecording,”GREEN”‐
MotionDetectionrecording,”YELLOW”‐alarmrecording.
Playback:Gointovideoplaybackinterface,use【↑】【↓】【←】,【→】buttonormousetosetthetimeperiod,
click【】orleftofmousegointoplaybackinterface.
Cancel:backtopreviousmenu
3.5.2Articleplaybacktools
Selecttheplaybackfileorplaybackbytime,itwillenterthevideoplaybackinterface.
StopPlay:Clickthebutton,thesystemwillstopplayingandexittheplaybackinterface
Pause/Play:Clickthebuttontopauseplayback,click tocontinuevideoplayback.
Fastforwarding:Click canfastforwardingplayback.Timesfastforwardingcanbesetbyclickagain.
Exitplayback:Click“ESC”or buttontowithdrawplaybackscreenatanytime;Afterplayall,itwillquit
theplaybackscreenautomatically.
3.6ManualRecording

USER'SMANUALOFEMBEDDEDDIGITALVIDEORECORDER
Page 15 of 27
Clickleftmousebuttontochoose"manualrecording"inmainmenucolumnorclickbutton【REC】toenterits
settingsinterface.
Manualrecordinginterfaceconsistsofseveralcomponents:
Channelnumber:correspondtotheequipmentvideochannel.“√”open;“□”close。
AllOn:chooseallchannelsvideosettings"on"
AllOff:chooseallchannelsvideosettings"off"。
OK:Confirmandexit。
Cancel:Clickreturnbutton,itwillexitManualrecordinginterface.
NOTE:Manualrecordingmustbestoppedbymanual,oritwillrecordcontinually.
3.7PTZControl
Click"PTZcontrol"inmainmenucolumnorclickbutton【PTZ】toenteritssettingsinterface
MainoperationofPTZcontrolinclude:directionalcontrol;horizontalsweep;zoomcontrol;adjustthefocal
length;adjustaperture;PTZspeed.
3.8SetupMenu
Click"menu"inshortcutmenuenterintothemainmenuinterface,including:videoinquiry,record
backup,systemsetup,informationmanagement,informationsystem,systemlogout.

USER'SMANUALOFEMBEDDEDDIGITALVIDEORECORDER
Page 16 of 27
3.8.1Videoplayback
Intheplaybackshortcutmenu(see3.5playback)
3.8.2videobackup
Choosethechannel,andrecordmode;setupthesearchtime,thenbeginsearchthefile.
Afterchoosingtheneededfilefromlistbox,clickbackupandok,waitforprocessbaruntil100%andshow
backupsuccess.
NOTE:USBflashdiskmustbeFAT32formatbeforebackupthefile.
3.8.3SystemSetup
Inthesetupmenu,Choose“systemsetup”andturnintoit'ssubmenu.Itincludes:Generalsetup,Encodesetup,
Recordsetup,Networksetup,Screensetup,Videodetection,PTZsetup,Sensorsetup.
3.8.3.1Generalsetup

USER'SMANUALOFEMBEDDEDDIGITALVIDEORECORDER
Page 17 of 27
Choosethe"Generalsetup"andturnintoit’ssetupinterface.
DateTime:Therealtimewhenpreview,click“Apply”aftersetting,makesuresavingwhenitshows“Record
stoppedduringsettingtime.Areyousuretocontinue?”Click”Yes”tosave.
DateFormat:“Y/M/D”、“D/M/Y”、“M/D/Y”
Autologout:Enable,thepresentuserwilllogoffifthereisnooperationin10minutes,itneedsloginagain.
Disable,won’tlogoff.
KeyBuzzer:Enable,thereissoundwiththecontrollerorpressingkeyonfrontpanel,disable,withoutsound.
Language:Thereismultiplechoiceaccordingtousers,ChineseandEnglishandsoon.
Videostandard:PALandNTSCareallavailable.
RemoteID:Controllerconnectbydevicenumberwhenitisusedtocontrol.Theremotecontrollershouldbe
correspondwiththeIDsothatitcanwork.
Aftersettingfinished,click"ok",theinformationwillbesaved.Click"cancel"toexitwithoutsaving.
3.8.3.2Encodesetup
Select“Encodesetup”insystemsetup.
Channel:ChoosetherightCHyoulikebyclickingtheselectbox
Stream:Choosetherightstream:"mainstream"or"substream"
Encodemode:Choosetherightencodemodelyouneed:"videoonly"meansonlyencodingforvideo;
"AVstream"meansencodingforbothvideoandaudio.

USER'SMANUALOFEMBEDDEDDIGITALVIDEORECORDER
Page 18 of 27
Bitratemode:Choosetherightbitratemodeyouneed:"constantbitrate"meanssystemencodingvideoas
user‐definedbitrateandframerate."Variablebitrate"meanssystemencodingaccordingto
user‐definedimagequalityandvideoframerate,butbitrateisautomaticallyadjustedbythesystem
dependingonthevideoscreen."Averagebirtrate"meanssystemautomaticallyadjustedfluctuationas
user‐definedbitrate.
Encodeformat:Encodingresolutionsdefinedbyuser'need(QCIF)176*144/(CIF)352*288/(HD1)576*288/
(D1)704*576
Bitrate:Usersselecttheencodingbitrateasneeded.Thehigherbitrate,thebetterimagebutwithlargedisk
space.
Quality:Imagequality,useridentified.
Framerate:Usersselectthevideoframerateasneeded.Thehigherframerate,thebetterimagebutwith
largediskspace.
Copyto:Selectthetargetchannelontherightof"copyto"button,click"copyto"&''ok"thensystemwillset
thecurrentchannelsetupinformationtoothertargetvideochannel.Clickbutton"cancel",thesetup
informationisnon‐savedbuttoexit.
3.8.3.3Recodesetup
Select“Recordsetup”insystemsetup.
Channel:ChoosetherightCHasneededbyclickingtheinvertedtriangle
Weekday:Choosetherightdayasuser'sneed,"ALL"meansalldaysinaweek.
Recordmodeandtime:Everytimeslotcansetdifferentrecodingmodeinall4timeslot."Time"recording
withredcolor,"Motion"recordingwithgreencolor,"Sensor"recordingwithyellowcolor;“√"means
working,“□”meansinvalid.Thebottompartshastimesstatusdisplay,wholeschedulefromtime0~24
hours
Copyto:Selectthetargetchannelontherightof"copyto"button,click"copyto"&''ok"thensystemwillset
thecurrentchannelsetupinformationtoothertargetvideochannel.Clickbutton"cancel",thesetup
informationisnon‐savedbuttoexit.

USER'SMANUALOFEMBEDDEDDIGITALVIDEORECORDER
Page 19 of 27
3.8.3.4Networksetup
Select“Recordsetup”in“systemsetup”.
DHCP:SelectwhethertostartupDHCPtoautomaticallyobtainIP。“√”meansworks;“□”meansnon‐work
IPaddress:TheIPaddressmustbeuniqueandcannotbeinconflictwiththehostorworkstationonthesame
networksegment.
SubnetMask:Subnetforthenetworksegment.
Gateway:Needtosetthegatewayaddresstoachievecommunicationbetweenthedifferentnetworksegments.
MACaddress:Showingthedevice'sMACaddress
Webport:PortnumberIEbrowservisit,defaultportis"80"
Clientport:Portnumberdeviceandmobilevisit,suggesttosetabove2000
ESeeID:Afterconnectinginternet,click“Esee”togainaEseeID,whichcanbeusedinIPremotemonitoring
inESeenetnetworkserver
PPPOE:
Enable:“√”meanstostartupPPPOEdial‐up.“□”meansnottostartup
Username:InputtheusernameofISPintoeditbox
Password:InputthepasswordofISPintoeditbox
Afterthepagesetupiscompleted,click'"OK"tosavethechanges;click"cancel",non‐savebutexit.
DDNS: Automaticanalyticalfunctionofdynamicdomainname,supported3322/DYNDNS/NO‐IPetc.DDNS
provider.
Enable:“√”meansDDNSdynamicdomainservicesstartusing;“□”meansnottostartup。
SelecttherightDDNSproviderandinputusername,passwordanddomainname.(editmethodpleasereferto
3.3.2(4))

USER'SMANUALOFEMBEDDEDDIGITALVIDEORECORDER
Page 20 of 27
3.8.3.5Screensetup
Select“Screensetup”in“systemsetup”
Channel:ChoosetherightCHasneededbyclickingselectbox
Cameratitle:Editanychanneltitleasneeded
OSDAlpha:OSDmenutransparency.Canbeadjustedasneeded
AutoSwitchDwellTime:Thetimeofautoswitchingpreviewimage,canbesinglescreenor4Channelsscreen.
Enable:“√”startusing,“□”non‐startusing
Afterthepagesetupiscompleted,click'"OK"tosavethechanges;click"cancel",non‐savebutexit.
3.8.3.6videodetection
Select”Videodetection”inthe“systemsetup”.
Sensor:ChoosetherightCHasneededbyclickingtheinvertedtriangle
Sensitivity:Choosethetriggervideodetectionsensitivity
Detectiontype:Selectdetectiontype‐‐motion,videoloss,videocover.
Alarmduration:Afterchoosethetriggervideodetection,thetimealarmlast
Areaedit:Setmotiondetectionarea;movebychoosingleftofmouse.
Alarm:“√”meansstart,“□”meansnonstart
Buzzer:“√”meansstart,“□”meansnonstart
E‐Mailnotice:“√”meansE‐Mailvalid,“□”meansE‐Mailinvalid
Copyto:selectthetargetchannelontherightof"copyto"button,click"copyto"&''ok"thensystemwillset
thecurrentchannelsetupinformationtoothertargetvideochannel.Clickbutton"cancel",thesetup
informationisnon‐savedbuttoexit.
This manual suits for next models
8
Table of contents


